


Why Do I Look Worse in Photos Than in Real Life? (10 Reasons + Fixes)
July 11, 2026
How to Make a Silhouette From a Photo: 2026 Full Guide
July 13, 2026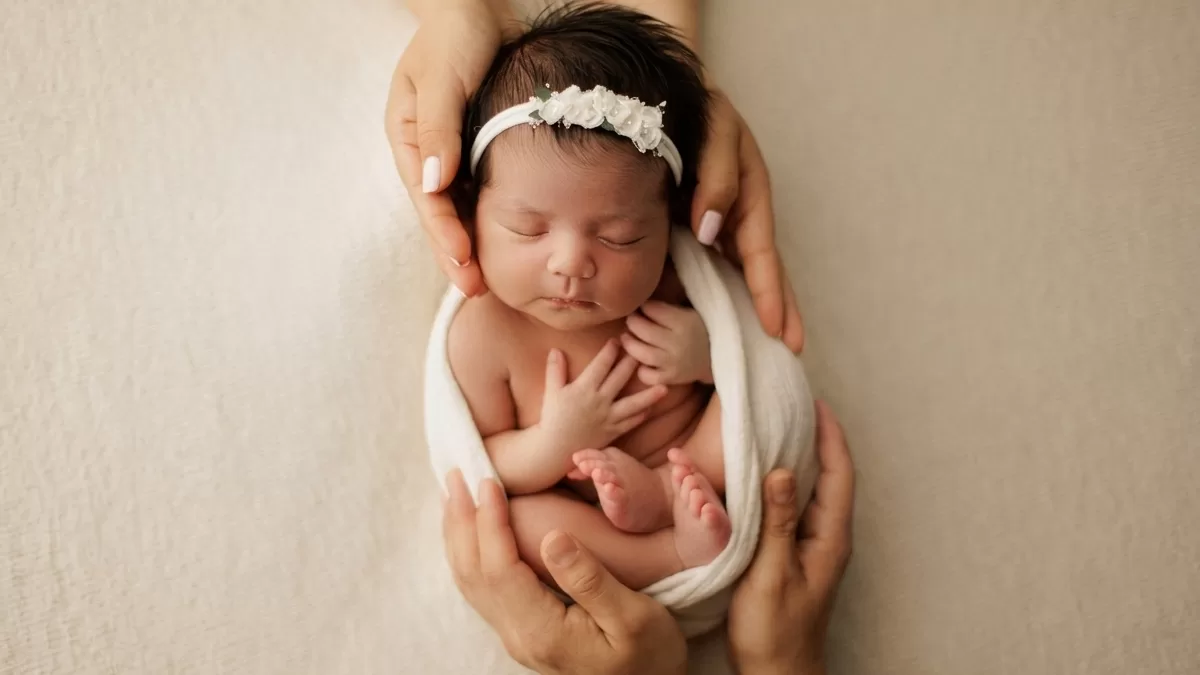
- Quick Answer: How to Retouch a Newborn Photo in 2026
- Why Newborn Editing Is a Genre of Its Own
- The 8-Stage Newborn Editing Workflow
- Stage 1 — Cull First, Edit Later
- Stage 2 — Fix RAW Color: The Two Sliders That Solve 80% of Problems
- Stage 3 — Get Skin Tones That Actually Look Like Skin
- Stage 4 — Sync Settings Across the Gallery
- Stage 5 — Skin Retouching in Photoshop: The Correct Frequency Separation Method
- Stage 6 — Clean the Scene: Distractions and Composites
- Stage 7 — Color Grade, Dodge and Burn, and Final Polish
- Stage 8 — Crop, Compose, and Deliver
- AI Retouching in 2026: Where It Helps and Where It Hurts
- Common Newborn Retouching Mistakes to Avoid
- Retouching by Session Type
- Delivering the Final Gallery Professionally
- Editing Baby Photos on Mobile: A Realistic Option for Parents
- How Much Newborn Retouching Costs in 2026
- Frequently Asked Questions
- Final Thoughts
Quick Answer: How to Retouch a Newborn Photo in 2026
- Cull first, edit second. Trim 400–700 frames down to your strongest 40–60.
- Fix exposure and white balance in RAW before any Photoshop work — these two sliders solve 80% of newborn skin problems.
- Use HSL (Hue, Saturation, Luminance), not global saturation, to calm red cheeks without damaging natural skin variation.
- Keep purple hands and feet — that color is normal newborn circulation, not an editing mistake.
- Retouch skin with Frequency Separation in Photoshop to preserve real texture while removing temporary redness and flakes.
- Blend safe-support composites to create magazine-worthy poses without ever putting a baby at risk.
- Enhance, never redesign. Parents want their real baby back, not a plastic doll.
Why Newborn Editing Is a Genre of Its Own
Editing a newborn photo differs sharply from editing weddings, products, or landscapes. You are working on a person only a few days old, whose skin still transitions from womb to world, and whose parents will look at these images for decades.
Newborn skin behaves in ways adult skin never does. In the first two weeks after birth, babies commonly show:
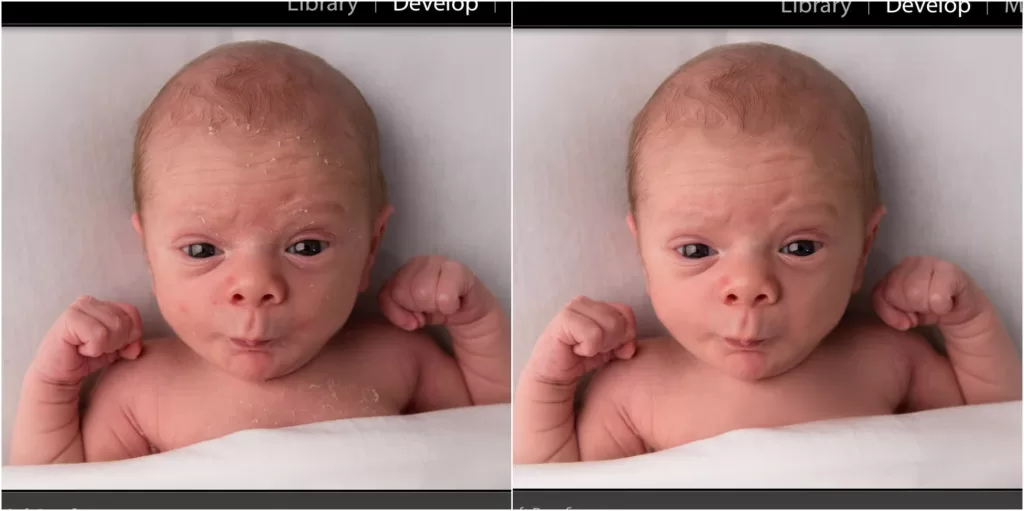
- Uneven color patches — pink cheeks, purple hands, reddish ears, and a slightly yellow torso, all at once.
- Milia and baby acne — small white or red bumps caused by hormones passing from mother to baby.
- Peeling and flaky skin — especially on ankles, wrists, and the lower back.
- Broken capillaries and stork bites — small vascular marks around the eyelids and neck.
- Cradle cap flakes — dry patches on the scalp that photograph as bright specks.
Some marks are permanent features parents love and want kept — birthmarks, dimples, small nail scratches. Others are temporary artifacts that vanish within days and should be gently removed. A skilled retoucher knows the difference.
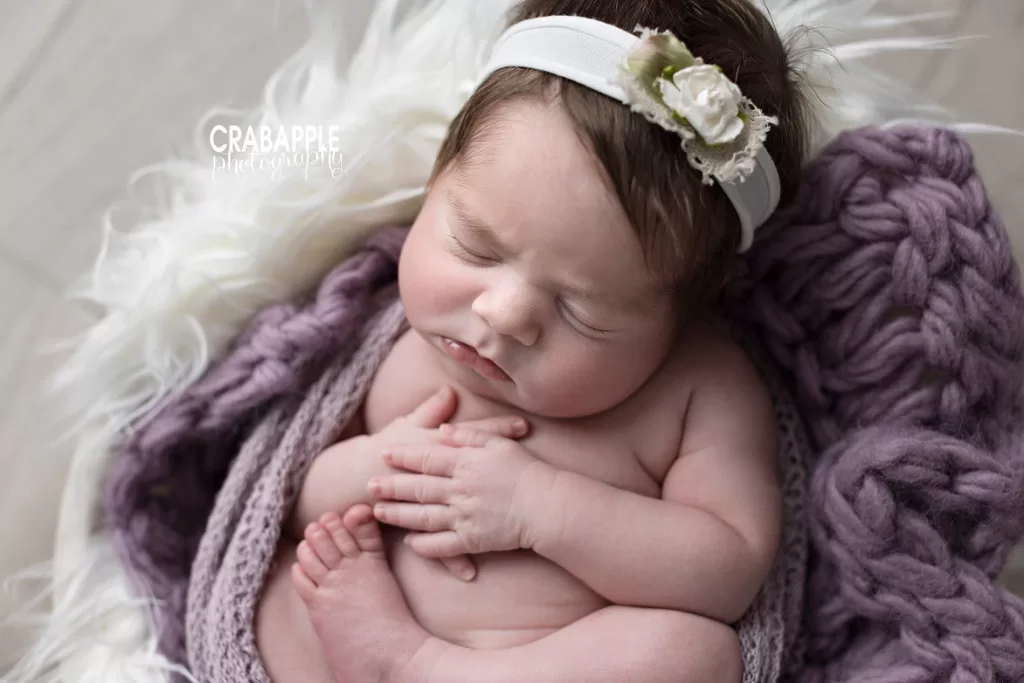
Newborn editing also carries a safety dimension no other genre requires. Poses like the “froggy,” “chin-on-hands,” or “hanging in a hammock” almost always use composite images — two or more frames blended in Photoshop, where a spotter or parent held the baby just outside the frame. Retouching those images means cleanly removing supporting hands and posing pods so the illusion looks real.
Send us 2 newborn images and we’ll return studio-grade edits within 24 hours — see our specialist photo retouching service work its magic before you commit.
The 8-Stage Newborn Editing Workflow
Every serious newborn retoucher follows the same pipeline. Learn it once, use it forever.
| Stage | What You Do | Where |
|---|---|---|
| 1 | Cull hundreds of frames down to 40–60 keepers | Lightroom / Aftershoot |
| 2 | Apply base RAW corrections — exposure, white balance | Lightroom / Camera Raw |
| 3 | Sync base edits across matching setups | Lightroom |
| 4 | Move hero frames into Photoshop | Photoshop |
| 5 | Retouch skin using frequency separation | Photoshop |
| 6 | Blend safe-support composites | Photoshop |
| 7 | Polish with color grading, dodge and burn, sharpening | Photoshop |
| 8 | Export high-res and web-ready files | Lightroom / Photoshop |
Each stage has its own tricks — and its own traps. Let’s walk through them.
Stage 1 — Cull First, Edit Later
The direct answer: Cull ruthlessly. A two-hour newborn session yields 400–700 frames. Only 40–60 deserve delivery.
Follow these three rules:
- Reject anything with closed parent eyes, motion blur, or a poorly wrapped baby.
- Keep only your strongest 40–60 frames (or the number stated in your package).
- Use flags, star ratings, or a dedicated culling app to make sorting fast and reversible.
Modern AI culling tools like Aftershoot and Narrative Select cut this work by up to 80%. Once your favorites are locked, do a second cull after your first editing pass — some frames that looked promising will feel repetitive next to your strongest shots.
Drowning in a 700-image gallery? Hand off skin cleanup and cutouts to our team — our clipping path service starts at just cents per image.
Stage 2 — Fix RAW Color: The Two Sliders That Solve 80% of Problems
The direct answer: Exposure and white balance are the two RAW adjustments that fix nearly every newborn color issue.
Fix Exposure First
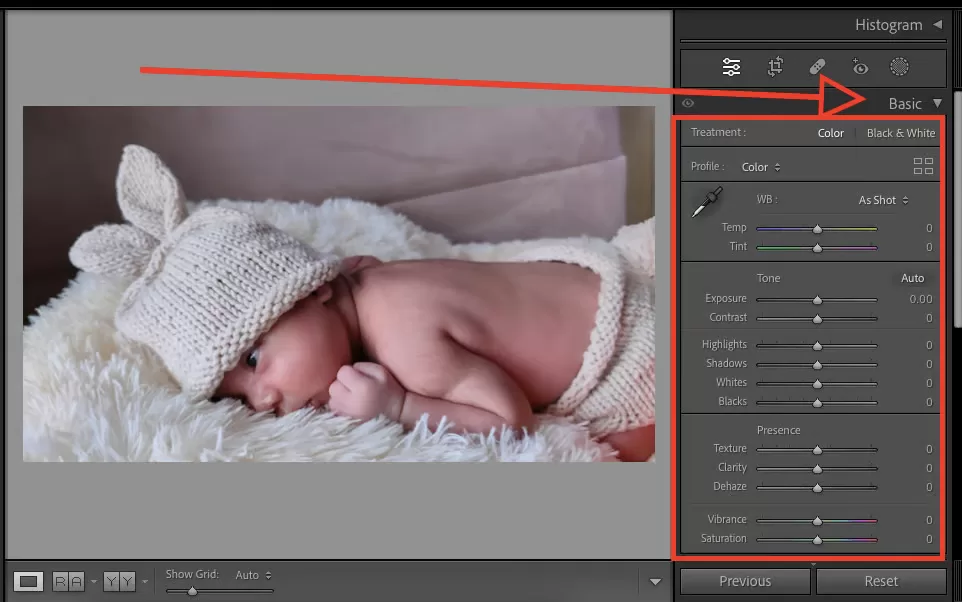
Shoot slightly underexposed on purpose — highlights on baby skin recover far better than blown-out ones. In the Develop module:
- Pull highlights down to about −30 to −50.
- Lift shadows to around +20 to +40 to open dark folds in fabric.
- Nudge whites slightly down and blacks slightly up to protect against clipping.
Then Fix White Balance
Studio lights, window light, and warm bounce cards each shift color differently. Use one of two anchors:
- Gray card — click the eyedropper on the neutral card you photographed as your first frame.
- The whites in the scene — the muslin blanket, wrap, or sheepskin should read as clean cream, never orange or yellow.
If skin reads as too orange, drop temperature slightly and pull tint just a touch toward green. Aim for gentle, believable warmth — the color of morning light rather than sunset.
Stage 3 — Get Skin Tones That Actually Look Like Skin
The direct answer: Use HSL channels (Hue, Saturation, Luminance), never global saturation.
The HSL panel is your best friend for newborn work. Instead of pushing global saturation up (which turns babies into cartoons), adjust individual channels:
- Red channel — lower saturation and lift luminance to calm angry cheeks and ears.
- Orange channel — this controls most of the skin. Fine-tune both saturation and luminance until the tone reads as natural.
- Yellow channel — reduce slightly if the baby looks jaundiced.
- Purple and magenta channels — leave these mostly alone. Purple feet and hands are normal in newborns because their circulation is still developing.
Do not desaturate purple feet to match pink legs. The color difference is a real physiological feature of a newborn. Editing it out often creates strange gray patches parents notice immediately.
For darker skin tones, treat orange saturation and luminance with extra care. Over-brightening flattens texture and washes out the deep warmth that makes those portraits so beautiful. Adobe’s official Hue/Saturation guide explains how targeted channel work protects highlight and shadow detail far better than global sliders.
Stage 4 — Sync Settings Across the Gallery
Once you have edited one strong image from a setup, sync the color and tone settings to every similar frame from that same lighting scenario. This keeps the gallery visually coherent.
Sync these:
- White balance
- Exposure and tone curve
- HSL adjustments
- Base color grade
Never sync these:
- Cropping
- Spot healing and blemish removal
- Masking (each frame needs its own)
- Composite alignment
Because RAW newborn sessions easily exceed 40 GB, storing them safely matters. Our guide to the best cloud storage for photos compares the strongest options for photographers in 2026.
Stage 5 — Skin Retouching in Photoshop: The Correct Frequency Separation Method
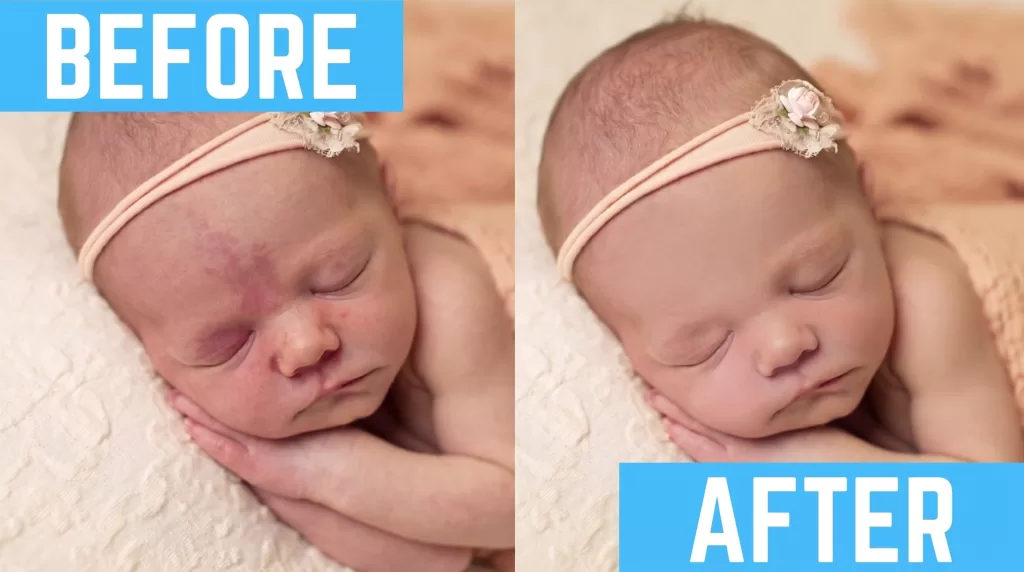
The direct answer: Frequency separation splits an image into color (low frequency) and texture (high frequency) so you can retouch each without damaging the other.
The Exact Steps (Adobe’s Official Method)
Follow these steps precisely — this is the workflow published in Adobe’s official frequency separation guide:
- Duplicate your base layer twice. Name the top copy “Skin + Texture” (high frequency) and the bottom copy “Shadows + Color” (low frequency).
- Group both layers by selecting them and pressing Layer → Group Layers.
- Select the “Shadows + Color” layer, then apply Filter → Blur → Gaussian Blur at a radius of 5 pixels. Click OK.
- Select the “Skin + Texture” layer. Go to Image → Apply Image. In the dialog, choose:
- Layer: Shadows + Color
- Blending: Subtract
- Scale: 2
- Offset: 128
Click OK.
- Change the “Skin + Texture” layer’s blend mode to Linear Light.
You now have two independent layers — one for color, one for texture. Retouch redness, uneven tone, and color patches on the Shadows + Color layer using the Mixer Brush, Clone Stamp at low opacity, or a soft-sampled Healing Brush. Retouch flakes, milia, scratches, and stray hairs on the Skin + Texture layer using the Patch Tool or Spot Healing Brush.
Golden Rules for Baby Skin
- Leave texture. Newborn skin has natural softness and fine pores. Strip that away and you get a plastic doll.
- Only remove temporary marks. Peeling, scratches, milia, and hormone acne go. Birthmarks and freckles stay.
- Zoom out and check. At 50% view, over-smoothed skin looks obvious. Zoom out every few minutes.
- Ask the parent. If a mark could be permanent (a birthmark, a Mongolian spot, a stork bite parents love), keep it.
Some editors also use targeted color adjustments to isolate specific redness without affecting adjacent tones — our tutorial on removing a color from an image walks through that method step by step.
Stage 6 — Clean the Scene: Distractions and Composites
Once skin is done, turn to the environment around the baby.
Remove Distractions First
Backgrounds during a newborn shoot are rarely perfect. Look for:
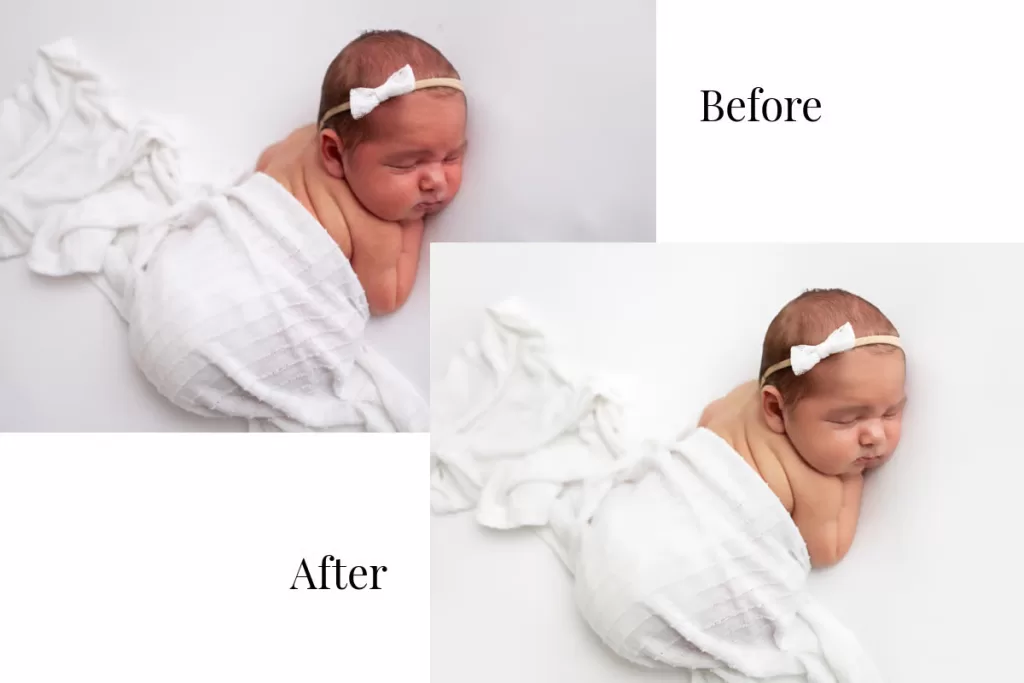
- Wrinkles in the muslin or backdrop fabric.
- Stray hairs, lint, and dust.
- Poking edges of posing pods or beanbags.
- Burp cloths, pacifier clips, or wipes accidentally left in frame.
Use the Patch Tool in Content-Aware mode, the Clone Stamp, or Generative Fill for large areas. Aftershoot’s newborn retouch panel automates the first pass, but a human eye still catches the last 10%.
When a backdrop needs full replacement, our guide on the Magic Wand tool shows a Photoshop-safe method that preserves fine baby hair and blanket fibers.
Blend Safe-Support Composites
Composite editing separates beginner newborn work from professional work. Any pose where the baby appears to defy gravity — chin-on-hands, hanging from a wrap, sitting up in a bucket — should always be a composite of two frames:
- Frame A: the baby held in the pose by a spotter or parent whose hands or arms are visible.
- Frame B: the empty setup with identical lighting and framing.
To blend them:
- Open both frames in Photoshop as separate layers.
- Align them with Edit → Auto-Align Layers if the camera moved slightly.
- Add a black mask to the top layer, then paint white to reveal only the safe baby.
- Erase the spotter’s hands by painting on the mask, letting the empty backplate show through.
- Clean any leftover seams with a low-opacity Clone Stamp on a merged layer.
The Accredited Professional Newborn Photographers International (APNPI) publishes safety and posing standards every retoucher should read at least once.
Composites eating your evenings? Our editors blend safe-support frames and remove hands every day — see how our image masking service delivers pixel-perfect edges.
Stage 7 — Color Grade, Dodge and Burn, and Final Polish
Once skin and scene are clean, the finishing pass gives the image its signature mood.
Subtle Color Grading
Newborn photos rarely benefit from strong film-emulation or heavy fades. Aim for one of two moods:
- Bright and airy — soft creams, gentle blushes, low contrast, luminous highlights.
- Warm and cozy — muted browns and honey tones, deeper shadows, gently desaturated overall.
Use the Color Balance or Color Grading panels rather than curves for these subtle shifts. A little goes a long way.
Light Dodge and Burn
Dodge (lighten) small highlights on the tip of the nose, the bridge of the cheek, and the highlight side of tiny fingers and toes. Burn (darken) shadows just beneath the chin, behind the ears, and at the edge of wraps to add gentle dimension. Keep both brushes at 5–10% opacity — anything stronger looks painted.
Final Sharpening
Sharpen only the eyes, lips, and eyelashes. Use a mask so the baby’s skin stays soft. A Smart Sharpen filter at Amount 100–150% and Radius 0.8 works well for print — reduce for web.
Stage 8 — Crop, Compose, and Deliver
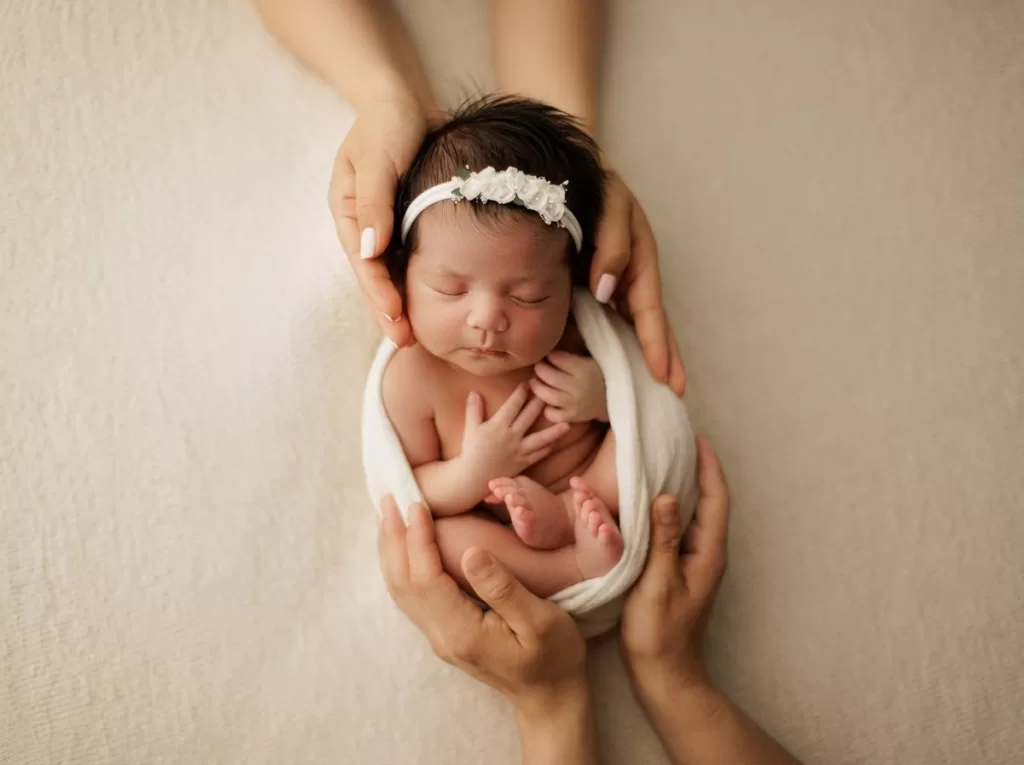
Newborn photographers often shoot slightly wide, knowing they will rotate and crop in post. When cropping, follow three simple rules:
- Never amputate joints. Cropping right at a wrist, ankle, or knee looks disturbing. Crop inside the limb or outside it — never through.
- Keep breathing room around the head. A tight crop above the crown feels claustrophobic.
- Level the horizon. Even a two-degree tilt on a shelf, window, or wrap line pulls the eye out of the frame.
Prepare multiple crops of the same image for client flexibility. Parents most often order 5×7 and 16×20 prints — plan those crop ratios in advance.
AI Retouching in 2026: Where It Helps and Where It Hurts
AI retouching tools have become genuinely useful — but they do not replace a human eye on newborn work.
Where AI Wins
- Batch culling — Aftershoot, Narrative Select, and FilterPixel cut culling time by 80%.
- First-pass skin cleanup — Evoto, Imagen, and Retouch4me smooth redness at scale.
- Background wrinkle removal — Generative Fill and one-click remove-object tools handle the boring cleanup.
Where AI Loses
- Recognizing permanent birthmarks — most tools remove them by default.
- Judging when to leave skin alone — automated systems tend to over-smooth peeling and milia into fake perfection.
- Composite work — no AI reliably blends multi-frame safe-support composites yet.
For a wider look at current tools, our roundup of the best AI photo editing software compares the strongest platforms head to head.
Want AI speed with a human safety net? Send a test batch to our background removal service and see the polished results in 24 hours.
Common Newborn Retouching Mistakes to Avoid
Even experienced editors slip into these traps:
- Plastic skin. The most obvious sign of over-editing.
- Removing every red patch. Some redness is real anatomy — leave it if it looks natural.
- Turning purple hands and feet pink. Circulation shifts are physiological, not errors.
- Over-saturating for “pop.” Instagram loves it; moms hate it; print labs emphasize every color cast.
- Using one preset for every baby. Skin tones vary enormously between newborns and ethnicities.
- Cropping through joints. Always crop inside or outside a limb.
- Ignoring the whites. If your muslin looks yellow, so does the baby.
- Leaving spotter hands visible in composites. Zoom to 200% and check every mask edge.
Retouching by Session Type
Not every newborn shoot happens in the same environment. Each type has its own editing priorities.
| Session Type | Main Editing Priority | Typical Cleanup Time per Image |
|---|---|---|
| Studio (posed) | Composites, posing pod removal, skin retouching | 15–30 min |
| In-home natural light | Per-frame white balance, background clutter | 8–15 min |
| Hospital Fresh-48 | Fluorescent color casts, medical clutter | 10–20 min |
| Lifestyle documentary | Minimal — mostly exposure and small distractions | 3–8 min |
For photographers switching between formats, our review of the best mirrorless cameras explains which bodies handle low-light hospital work best.
Delivering the Final Gallery Professionally
Your file delivery matters as much as your edit.
- Export high-res JPEGs at 100% quality for print.
- Export web-optimized JPEGs at 2048px on the long edge for gallery viewing.
- Embed the sRGB color profile for consistent rendering across screens.
- Watermark preview files only — never final delivery images.
- Deliver via a professional gallery platform like Pic-Time, Pixieset, or ShootProof — not a raw Dropbox folder.
Renaming files professionally — for example, SmithFamily-Newborn-001.jpg — signals care and finishes the client experience on a high note.
Editing Baby Photos on Mobile: A Realistic Option for Parents
If you are a parent (not a professional) touching up your own baby photos, mobile apps have become genuinely capable:
- Snapseed — free, powerful selective adjustments, no watermark.
- Lightroom Mobile — the same color panels as the desktop version, syncing with the cloud.
- TouchRetouch — excellent for erasing distractions with one tap.
- Facetune — use sparingly; heavy-handed presets can plasticize skin fast.
For a wider comparison, our post on the best photo editing apps of 2026 breaks each option down by strength.
How Much Newborn Retouching Costs in 2026
Pricing varies widely, but here is the current market range for outsourced newborn editing:
| Service Level | Typical Price per Image | What’s Included |
|---|---|---|
| Basic color and exposure correction | $2–$5 | White balance, exposure, base tone |
| Standard retouching | $5–$10 | Skin cleanup, distraction removal, minor cropping |
| Advanced retouching | $15–$30 | Composites, head swaps, background rebuilds |
| Full editorial finish | $30–$80 | Magazine-grade skin work and stylized grading |
Volume clients typically negotiate discounts starting around 100 images per month. Photographers who outsource full sessions usually spend $80–$250 per gallery — a fraction of their own studio hours.
For an in-house comparison, our overview of the best photo retouching software of 2026 shows current tool costs.
Frequently Asked Questions
1. What is the best software for editing newborn photos in 2026?
Adobe Lightroom Classic paired with Adobe Photoshop remains the industry standard. Lightroom handles culling, RAW correction, and gallery sync. Photoshop handles frequency separation, composites, and detailed retouching. Capture One and Affinity Photo work well as alternatives.
2. How much should I edit newborn skin?
Enhance, do not redesign. Remove temporary flakes, milia, and hormone spots, but keep birthmarks, dimples, and natural texture. Over-editing turns babies into plastic dolls — a look almost every parent dislikes.
3. Is it safe to use AI to retouch newborn photos?
Yes, for skin smoothing and background cleanup, but always do a manual pass afterward. AI often removes permanent features like birthmarks that parents want preserved.
4. How do I fix purple feet or hands on a newborn?
Do not fix them. Purple extremities are normal newborn circulation. Removing that color creates unnatural gray patches that look worse than the original.
5. What is frequency separation, and do I need it for every baby photo?
Frequency separation is a Photoshop technique that separates skin color from texture so you can retouch each independently. Use it on hero images and composites — routine gallery images rarely need it.
6. How long does editing a full newborn session take?
For a solo photographer, expect 6–12 hours for a fully edited 40-image gallery, including composites. Outsourcing to a specialist team typically cuts turnaround to 24–48 hours.
7. How do I make sure my skin tones are accurate before delivery?
Calibrate your monitor with a hardware tool like Datacolor SpyderX or X-Rite i1Display. Then compare edited files against a printed proof, since screens and print labs render color differently.
8. Can I use one preset for every newborn session?
No. Skin tones vary enormously between babies and ethnicities. Presets are a good starting point for consistency, but every image needs its own final adjustments — especially in HSL and white balance.
Final Thoughts
Newborn photography retouching is a genre of restraint. The best editors stay almost invisible. Parents should not think “wow, what an edit” — they should think “wow, that is my baby, exactly as I remember.” Every stage of your workflow, from culling to composites to color grading, should serve that emotional truth.
The 2026 toolkit gives you powerful AI helpers, more capable software, and better hardware than any newborn photographer has ever had. But those tools work best in the hands of an editor who knows when to use them — and, more importantly, when to leave the image alone.
Ready to spend more time behind the camera and less time behind a screen? Our specialists edit thousands of newborn frames every month — start a free trial with Clipping Expert Asia today.