

Professional Headshot Examples: Inspiration,Tips,and Best Practices
February 7, 2026
Mirror vs Camera: Which Is More Accurate?
February 9, 2026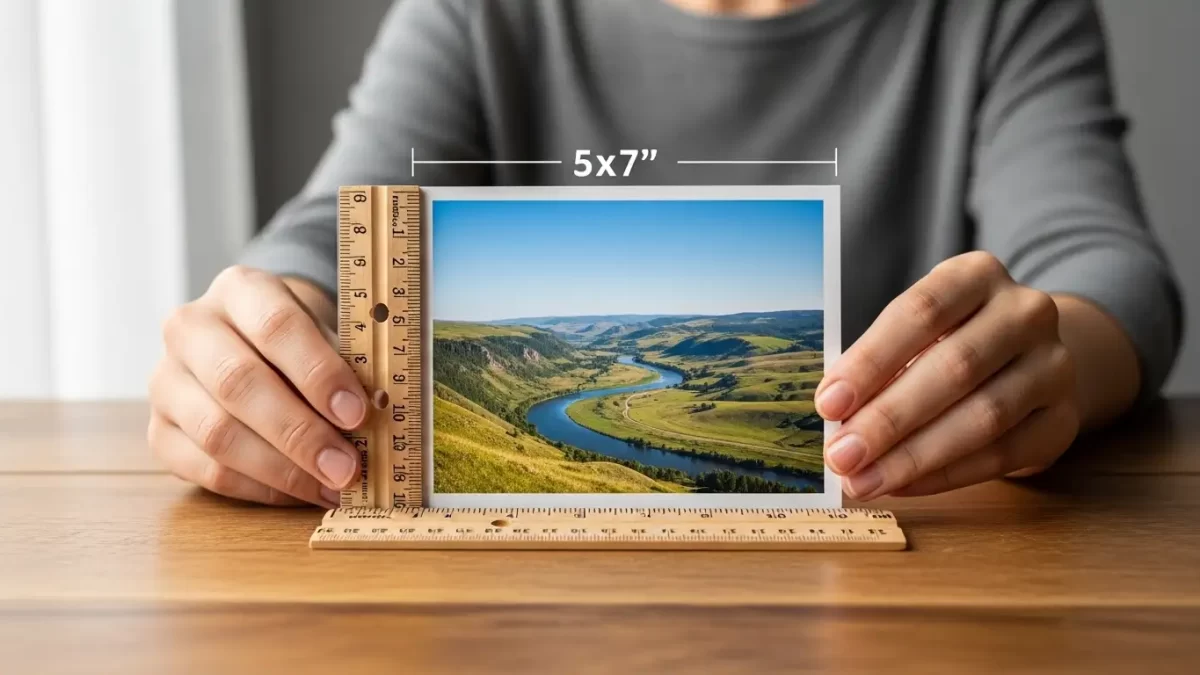
People often wonder about the exact size of a 5×7 photo when planning prints for frames, albums, or gifts. This common print measures 5 inches wide by 7 inches tall, making it a versatile choice for personal and professional images. In centimeters, it converts to about 12.7 cm by 17.8 cm, while in millimeters, that’s 127 mm by 178 mm. For digital files, at a standard 300 DPI resolution, a 5×7 photo requires 1500 pixels by 2100 pixels to ensure sharp, clear results without pixelation.
Photographers and hobbyists favor this dimension because it strikes a balance between compact 4×6 prints and larger 8×10 options. It fits neatly into standard frames and offers enough space for detailed portraits or scenic shots. Whether you’re printing family memories or creating custom cards, understanding these measurements helps you avoid common pitfalls like blurry outputs or mismatched frames. This guide breaks down everything from history to practical applications, so you can confidently handle your next project.
Fine details like hair or fur? Masking is the answer. Check our image masking service for exact cutouts
- The Basics of 5x7 Photo Dimensions
- Why Resolution Matters for Your 5x7 Photo
- Exploring the History Behind the 5x7 Photo Size
- Comparing 5x7 to Other Popular Photo Sizes
- How 5×7 Compares to Other Common Photo Sizes
- Practical Uses for a 5x7 Photo in Everyday Life
- Choosing the Right Paper for Printing Your 5x7 Photo
- Mastering Digital Printing Techniques for 5x7 Photos
- Traditional vs. Digital: Which Suits Your 5x7 Photo Needs?
- Essential Tips for DIY Printing a 5x7 Photo at Home
- Framing Options to Enhance Your 5x7 Photo
- Preserving Your 5x7 Photo for Longevity
- Avoiding Common Mistakes with 5x7 Photo Projects
- Creative Projects to Try with Your 5x7 Photo
- Final Thoughts on the Versatile 5x7 Photo
- FAQs
The Basics of 5×7 Photo Dimensions
You measure a 5×7 photo in inches as 5 by 7, with the smaller number typically representing width and the larger one height in portrait orientation. Flip it to landscape, and it becomes 7 inches wide by 5 inches tall. This flexibility lets you adapt to different compositions. Printers and labs standardize this size, so you rarely face surprises when ordering.
Converting to metric units simplifies international use. Multiply inches by 2.54 for centimeters: 5 inches equals 12.7 cm, and 7 inches equals 17.78 cm. For millimeters, go further by multiplying centimeters by 10, yielding 127 mm by 178 mm. These conversions prove handy for custom framing or overseas shipping.
In digital terms, pixels depend on dots per inch (DPI). At 300 DPI – the gold standard for prints – calculate width as 5 times 300 for 1500 pixels, and height as 7 times 300 for 2100 pixels. Lower DPI, like 150, halves those to 750 by 1050, but risks quality loss. Always check your file’s resolution before hitting print to maintain crisp details.
Why Resolution Matters for Your 5×7 Photo
Resolution dictates how sharp your 5×7 photo appears once printed. It measures in pixels per inch (PPI) or DPI, influencing detail and clarity. Low resolution stretches pixels, causing blurriness, while high resolution packs them tightly for smooth edges.
Aim for at least 300 DPI in most cases. This ensures professional-grade output suitable for close viewing. For example, a smartphone shot at high megapixels easily hits this mark, but older scans might fall short. Use editing software like Photoshop or consider professional photo retouching services to enhance details and clarity.
Different scenarios call for adjustments:
- Everyday home prints: 200-250 DPI suffices for casual displays.
- Gallery or professional work: Push to 400 DPI or more for ultra-fine results.
- Web sharing: Drop to 72 DPI since screens don’t demand as much.
Test prints reveal issues early. Print a small section at your chosen DPI and inspect for artifacts. This step saves paper and ink in the long run.
Exploring the History Behind the 5×7 Photo Size
Photography’s roots trace back to the 1830s when inventors experimented with light-sensitive materials. Early portraits used daguerreotypes, often in small formats, but by the mid-1800s, larger plates emerged for detailed images.
The 5×7 size gained traction in the late 19th century with glass plate negatives. Studios favored it for portraits because it balanced portability and quality. Home portrait cameras from brands like Graflex popularized it further in the early 20th century.
Post-World War II, film costs dropped, making 5×7 accessible for amateurs. It fit well with 35mm adaptations and enlarging techniques. Today, digital cameras preserve this legacy, with sensors supporting easy cropping to these proportions.
This evolution shows how practical needs shaped standards. Early photographers cut larger plates to save materials, leading to familiar ratios. Understanding this history adds appreciation when you frame a modern 5×7 photo.
Comparing 5×7 to Other Popular Photo Sizes
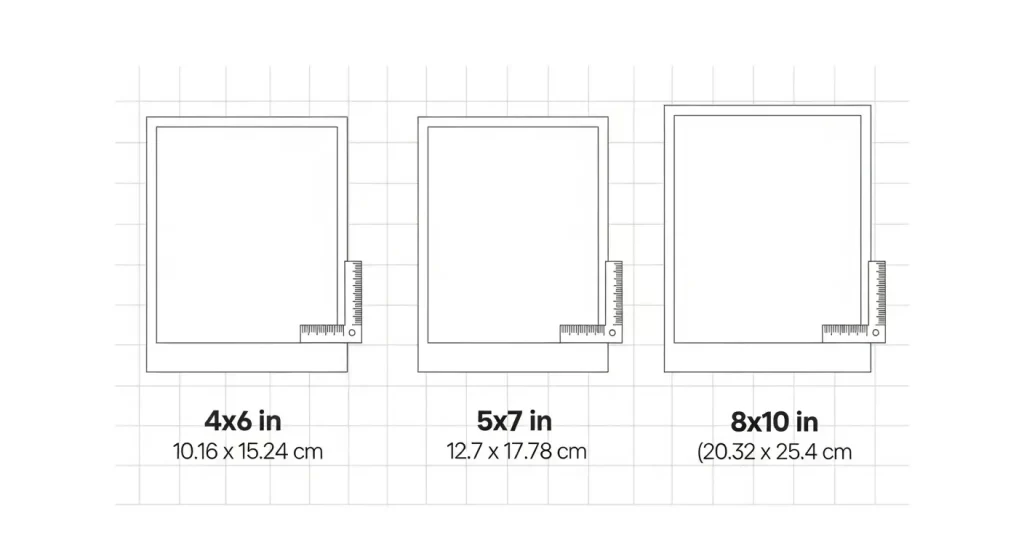
A 5×7 photo sits comfortably between smaller and larger formats. Take the 4×6: It measures 4 inches by 6 inches, ideal for wallets or quick albums, but lacks the presence of a 5×7. The extra inch in height allows more subject detail without overwhelming space.
On the larger side, an 8×10 spans 8 inches by 10 inches, perfect for wall art. However, it demands bigger frames and more room. A 5×7 offers similar impact in tighter spots, like desks or shelves.
Consider aspect ratios too. All three share a roughly 3:4 or 4:5 feel, but 5×7’s 5:7 ratio (about 1:1.4) suits portraits best. It avoids the squareness of 5×5 or the elongation of 3×5.
Choose based on purpose:
- 4×6 for bulk printing and portability.
- 5×7 for balanced display and gifting.
- 8×10 for statement pieces.
This comparison helps you select the right size every time.
How 5×7 Compares to Other Common Photo Sizes
Size comparisons reveal the 5×7’s sweet spot. Stack it against the 4×6, a staple for albums at 4 inches wide and 6 inches tall. The 4×6 feels compact, but the 5×7 adds an inch in each direction, allowing more breathing room for subjects.
Move to 8×10, and dimensions double roughly to 8 inches by 10 inches. This suits wall art but demands larger frames and space. The 5×7 bridges the gap, offering presence without bulk.
Consider wallet sizes like 2×3, tiny for portability. Or go bigger with 11×14 for posters. Each serves a purpose:
- 4×6: Everyday snaps, quick prints.
- 5×7: Portraits, gifts, moderate displays.
- 8×10: Professional headshots, enlargements.
- 11×14: Gallery walls, statements.
Tables clarify these differences:
| Photo Size | Inches | CM | Best Uses |
|---|---|---|---|
| 4×6 | 4 × 6 | 10.16 × 15.24 | Albums, casual |
| 5×7 | 5 × 7 | 12.7 × 17.78 | Frames, cards |
| 8×10 | 8 × 10 | 20.32 × 25.4 | Walls, pros |
You choose based on intent. For group photos, 5×7 accommodates more faces clearly than smaller options.
To learn more about standard sizes, explore our detailed post on photo printing resolutions explained.
Printing at 5×7? Every edge must be perfect. Get Started with Free Clipping Path Editing
Practical Uses for a 5×7 Photo in Everyday Life
Families treasure 5×7 photos for their versatility in capturing moments. Print portraits of kids or pets, then slip them into frames for instant desk decor. The size highlights facial expressions without cropping awkwardly.
Create custom gifts with ease. Personalize calendars by inserting a 5×7 photo per month, showcasing seasonal family outings. Or attach one to greeting cards for birthdays, adding a heartfelt touch that beats store-bought options.
Home decor thrives on this format. Arrange several in a gallery wall for a cohesive look. Mix landscapes and portraits to tell a story. Tabletop displays work well too – prop them on easels in living rooms or bedrooms.
Professionals use them for headshots or product shots. Real estate agents include 5×7 prints in brochures, while artists sell limited editions at fairs. The size feels premium yet affordable.
Explore creative projects:
- Photo garlands: Clip 5×7 prints to string for party backdrops.
- Coasters: Laminate photos onto tiles for functional art.
- Scrapbooks: Layer with stickers for themed pages.
These ideas turn simple prints into meaningful items.
Choosing the Right Paper for Printing Your 5×7 Photo
Paper type transforms a 5×7 photo’s appearance. Glossy finishes reflect light, boosting colors for vibrant landscapes or family snaps. They resist fingerprints but show glare in bright rooms.
Matte paper absorbs light, creating a soft, non-reflective surface. It suits black-and-white portraits or artistic shots, reducing distractions. Fingerprints show more, so handle carefully.
Luster combines both, offering subtle shine without full gloss. Many pros prefer it for balanced results across lighting conditions.
Consider weight too. Thicker stock feels premium and holds up better in frames. Standard photo paper runs 200-250 gsm, while archival options hit 300 gsm for longevity.
Match paper to printer:
- Inkjet: Handles glossy and matte well.
- Laser: Better for matte to avoid smudges.
Experiment with samples from suppliers to find your favorite. This choice elevates your 5×7 photo from ordinary to standout.
Mastering Digital Printing Techniques for 5×7 Photos
Digital printing speeds up creating 5×7 photos. Upload files to online services or use home printers for quick results. It beats traditional methods in cost and convenience.
Start with editing. Adjust brightness, contrast, and sharpness in software like Photoshop. Crop to exact 5×7 proportions to prevent borders.
Set printer settings carefully. Select photo paper type and high-quality mode. Borderless printing ensures full coverage without white edges.
For best outcomes:
- Calibrate your monitor to match print colors.
- Use ICC profiles for accurate hues.
- Print proofs on plain paper first.
Home setups save money for small batches. Invest in a dedicated photo printer for consistent quality. Services like Shutterfly handle larger orders efficiently. Explore this guide on digital printing basics for more insights.
Traditional vs. Digital: Which Suits Your 5×7 Photo Needs?
Traditional printing involves film and chemicals, yielding unique textures. It appeals to purists seeking depth in 5×7 photos, like in darkroom sessions.
Digital dominates today for its speed and edits. Fix flaws instantly, unlike film’s one-shot nature. Costs drop with bulk digital prints.
Compare key aspects:
- Speed: Digital wins with minutes vs. hours for traditional.
- Cost: Digital is cheaper per print.
- Quality: Both excel, but digital offers consistency.
Hybrid approaches blend both. Scan film negatives, then print digitally. This preserves vintage feel while adding modern tweaks.
Choose based on project. Art exhibits might favor traditional for authenticity, while family albums lean digital for ease.
Essential Tips for DIY Printing a 5×7 Photo at Home
Gather supplies first: Photo paper, ink, and a reliable printer. Epson or Canon models excel for photos.
Prepare your image. Resize to 1500×2100 pixels at 300 DPI. Save as JPEG or TIFF for best compression.
Load paper correctly. Align sheets in the tray to avoid jams. Select 5×7 size in print dialog.
Troubleshoot common issues:
- Streaks: Clean print heads.
- Colors off: Update drivers.
- Paper curls: Use flat storage.
Print one test copy. Adjust settings if needed, then run multiples. This method yields pro results without lab visits.
Framing Options to Enhance Your 5×7 Photo
Frames protect and beautify 5×7 photos. Wood varieties add warmth, suiting rustic homes. Stain options range from oak to walnut.
Metal frames bring modern sleekness. Aluminum or steel resists warping, ideal for humid areas.
Plastic offers budget-friendly choices. Lightweight and colorful, they fit kids’ rooms or casual spaces.
Add mats for polish. A white mat around a 5×7 photo creates breathing room, emphasizing the image.
Hang securely. Use hooks rated for weight, and level for straight display. Group frames for impact.
Creative ideas include floating frames where the photo appears suspended. Or try shadow boxes for 3D effects with mementos.
Preserving Your 5×7 Photo for Longevity
Handle 5×7 photos by edges to avoid oils. Wear cotton gloves for extra care.
Store in acid-free albums or boxes. These prevent yellowing over time.
Control environment: Keep away from direct sun, heat, or moisture. Ideal spots maintain 50-70 degrees Fahrenheit.
Digitize for backups. Scan at high resolution to preserve details digitally.
Rotate displays periodically. This evens fading if any occurs.
Follow these steps, and your 5×7 photo lasts generations, holding memories intact.
Avoiding Common Mistakes with 5×7 Photo Projects
Skipping resolution checks leads to blurry prints. Always verify DPI before ordering.
Ignoring aspect ratios crops images wrongly. Match your file to 5:7 proportions.
Overlooking paper quality dulls colors. Invest in good stock for vibrant results.
Rushing framing skips measurements. Double-check fits to avoid gaps.
Neglecting storage invites damage. Use protective sleeves from the start.
Learn from these pitfalls to perfect your 5×7 photo endeavors.
Creative Projects to Try with Your 5×7 Photo
Transform 5×7 photos into coasters. Seal onto ceramic tiles for durable, personalized drink rests.
Build a photo wall. Arrange in grids or patterns for dynamic decor.
Make magnets: Attach to magnetic sheets for fridge art.
Craft bookmarks: Laminate slim strips for readers.
Design ornaments: Insert into clear baubles for holiday trees.
These projects add fun, turning prints into functional items.
Final Thoughts on the Versatile 5×7 Photo
A 5×7 photo delivers big impact in a small package. Its dimensions suit countless uses, from framing to gifting. Master the basics like pixels and printing, and you unlock endless possibilities. Whether preserving history or creating new memories, this size remains a favorite. Next time you capture a moment, consider printing it as a 5×7 photo – you’ll appreciate the results.
Prints demand flawless retouching. Get a free quote for retouching services
FAQs
What is the pixel size for a 5×7 photo at standard resolution?
At 300 DPI, a 5×7 photo needs 1500 by 2100 pixels. This ensures sharp prints. Lower DPI reduces pixels but may cause blurriness.
How does a 5×7 photo compare in size to a 4×6?
A 5×7 measures 5 by 7 inches, larger than a 4×6’s 4 by 6 inches. It offers more detail and presence for displays.
Can I print a 5×7 photo at home effectively?
Yes, use a photo printer with quality paper and 300 DPI settings. Test prints help adjust colors and avoid waste.
What paper type works best for a 5×7 photo?
Glossy suits vibrant colors, matte reduces glare, and luster balances both. Choose based on your image and display location.
Why choose a 5×7 photo for framing?
Its size fits standard frames easily and shows details well. It’s versatile for portraits, groups, or decor without overwhelming space.
How do I convert 5×7 photo inches to centimeters?
Multiply inches by 2.54: 5 inches is 12.7 cm, 7 inches is 17.78 cm. This aids international projects.
What DPI should I use for professional 5×7 photo prints?
Aim for 300-400 DPI. Higher ensures fine details, especially for close-up viewing or gallery displays.
Are there historical reasons for the 5×7 photo popularity?
It stemmed from early portrait cameras and glass plates. Post-war, lower costs made it widespread for home use.