

Which Image Format Should You Use? JPEG, PNG, WebP, AVIF, and HEIC Explained (2026 Edition)
July 10, 2026
Newborn Photography Editing: How to Retouch Baby Photos
July 13, 2026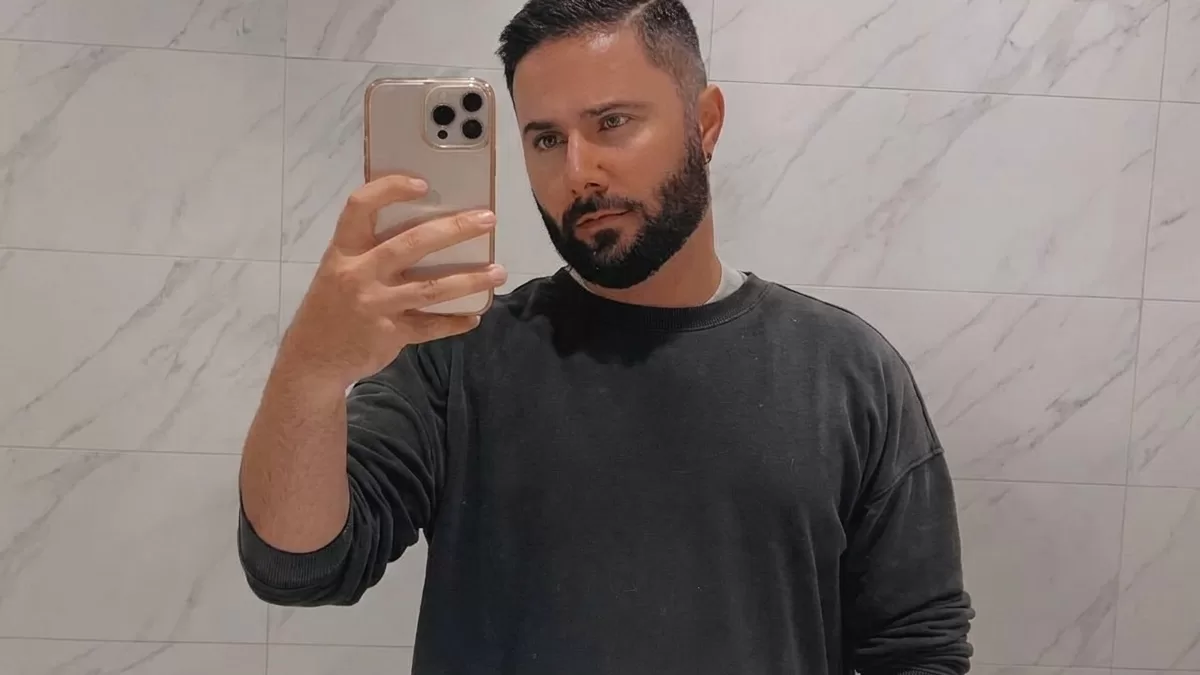
You glance in the mirror before leaving the house and feel great. Ten minutes later, someone snaps a candid, hands you the phone, and a stranger stares back — puffy jaw, weird smile, one eye smaller than the other. If that scene feels painfully familiar, take a breath. You are not less attractive on camera. Your mirror, your lens, and your lighting are simply telling three different stories about the same face — and this guide untangles all three.
Below, we break down the 10 real reasons your photos look worse than your reflection — mirror reversal, lens distortion, lighting, angles, expression, posture, wardrobe, self-criticism, sensor colour, and frozen motion — and pair every reason with a fix you can use before your next shoot. Skim the quick-answer box, or dive into the full breakdown.
Quick answer: You look “worse” in photos mainly because a mirror shows a flipped, familiar version of your face, while a camera captures a still, unflipped, lens-distorted, badly-lit slice of a moving expression. Fix the lens, the light, the angle, and your mindset — and photos start looking like you again.
Already have shots you love but wish they looked sharper? Our team can polish every detail while keeping the image natural — see how professional photo retouching works.
- The Core Truth: Your Mirror Is a Very Polite Liar
- 1. Mirror Reversal: The Stranger in Your Camera Roll
- 2. Lens Distortion: Why Selfies Enlarge Your Nose
- 3. Bad Lighting: The Silent Villain of Every Bad Photo
- 4. Frozen Frames: A Photo Traps a Millisecond Your Brain Ignores
- 5. Forced Expressions: Why Held Smiles Look Fake
- 6. Awkward Angles: Every Chin You Never Knew You Had
- 7. Posture: How Slouching Adds Years and Kilos in a Click
- 8. Wrong Wardrobe and Grooming: Competing with Your Own Face
- 9. Self-Criticism: You Are the Harshest Critic in the Room
- 10. Sensor, Screen, and Skin: Three Devices, Three Colour Stories
- Bonus Fix: Retouching Is Translation, Not Deception
- The Psychology in One Chart
- Quick Pre-Shoot Checklist (Screenshot This)
- When to Blame the Photo, When to Blame the Editing
- Real-Life vs. Photo: The Gap Is Smaller Than You Think
- FAQs
- Final Thoughts
The Core Truth: Your Mirror Is a Very Polite Liar
Why the “you” you know is not the “you” the world sees
Before we get to the 10 reasons, one uncomfortable fact needs saying: the face you rehearse every morning is not the face anyone else sees. A mirror flips your image left-to-right. A camera does not. Psychologists call the resulting preference for the flipped version the mere-exposure effect — the more we see something, the more we like it. In a landmark 1977 study, participants preferred mirror-image photos of themselves, while their close friends preferred the true (unflipped) image.
- Mirror = the face you rehearse.
- Camera = the face the world remembers.
- Discomfort = the gap between the two.
For a deeper technical breakdown of which surface tells the truth, our comparison of mirror vs camera accuracy unpacks the science in plain English.
1. Mirror Reversal: The Stranger in Your Camera Roll
Why every asymmetry suddenly screams for attention
Every tiny asymmetry you own — a slightly higher eyebrow, a nose that leans a hair left, a fuller cheek on one side — sits on the opposite side in a photo compared to your mirror. Your brain instantly flags the switch as “off,” even when nothing has actually changed. This is why a photo can feel unsettling within a fraction of a second, long before you can articulate what looks different.
Fix it
- Practise with your true face. Rapidly scroll through 20–30 photos of yourself each week; short, repeated exposure builds familiarity faster than long stares.
- Try a non-reversing (true) mirror to see your face the way others see it.
- Flip your selfies horizontally in any editing app before you review or post them — you will suddenly look more like “yourself.”
2. Lens Distortion: Why Selfies Enlarge Your Nose
The 12-inch problem no filter can solve
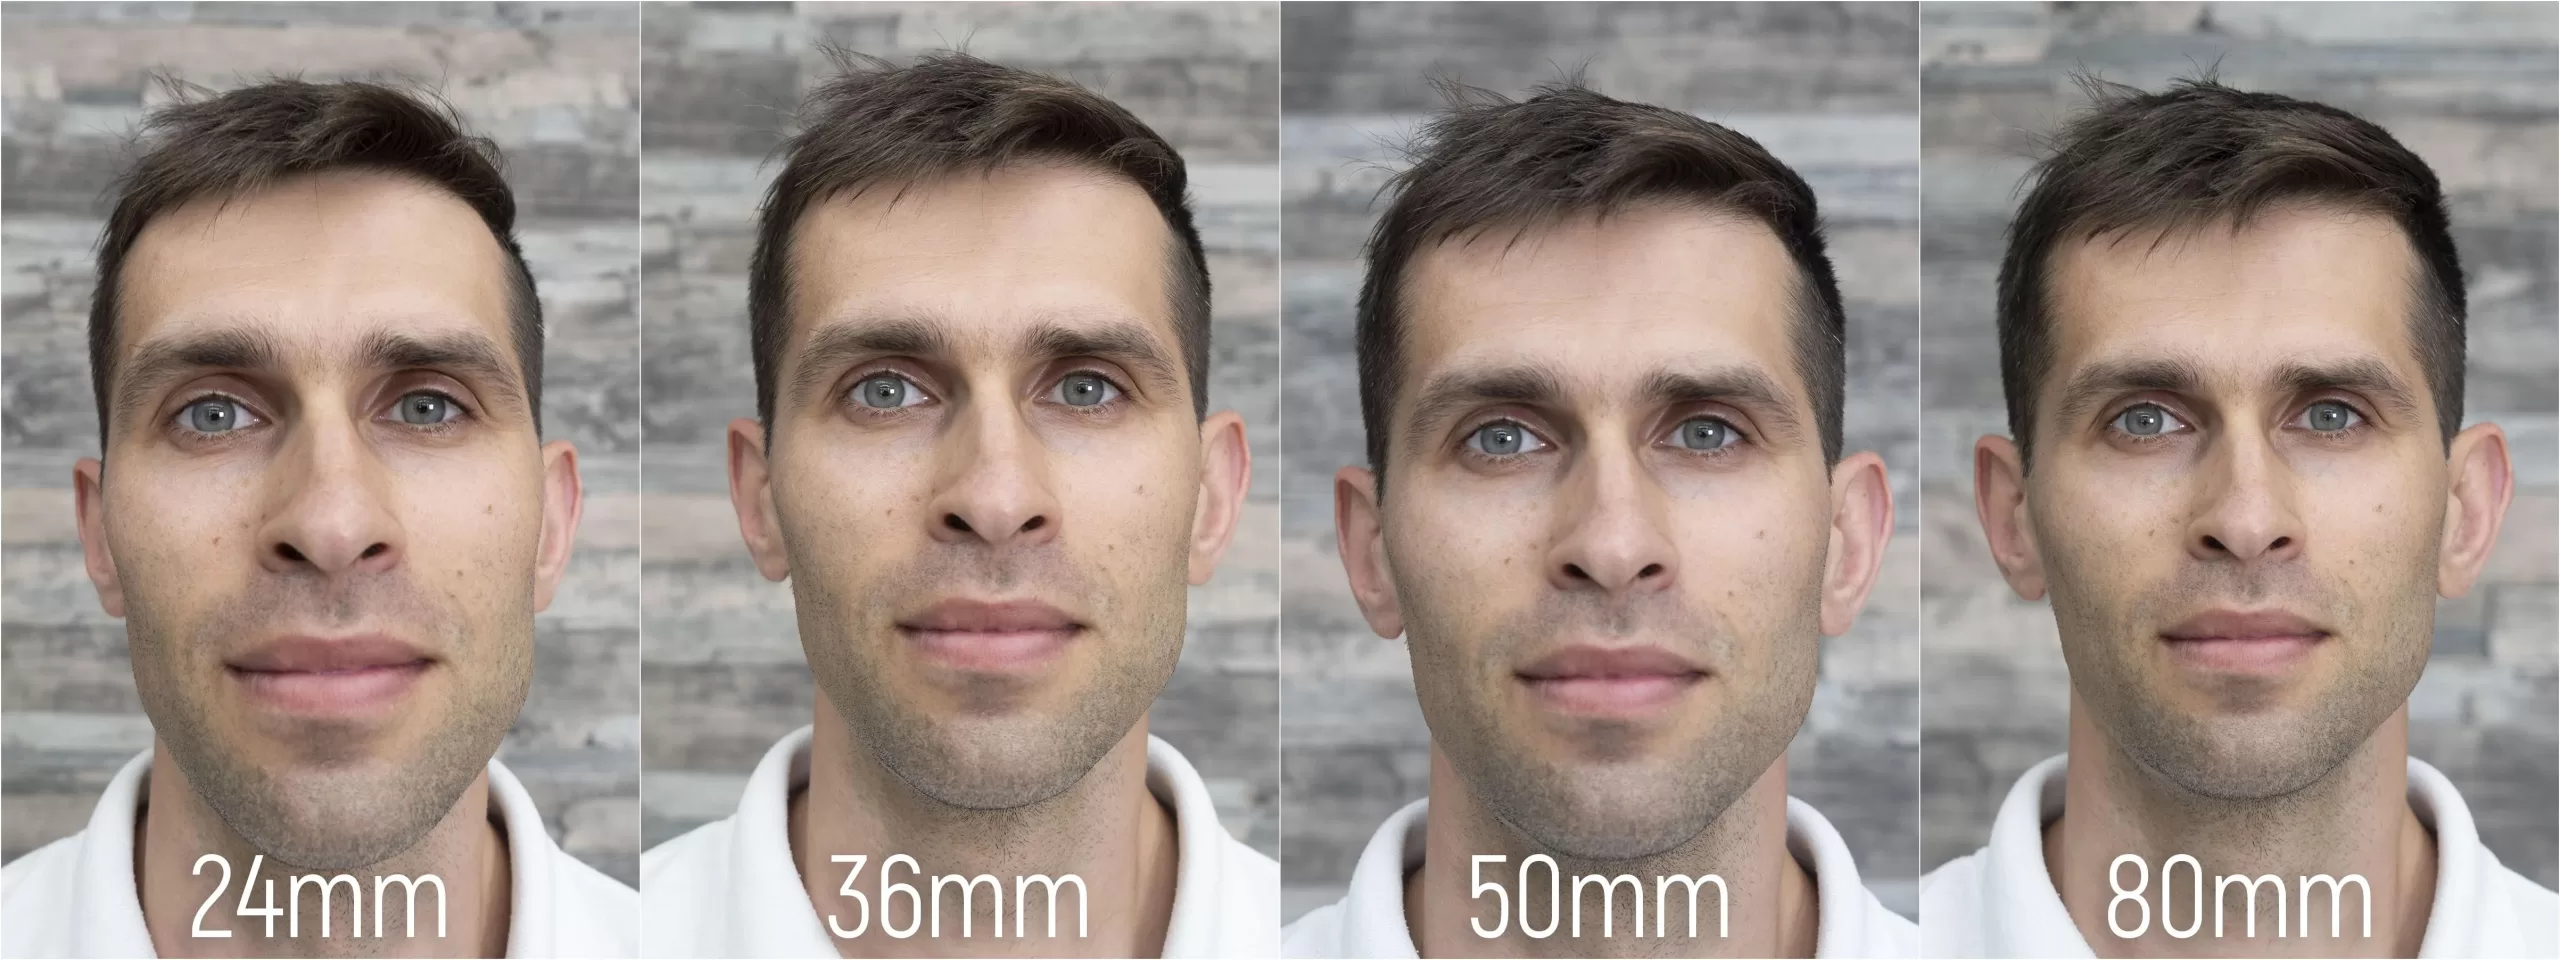
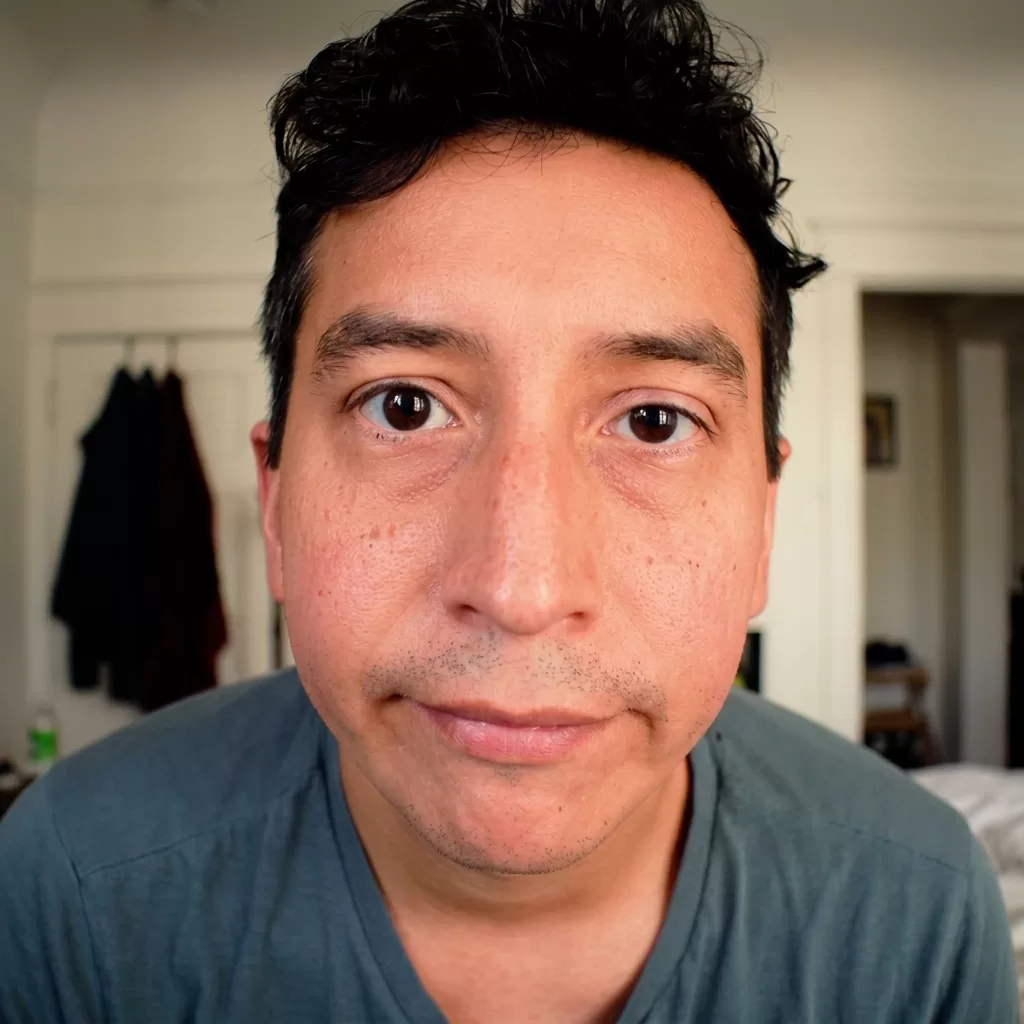
Grab your phone, hold it 12 inches (30 cm) from your face, and snap. Your nose looks larger, your ears look smaller, your forehead balloons. This is not your face — it is perspective distortion, caused by shooting close with a wide-angle lens. A widely-cited Rutgers study led by Dr. Boris Paskhover found that a selfie taken from 12 inches made the nose appear roughly 30% wider than a portrait taken from five feet away.
Phone front cameras typically sit around a 24–28 mm equivalent focal length — brilliant for landscapes, brutal for close-up faces. Portrait photographers reach for 50 mm, 85 mm, or 105 mm lenses because they compress features closer to how the human eye reads a face at conversational distance.
Fix it
- Step back and zoom in. Distance flattens distortion far more than lens setting alone.
- Use the rear camera, which almost always has a longer, more flattering focal length.
- Choose portrait mode on iPhones and Androids; most devices simulate an 80–90 mm lens.
- Photographers, upgrade thoughtfully — see our roundup of the best portrait lenses for face-friendly glass.
3. Bad Lighting: The Silent Villain of Every Bad Photo
Overhead bulbs, harsh noon sun, and window backlight
Lighting is the single most brutal variable in any photo. Overhead office fluorescents carve dark hollows under your eyes. Harsh noon sun deepens every pore. A single window behind you turns your face into a silhouette. In the mirror, your brain quietly adjusts for ambient light — the sensor cannot.
Fix it
- Face a window for soft, front-directional daylight — the universal beauty light.
- Shoot during golden hour (first hour after sunrise, last hour before sunset) for warm, low-angle glow.
- Avoid overhead-only lighting that casts raccoon shadows under the eyes.
- Bounce with white paper or a wall to lift shadows on the shaded side of your face.
- Add fill flash outdoors under midday sun to erase harsh under-eye shadows.
For everyday improvements, our photography tips for beginners covers indoor lighting hacks in detail.
Cluttered backdrop stealing the spotlight from your subject? Get pixel-perfect edges in hours with our clipping path service.
4. Frozen Frames: A Photo Traps a Millisecond Your Brain Ignores
Real life is a movie; a photo is one page torn out
In real life, people see you in motion — micro-expressions, blinks, laughter, the way you tilt your head when you listen. A photograph traps one 1/250th of a second, often mid-blink, mid-word, or mid-chew. That frozen sliver is almost always less flattering than the moving average.
Picture it this way: if someone made a flipbook of your face across ten seconds, most pages would look great, and two or three would look strange. A single unflattering photo is simply the one strange page pulled out and framed.
Fix it
- Take burst shots and pick the frame where your expression is naturally settled.
- Ask the photographer to shoot during conversation, not during “hold still.”
- Reset between shots — exhale, drop your jaw, wet your lips, blink, then re-engage.
- Never trust a single frame as evidence of “how you look.”
5. Forced Expressions: Why Held Smiles Look Fake
The Duchenne effect (and how to fake it convincingly)
Hold a smile for more than three seconds and your eyes go flat, your cheeks stiffen, and your mouth acquires that faint hostage-crisis quality. A genuine Duchenne smile activates both the mouth and the muscles around the eyes; a posed smile only activates the mouth. Cameras are ruthless at catching the difference.
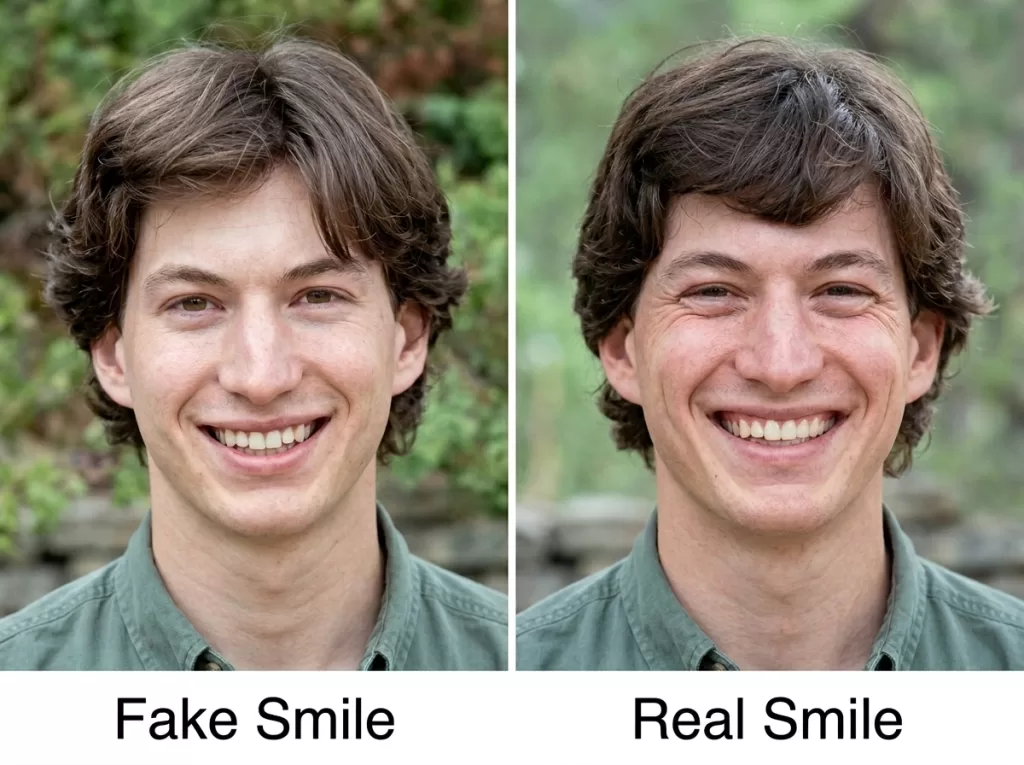
Fix it
- Think of a specific memory that makes you laugh — a real scene, not the abstract idea of “happy.”
- Say a soft “yes” or a long “mmm” just before the shutter clicks to relax your jaw.
- Break, laugh, and reset between every two or three frames.
- Try a closed-mouth smile if teeth make you self-conscious — the eye crinkle still reads as warmth.
6. Awkward Angles: Every Chin You Never Knew You Had
Below the jawline is enemy territory
The camera angle relative to your face controls almost as much as the lens. A camera below chin level shows the underside of your jaw and nostrils. A camera perfectly straight-on flattens your features into a passport-photo shape. A camera slightly above eye level, tilted 10–15 degrees toward you, is the near-universal flattering angle used by nearly every professional headshot photographer.
Fix it
- Position the lens slightly above your eyeline.
- Push your forehead forward and drop your chin by about one centimetre — the “turtle” move — to sharpen your jawline.
- Turn your body 30–45° off-camera, then rotate your face back toward it; this creates dimension.
- Never shoot from below unless you want a superhero low-angle look.
Curious how sensor and lens work together to shape a face? Our Nikon Zf review breaks down why certain cameras render skin so naturally.
7. Posture: How Slouching Adds Years and Kilos in a Click
Confidence has a shape, and the camera sees it
Slouching, hunched shoulders, or a forward-thrust head shrinks your neck, widens your torso, and quietly whispers “unconfident.” Photographers see this every day — a client stands tall in the mirror, then curls inward the moment the camera rises.
Fix it
- Imagine a string pulling up from the crown of your head.
- Roll your shoulders back and down, not up and forward.
- Weight on the back foot, front knee slightly bent to break stiffness.
- Create separation — a visible gap between arms and torso — to slim the silhouette.
- Elongate the neck by pushing your ears slightly forward of your shoulders.
8. Wrong Wardrobe and Grooming: Competing with Your Own Face
If the shirt shouts, the face whispers
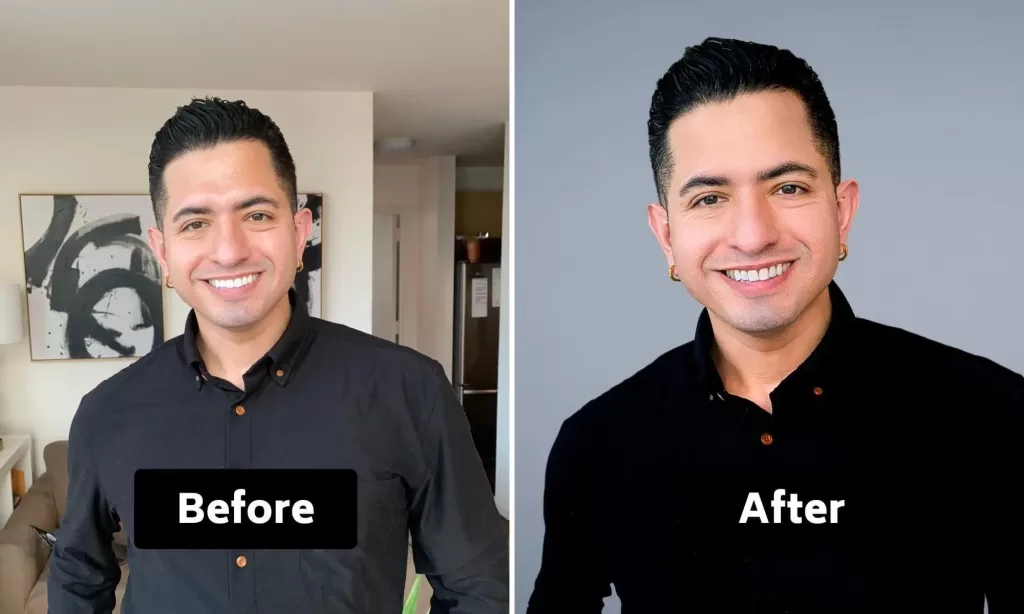
Your outfit either quietly frames your face or screams over it. Neon patterns, tight logos, unbuttoned collars, and clashing accessories drag the viewer’s eye away from your best feature — you. Similarly, unstyled hair, forgotten flyaways, and midday shine all read louder on camera than in a mirror.
Fix it
- Pick solid, mid-toned colours that complement your skin — jewel tones tend to flatter almost everyone.
- Match neckline to face shape: V-necks lengthen, crew necks broaden.
- Style your hair 20 minutes before, not five — settled hair looks more natural on camera.
- Blot shine with a tissue or matte powder just before shooting.
- Do a pre-shoot selfie test — if it looks wrong there, it will look wrong on set.
Selling online with product shots that look dull? Make every stone, band, and detail sparkle with our expert jewelry photo editing and retouching.
9. Self-Criticism: You Are the Harshest Critic in the Room
Your brain zooms; nobody else does
Neuroscience is on your side here. When you look at photos of yourself, your brain enters a hyper-detail scanning mode reserved almost entirely for your own face. You zoom in on a stray hair, an uneven eyebrow, a smile line. Nobody else does this to your picture. Others see the whole — expression, energy, familiarity — the way they see you at a coffee shop.
The mere-exposure effect works both ways: friends have spent years memorising your true, unflipped face, so a photo feels right to them and jarring to you.
Fix it
- Zoom out literally — review photos at 100%, not 400%.
- Ask a trusted friend which frame they prefer; you will almost always disagree with them, and they will almost always be right.
- Wait 24 hours before deleting a batch — first impressions are the harshest.
- Focus on the expression, not the pore.
10. Sensor, Screen, and Skin: Three Devices, Three Colour Stories
Your bathroom mirror was never colour-graded
The final surprise: cameras and screens see your skin differently than your eyes do. Sensors amplify redness, cool the mid-tones on some phones, exaggerate texture, and pick up freshly-formed blemishes that were invisible in your bathroom mirror. Then the screen you view the photo on adds its own colour bias.
Add sweat, sunscreen sheen, or a fresh haircut, and the mismatch grows. This is why almost every professional portrait you have ever admired — from magazine covers to LinkedIn headshots — has been retouched. Retouching does not mean “fake”; it means restoring what your eye saw and the sensor missed.
Fix it
- Set your phone to a neutral colour profile and avoid ultra-warm “Vivid” filters.
- View photos on a calibrated screen if you shoot for work.
- Use light retouching to smooth transient issues — a pimple, a shine spot — while keeping pores and freckles.
- Shoot in RAW whenever possible; RAW preserves editing latitude.
If you edit at home, our roundup of the best retouching software will point you to the right tools.
Product photos ruined by a messy backdrop? Swap it for anything you want in minutes with our precise background removal service.
Bonus Fix: Retouching Is Translation, Not Deception
What ethical retouching actually removes
Every celebrity portrait, every polished LinkedIn headshot, and every Amazon product photo has passed through a retoucher’s hands. Good retouching does not remove your face; it removes the noise that stops your face from reading correctly on camera — transient redness, oily reflections, distracting shadows, a stray strand. Think of it like an audio engineer removing hiss from a podcast: the voice is still yours, but you can finally hear it clearly.
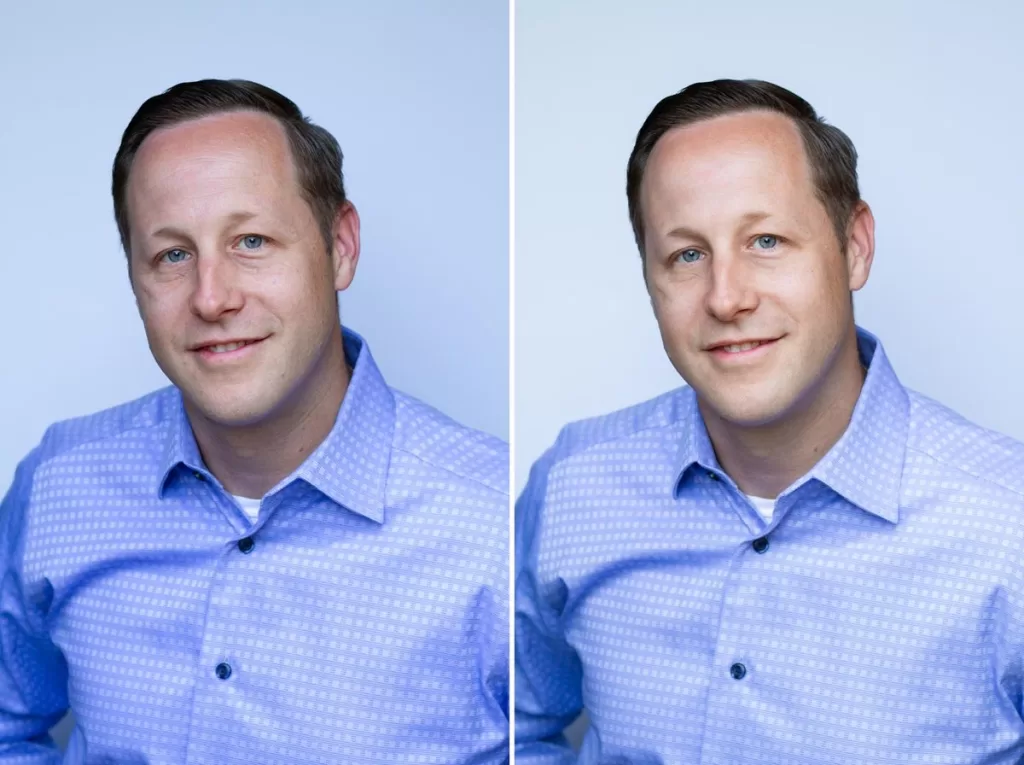
Common ethical retouching steps include:
- Removing temporary blemishes and stray hairs
- Balancing skin tone across the face
- Softening under-eye shadows without erasing them entirely
- Slightly whitening the sclera, never the iris
- Cleaning up wardrobe wrinkles and stray threads
Understanding pixel-level detail also matters when judging your own photos — our explainer on human eye resolution helps calibrate expectations between what your eye sees and what a sensor captures.
The Psychology in One Chart
A pocket-guide to what is actually going wrong
| What you feel | What is actually happening | Quick fix |
|---|---|---|
| “That doesn’t look like me.” | Mirror reversal + mere-exposure effect | Look at photos daily; flip selfies before reviewing |
| “My nose is huge.” | Wide-angle lens + short subject distance | Step back, use the rear camera, or a 50 mm+ lens |
| “I look tired.” | Overhead or harsh directional lighting | Face a window; shoot during golden hour |
| “My smile is weird.” | Held expression with dead eyes | Talk, laugh, then shoot in bursts |
| “I look wider than I am.” | Straight-on angle + slouch | Angle body 30–45°, roll shoulders back |
| “It looks worse than the mirror.” | Frozen frame vs. moving-average brain | Take 20 frames; keep the best 2 |
Quick Pre-Shoot Checklist (Screenshot This)
10 boxes to tick before you press the shutter
- ☐ Camera positioned slightly above eye level
- ☐ Light source in front of you, not behind
- ☐ Rear camera selected for portraits (never front)
- ☐ Distance of at least one metre from lens
- ☐ Shoulders rolled back, chin slightly forward and down
- ☐ Body angled 30–45° from the camera
- ☐ Solid, complementary clothing colour
- ☐ Bursts on, not single-shot
- ☐ Genuine memory or joke cued before shutter
- ☐ Reviewed the batch after 24 hours, not immediately
Mannequin distracting from your fashion shots? Deliver the invisible-mannequin look brands love with our ghost mannequin service.
When to Blame the Photo, When to Blame the Editing
Not every bad shot is a lighting problem
Not every unflattering image is a lighting problem — sometimes it is a post-production problem. If photos look great on your phone but muddy on Instagram, compression is the culprit. If skin tones shift dramatically between apps, colour management is off. If a photo looks great everywhere except in your own eye, the mere-exposure effect is at work.
Common post-production issues to watch for:
- Over-sharpening that turns pores into craters
- Aggressive HDR that flattens facial contour
- Wrong white balance that pushes skin either green or magenta
- Heavy compression on social platforms that muddies fine detail
- Filters trained on Western features that distort other skin tones or face shapes
Real-Life vs. Photo: The Gap Is Smaller Than You Think
Studies of self-perception consistently show that people rate themselves harsher than others rate them in photos, even when the photo is objectively neutral. The gap between “how I look in real life” and “how I look in this photo” is mostly a gap between how you feel about a familiar image and how you feel about a slightly unfamiliar one.
Once you understand the mechanics — the reversed mirror, the wide lens, the frozen frame, the harsh light, the harsher inner critic — you can stop taking the bad photo personally. It is not evidence of your appearance. It is evidence of physics, psychology, and a very fast shutter.
FAQs
Why do I look worse in photos than in the mirror?
Mainly because a mirror flips your face into the version you have practised, while a camera captures the unflipped version. Add lens distortion, frozen expressions, and harsh lighting, and photos feel unfamiliar even when they are accurate.
Do I actually look like my mirror or my photos?
Neither is fully “the truth.” Others see closer to your photo version, but they see it in motion, softly lit, and in context — not as a static, hyper-detailed still. The most accurate answer: you look like a video of yourself, not a mirror or a photo.
Which camera is more accurate — front or back?
The rear camera is almost always more accurate for portraits because it uses a longer focal length. The front camera’s wide lens exaggerates whatever is closest to it — usually your nose and forehead.
Does phone camera distortion really change my face shape?
Yes. Research shows shooting from 12 inches can make the nose appear roughly 30% larger than shooting from five feet. Distance changes proportions far more than lens choice alone.
Why do I look great in the mirror but bad in group photos?
Group photos are often taken with a wide lens, harsh overhead light, and off-centre framing. Everyone at the edges of a wide shot experiences edge distortion — stretched cheeks and elongated ears. Ask to stand near the middle.
Is retouching dishonest?
Not when it corrects temporary issues — blemishes, glare, wrinkles in clothing. Ethical retouching brings the photo closer to what your eye actually saw. It becomes dishonest only when it alters bone structure, body proportions, or identity.
Can I train myself to like my photos?
Yes. Thanks to the mere-exposure effect, brief repeated exposure increases liking. Set a favourite photo as your lock screen, scroll past your own images often, and stop avoiding them. Familiarity does the emotional work.
What is the single biggest fix for looking better in photos?
Distance and light. Move at least a metre from the lens, switch to the rear camera, and face a soft light source. Those three moves fix more than 70% of “why do I look bad” photos instantly.
Final Thoughts
Looking “worse” in photos is not a verdict on your face — it is a mismatch between the version of yourself you have memorised and the version a lens captures. Correct the lens distance, tame the lighting, relax the expression, and treat retouching as translation rather than deception. Then, most importantly, give your brain time to catch up to your camera face. The more you see it, the more it becomes just… you.
Ready to make every photo look like the best version of you or your product? Explore the full range of image editing and enhancement at Clipping Expert Asia.