

How to Remove Bald Spots from Photos Like a Pro–Step-by-Step Guide
January 16, 2026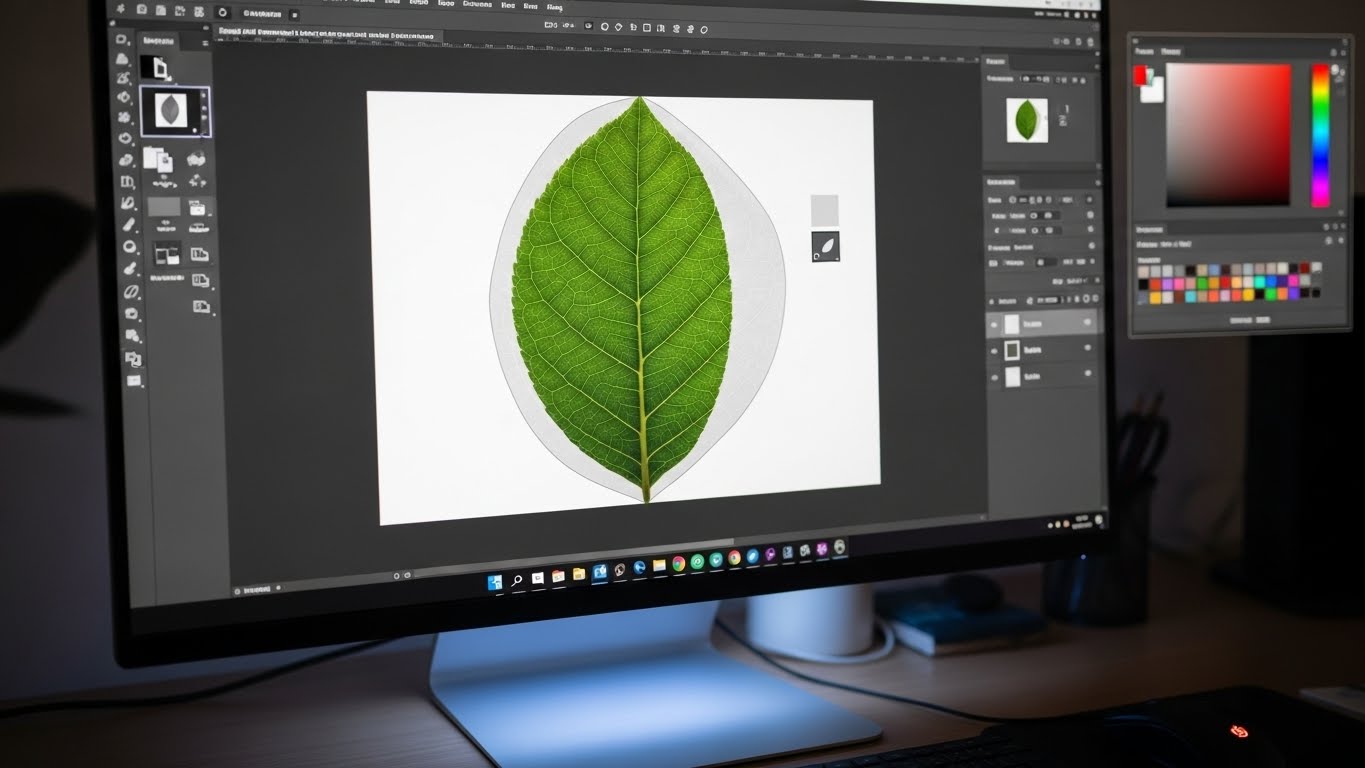
Unlocking the Power of Bitmap Masking in Digital Editing
January 19, 2026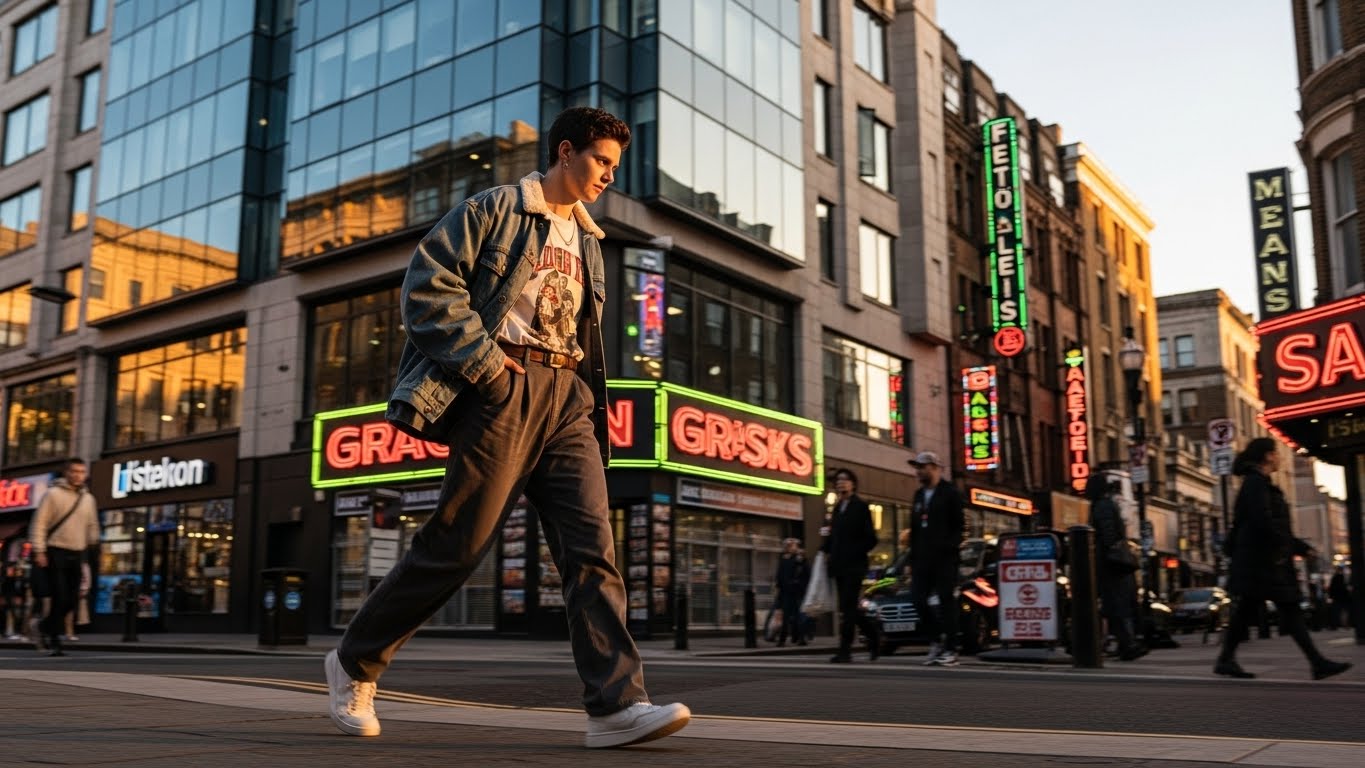
Photography in 2026 looks nothing like it did even three years ago. Phones now out-resolve entry-level cameras from 2019, AI assistants edit faster than most humans, and computational tricks save photos that older sensors would have ruined. Yet the photos that move people still follow the same quiet rules they always have: clean light, intentional framing, and a subject worth caring about.
This guide pulls those rules into a 2026-ready workflow. You will learn the gear that genuinely helps beginners today, the camera settings that work in real conditions, and the editing habits that separate “nice snapshot” from “frame-worthy print.” You will also see where AI fits — and where it should stay out of the way.
Who this guide is for: beginners with a phone or first camera, hobbyists ready to level up, and small business owners who shoot their own product, lifestyle, or social content.
Quick reader-friendly summary: The single biggest upgrade you can make in 2026 is not a new camera — it is shooting in RAW (or HEIF), learning the exposure triangle, and editing with restraint. Everything else is detail.
Want clean, share-ready photos without learning Photoshop? Let our experts handle the cleanup with our professional background removal service — fast, accurate, and edge-perfect.
- What Has Actually Changed in Photography in 2026?
- Step 1: Choose Gear That Matches Where You Actually Shoot
- Step 2: Master the Exposure Triangle (Still the Most Important Skill in 2026)
- Step 3: Compose Like You Mean It
- Step 4: Read Light Before You Read Your Camera
- Step 5: Get Real With Your Smartphone Camera
- Step 6: Take Better Portraits in 2026
- Step 7: Try Street, Lifestyle, and Documentary Photography
- Step 8: Product, Fashion, and E-commerce Photography (Worth Its Own Section in 2026)
- Step 9: Edit With Restraint (and Smarter AI)
- Step 10: Build the Habits That Actually Make You a Better Photographer
- Bonus: 2026 Trends Worth Riding (and Ones to Ignore)
- Frequently Asked Questions (FAQ)
- Final Thoughts: The Best Photography Tip of 2026
What Has Actually Changed in Photography in 2026?
Before any settings, it helps to know what is genuinely new this year, because it shapes the advice that follows.
- AI editing is now the default, not the upgrade. Lightroom, Photoshop, Capture One, and most phone gallery apps ship with generative remove, denoise, and upscale built in.
- Computational photography keeps closing the gap on dedicated cameras. The computational photography market is projected to grow from about USD 20 billion in 2026 to over USD 60 billion by 2034, which tells you exactly where the industry is pushing — into your phone, not your DSLR. Source: Fortune Business Insights
- HEIF is finally winning over JPEG. Smaller files, more color depth, better gradients. If you have never compared them, this side-by-side is worth a read: HEIF vs JPEG: quality, size, and compatibility compared.
- Authenticity is back in style. “Candid” and “imperfect” beat over-edited and over-posed across portrait, wedding, and brand work this year.
- C2PA content credentials are spreading. Expect more cameras, phones, and editors to label real photos vs. AI-generated ones.
What this means for you: Spend less time chasing megapixels, more time learning light and storytelling. The gear can finally get out of your way.
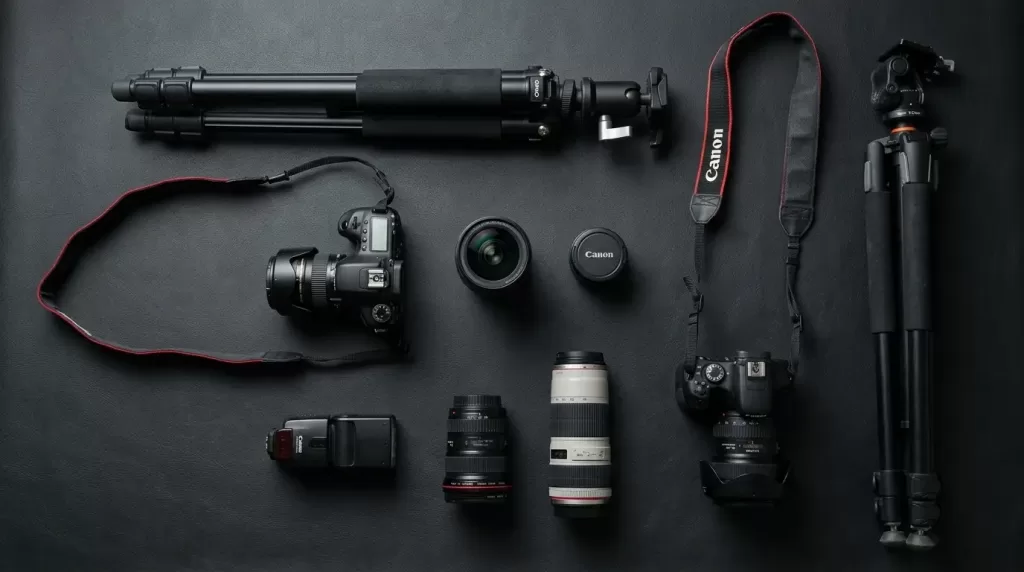
Step 1: Choose Gear That Matches Where You Actually Shoot
You do not need expensive equipment to make great photos in 2026. You need appropriate equipment.
The Three Realistic Paths for Beginners
- Smartphone-first path — Any flagship phone from the last three years can shoot in RAW or HEIF with manual exposure. Free apps like Halide, Lightroom Mobile, or your phone’s built-in Pro mode unlock real control.
- Used mirrorless path — A used Sony a6000, Fujifilm X-T30, or Canon R50 in the $300–$500 range outperforms most new entry-level kits and holds value well.
- Niche-specific path — If you already know you want to shoot wildlife, sports, or studio product work, buy for that niche first and skip the “all-rounder” trap.
Accessories That Are Worth Buying Day One
- A fast 35mm or 50mm prime lens (often $200 used) teaches you composition faster than a zoom.
- A lightweight tripod for night, long-exposure, and self-portrait work.
- A 64GB or 128GB SD card with V30 or higher rating.
- An extra battery — every photographer regrets the day they did not have one.
- A microfiber cloth kept in your bag pocket, not at home.
For deeper buying advice grounded in 2026 testing rather than spec sheets, Fstoppers maintains a useful breakdown: Best Beginner Cameras 2026: What Actually Matters.
Pro insight (often missed): New gear cannot fix bad habits, but used gear in good hands almost always outshoots brand-new gear in inexperienced hands.
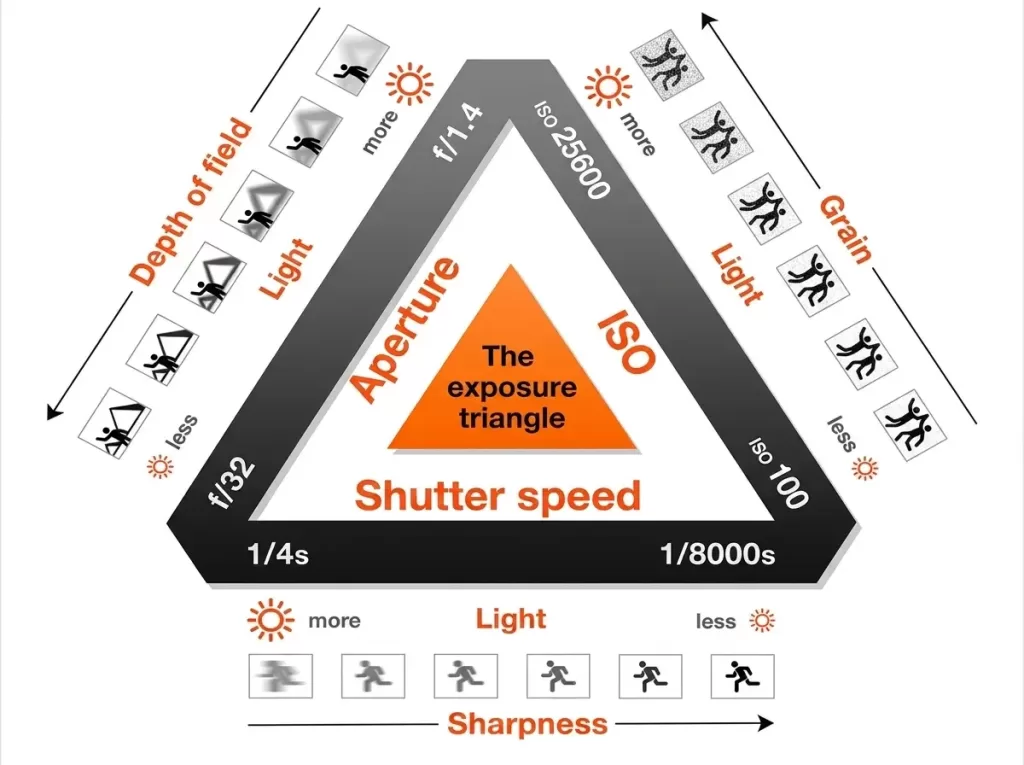
Step 2: Master the Exposure Triangle (Still the Most Important Skill in 2026)
Every camera in the world — including your phone — exposes images using three controls. Learn this once and you own the craft.
The Three Controls Explained Simply
- Aperture (f-stop) — How wide the lens opens. Smaller numbers (f/1.8) blur backgrounds; larger numbers (f/8–f/11) keep everything sharp.
- Shutter speed — How long the sensor is exposed. Fast speeds (1/1000s) freeze motion; slow speeds (1/30s and below) blur it.
- ISO — How sensitive the sensor is to light. Low ISO (100–400) gives clean files; high ISO (3200+) adds noise but rescues low-light shots.
A Cheat Sheet for Real Conditions
| Scenario | Aperture | Shutter Speed | ISO |
|---|---|---|---|
| Bright daylight portrait | f/2.8 | 1/500s | 100 |
| Indoor casual photo | f/2.0 | 1/125s | 800 |
| Moving kids or pets | f/4 | 1/1000s | 400–1600 |
| Handheld night street | f/1.8 | 1/60s | 3200 |
| Tripod landscape | f/8 | 1–10s | 100 |
If you want a deeper but still beginner-friendly walkthrough with real examples, PetaPixel keeps an evergreen explainer here: The Exposure Triangle: A Beginner’s Guide.
Active habit to build: Shoot in Aperture Priority with Auto ISO for your first three months. It teaches you depth of field while the camera handles exposure math.
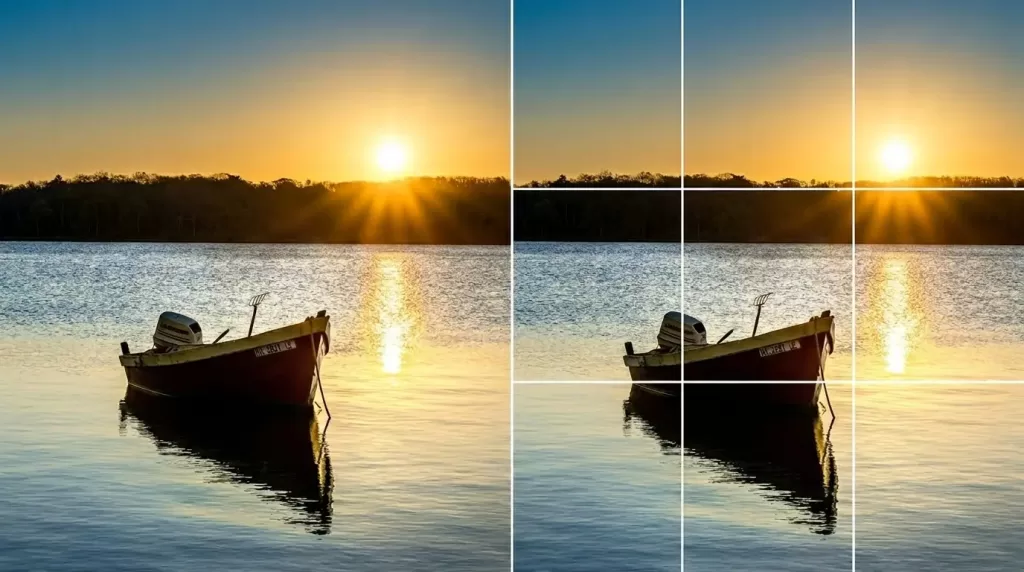
Step 3: Compose Like You Mean It
Composition is what makes a photo feel intentional rather than accidental. Cameras have improved every year; composition rules have not changed in a century.
Five Composition Rules That Always Work
- Rule of thirds — Place key subjects on the intersecting lines, not dead center.
- Leading lines — Roads, fences, rivers, and shadows all guide the eye toward your subject.
- Negative space — Empty areas give a subject room to breathe and feel important.
- Framing within a frame — Shoot through doorways, windows, or branches to add depth.
- Symmetry and pattern — Powerful in architecture, reflections, and minimalism.
The Composition Habits Most Beginners Skip
- Check the corners and edges before pressing the shutter. Cluttered corners ruin more photos than bad exposure.
- Move your feet, not your zoom. Walk closer, crouch lower, shoot from a child’s eye level — the perspective shift is dramatic.
- Take the same scene three ways. Wide, medium, tight. You will almost always prefer one you would not have shot first.
For a quick foundational refresher with examples from working photographers, Adobe maintains a free hub here: Photography basics by Adobe.
Need pixel-perfect cutouts for your product or portfolio shots? Try our hand-drawn clipping path service — sharp edges, zero halos, fast turnaround.
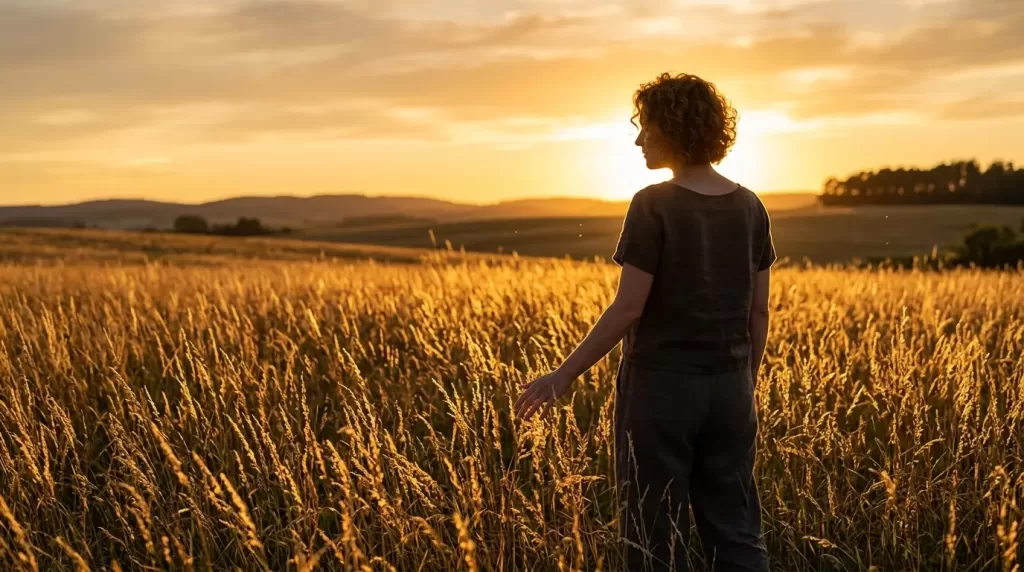
Step 4: Read Light Before You Read Your Camera
A great photographer with a phone will beat a beginner with a $4,000 setup almost every time, because light is the actual subject of every photograph.
When to Shoot (and When Not To)
- Golden hour — The first hour after sunrise and the last hour before sunset. Warm, low, flattering for almost everything.
- Blue hour — The 20–30 minutes after sunset. Cool tones, glowing city lights, cinematic mood.
- Overcast midday — The best free softbox in the world. Perfect for portraits, product, and food.
- Harsh midday sun — Hardest light for beginners. Use shade, backlight, or wait.
- Night — A tripod, ISO 1600–6400, and patience open an entirely new world.
Direction Matters More Than Quantity
- Front light flattens faces but pops color.
- Side light sculpts texture and skin.
- Backlight creates glow, silhouettes, and separation.
- Top light at noon creates raccoon eyes — avoid or fill with a reflector.
Quick test: Before every shot, ask one question — “where is the light coming from?” That single habit changes more photos than any setting on the dial.
Step 5: Get Real With Your Smartphone Camera
In 2026, the phone in your pocket is a serious camera. Use it like one.
Phone-Photography Upgrades That Take Five Minutes
- Turn on RAW or ProRAW. You will see noise and color you never knew were there — and recover detail no JPEG can.
- Switch on the grid and use it for thirds.
- Lock focus and exposure by long-pressing your subject.
- Use the main wide lens, not the digital zoom. Crop afterward instead.
- Clean your lens before every important shot. Pocket lint is the silent photo killer.
- Shoot in HEIF if your phone supports it — smaller files, better color depth than JPEG. See the HEIF vs JPEG comparison here.
Advanced Phone Tricks Worth Learning
- Burst mode for kids, pets, sports. Then keep one frame, delete the rest.
- Night mode + tripod or steady ledge. The results rival mid-range mirrorless.
- Manual white balance in pro mode for consistent tones across a series.
- External clip-on lens or magnetic ND filter if you want to push into long-exposure or cinematic work.

Step 6: Take Better Portraits in 2026
Portraits are where most photographers feel the steepest learning curve — and the most rewarding wins.
Portrait Settings That Work in Almost Any Light
- Aperture: f/1.8–f/2.8 for blurred backgrounds; f/4–f/5.6 for groups.
- Shutter speed: at least 1/200s handheld to avoid motion blur.
- Focus: always on the eye closest to the camera. Most cameras and phones now offer Eye AF — turn it on.
- Light: place the subject so the brightest light source falls on the side of the face, not the front.
Direction and Connection
- Give people something easy to do with their hands — hold a coffee, adjust a sleeve, lean on a wall.
- Talk to them. The relaxed half-second between your sentences is when the real photo happens.
- Shoot a few frames before they “feel ready.” Those are often the keepers.
- Show them one good shot early so they relax for the rest.
Want flawless skin, eyes, and tones without losing realism? Our high-end photo retouching service delivers natural, magazine-grade portrait edits.
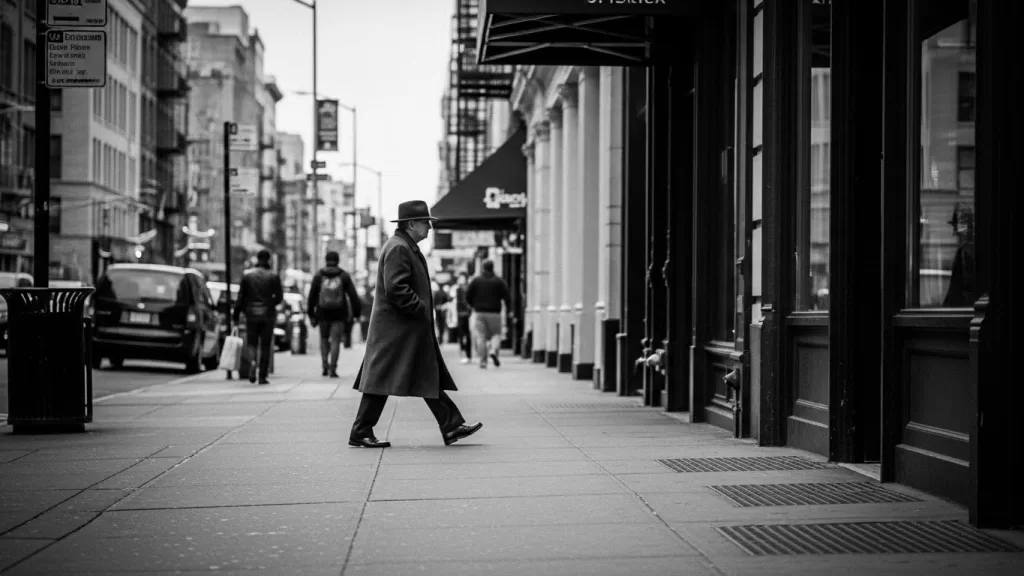
Step 7: Try Street, Lifestyle, and Documentary Photography
Street photography is the fastest way to develop your eye in 2026. You learn to react, compose, and respect the moment all at once.
Practical Street Photography Tips
- Use a small camera or your phone so people stay relaxed.
- Pre-set your camera to f/8, 1/500s, Auto ISO, zone focus around 3–5 meters.
- Wait for the moment rather than chasing it. Find a good background and let life walk in.
- Shoot legally and ethically — most countries allow photographing people in public, but always read the room.
- Black and white forgives a lot of harsh light and busy color.
Fresh 2026 Street Ideas
- Reflections in puddles and shop windows during rain or blue hour.
- Silhouettes against neon, LED screens, or train doors.
- Layered scenes — foreground, midground, background all telling part of the story.
- Detail series — hands, shoes, hats, signs — assembled as a small portfolio.
Step 8: Product, Fashion, and E-commerce Photography (Worth Its Own Section in 2026)
E-commerce photography deserves separate attention because it pays well, scales fast, and has very specific rules.
What Buyers Actually Need to See
- A clean front view on white or off-white background.
- Multiple angles — back, side, top, detail close-ups.
- Scale shots — held in a hand, worn on a body, placed in a room.
- Lifestyle context that matches the customer’s environment.
- Consistent color and white balance across every variant.
Apparel-Specific Tip: Ghost Mannequin
For clothing, the ghost mannequin technique (also called invisible mannequin or hollow man) gives garments shape without distracting human models. Shoot the front on a mannequin, then shoot the inside neckline separately, and composite them in post for that floating “worn but empty” look.
Selling clothing online? Our ghost mannequin service gives garments shape and depth without a model — perfect for store-ready visuals.
Multi-Layer and Transparent Subjects
Glass, jewelry, hair, fur, smoke — these are the hardest subjects to cut out cleanly because they have semi-transparent edges. A simple background removal will not work; you need professional masking that preserves detail and transparency.
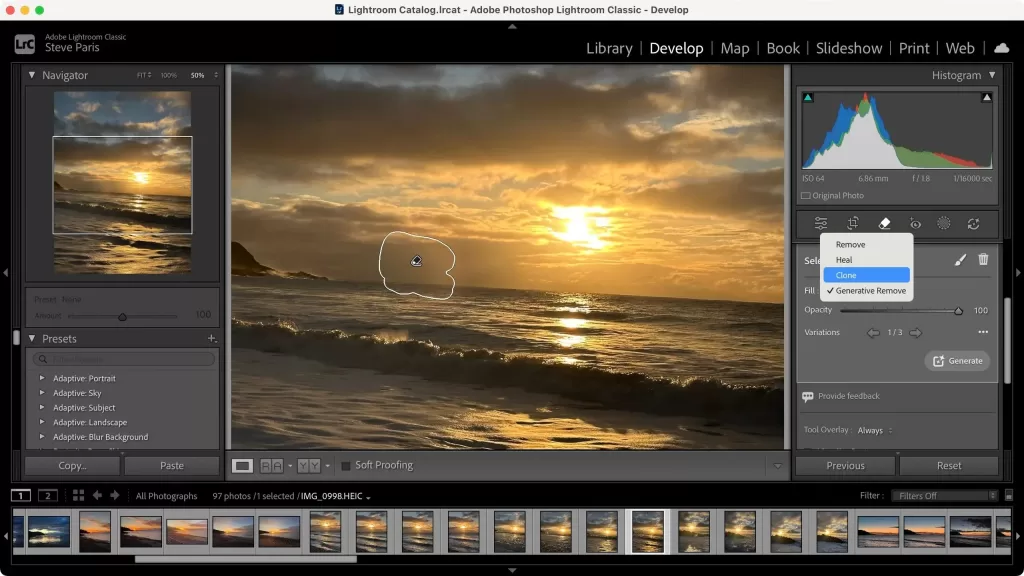
Step 9: Edit With Restraint (and Smarter AI)
Editing in 2026 is faster than ever, which means it is easier than ever to overdo it. The best editors do less, but do it on the right places.
A Five-Step Workflow That Always Holds Up
- Crop and straighten first. Get composition right before color.
- Set white balance so neutral colors actually look neutral.
- Adjust exposure, then highlights and shadows — never just push “auto.”
- Add subtle contrast and clarity locally, not globally.
- Sharpen and export at the right size for the platform.
What AI Editing Is Good At — and What It Isn’t
- ✓ Removing distracting objects, denoising high-ISO files, masking subjects, upscaling old photos.
- ✓ Generating quick variations and skies for social media.
- ✕ Replacing your judgment on mood, story, and color.
- ✕ Saving a photo that was poorly lit or poorly composed at capture.
For a deeper look at the 2026 editing landscape and AI tool comparisons, Envato keeps a helpful overview: 10 Photography Trends for 2026.
Step 10: Build the Habits That Actually Make You a Better Photographer
Skills plateau without habits. Here are the ones that compound fastest.
Daily and Weekly Practices
- Carry a camera (or use your phone) every single day. Most great photos are unplanned.
- Shoot one personal project per month. A theme, a series, a single subject.
- Edit less, but finish more. A delivered series of 10 beats a folder of 200 ignored RAWs.
- Print your favorites. Holding a print teaches you what works far faster than scrolling.
- Study one photographer per week. Not their gear — their choices.
Mistakes Almost Every Beginner Makes
- Buying lenses before mastering one.
- Editing for likes instead of for memory.
- Shooting only in good weather.
- Chimping (checking the LCD after every frame) and missing the next moment.
- Ignoring backups — until they lose a year of work.
Have hundreds of RAWs sitting unfinished? Let us handle the cleanup with our professional image masking service — perfect for complex subjects like hair, fur, and lace.
Bonus: 2026 Trends Worth Riding (and Ones to Ignore)
A short, honest read on what is genuinely shaping photography this year.
Trends Worth Riding
- Cinematic photography — moody color grading, wider aspect ratios, story-first framing.
- Candid and authentic portraiture — fewer poses, more real expressions.
- Mobile-first framing — composing for vertical 9:16 from the start, not as an afterthought.
- AI-assisted culling and editing — saves hours, lets you focus on creative choices.
- Sustainable and local photo walks — over expensive international travel content.
Trends Worth Ignoring (for Most People)
- Chasing every new camera body release.
- Over-stylized AI sky replacements that scream “edited.”
- Vintage filters applied indiscriminately — they age fast.
- Buying gear because a YouTuber loves it before you have made 1,000 frames with what you own.
Frequently Asked Questions (FAQ)
1. What is the single most important photography tip for beginners in 2026?
Learn to read light before you learn any setting. Where the light comes from, how soft or hard it is, and what color it is will shape your photos more than any camera you own.
2. Is a smartphone good enough for serious photography in 2026?
Yes — for most beginners and even many professionals working in social, lifestyle, and travel niches. Shoot in RAW or HEIF, use manual exposure, and stick to the main wide lens for best results.
3. What camera settings should beginners start with?
Begin in Aperture Priority with Auto ISO. Set aperture by subject (f/1.8–f/2.8 for portraits, f/8 for landscapes), keep shutter speed above 1/200s handheld, and let ISO float.
4. RAW or JPEG — which should I shoot in 2026?
Shoot RAW if you plan to edit, and HEIF if your camera or phone supports it for smaller files with better quality than JPEG. Use JPEG only when you need instant share-ready files and minimal editing.
5. How long does it take to become a “good” photographer?
Most beginners see a clear jump in quality after about three to six months of consistent shooting (a few times per week) and active editing review. Expertise in a niche typically takes one to three years.
6. Do I need to learn Photoshop or Lightroom in 2026?
Yes — at least the basics of one. Lightroom (or Lightroom Mobile) is the most beginner-friendly and powerful. AI tools speed things up, but you still need to know what a “good edit” looks like.
7. What is the best lens for a beginner photographer?
A 35mm or 50mm prime lens (f/1.8 versions are affordable). They force you to move, train your composition, and produce beautiful background blur for portraits and lifestyle work.
8. How can I make my product photos look more professional without a studio?
Use natural window light, a clean neutral background, a small tripod, and an editing service or AI tool for clean cutouts. Consistency in white balance and angles matters more than fancy gear.
Final Thoughts: The Best Photography Tip of 2026
If you remember nothing else from this guide, remember this: the goal is not better photos — it is more honest ones. The cameras are good enough. The phones are good enough. The editors are smarter than ever. What separates memorable work from forgettable work in 2026 is intention: knowing why you took the photo, who it is for, and what feeling you wanted it to carry.
Shoot more. Edit less. Print the ones that matter. The rest takes care of itself.
Ready to make your photos look studio-finished? Add depth and realism with our natural shadow creation service — perfect for e-commerce, portfolios, and ads.