


Best AI Upscaler 2026: 10 Photo Enhancers Compared
July 14, 2026
Best Photo Scanner Apps 2026: Free & Paid Picks Compared
July 20, 2026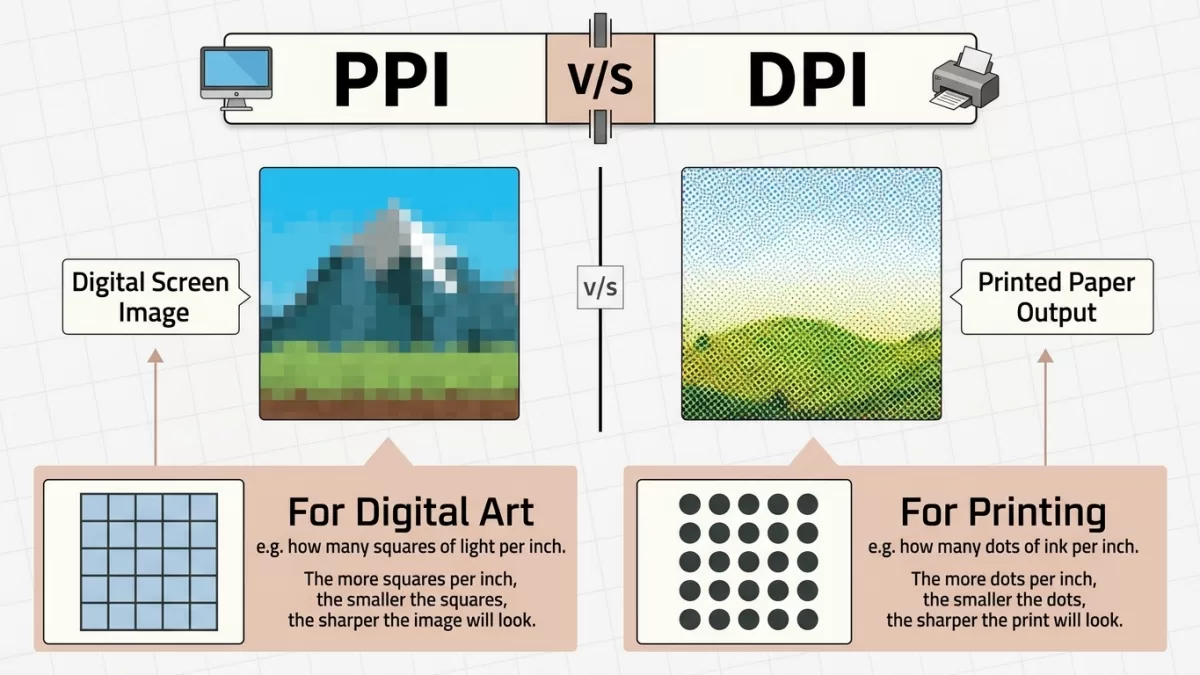
If you have ever uploaded a photo to a print shop and received a soft, blurry result, or squinted at a “72 DPI” warning in your editing software and wondered what it actually means, you have already bumped into the DPI vs PPI confusion. Photographers, designers, and online sellers throw these two terms around constantly, and most people treat them as synonyms. They are not. DPI and PPI describe two completely different things, and mixing them up leads to blurry prints, oversized files, and hours of avoidable rework.
Quick answer: PPI (Pixels Per Inch) describes the digital resolution of an image or a screen — how many square pixels sit inside one linear inch. DPI (Dots Per Inch) describes a printer’s output resolution — how many microscopic ink droplets the printer sprays into one linear inch of paper. PPI belongs to the file and the display. DPI belongs to the machine that prints it.
This guide explains exactly what each term means, where each one applies, and what numbers to actually use when you prepare files for printing or for screens. You will get simple formulas, real device data, a pre-flight checklist, and clear examples you can reuse every time you export, resize, or send a photo to print.
- What Is PPI? Understanding Pixels Per Inch
- What Is DPI? Understanding Dots Per Inch
- DPI vs PPI at a Glance
- Why Everyone Mixes Up DPI and PPI
- How PPI Affects Screens and Web Images
- How DPI Affects Print Quality
- The Math: Calculating Print Size and Pixel Needs
- Real-World Examples You Can Use Today
- Common DPI and PPI Myths, Debunked
- Recommended PPI and DPI by Use Case
- How to Change PPI in Photoshop and Other Editors
- DPI, PPI, and Product Photography for E-commerce
- Preparing Files for Print: A Simple Pre-Flight Checklist
- Common Resolution Mistakes and How to Fix Them
- Quick Reference Cheat Sheet
- Frequently Asked Questions About DPI vs PPI
- Final Thoughts
What Is PPI? Understanding Pixels Per Inch
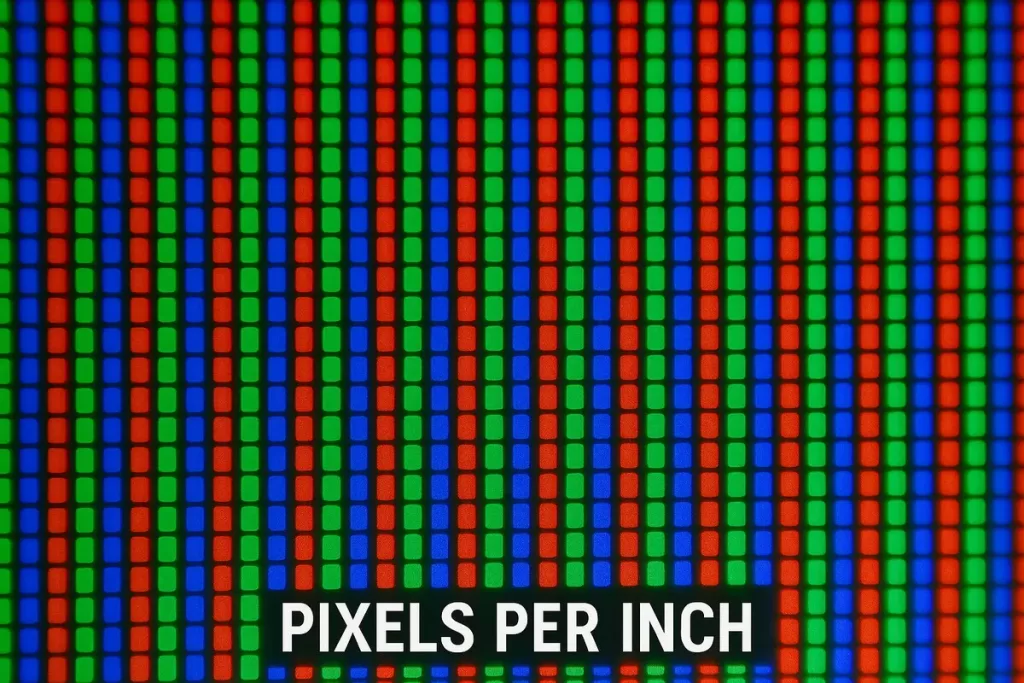
PPI stands for Pixels Per Inch, and it describes how many individual pixels sit within one inch of a digital image or a screen. Your camera captures a fixed grid of pixels the moment you press the shutter — a 24-megapixel sensor, for example, produces an image roughly 6000 × 4000 pixels wide. PPI tells software and printers how densely those existing pixels get packed when the image displays or prints at a given size.
A few facts make PPI easier to grasp:
- PPI lives inside the image file and inside your screen’s specifications, not inside a printer.
- Editing software such as Photoshop uses PPI to calculate physical print dimensions.
- Standard computer monitors historically ran around 72–110 PPI, while modern phone and tablet screens push 220–520 PPI.
- Changing the PPI number in your software does not automatically add detail to a photo — it only changes how large that same set of pixels will print.
Think of PPI as a density setting. The same 3000 × 2000 pixel file prints at 10 × 6.7 inches when set to 300 PPI, but spreads out to 20 × 13.3 inches when set to 150 PPI, using the exact same pixels. Screen PPI works the same way — it just measures how tightly a physical display packs its own pixels rather than how tightly a printer will pack yours.
What Is DPI? Understanding Dots Per Inch
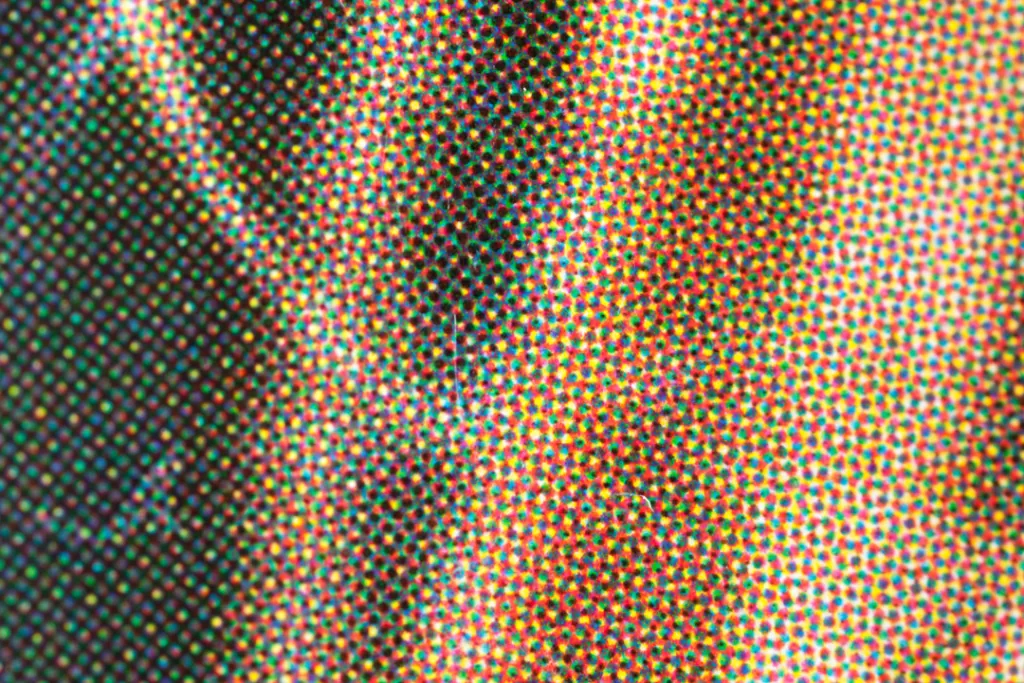
DPI stands for Dots Per Inch, and it belongs entirely to the physical world of printers and ink. A printer does not “see” pixels the way a screen does. Instead, it lays down countless microscopic dots of cyan, magenta, yellow, and black ink to recreate the color and tone of each pixel in your file. DPI measures how many of those physical ink dots the printer places along one inch of paper.
Key points to remember about DPI:
- DPI is a hardware specification tied to the printer, not a property stored in your image file.
- A single image pixel often requires several overlapping ink dots to reproduce its exact color, which is why printer DPI numbers (1200, 2400, even 4800) run far higher than the 300 PPI standard used for images.
- Higher DPI settings create smoother gradients and sharper text, but they also use more ink and slow down printing.
- Most professional photo printers deliver excellent photographic results somewhere between 300 and 1440 DPI, depending on the paper and ink combination.
Modern flagship photo printers such as the Canon PIXMA PRO-1000 and Epson SureColor P900 advertise resolutions of 2400 × 1200 DPI or higher, but that number describes how finely the print head can spray droplets — not how many pixels your file needs. Feed those printers a 300 PPI file at final print size and they translate every pixel into roughly 30–60 overlapping droplets to reproduce its exact color and tone.
Remember the golden rule: if it lives on a screen, think PPI. If it lives on paper, think DPI.
DPI vs PPI at a Glance
Here is the clearest way to separate the two terms:
| Feature | PPI (Pixels Per Inch) | DPI (Dots Per Inch) |
|---|---|---|
| Full name | Pixels Per Inch | Dots Per Inch |
| Belongs to | Digital images and screens | Printers and printed paper |
| Controlled by | Camera sensor / editing software | Printer hardware and driver |
| Unit | Colored pixels (RGB) | Ink droplets (CMYK) |
| Typical range | 72–520 PPI | 300–4800 DPI |
| Visible on screen? | Yes | No — meaningless on displays |
| Affects | Screen sharpness, print size | Ink smoothness, print sharpness |
| Changes file size? | Only when resampling | Never — printer-side setting |
You can even calculate a screen’s own pixel density using a simple version of the Pythagorean theorem. Take a 27-inch monitor running a 4K resolution of 3840 × 2160 pixels:
That formula explains why the same 4K image looks razor-sharp on a 27-inch monitor but noticeably softer stretched across a 65-inch television, even though both screens show identical pixel counts. Standards bodies formalize this relationship too — the W3C’s resolution unit specification defines exactly how browsers and devices interpret pixel density in code.
Why Everyone Mixes Up DPI and PPI
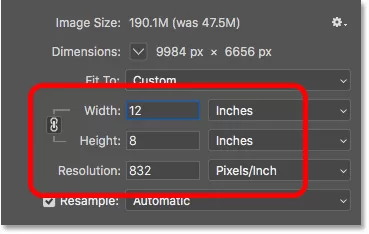
If DPI and PPI describe such different things, why does almost everyone confuse them? Historical habit deserves most of the blame. Early desktop publishing software adopted “DPI” as a catch-all label for both screen density and print density, and the habit stuck for decades. Even today, operating systems and editing tools display “DPI” fields that are technically measuring PPI.
Adobe’s own documentation acknowledges this overlap directly. The Adobe Help Center’s guide to image size and resolution explains how Photoshop’s “Resolution” field controls pixel density for both screen and print purposes, using the labels somewhat interchangeably. Once you know that software vendors themselves blur the line, the widespread confusion makes a lot more sense — and you can stop assuming you missed something obvious.
Print shops add another layer of noise by shouting “I need 300 DPI!” when they technically mean 300 PPI at the final print size. Treat any lab instruction that references DPI as a PPI requirement unless the conversation is clearly about their own printer hardware.
Need your images to be marketplace-ready (Amazon, Shopify, etc.)?
Ensure compliance and quality with our professional Photo Retouching
How PPI Affects Screens and Web Images
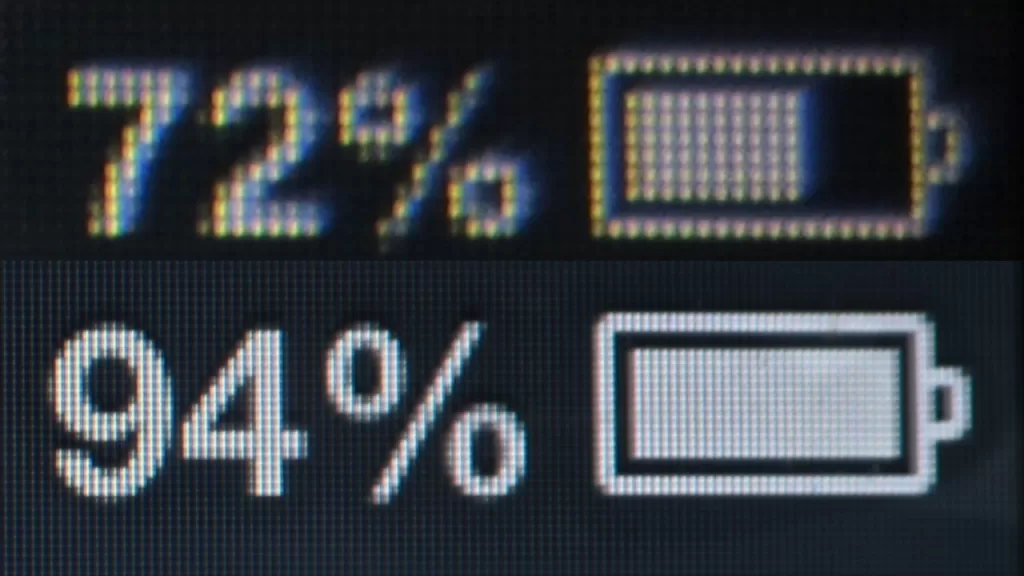
Web browsers ignore the PPI number stored inside an image file completely. They only care about pixel dimensions. Upload a 1200 × 800 pixel photo to any website, and it displays at 1200 × 800 device pixels regardless of whether its metadata reads 72, 300, or 3000 PPI. The “save for web at 72 DPI” rule is a leftover from 1990s cathode-ray monitors and holds no meaning today.
Pixel density still matters, though, because of high-density displays. Apple’s Retina panels and similar HiDPI screens pack far more physical pixels into the same inch of screen space than older monitors did. Real-world densities today look like this:
- Budget 15.6-inch 1080p laptops: ~141 PPI
- 27-inch 1440p desktop monitor: ~109 PPI
- 27-inch 4K desktop monitor: ~163 PPI
- Apple Studio Display (27-inch 5K): 218 PPI
- MacBook Pro 14-inch Liquid Retina XDR: 254 PPI
- iPad Pro (M4): ~264 PPI
- iPhone 15 Pro Super Retina XDR: 460 PPI
- Google Pixel 8 Pro: 489 PPI
- Meta Quest 3 VR headset: ~1,218 PPI per eye
Apple’s “Retina” label is not a fixed number — it simply means the pixels are small enough that a typical user cannot resolve them at the expected viewing distance. Apple’s own Human Interface Guidelines for images recommend supplying image assets at 2× or 3× their intended display size specifically so they stay crisp on these dense screens.
Practical takeaways for screen work:
- Resize images based on pixel dimensions, never based on a PPI number.
- Supply 2× or 3× pixel dimensions for logos, icons, and hero images if you want them sharp on Retina-style displays.
- Ignore the “72 DPI for web” rule — it is a fossil from the 1980s Macintosh era.
- Choose the right image format (WebP or AVIF where supported) rather than obsessing over metadata.
How DPI Affects Print Quality
Once a file reaches a printer, DPI takes over as the number that actually determines sharpness. A higher DPI setting lets the printer place smaller, more numerous ink dots, which produces smoother gradients and crisper edges — especially on glossy paper. Viewing distance dictates almost everything, though.
Recommended PPI values by output type look like this:
- Photo prints (4×6, 5×7, 8×10): 300 PPI minimum for professional sharpness.
- Business cards, magazines, and brochures: 300 PPI to keep tiny type crisp.
- Fine art giclée prints: 300–360 PPI for maximum tonal richness.
- Large-format posters (viewed from 3–6 ft): 150–200 PPI works beautifully.
- Trade-show banners (viewed from 6–10 ft): 100–150 PPI is plenty.
- Billboards (viewed from 50+ ft): 15–45 PPI, because distance does the sharpening.
Camera resolution plays a direct role here too. A 24-megapixel camera capturing roughly 6000 × 4000 pixels can comfortably support a 20 × 13 inch print at 300 PPI. If you want to know which cameras deliver the most pixels for oversized prints, this ranking of highest-resolution cameras breaks down the current megapixel leaders.
The Math: Calculating Print Size and Pixel Needs
You only need two formulas to plan any print job correctly:
Let’s walk through the numbers you will use most often:
- 4×6 print at 300 PPI: 4 × 300 = 1200 px, and 6 × 300 = 1800 px, so you need at least 1200 × 1800 pixels. Our breakdown of the 4×6 photo size covers dimensions in both inches and centimeters.
- 8×10 print at 300 PPI: 8 × 300 = 2400 px, and 10 × 300 = 3000 px, so a 2400 × 3000 pixel file (7.2 MP) covers it comfortably.
- 16×20 wall print at 300 PPI: 16 × 300 = 4800 px, and 20 × 300 = 6000 px, which works out to 28.8 MP — well within reach of most modern mirrorless or DSLR cameras.
- 24×36 poster at 150 PPI: 24 × 150 = 3600 px, and 36 × 150 = 5400 px, giving you a 19.4 MP requirement instead of the 77 MP that full 300 PPI would demand.
Notice how viewing distance changes everything. A photo held in your hand needs far more density than a poster seen from across a room, and a billboard needs even less.
Real-World Examples You Can Use Today
Numbers get abstract quickly, so here are three scenarios that map directly to jobs designers and photographers face every week.
Example 1: 24 MP camera → 8 × 10 print
Your file is 6000 × 4000 pixels. Your target is an 8 × 10 print at 300 PPI, which needs just 2400 × 3000 pixels. You have roughly 3× the headroom needed, so you can crop aggressively and still hit magazine sharpness. Our detailed 8×10 photo dimensions guide explains the aspect-ratio math behind this common size.
Example 2: iPhone shot → 16 × 20 canvas
Your file is 4032 × 3024 pixels. Printed at full 16 × 20 inches, that works out to roughly 201 PPI on the long edge — below the 300 gold standard, but perfectly acceptable for canvas viewed at arm’s length or farther. Canvas texture also masks softness.
Example 3: Amazon product listing
Amazon requires 1600 × 1600 pixels minimum to enable its zoom feature. PPI is completely irrelevant here — the marketplace only reads pixel dimensions. Ignore the “300 DPI” instinct and simply hit the pixel spec.
Need to process hundreds of images with a fast turnaround?
Our scalable Background Removal Service handles bulk orders with ease.
Common DPI and PPI Myths, Debunked
Several persistent myths cause more harm than the confusion itself.
- Myth: “300 DPI is always required for a good print.” Reality: 240 PPI often looks identical at normal viewing distance, and large posters can look great at 150 PPI or lower.
- Myth: “Raising the PPI number in software makes an image sharper.” Reality: if pixel dimensions stay the same, you have only changed the intended print size, not the actual detail in the file.
- Myth: “72 PPI images are automatically low quality for the web.” Reality: browsers ignore PPI metadata entirely; only pixel dimensions matter for screen display.
- Myth: “A higher DPI printer always produces a better print.” Reality: paper quality, ink chemistry, and color management often matter more than the raw DPI number.
- Myth: “DPI lives inside my JPEG.” Reality: files store a PPI value (frequently mislabeled DPI in menus). Actual DPI belongs to the printer.
- Myth: “Bigger PPI = bigger file.” Reality: only if resampling is enabled. Otherwise you are editing metadata, not pixels.
Understanding these myths connects to a bigger truth about perception: the human eye has real limits on how much detail it can actually resolve at a given distance, a topic covered in depth in this guide to human eye resolution.
Recommended PPI and DPI by Use Case
Use this quick reference whenever you are unsure which number to target:
| Use case | Recommended value | Notes |
|---|---|---|
| Photo albums and framed prints | 300 PPI | Fine-art papers benefit from 360 |
| Magazines, brochures, books | 300 PPI | Match printer’s line-screen |
| Business cards | 300 PPI | Small type demands sharpness |
| Retail posters (18×24 in) | 200 PPI | Viewed at ~3 ft |
| Wall murals | 100–150 PPI | Viewed at ~6 ft |
| Trade-show banners | 100–150 PPI | Rolled fabric or vinyl |
| Billboards | 15–45 PPI | Viewed from 50+ ft |
| Ecommerce product photos | 2,000–3,000 px long edge | Focus on pixels, not PPI |
| Web & social media | Match layout pixels | PPI value irrelevant |
| Smartphone screen target | 460+ PPI | Retina-class density |
Getting these settings right pays off directly for online sellers, since sharper product images consistently drive better engagement and more sales. Reviewing standard photo sizes before you shoot or crop helps you avoid resolution shortfalls later.
Want to boost your online sales with better product photography?
High-quality images increase conversions by up to 40%. Let us help you get there. See our editing services
How to Change PPI in Photoshop and Other Editors
Every major editor handles PPI the same way, even if the menu names differ slightly.
- Open Image → Image Size in Photoshop (or the equivalent “Document Size” panel in other tools).
- Look for the Resample checkbox. Turning it off locks your pixel count in place; turning it on lets the software add or remove pixels through interpolation.
- With Resample off, changing the PPI number only changes the intended print size — your file gains no new detail and file size does not change.
- With Resample on, the software invents or discards pixels using algorithms such as Bicubic Smoother (enlargements) or Bicubic Sharper (reductions). File size changes accordingly and aggressive upscaling can introduce softness.
The rule of thumb professionals follow: for print prep, turn Resample off, type your target PPI, and read the resulting inches. If the dimensions match your paper size, you are done. For web export, ignore PPI entirely — use Export As and set pixel dimensions directly.
If cropping and resizing still feel confusing, this step-by-step guide on how to resize an image in Photoshop walks through the exact clicks, including when to use Bicubic Sharper versus Bicubic Smoother interpolation.
DPI, PPI, and Product Photography for E-commerce
Ecommerce sellers live almost entirely in the pixel-dimension world rather than the DPI world, since marketplaces display everything on screens. Amazon requires product images to measure at least 1000 pixels on the longest side and recommends 1600 pixels or more to enable its zoom feature properly. Shopify and eBay follow similar pixel-first rules. None of these requirements reference PPI at all — they only care about raw pixel count.
The situation changes the moment those same photos need to appear in a printed catalog, packaging insert, or trade-show banner. At that point, you need enough original pixels to hit 300 PPI at whatever physical size the print job requires. The safest habit is simple: always shoot and edit at your camera’s full resolution, then export smaller, platform-specific versions for web use. You can always scale an image down without losing quality, but you cannot manufacture pixels that were never captured in the first place.
Resolution alone will not save a product photo with a messy background or inconsistent lighting, either. Clean, consistent backgrounds make even a modestly resolved image look far more professional than a technically perfect but cluttered one. Learning why Amazon sellers need professional photo editing shows exactly how resolution and clean presentation work together to boost conversions.
Preparing Files for Print: A Simple Pre-Flight Checklist
Before you send anything to a print lab or commercial press, run through these six steps. They eliminate the vast majority of “why did my print look soft?” phone calls.
- Check total pixel dimensions. Divide by your target PPI to confirm the physical print size will actually match your goal.
- Convert to the correct color mode. RGB for photo labs (they convert internally), CMYK for offset presses when the print vendor explicitly requests it.
- Embed the color profile. sRGB for web, Adobe RGB or ProPhoto RGB for print workflows that support it.
- Sharpen for output. Output-sharpening in Lightroom or Photoshop compensates for the slight softening caused by ink spreading on paper.
- Save at the right file format. TIFF or high-quality PDF for print, WebP/AVIF/JPEG for the web.
- Proof at 100% zoom. If it looks pixelated on screen at 100% view, it will print pixelated too.
Modern web development standards reinforce this same pixel-first thinking — the MDN guide to responsive images shows how browsers automatically select the right pixel dimensions for different screen densities, with no PPI metadata involved at all.
Common Resolution Mistakes and How to Fix Them
Even experienced photographers slip up on these basics regularly.
- Upscaling a low-resolution image to hit a print spec. Interpolated pixels are guesses, not real detail, and the result usually looks soft. Start with enough resolution at capture instead — or use a modern AI upscaler when there is no other choice.
- Confusing printer DPI with image PPI. A 2400 DPI printer does not need a 2400 PPI image; it still only needs roughly 300 PPI, because the printer itself creates the extra ink dots.
- Ignoring color space alongside resolution. A perfectly sharp 300 PPI file can still look washed out if it uses the wrong color profile for the intended output device.
- Cropping after finalizing your resolution plan. Cropping removes pixels, so always check final pixel dimensions after every crop, not before.
A soft or noisy file that still holds sentimental or commercial value does not have to go to waste. Skilled retouching can rescue detail, correct color, and sharpen selectively without introducing artificial-looking artifacts.
Want your images to look professionally edited, not over-processed?
Achieve natural, high-end perfection with our skilled Photo Retouching Service
Quick Reference Cheat Sheet
Bookmark this list for the next time you prepare a file for print or screen.
- Use PPI when exporting files, setting up new documents, or calculating print size.
- Use DPI when configuring printer quality settings or comparing printer hardware specs.
- Target 300 PPI for handheld prints, 150–200 PPI for posters, and pixel dimensions only for anything destined for a screen.
- Always check pixel dimensions and color space before sending a file to a print lab.
- Serve 2× or 3× image assets for HiDPI/Retina displays.
- Avoid upscaling beyond roughly double the original size without a careful quality check afterward.
- Ignore the “72 DPI for web” rule permanently — pixel dimensions are the only thing that matters online.
Frequently Asked Questions About DPI vs PPI
Is 72 PPI too low for printing photos?
Yes, for most standard print sizes. A 3000-pixel-wide image saved at 72 PPI would print roughly 41.7 inches wide, which looks soft and pixelated up close. Aim for 240–300 PPI for anything viewed at arm’s length instead.
Does DPI matter for photos shared on social media or a website?
No. Browsers and apps display images purely based on pixel dimensions, and they ignore any DPI or PPI metadata embedded in the file completely.
Can I turn a low-resolution image into a high-resolution one?
You can upscale it using interpolation or AI tools such as Adobe Super Resolution and Topaz Gigapixel, but you cannot invent detail that the camera never captured. Heavily upscaled images often look smoother but noticeably less crisp than a genuinely high-resolution original.
Why do print labs ask for “300 DPI” files when they technically mean PPI?
Most labs use “DPI” as informal shorthand for “300 pixels per inch at your chosen print size.” Treat any lab instruction mentioning DPI as a PPI requirement unless they are explicitly discussing their own printer hardware.
What is the difference between DPI and LPI?
LPI stands for Lines Per Inch and applies specifically to halftone printing used in magazines and newspapers. A typical magazine prints around 133–150 LPI, and the source image generally needs roughly 1.5 to 2 times that PPI value to reproduce cleanly.
Does changing DPI affect an image’s file size?
No. File size depends on pixel dimensions, bit depth, and compression format, not on the DPI or PPI number stored in the file’s metadata.
How many pixels do I need for an 8×10 print at 300 PPI?
You need at least 2400 × 3000 pixels, calculated by multiplying each dimension in inches by 300 (8 × 300 = 2400 and 10 × 300 = 3000).
Final Thoughts
DPI and PPI describe two completely different stages of the same journey: PPI governs the digital world of pixels, cameras, and screens, while DPI governs the physical world of ink and paper. Once you separate the two concepts clearly, choosing the right resolution for any print or screen project becomes a simple calculation rather than a guessing game.
Start every project with the highest resolution your camera or design software can realistically deliver, match your PPI to the actual viewing distance of the final output, and reserve DPI conversations for printers and print labs rather than your image files. Apply that single mental model consistently, and you will stop second-guessing resolution settings for good — no more blurry prints, no more oversized files, and no more late-night calls from confused clients.