

Cut Out Photo Backgrounds in 2026: AI, Photoshop & GIMP
August 1, 2026
AI Lifestyle Product Photos & Jewelry Photography With AI: The Complete 2026 Playbook
August 8, 2026
TL;DR / Key Takeaways
- Candid photo editing is about protecting the moment while polishing exposure, color, and skin — never erasing the emotion you captured.
- The professional look comes from a repeatable ten-step workflow: cull, white balance, exposure, color grade, retouch, clean distractions, denoise, sharpen, crop, batch-sync.
- Shoot RAW at ISO 100–3200, 1/250s or faster, and f/1.8–f/2.8 so the file survives editing.
- Use frequency separation or dodge-and-burn — never global skin smoothing.
- Build one preset per shoot type, sync across the gallery, then fine-tune per frame.
- Convert to black and white only when color hurts the story, not to hide bad edits.
Candid photos carry a strange kind of weight. A blurred hand mid-laugh, a father catching his daughter mid-jump, the exact second a bride notices her dad’s tears — those are the frames that outlive every posed portrait on the mantelpiece. Yet the moment you open the RAW file on Monday morning, that magic feels fragile. Skin goes flat. Whites look faintly yellow. A stranger you never noticed is standing right behind the subject’s shoulder. Candid editing exists to close the gap between what you felt through the viewfinder and what the sensor actually recorded. This guide walks through the entire workflow — cull to export — with the settings, decisions, and small habits that separate amateur snapshots from the images clients frame.
- What Is Candid Photography Editing?
- Candid vs. Posed Editing: What’s Actually Different
- The Foundation: Shoot RAW, Then Edit With Intention
- Step 1: Cull Ruthlessly Before You Edit
- Step 2: Fix White Balance First — Always
- Step 3: Recover Exposure Without Killing Contrast
- Step 4: Color Grading — The Signature Move
- Step 5: Retouch Skin Like You Are Not Retouching
- Step 6: Remove Distractions Without Rewriting the Scene
- Step 7: Denoise First, Then Sharpen (Order Matters)
- Step 8: Fix Slightly Blurry Candid Photos
- Step 9: Crop and Compose Like the Frame Is New
- Step 10: Batch-Edit for Gallery Consistency
- Step 11: Convert to Black and White (When Color Hurts)
- Best Software for Candid Photo Editing in 2026
- 10 Candid Photo Editing Mistakes to Avoid
- Advanced Pro Techniques That Separate Editors
- Editing Candid Kids and Family Photos
- Editing Candid Wedding Photos
- Editing Candid Street Photography
- Export Your Candid Photos Correctly
- When to Outsource Candid Photo Editing
- Storage, Backup, and Workflow Hygiene
- FAQ: Candid Photography Editing
What Is Candid Photography Editing?
Candid photography editing is the process of enhancing spontaneous, unposed images while keeping the emotional truth of the moment intact. It is closer to documentary work than to studio retouching. The RAW file arrives with mixed light, motion blur, half-blinks, and background clutter, and the editor’s job is to clean the noise without smoothing out the story.
Three goals guide every professional candid edit:
- Emotional fidelity — protect the feeling, whatever it takes
- Technical repair — fix exposure, color casts, mild blur, distractions
- Gallery consistency — make hundreds of images feel like one story
Candid vs. Posed Editing: What’s Actually Different
Posed editing starts with clean, controlled data. Candid editing starts with whatever the room gave you. That single difference reshapes every part of the workflow.
| Aspect | Candid Editing | Posed Editing |
|---|---|---|
| Starting exposure | Mixed, uneven, often 1–2 stops off | Controlled, consistent |
| Skin work | Minimal, texture retained | Deeper retouching acceptable |
| Cropping | Frequent — kills distractions | Rare — composition pre-planned |
| Color grading | Subtle, mood-driven | Bold, stylized allowed |
| Time per image | 20–90 seconds ideal | 2–10 minutes for beauty work |
| Base preset | Non-negotiable for volume | Optional |
| Retouching goal | Invisible | Polished |
A wedding gallery of 600 candid frames simply cannot survive twelve minutes of per-image attention. That is the volume reality that shapes every choice below.
The Foundation: Shoot RAW, Then Edit With Intention
You cannot fix what the sensor never recorded. Every professional candid workflow starts before the shutter clicks — with the decision to shoot RAW. RAW files preserve highlight and shadow data that JPEG compression discards, which is exactly the latitude you need to save a blown-out veil or lift a shadowed face at the reception.
Reliable baseline capture settings for natural-light candid work:
- Shutter speed — 1/250s for slow moments, 1/500s for medium action, 1/1000s+ for kids, dancing, and laughter
- Handheld minimum — never slower than 1/focal-length (a 50mm lens = 1/60s floor)
- Aperture — f/1.8–f/2.8 for one-person candids, f/4–f/5.6 for groups so all faces stay sharp
- ISO — lowest possible while keeping the shutter fast; modern full-frame sensors handle ISO 800–3200 cleanly, and AI denoise now rescues ISO 6400–12800
- White balance — Auto is fine because RAW lets you rewrite it in post
- File format — RAW + smallest JPEG (JPEG for fast previews, RAW for the edit)
Understanding the exposure triangle is what turns these numbers into instincts you can trust when the flower girl suddenly bolts down the aisle.
Want to boost your online sales with better product photography?
High-quality images increase conversions by up to 40%. Let us help you get there. See our editing services
Step 1: Cull Ruthlessly Before You Edit
Culling saves more hours than any keyboard shortcut ever will. A single wedding day produces 2,000–4,000 frames. Only 300–600 of them belong in the final gallery. Editing everything wastes days and dilutes the story you actually shot.
A three-pass culling method that works:
- Pass one — flag any image where the eyes are sharp and the expression reads
- Pass two — for every near-duplicate, keep only the strongest single frame
- Pass three — group images by scene (getting ready, ceremony, reception) and confirm the narrative flows
If you hesitate on an image for more than three seconds, reject it. AI-powered culling apps such as Aftershoot, Narrative Select, and FilterPixel identify closed eyes, motion blur, and duplicates automatically and can shave 60–80% off the manual cull for high-volume shooters.
Step 2: Fix White Balance First — Always
White balance sets the emotional temperature of the entire edit. Get it wrong and every downstream slider fights you. Get it right and half the “professional look” appears for free.
In Lightroom or Camera Raw:
- Click the eyedropper on a neutral gray or white area — a linen napkin, a plain wall, a paper cup
- If nothing neutral exists, drag the Temperature slider until skin looks natural (not orange, not sickly green)
- Warm slightly (5,500–6,000K) for outdoor candid warmth
- Cool slightly (4,800–5,200K) for clean indoor documentary tone
- Use Tint (magenta ↔ green) to kill fluorescent-light color casts common in offices, hotel lobbies, and event halls
If you are ever unsure whether a room’s tungsten cast is charming or just wrong, our white balance photography guide walks through the correction vs. embrace decision for every common lighting situation.
Step 3: Recover Exposure Without Killing Contrast
Candid frames almost always need exposure work because you reacted to the moment, not the light meter. Follow this order, and the image resolves itself.
- Exposure slider first — get midtones roughly right, skin around zone V
- Highlights down (–30 to –70) — recover blown skies, veils, white shirts
- Shadows up (+20 to +50, rarely more) — lift faces in backlit shots
- Whites up gently (+10 to +25) — set the white point so the image has bite
- Blacks down (–5 to –20) — anchor the shadows so the frame does not feel washed
- Contrast last (+5 to +15 only) — tiny nudges, never a hammer
The most common mistake here is cranking Shadows to +100 to “save” a face. That move flattens the entire image, reveals sensor noise, and drains the drama the candid moment had in it. Recover just enough — leave some shadow in the shadow.
Step 4: Color Grading — The Signature Move
Color grading is where a competent edit becomes a memorable one. This is the step that gives a photographer’s candid work a recognizable style. In 2026 the dominant look is what colorists call soft cinematic — slightly lifted blacks, warm midtones, cool shadows, muted primaries.
A repeatable candid color recipe using Lightroom’s HSL and Color Grading panels:
- Orange (skin) — Saturation –5 to –10, Luminance +5 to +10 for glow
- Red (lips, blush) — Saturation –10 to keep skin natural
- Yellow — Hue shifted slightly toward orange for warmer greens
- Green — Saturation –15 to –25 so grass and foliage stop shouting
- Blue — Luminance –10 for deeper skies
- Color Grading wheels — Highlights warm (yellow-orange, +8), Shadows cool (teal-blue, +8), Midtones neutral
The classic orange-and-teal palette remains popular because it flatters skin against almost every environment — warm subject, cool world, instant separation. If you want the full theory behind the sliders, our color grading guide breaks down every panel and profile in Lightroom and Photoshop.
Want your images to look professionally edited, not over-processed?
Achieve natural, high-end perfection with our skilled Photo Retouching Service
Step 5: Retouch Skin Like You Are Not Retouching
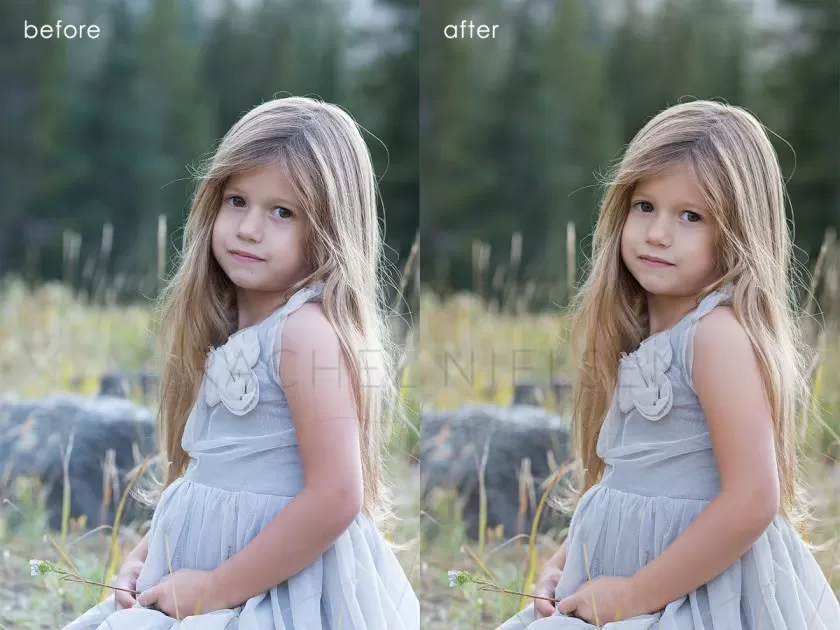
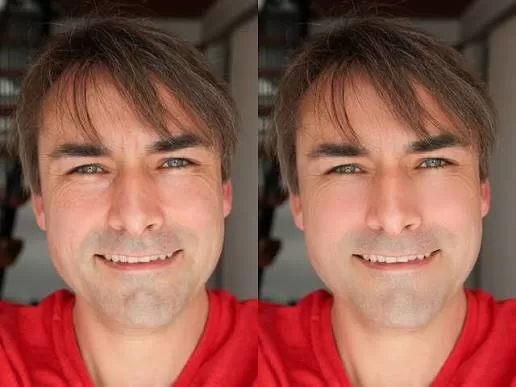
Nothing screams “over-edited” like plastic skin on a candid photo. The mission is to remove genuinely distracting blemishes — a fresh pimple, mascara smudges from happy tears, a bright red spot on the forehead — while keeping pores, freckles, laugh lines, and every mark that makes the subject a person rather than a mannequin.
A three-layer natural workflow in Photoshop:
- Spot Healing Brush — one-tap fixes for isolated blemishes
- Frequency Separation — split the image into a high-frequency texture layer and a low-frequency tone layer, then smooth only the tone; the official Adobe walkthrough of how to use frequency separation is the cleanest reference for the exact layer settings
- Dodge & Burn on a 50% gray Soft-Light layer — brighten under-eye areas, sculpt light on cheekbones and jaw
A subtlety most editors miss: after smoothing the low-frequency layer, sharpen the texture layer very slightly to restore the pore detail that softens during the pass. That single move keeps skin looking real instead of vinyl.
Simple rules that keep candid skin honest:
- Never zoom past 100% while smoothing
- Toggle the original layer visibility every 30 seconds — if the difference is obvious, dial back
- Keep freckles, moles, scars, and character marks
- If the subject would recognize the retouching, it is too much
Step 6: Remove Distractions Without Rewriting the Scene
Candid shots pick up junk. A stranger walking through the frame, a cable snaking across the floor, an exit sign glowing above someone’s shoulder. Cleaning up that visual noise is legitimate editing. Recreating the scene is not.
Fair game for removal:
- Sensor dust spots
- Cables, trash cans, light stands on the edge of the frame
- Exit signs, fire alarms, unrelated logos
- Strangers deep in the background
Where the line sits:
- Never remove people who were part of the moment
- Never head-swap between frames unless the client asked
- Never replace the sky in a documentary-style wedding shot
Photoshop’s Content-Aware Fill and Generative Fill handle roughly 90% of these cleanups in seconds. For tighter cases — a subject too close to a distracting element — a manual pass or a professional clipping path keeps edges crisp without halos. When the background needs to go entirely for a headshot crop or a promotional graphic, a hand-drawn removal beats one-click AI tools, which still eat flyaway hair.
Want to replace messy backgrounds with pure white or custom colors?
Our expert Background Removal Service makes it quick and effortless.
Step 7: Denoise First, Then Sharpen (Order Matters)
Do these in this exact order. Sharpening amplifies noise, so denoising afterward is a losing fight.
AI-based noise reduction (for high-ISO candid frames):
- In Lightroom Classic, run Photo → Enhance → Denoise first — this creates a new DNG file
- Default Amount slider at 50 is a solid starting point for ISO 3200; push to 70–90 for ISO 6400+
- Skip legacy Luminance / Color Noise sliders after AI Denoise — they add nothing
Classic sharpening (applied after denoise):
- Amount 40–60 for portraits
- Radius 1.0–1.2
- Detail 25–35 (lower for skin, higher for landscapes)
- Masking 60–80 — hold Alt/Option and drag the slider so sharpening only hits eyes, lips, hair, and clothing edges, not smooth skin
That masking step is the difference between crisp candid work and gritty caricature. Every pore does not need to shout.
Step 8: Fix Slightly Blurry Candid Photos
Motion blur is candid’s occupational hazard. Modern AI sharpening has genuinely changed what is recoverable, but only within limits.
A rescue workflow that works for slightly-soft frames:
- Run AI deblur — Topaz Photo AI, Lightroom’s Enhance, or Photoshop’s Camera Raw Sharpen
- Add a radial mask over the eyes and increase Sharpness inside the mask
- Add subtle grain (Amount +8 to +12) to disguise any AI artifacts
- If color still reveals the softness, convert to black and white — grain and contrast forgive more than color does
For genuinely blurry frames, cut your losses. Once the eyes are less than 60% sharp, no software rescues the image. Revisit your shutter speed settings before the next shoot — that is where the real fix lives.
Step 9: Crop and Compose Like the Frame Is New
Candids are shot fast. Composition is often “close enough” in-camera. Post-crop is where you finish the frame.
Practical composition rescue moves:
- Apply the rule of thirds — eyes on the top-third line
- Straighten tilted horizons (a 0.5° tilt reads worse than a bold 8° Dutch angle)
- Crop tighter to eliminate empty space and dead corners
- Try 4:5 or 5:4 for Instagram-friendly portrait crops
- Never crop below 60% of original resolution — you will lose print quality
A small crop is often more honest than trying to fix a distraction with the clone tool. The crop preserves the moment; the clone tool sometimes rewrites it.
Step 10: Batch-Edit for Gallery Consistency
Professionals do not edit every image from scratch. They edit one hero frame per scene, sync those settings across the rest, and then spend 5–10 seconds per image on exposure and white balance tweaks.
The batch workflow that keeps a 600-image wedding gallery cohesive:
- Edit one well-exposed hero image completely
- Copy Develop settings (Cmd/Ctrl + Shift + C)
- Select the rest of the scene → Paste Settings
- Fine-tune exposure and WB per frame — nothing more
- Skip the color grading tweaks; those are already synced across the batch
Skilled event editors regularly hit a 30-seconds-per-image average this way. That pace is not laziness — it is what makes candid volume work sustainable and consistent. A full companion article on the wedding photographer’s editing workflow breaks the same idea down for a full wedding-season pipeline.
Need your images edited faster without sacrificing quality?
Our streamlined process delivers premium results in as little as 6 hours. Explore our fast-turnaround services
Step 11: Convert to Black and White (When Color Hurts)
Black and white is a deliberate choice, never a fallback for a bad color edit. It works when color adds nothing — or actively pulls the eye away from the moment.
Strong candidates for a B&W conversion:
- Harsh mixed light with unrecoverable color casts
- Emotional close-ups where color distracts from the expression
- Busy backgrounds that overpower the subject
- Historical or documentary-style storytelling
- Frames with motion blur that would embarrass in color
A clean B&W conversion recipe:
- Convert via the HSL/B&W panel — never just desaturate
- Push Red +20 to +40 (brightens skin)
- Push Orange +15 to +30 (adds glow to most skin tones)
- Push Yellow +10 (brightens highlights)
- Pull Blue –10 to –20 (deepens skies dramatically)
- Add film grain +8 to +15 for tactile, filmic feel
The Digital Photography School team’s 13-step street editing tutorial is the tightest reference for translating this idea into a repeatable Lightroom sequence.
Best Software for Candid Photo Editing in 2026
There is no single “best” app. Pick based on volume, workflow, and how much retouching your genre demands.
- Adobe Lightroom Classic — still the industry default for candid batch work, unbeatable for cataloging thousands of frames
- Adobe Photoshop — essential for skin work, distraction removal, and composites
- Capture One Pro 2026 — the top pick for portrait shooters obsessive about skin-tone rendering
- ON1 Photo RAW 2026 — a single-app alternative combining browser, RAW processor, and AI masking
- Aftershoot / Imagen AI — AI culling plus preset application at wedding-day scale
- Topaz Photo AI — best-in-class noise reduction and blur recovery
- Affinity Photo 2 — one-time purchase, no subscription, near-Photoshop feature set
PCMag’s independent best photo editing software roundup confirms Lightroom and Photoshop’s Editors’ Choice status in 2026, though free and one-time-purchase competitors keep closing the gap year over year. Our own best AI photo editing software guide compares the AI features across all of the tools above.
10 Candid Photo Editing Mistakes to Avoid
Even experienced editors fall into these traps. Fix these and your candid work will jump one tier immediately.
- Over-smoothing skin — cap the Texture slider at –10, keep pores visible
- Over-saturating colors — use Vibrance instead of Saturation to protect skin
- Cranking Clarity to +100 — reads as HDR-crunchy; max +25
- Treating a preset as a finish line — presets are a starting point, always fine-tune
- Blowing highlights past recovery — Highlights –70 before Whites move
- Under-exposing eyes — radial mask, +0.3 exposure on the face
- Sharpening skin — use the Masking slider (Alt/Option-drag) so sharpening skips smooth areas
- Inconsistent gallery tone — sync a base preset before fine-tuning frames
- Editing at 200% zoom — everything looks bad at 200%; judge at fit-to-screen
- Working on an uncalibrated monitor — an uncalibrated screen guarantees prints that do not match
CTA Beauty Retouching 1
Advanced Pro Techniques That Separate Editors
Once the foundation is solid, these small moves push candid work from clean to portfolio-worthy.
Local adjustments over global ones. Instead of pushing global exposure, brush light onto the face and darken competing bright spots at the edge of the frame. The professional trick is to guide the viewer’s eye without the viewer noticing you did anything at all.
Radial masks for spotlight effects. Drop a soft radial gradient over the subject’s face, feather it heavily, and lift exposure inside the mask by +0.15 to +0.3 stops. Instant subtle spotlight — the cinematic move nobody spots on Instagram but everybody feels.
Split toning with the Color Grading wheels. Warm highlights toward orange (Hue 30–40, Saturation +8), cool shadows toward teal (Hue 200–220, Saturation +8). Keep midtones neutral. That is the industrial recipe behind 80% of “cinematic” candid feeds.
Add fine grain deliberately. Grain (Amount +10, Size 20–25) hides sensor noise, unifies inconsistent frames, and adds a tactile filmic quality pure digital lacks. It also lets you sharpen slightly harder without the image looking crunchy.
Selective color desaturation. Drop the saturation of every color except one dominant tone — usually the subject’s outfit, lipstick, or a signature background element. The eye lands on the surviving color instantly, and the frame gains a hierarchy the RAW file never had.
Editing Candid Kids and Family Photos
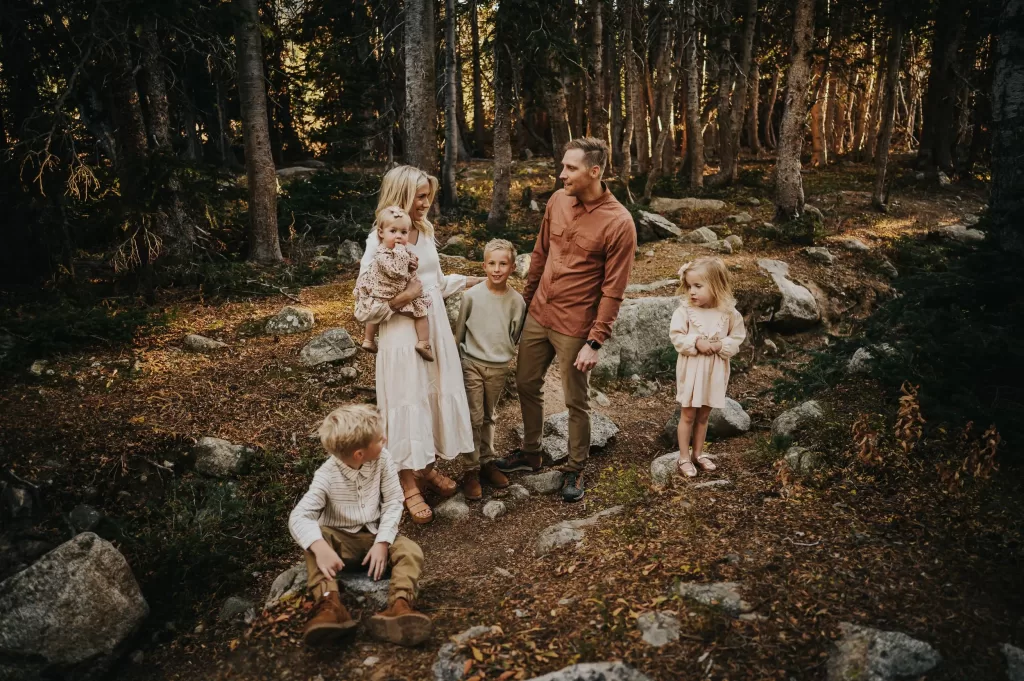
Kids move fast. Expressions turn in a fraction of a second. Editing candid child photography is 80% cull, 20% subtle enhancement — restraint is the whole game.
A child-specific workflow:
- Accept motion blur as part of the energy, do not over-sharpen
- Keep skin warm and rosy (Orange saturation +5)
- Lift shadows gently on faces — kids duck into weird light constantly
- Watch for boogers, food, and shirt stains — quick heal-brush passes
- Avoid heavy grain and moody cinematic looks — kids read best in bright, clean edits
- Sprinkle a few frames converted to black and white for emotional variety in the gallery
For the youngest subjects, the retouching demands change entirely. Skin is delicate, redness is heavy, and parents want natural, natural, natural. Our newborn photography editing guide walks through the safe adjustment range so babies still look like babies.
Editing Candid Wedding Photos
Weddings are the hardest candid volume test in photography. You deliver 400–800 candid frames from a single day, and every one has to feel like part of the same visual story.
The professional wedding-day approach:
- Build one preset per shoot type before the season starts
- Sync that preset across every scene (ceremony, cocktail hour, reception)
- Fine-tune exposure and white balance per frame — nothing more
- Reserve deep retouching for hero frames of the couple only
- Handle the tungsten + ambient + flash mess at reception with per-image WB adjustments
- Use masks to lift faces under harsh midday sun
- Convert emotional close-ups (parents crying, first look, vows) to black and white for weight
The invisible-photographer school of thought — pioneered in guides like Kevin Mullins’ candid wedding photography tips — is worth internalizing: arrive early, dress like a guest, use a silent shutter. When the shooting is unguarded, the editing can be restrained. That is the whole loop.
Ready to transform your raw photos into professional assets?
Get a custom, no-obligation quote tailored to your specific volume and needs. Explore Clipping Expert Asia
Editing Candid Street Photography
Street candid work is its own animal. Distraction control matters more than skin, and grain, contrast, and geometry carry the frame.
- Boost contrast +10 to +20 — streets need bite
- Convert to black and white often; color streets have to earn their color
- Deepen shadows to –15 to hide messy details
- Push Dehaze +10 to +20 for classic urban punch
- Add grain +15 to +25 for filmic street feel
- Straighten aggressively — leaning verticals ruin street shots
- Clone out phone glow, background text, and stray pedestrians ruthlessly
Export Your Candid Photos Correctly
Every good edit collapses on a bad export. Match the file to the destination.
Web, social, or client gallery preview:
- JPEG quality 80–85
- sRGB color space
- Long edge 2,048 px (Instagram) or 2,560 px (client gallery)
- Sharpen for screen (Standard)
Print delivery:
- JPEG quality 100 or TIFF
- Adobe RGB or ProPhoto RGB
- 300 DPI at print size
- Sharpen for matte or glossy paper
Client-folder structure:
01_High_Res— full-size JPEGs02_Social_Media— long-edge 2,048 px versions03_Black_and_White— a curated subset
If you want to generate clean, SEO-friendly file names or gallery slugs in one pass before delivery, a free slug generator turns “IMG_2481-final-FINAL-v3.jpg” into “wedding-first-look-riverdale” in a click.
When to Outsource Candid Photo Editing
Every full-time photographer eventually hits the editing bottleneck. A wedding season with 25 weddings produces 15,000+ candid frames — over 200 hours of screen time, no matter how tight the workflow.
Outsource when:
- Your backlog is delaying client delivery
- You are spending more time editing than shooting or marketing
- The edits need skills you do not have (compositing, deep retouching, extractions)
- Consistency across a large gallery is critical
- You are scaling but cannot scale your hands
Keep in-house when:
- Your editing style is deeply personal and unteachable
- Volume is low enough that editing is meditative, not a bottleneck
- Client contracts explicitly require you to edit personally
Shooters who offload the highest-volume tasks — culling, background cleanup, batch skin work — typically free up 20–40% more shooting days per year. Shooting days are what actually grow the business.
Storage, Backup, and Workflow Hygiene
An underrated piece of every candid editing workflow: your files have to survive to be edited. A corrupted card or a dead drive erases a wedding. Redundancy is not paranoia — it is part of the job.
- 3-2-1 backup rule — 3 copies, on 2 different media, with 1 off-site
- Cloud sync during travel — Backblaze, iDrive, or Adobe cloud storage
- Two SSDs per shoot — one working drive, one live mirror
- Card retirement — retire memory cards after ~3 years of heavy use
- Format cards in-camera — never delete individual files, and never format on a computer
If you are not sure whether your current cards can hold a full wedding, our memory card capacity guide breaks down real-world file counts by card size and camera resolution. A quick free percentage calculator is also handy for mid-shoot math — checking how much card capacity you have burned through in the first hour of a reception.
FAQ: Candid Photography Editing
How long should it take to edit one candid photo?
For a high-volume candid gallery, aim for 20–45 seconds per image once your base preset is applied. Hero shots or heavily retouched photos can take 3–10 minutes. If one candid image takes more than 15 minutes, the file is likely unusable, or you’re spending too much time over-editing.
What is the best software for editing candid photos in 2026?
Adobe Lightroom Classic remains the industry standard for batch editing candid photos, with Adobe Photoshop handling detailed retouching. Capture One is a favorite among portrait photographers for its excellent skin tone rendering, Aftershoot speeds up AI-powered culling and preset application, and Topaz Photo AI is ideal for recovering noisy or slightly blurry images.
Should I shoot candid photos in RAW or JPEG?
Always shoot in RAW whenever possible. Candid photography is unpredictable, and RAW files provide far greater flexibility for recovering highlights, shadows, and white balance during editing. JPEG files permanently apply camera processing, limiting your editing options.
How do I make candid photos look cinematic without over-editing?
Create a subtle cinematic look by slightly lifting the blacks, adding warm highlights (orange, around +8), cool shadows (teal, around +8), muting greens, and applying a light grain effect (+10 to +15). Keep skin tones natural—the cinematic style comes from subtle adjustments, not heavy filters.
How can I fix a slightly blurry candid photo?
Use AI-powered sharpening tools such as Topaz Photo AI, Lightroom Enhance, or Photoshop Camera Raw AI Denoise + Sharpen. Apply sharpening mainly to the eyes with a radial mask, add a small amount of grain to disguise artifacts, and consider converting the image to black and white if it still appears soft.
Is it okay to remove people from candid photos?
Yes, it’s generally acceptable to remove strangers in the distant background if they distract from the main subject. However, avoid removing people who were genuinely part of the moment, such as family members, guests, or event participants, as this changes the story the photograph tells.
How do I keep skin looking natural after retouching?
Use frequency separation to smooth uneven skin tones while preserving texture. In Lightroom, keep the Texture slider around –10 or less, and compare your edits with the original image regularly. Preserve natural details like freckles, pores, and distinctive features so the retouch remains virtually invisible.
Do professional candid photographers use presets?
Yes. Professional photographers use presets as a starting point, not a final edit. Many create custom presets for different scenarios, such as indoor weddings, outdoor family sessions, or street photography, apply them across the gallery for consistency, and then fine-tune each image individually for the best results.