
Master Watermark Removal in Photoshop with 5 Easy Techniques
April 6, 2026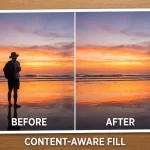
Mastering Content-Aware Fill for Seamless Photo Editing
April 8, 2026
Wedding photography is an art form where magic truly begins after the vows are exchanged. While capturing the day is a thrill, the real marathon starts when you return home with thousands of raw files. Turning a chaotic collection of images into a cohesive, breathtaking gallery is a meticulous process.
This guide pulls back the curtain on exactly how wedding photographers edit photos, revealing the step-by-step workflow that transforms raw captures into polished memories. Let’s dive into the complete wedding photography editing workflow.
You handle the poses, we handle the pores. Get a free retouching demo for your next wedding batch
- The Post-Production Mindset: Why Workflow Matters
- Step 1: Secure Ingestion and Backup (The Non-Negotiable First Step)
- Step 2: Efficient Culling – Finding the Keepers
- Step 3: The Editing Phase – Lightroom & Presets
- Step 4: Photoshop Retouching (The Polish)
- Step 5: Exporting and Delivery
- Outsourcing vs. Automation: Scaling Your Business
- Realistic Timeline: How Long Does It Really Take?
- Your Workflow, Your Signature
- Frequently Asked Questions (FAQ)
The Post-Production Mindset: Why Workflow Matters
Editing is not just about making photos look pretty; it’s about telling the story of the couple’s most important day. A solid workflow protects your time, ensures consistency, and saves you from burnout. A typical solo photographer might spend anywhere from 20 to 60 hours on post-processing per wedding. Without a structured plan, that number can skyrocket. By establishing a repeatable system, you protect your creative energy and deliver galleries faster.
Many photographers underestimate the mental toll of disorganized editing. Staring at a grid of 3,000 unlabeled files without a clear plan leads to decision fatigue and inconsistent results. A workflow gives you a roadmap. You move from ingestion to culling to color correction without asking “What’s next?” every five minutes. This clarity also improves your final product because you spend less energy on logistics and more on artistic choices.
Step 1: Secure Ingestion and Backup (The Non-Negotiable First Step)
Before any creative work begins, we must protect the assets. This stage is about safely transferring files and creating redundancies.
Dual-Card Shooting and Transfer
Professional photographers shoot on two memory cards simultaneously. One card acts as the primary source, while the other serves as an immediate physical backup. After the wedding, we use robust ingestion software like Photo Mechanic to copy the RAW files. Unlike the standard computer copy-paste function, these programs verify data integrity, ensuring no files are corrupted during transfer.
The 3-2-1 Backup Strategy
Once the files hit your hard drive, backup begins immediately. I adhere strictly to the 3-2-1 rule:
- 3 copies of your data.
- 2 different storage media (e.g., external SSD and Cloud).
- 1 copy stored off-site.
For local storage, a RAID 1 (mirrored) system is a lifesaver. It writes the same data to two separate disks simultaneously, so if one drive fails, your work survives instantly. Services like Backblaze provide secure, automated cloud backup for that off-site layer. Never format your memory cards until you have verified the backups and delivered the final gallery.
Pro tip: Create a written backup checklist. After every wedding shoot, tick off three boxes: (1) Files copied to primary working drive, (2) Files mirrored to RAID or second internal drive, (3) Cloud backup initiated. This ritual eliminates the dreaded “Did I back that up?” panic.
Step 2: Efficient Culling – Finding the Keepers
Culling is the process of selecting the best images from thousands. It is the most tedious part of the workflow, but also the most crucial for storytelling. We usually cull down from 2,000-4,000+ RAW files to a final delivery of roughly 400-600 images.
Manual Culling vs. AI-Assisted Selection
For years, photographers spent 3-4 hours manually flagging photos in Lightroom, relying on the “Pick” and “Reject” flags. While effective, it is painfully slow. The modern industry standard now involves AI culling tools. According to recent data, manual Lightroom culling takes 4-8 hours, while AI tools can complete the initial pass in 20-60 minutes.
Here is how the speed compares:
| Method | Estimated Time for 2,000 Photos | Pros |
|---|---|---|
| Manual (Lightroom) | 4–8 hours | Full control, free (software cost aside) |
| Photo Mechanic | 2–4 hours | Very fast previews, excellent metadata handling |
| AI Culling (Aftershoot, etc.) | 20–60 minutes | Flags blinks, blur, and duplicates automatically |
AI software like Aftershoot runs locally on your computer. It scans the images to detect technical flaws (closed eyes, blur) and groups similar photos, automatically selecting the best frame from a burst. However, technology is not perfect. I always do a final manual pass for critical moments like the first kiss and family formals to ensure emotional nuances are not missed.
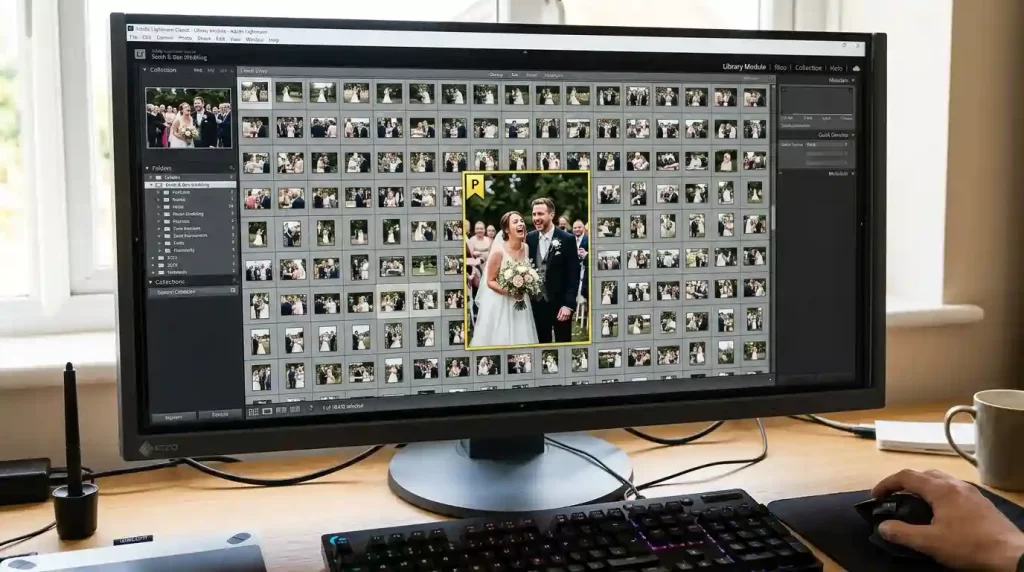
A practical culling workflow inside Lightroom: Use the “X” key to reject a photo and “P” to pick it. Work in bursts. Go through the entire wedding once, picking only the obvious winners. Then go through a second time, this time looking at the “Picked” filter to tighten your selection. Never cull when you are tired; your judgment suffers. Take a five-minute break every 500 photos.
Step 3: The Editing Phase – Lightroom & Presets
Once culling is complete, we move to the core editing software. For 90% of wedding photographers, Adobe Lightroom Classic is the central hub of the workflow.
Software Comparison: Lightroom vs. Capture One
While Lightroom dominates the wedding industry, some photographers prefer Capture One. Here is a quick breakdown:
- Adobe Lightroom: Best for volume and ecosystem. It offers seamless cloud syncing, extensive preset marketplaces, and industry-standard tethering. It is perfect for photographers who also use Photoshop for retouching.
- Capture One: Known for superior color science and tethering for high-end studio work. It offers granular color control but has a steeper learning curve and is less common in fast-paced wedding environments.
Batch Editing with Presets and Sync
Presets are the secret weapon of wedding photographers. A preset is a saved set of adjustments (exposure, contrast, color grading) that you can apply to an image instantly. We usually start by editing one “hero” photo from a specific lighting scenario (e.g., outdoor shade). Once it looks perfect, we Sync those settings across every other photo taken under those exact same lighting conditions. This ensures color consistency across the entire gallery in seconds, not hours.
How to build your own preset library: Do not download random free presets from the internet. Instead, as you edit a wedding, save your adjustments as a user preset whenever you nail a specific lighting condition. Name it descriptively: “Golden Hour – Warm Skin,” “Overcast – Desaturated Greens,” “Reception – Tungsten Fix.” Over time, you will build a custom toolkit that reflects your unique style.
Mastering Color Correction and Grading
This is where the “vibe” of the wedding is established.
- Color Correction: First, we ensure the whites are white and the blacks are black. We fix white balance (crucial for making a white dress look white, not blue) and recover blown-out highlights.
- Color Grading: This is the artistic step. We manipulate the mid-tones, shadows, and highlights to create a mood. For example, adding a touch of warmth (orange/gold) to the highlights gives a romantic, golden-hour feel, while lifting the blacks creates a trendy, matte film look.
A common beginner mistake is over-saturating skin tones. Always check skin color on a calibrated monitor. The skin on the forehead and cheeks should have natural red and yellow undertones, not orange or magenta. Use the HSL (Hue, Saturation, Luminance) panel to target specific colors. For example, reduce orange saturation slightly if skin looks too tan, or shift red hue toward orange for a sun-kissed look.
Step 4: Photoshop Retouching (The Polish)
While Lightroom handles 80% of the work, Photoshop is reserved for the “hero shots”—the portraits that will hang on the wall or go in the album.
Frequency Separation for Skin
Basic Lightroom adjustments can smooth skin, but they often result in a “plastic” look. Professional retouchers use a technique called Frequency Separation. This breaks the image into two layers:
- Low Frequency (Color/Tone): You can blur the skin color and even out blotchiness without losing texture.
- High Frequency (Texture): You keep all the pores, eyelashes, and skin texture intact here.
This allows you to remove blemishes and smooth wrinkles on the texture layer without affecting the color, resulting in silky-smooth skin that still looks like real skin. I also use Photoshop for object removal (like removing a rogue guest or a distracting exit sign) and body sculpting (subtle adjustments to posture or clothing fit).
Create album‑ready cutouts of the couple, the cake, or the bouquet – all from one image. See our multi‑clipping path pricing for bulk images
When not to use frequency separation: For family formals with 15+ people, do not retouch each person individually. Clients do not expect magazine-level retouching on group shots. Save this technique for the bride and groom’s individual portraits, the ring shots, and the first dance close-ups. This prioritization keeps your workflow efficient.
Step 5: Exporting and Delivery
The final step is packaging the images for the client.
File Formats and Settings
Never send RAW files to clients. They are unprocessed and look flat. The industry standard for delivery is High-Quality JPEG.
- Resolution: Full resolution (usually 3000-4000 pixels on the long edge).
- Color Space: sRGB. While Adobe RGB is technically superior, sRGB ensures the photos look correct on every phone, tablet, and computer screen.
- Sharpening: Apply output sharpening specifically for “Screen” to ensure the images pop in the online gallery.
Online Gallery Platforms
Most photographers use platforms like Pixieset, Pic-Time, or ShootProof. These allow you to upload the high-resolution JPEGs, organize them into albums, and deliver them to the client with a beautiful storefront. They also handle print ordering, which can be a significant revenue source.
Bonus tip for faster exports: Create an export preset in Lightroom. Name it “Wedding Web Delivery” with these settings: JPEG quality 85, resize to 2048px on long edge, sharpen for screen (standard), and add a subtle copyright metadata. Then create another preset called “Wedding Print Ready” with 100 quality, no resizing, and sharpen for matte paper. This eliminates the need to reconfigure the export dialog every time.
Outsourcing vs. Automation: Scaling Your Business
As your business grows, you may choose to step away from the computer.
- AI Tools: Software like Imagen can be trained on your personal Lightroom edits. Once you teach it your style by feeding it 3,000+ previously edited photos, it will edit entire weddings in your voice.
- Human Outsourcing: Many top-tier photographers outsource culling and basic color correction to editing houses (like ShootDotEdit or Freedom Edits). The photographer retains the final creative control over the artistic color grading and retouching, but the grunt work is handled by professionals.
Realistic Timeline: How Long Does It Really Take?
If you are a couple waiting for your photos, or a new photographer planning your schedule, here is the realistic breakdown:
- Sneak Peek: Usually delivered within 48 hours of the wedding. (5-10 images).
- Initial Culling & Backup: 1-3 hours.
- Full Edit (Color Correction & Grading): 15-25 hours.
- Retouching (Photoshop): 2-5 hours (varies based on the number of hero shots).
- Total Turnaround: Typically 4 to 8 weeks for the full gallery.
Your Workflow, Your Signature
No two wedding photographers edit exactly the same way, and that is a good thing. Your editing workflow becomes your signature, the reason couples choose you over someone else. Master the fundamentals: secure backups, fast culling, batch color correction, and selective Photoshop retouching. Then tweak every step until it feels natural and fast.
Do not chase perfection on every single image. Focus your best energy on the hero shots and maintain clean consistency everywhere else. A confident, repeatable process turns editing from a chore into a craft. Trust your system, and your galleries will speak for themselves.
You shoot, we edit, you get paid faster. Request a free trial of our wedding photo editing service today
Frequently Asked Questions (FAQ)
1. Do wedding photographers edit every single photo they take?
No. We edit only the “keepers.” We generally shoot 2,000-4,000 photos but cull that down to 400-600 final images that tell the story of the day. The rest are archived as RAW files.
2. Can you edit a photo to remove someone in the background?
Yes. For specific “hero shots,” we use Photoshop’s Content-Aware Fill and Clone Stamp tools. However, removing a person from every photo in a gallery is too time-consuming. We do it selectively for portraits.
3. Why do my edited JPEGs look different on my phone vs. my computer?
This is usually due to screen calibration. Different screens display brightness and contrast differently. Professional photographers calibrate their monitors to ensure color accuracy, but we cannot control the settings on every client device.
4. What is the difference between a preset and a filter?
A preset is a professional adjustment profile that changes exposure, contrast, and color based on the photo’s data. A filter is often a simple overlay that darkens or lightens the image indiscriminately. Presets are much smarter.
5. How much time do AI editing tools really save?
AI culling can save 2-4 hours per wedding. AI editing tools that learn your style can save an additional 10-20 hours per wedding, depending on your volume.
6. Is it normal for photographers to outsource editing?
Yes, it is very common for high-volume studios and established photographers. Outsourcing allows them to shoot more weddings without sacrificing their family time or sanity.
7. Why do photos look blurry when I zoom in on the online gallery?
Most galleries deliver photos at 2048px on the long edge for web viewing to ensure fast loading. The high-resolution files are available for download separately. Check your gallery settings to ensure you are viewing the “Original” size.
8. Can I request a specific editing style (like dark and moody vs. bright and airy)?
Absolutely. During your consultation, you should discuss your style preferences. Look at the photographer’s portfolio to ensure their natural style aligns with your vision.