

SDHC vs SDXC: Which SD Card Is Right for Your Camera?
July 30, 2026
Make Candid Photos Look Professional: 2026 Editing Guide
August 6, 2026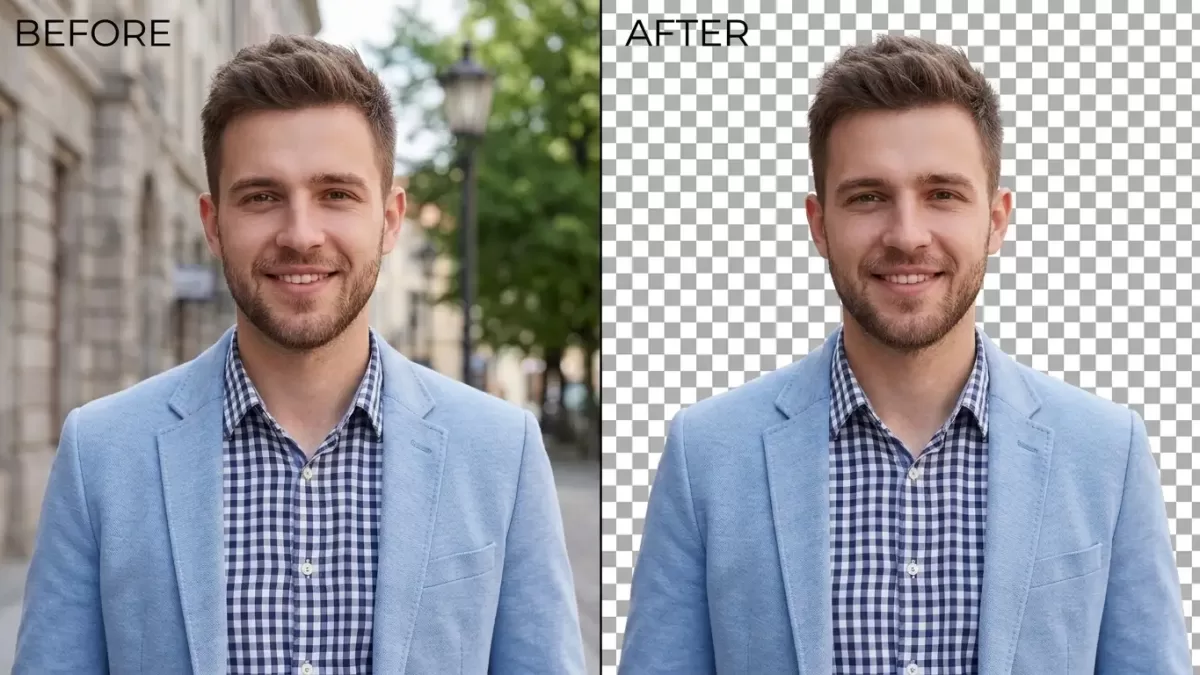
- TL;DR — The 40-Second Answer
- Which Method Should You Use? (2-Second Decision Guide)
- Why Cut Out the Background of a Picture?
- What Do You Need Before You Start? (Pre-Flight Checklist)
- What Are the Best Methods to Cut Out a Background in 2026?
- Why Is Manual Clipping Path Still the Gold Standard?
- How Do You Handle Hair, Fur, and Complex Edges?
- What Do E-Commerce Sellers Need for Perfect Cutouts?
- Which File Format Should You Save Your Cutout In?
- What Common Mistakes Ruin a Cutout — and How Do You Fix Them?
- AI vs. Manual Background Removal: Which One Wins in 2026?
- Troubleshooting Guide: Fixing the Cutouts AI Gets Wrong
- How Do You Add Realistic Shadows and Composites?
- How Do You Batch-Process Hundreds of Cutouts?
- Mini Glossary of Terms Used Above
- Frequently Asked Questions
TL;DR — The 40-Second Answer
To cut out the background of a picture: open the image in an AI-powered tool such as remove.bg, Photopea, Canva, Adobe Express, or Photoshop 2026, let the software auto-detect the subject with a feature like Select Subject or Magic Cut, refine the edges around hair, fur, or thin details, and export the result as a PNG or WebP to preserve transparency. Simple images finish in under 5 seconds; hair, jewelry, and glass need manual refinement or a professional clipping path.
Key Takeaways
- Fastest: remove.bg, Canva BG Remover, Adobe Express, Photopea Magic Cut, Photoroom — 3 to 10 seconds per image.
- Most accurate: Photoshop 2026 with cloud-processed Select Subject + Refine Hair, or a hand-drawn Pen Tool clipping path.
- Free desktop option: GIMP with Fuzzy Select, Foreground Select, and Layer Masks.
- On mobile: iPhone (iOS 16+ Lift Subject, iOS 18 Clean Up, iOS 26 background editing); Google Photos, Samsung Gallery, PhotoRoom, Pixelcut on Android.
- Save as PNG-24, WebP, or AVIF to keep transparency. Never save as JPG.
- AI accuracy: ~94% on clean product shots, ~78% on transparent or reflective objects, 60–70% hair retention vs. manual masking.
Which Method Should You Use? (2-Second Decision Guide)
| Your image | Best tool | Why |
|---|---|---|
| Simple product on plain backdrop | remove.bg, Canva | 3–5 seconds, 94% accurate |
| Portrait with hair or fur | Photoshop Refine Hair | Preserves fine strands |
| Jewelry, glass, gemstones | Manual clipping path | AI destroys reflections |
| Bulk e-commerce catalogue | PhotoRoom Batch or API | Handles 100s at once |
| Free desktop workflow | GIMP + Layer Mask | Full pen-tool power, $0 cost |
| Phone-only user | iOS Lift Subject or Google Photos | Zero apps, one long-press |
Why Cut Out the Background of a Picture?
Cutting out a background does far more than clean up a photo — it converts a flat picture into a flexible design asset. Marketplaces like Amazon, eBay, and Walmart require pure white backgrounds (RGB 255, 255, 255) for main product listings, and clean cutouts help sellers meet those rules without re-shooting. Shopify’s own guidance in the Shopify blog on product photography confirms that distraction-free product shots directly influence buyer trust and click-through.
Beyond commerce, isolated subjects unlock creative freedom. Designers drop cutouts into posters, ads, thumbnails, and mockups. Photographers use them to swap skies, replace studios, and build composite scenes. Casual users make stickers, memes, and greeting cards. Understanding what a transparent background actually stores inside a PNG file — an alpha channel that ranges from 0 to 255 — is where every serious workflow begins.
Common real-world use cases:
- Amazon, Shopify, Etsy, and eBay product listings
- Social media posts, YouTube thumbnails, and TikTok covers
- Website hero images, banners, and mockups
- Composite photography and photo manipulation
- Logo isolation, sticker packs, and print-on-demand designs
- Passport photos, ID cards, and corporate headshots
What Do You Need Before You Start? (Pre-Flight Checklist)
Great cutouts start before you open any software. Better source photos mean fewer edge repairs later.
- Shoot on a clean, evenly lit backdrop — light gray, pure white, or a color that contrasts with your subject.
- Avoid same-color pairings (a white shirt on a white wall confuses every AI model).
- Use soft, diffused light to prevent hard cast shadows the tool must remove separately.
- Focus sharply on the subject edge — motion blur becomes fringe you cannot recover.
- Shoot in RAW when possible to preserve edge detail for later masking.
- Frame with breathing room so the tool has room to detect and refine edges.
For accessory setup and studio lighting recommendations, our post on white background photography walks through the exact kit small teams use.
What Are the Best Methods to Cut Out a Background in 2026?
Six methods dominate 2026. Each shines in a different scenario, so match the tool to the image — not the other way around.
1. How Do AI Background Removers Work? (Fastest Method)
AI background removers took over the market because they finish in seconds and require zero skill. Tools like remove.bg, Canva BG Remover, Adobe Express, Photoroom, Pixelcut, Cutout.Pro, and PhotoScissors use trained neural networks — usually variants of U²-Net or Segment Anything — to detect the subject and erase everything else. Most deliver a downloadable PNG in under five seconds.
Independent testing places remove.bg at around 94% accuracy on clean product photos, dropping to roughly 78% on transparent or reflective items, with 60–70% hair retention compared to hand-drawn masks. For a broader comparison with actual before/after tests, the well-documented breakdown on the remove.bg blog covering five Photoshop techniques contrasts one-click AI results against traditional Photoshop selection methods.
Best for: social posts, quick e-commerce shots, bulk product images, and beginners.
Pros:
- Extremely fast — 3 to 10 seconds per image
- No editing skills needed
- Batch processing on many platforms
- Free tiers for casual use
Cons:
- Free tiers cap resolution or add watermarks
- Struggles with hair strands, fur, transparent glass, and jewelry facets
- Same-color subject-background pairs confuse the model
- Cannot preserve multi-layer paths for future edits
If you want to understand the machine-learning tradeoffs, our explainer on how the AI background remover compares to manual editing breaks down the pixel-level differences with side-by-side samples.
Want to test our quality before committing to a large order?
Try our Image Background Removal Services risk-free with a free trial.
2. How Do You Remove a Background in Photoshop 2026? (Most Accurate Desktop Software)
Photoshop remains the industry gold standard because it combines AI shortcuts with pixel-level control. The 2026 release (version 27.x) introduced several notable upgrades: an improved Firefly-powered Generative Fill and Generative Expand model, Harmonize (blend cutouts into scenes with matched lighting and color), Remove Reflections, Generative Upscale, and a rebuilt Select Subject with a cloud-processing option that delivers noticeably cleaner hair and edge results than the on-device model.
Step-by-step: remove background in Photoshop 2026
- Open the image and duplicate the layer (Ctrl/Cmd + J).
- Go to Edit → Preferences → Image Processing and switch selection to Cloud for cleaner edges.
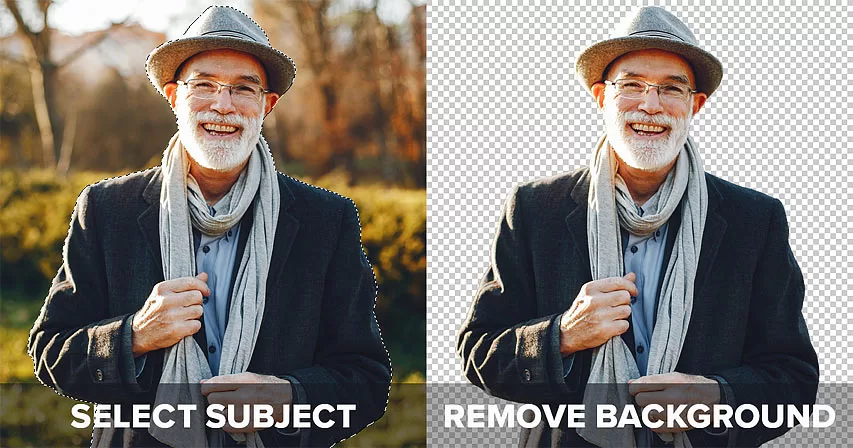
- Click Select → Subject — Photoshop draws marching ants in seconds.
- Click Select and Mask to open the refine workspace.
- Use the Refine Hair button, then paint problem edges with the Refine Edge Brush.
- Tick Decontaminate Colors to remove fringing.
- Set Output To → Layer Mask and press OK.
- Hide the background layer to reveal a transparent cutout.
- Optionally apply Harmonize to blend the subject into a new backdrop.
- Export as PNG or WebP via File → Export → Export As.
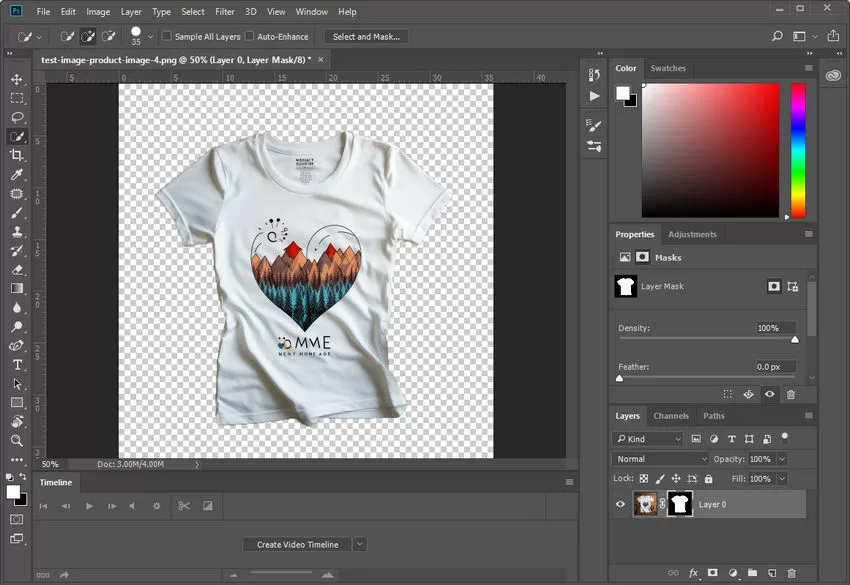
Layer masking always beats the Eraser Tool because it hides pixels non-destructively — a workflow professionals never abandon. You can also produce a fully alpha-blended file when you make background transparent for use in print, PDFs, and social graphics.
Struggling with inconsistent cutouts from automated software?
Switch to 100% manual, expert Clipping Path for guaranteed perfection.
3. How Do You Remove a Background in GIMP? (Best Free Alternative)
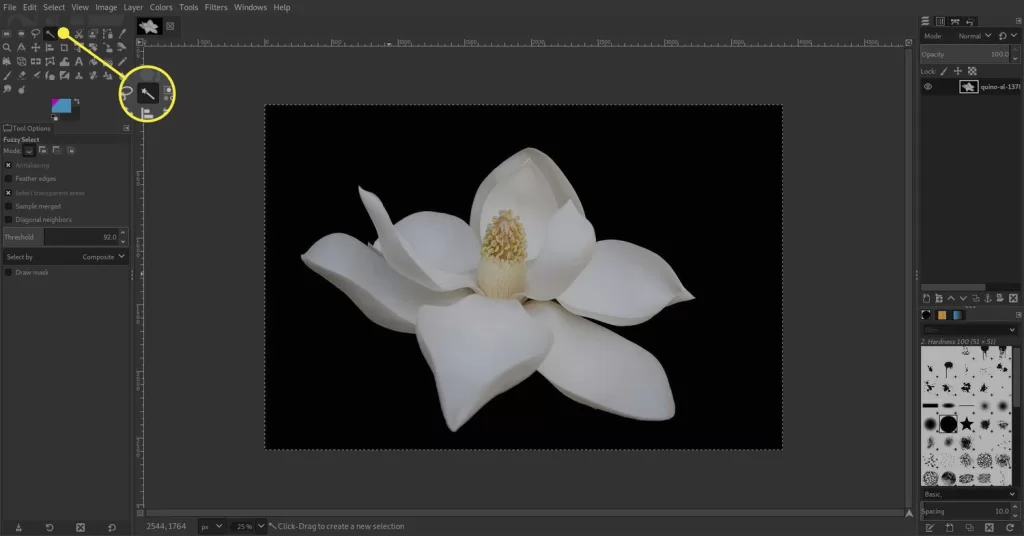
GIMP delivers professional-grade background removal without a subscription. The learning curve is steeper, but three tools handle almost every scenario: the Fuzzy Select Tool (magic wand equivalent), the Foreground Select Tool (for portraits and pets), and Layer Masks (for reversible edits).
Quick GIMP workflow:
- Open the image and add an Alpha Channel (Layer → Transparency → Add Alpha Channel).
- Pick the Fuzzy Select Tool (U), enable Antialiasing + Feather Edges.
- Click the background — GIMP selects similar pixels automatically.
- Add or subtract selections with Shift and Ctrl.
- Press Delete, or add a layer mask and paint with black to hide instead.
- Export as PNG through File → Export As.
For portraits, the Foreground Select Tool works better: rough-brush the subject, then paint fine details for the algorithm to lock onto. The illustrated tutorial on the Lifewire GIMP background removal walkthrough explains each of these tools with screenshots, and our own step-by-step guide on how to remove background in GIMP covers advanced tricks including channel masking and quick masks.
4. Is Canva Good for Removing Backgrounds? (Easiest for Non-Designers)
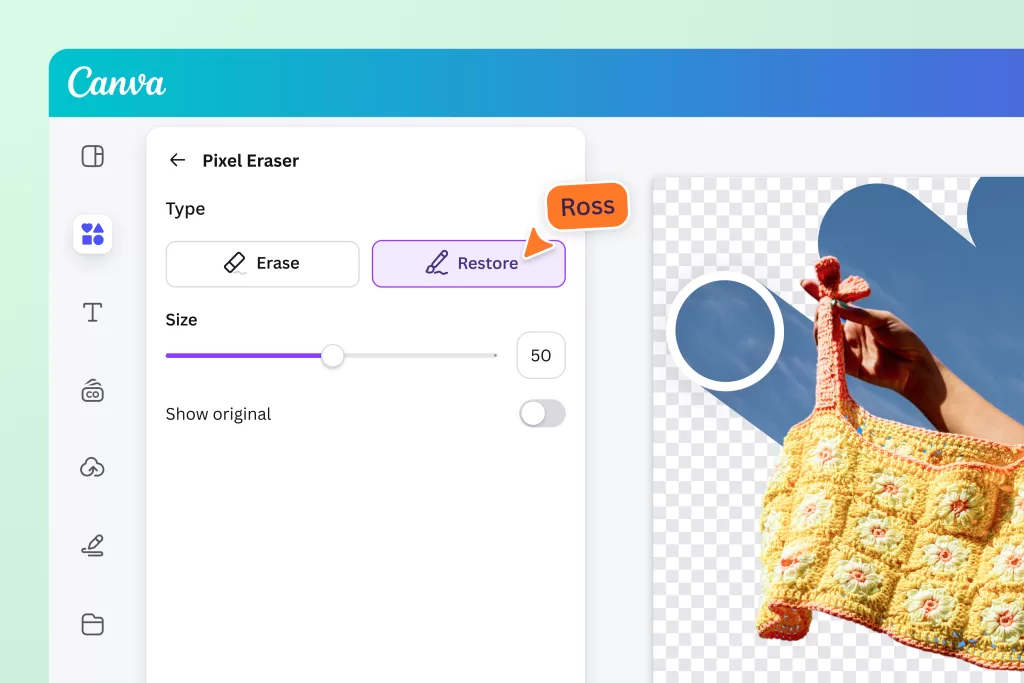
Canva reduces background removal to a single click. Upload your image, click Edit Image → BG Remover, and Canva erases the background in about two seconds. Canva Magic Studio added AI-driven Magic Layers, Magic Expand, and Magic Background in 2025–2026, which lets non-designers replace the removed background with a generated scene in the same panel.
When Canva wins:
- Simple product shots with clear separation
- Portraits with defined outlines
- Marketing graphics and social templates
- Team members without editing experience
Canva limitations:
- BG Remover requires Canva Pro
- Weak on translucent objects and shadow-only edges
- No pen-tool-level control for manual corrections
- Cannot export multi-layer PSD files
5. How Does Photopea Compare? (Free Browser-Based Photoshop)
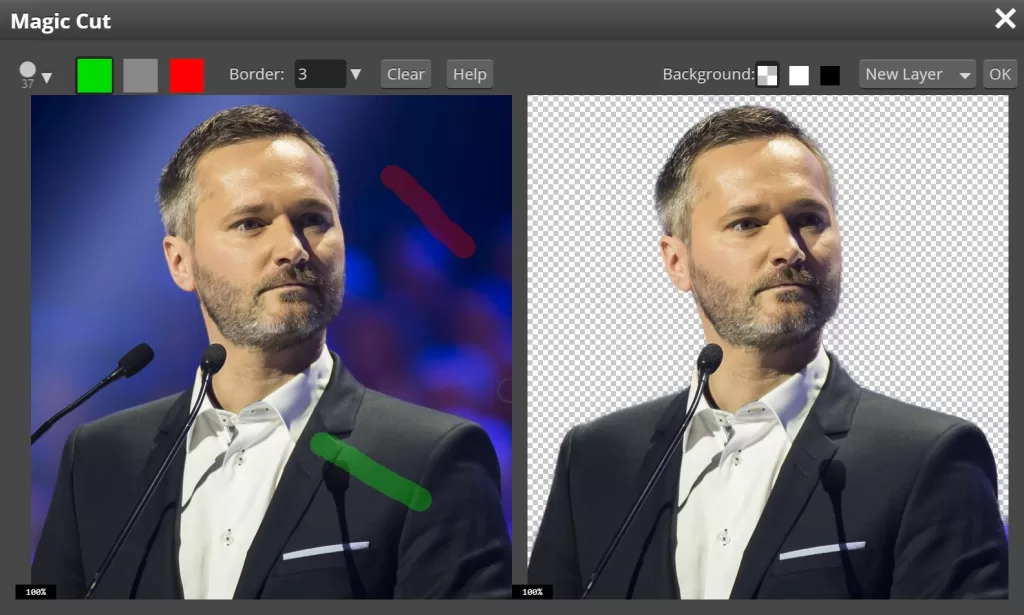
Photopea runs entirely in your browser, opens PSD files, and clones the Photoshop interface almost pixel for pixel. Its Magic Cut uses AI similar to Select Subject, while the Quick Selection, Object Selection, and Pen Tool offer manual power to precise users. Photopea is free, requires no installation, and — critically — processes many operations locally, keeping private images off external servers.
Photopea workflow:
- Open photopea.com and drop your image.
- Click Select → Magic Cut for AI removal, or use the Object Selection Tool.
- Refine with the Quick Selection brush.
- Add a layer mask (Layer → Mask → Reveal Selection).
- Export as File → Export As → PNG.
6. Can You Cut Out a Background on Your Phone? (Mobile in 2026)
Modern phones match desktop-tool speed. iPhone users can long-press the subject in Photos to trigger Lift Subject, then tap Copy or Share to paste a transparent cutout anywhere. Apple documents the exact tap-and-hold sequence on the official iPhone user guide for lifting a subject, a feature available since iOS 16 and refined in every release. iOS 18 added the Clean Up tool for removing distracting people and objects, and iOS 26 introduced deeper background editing plus Visual Intelligence-driven selections.
Android users on Google Photos and Samsung Gallery get similar built-in cutout and object erase features. Third-party apps expand the toolkit further.
Best mobile apps in 2026:
- PhotoRoom — batch removal, templates, and marketplace exports
- Pixelcut — cutouts, shadow generator, and background AI
- Snapseed — free, non-destructive edits with double-exposure tricks
- Background Eraser — manual precision on Android
- YouCam Perfect — beauty + object removal combined
Why Is Manual Clipping Path Still the Gold Standard?
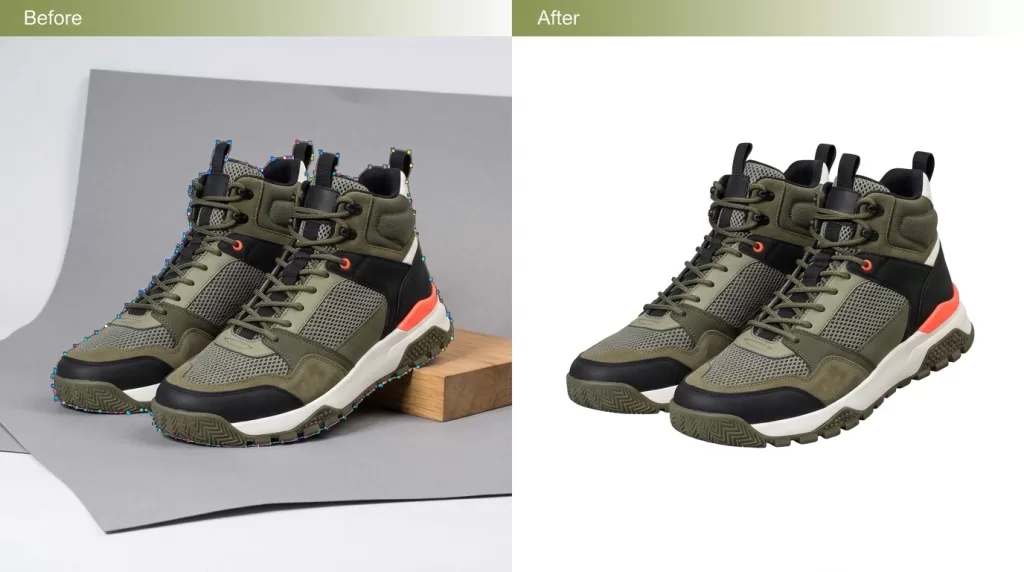
AI handles about 80% of images. The remaining 20% — jewelry, transparent bottles, wispy hair, luxury fashion catalogues, and detailed product shoots — still demand a hand-drawn clipping path. A clipping path uses the Pen Tool to trace the subject with vector points, creating a razor-sharp mask that never blurs, never over-crops, and never invents fake edges.
Why professionals still trace by hand:
- Preserves the original shape and geometry — critical for gemstones and reflective metals
- Handles same-color subject/background situations that break AI
- Produces pixel-perfect outlines even at 300% zoom
- Supports multi-path files for later color changes and layered edits
- Delivers a vector path that stays crisp at any output size
A magic wand tool selection works for basic shots, but the Pen Tool always wins where precision matters. High-end studios editing watches, jewelry, and fashion still rely on manual paths for exactly this reason.
Basic Pen Tool workflow:
- Zoom to 200–400% for accuracy.
- Click anchor points along the subject edge, holding to drag Bezier handles on curves.
- Close the path back at the starting point.
- Right-click → Make Selection, feather 0.3–0.5 px.
- Add a layer mask from the selection.
Struggling with complex hair or fur edges?
Let our experts deliver flawless, natural cutouts with our advanced Image Masking Service
How Do You Handle Hair, Fur, and Complex Edges?
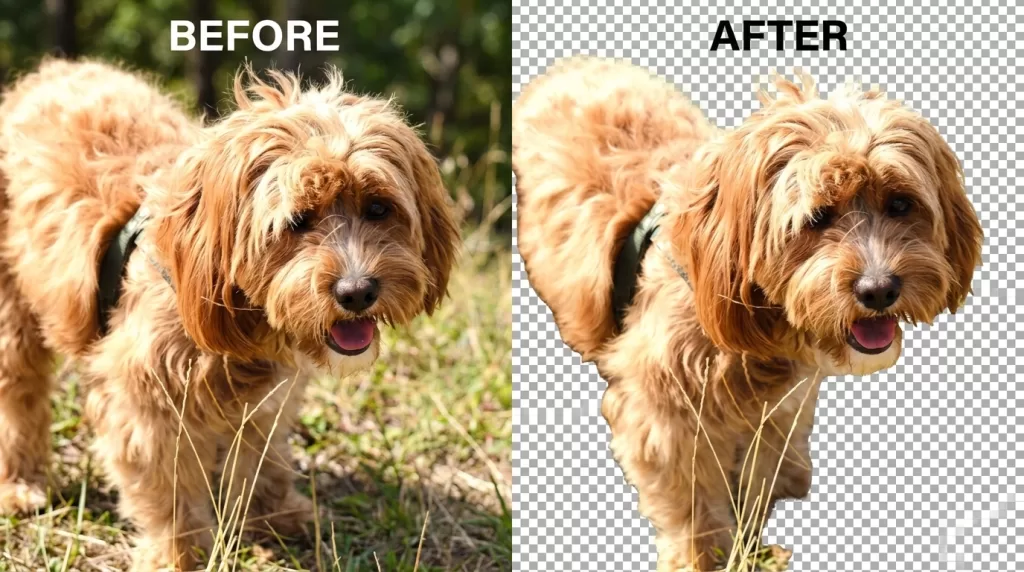
Hair and fur destroy most one-click tools. The reason is technical: neural networks treat translucent hair as background because pixels blend with whatever sits behind them. To beat that limitation, editors switch to channel masking or hair masking, which isolate strands using contrast channels instead of color selections.
Reliable hair-masking recipe in Photoshop 2026:
- Make a rough Select Subject selection in cloud mode.
- Open Select and Mask.
- Paint the hair boundary with the Refine Edge Brush — never inside the face.
- Tick Decontaminate Colors to kill fringing.
- Output to a new layer with a mask.
- Paint a solid interior with a soft black brush if the AI erased the forehead or ears.
- For hard-to-recover strands, duplicate the base layer, open Channels, pick the highest-contrast channel, and use Image → Adjustments → Levels to force a black-on-white silhouette before loading as a selection.
For fur (dogs, cats, plush textures), keep the same steps but lower brush hardness to 20% and set feathering to 1–2 pixels for softer transitions.
What Do E-Commerce Sellers Need for Perfect Cutouts?
E-commerce photos live and die by their backgrounds. Amazon requires an RGB white background (255, 255, 255) with the product filling 85% of the frame for main product images, and cluttered backdrops reduce trust before shoppers even read the title. Clean, uniform product images improve category browsability, drop bounce rates, and increase conversion — one reason large brands still invest in professional editing pipelines rather than trust one-click tools alone.
E-commerce cutout checklist:
- Shoot on continuous, evenly lit backdrops — clean input equals clean output.
- Capture at native camera resolution and crop with padding around the subject.
- Cast subtle drop shadows or natural shadows after removal to keep depth.
- Batch-process product families for visual consistency across the catalogue.
- Save PNG for site galleries; export JPG with pure white fill for marketplace hero shots.
- Keep a working PSD or TIFF file so you can swap colors, angles, or backdrops later.
Want to boost your online sales with better product photography?
High-quality images increase conversions by up to 40%. Let us help you get there. See our editing services
Which File Format Should You Save Your Cutout In?
The best background removal in the world means nothing if you save the file wrong. JPG cannot hold transparency — the moment you export a cutout as JPG, your background reappears as solid white or black. Choose formats that support an alpha channel instead.
Format cheat sheet:
- PNG-24 — universal transparent format, larger files, best for print and detailed graphics.
- WebP — Google’s modern format, 25–35% smaller than PNG, supported in every major browser.
- AVIF — the smallest files with alpha, gaining browser adoption fast in 2026.
- TIFF — for print production and archival storage with layers preserved.
- PSD — preserves layers, masks, paths, and smart objects for future edits.
If you plan to reopen the file for edits or color swaps later, always save a working PSD or TIFF next to your PNG.
What Common Mistakes Ruin a Cutout — and How Do You Fix Them?
Even seasoned editors slip up. Fix these issues before you deliver a file:
- Hard, jagged edges — feather selections 0.3 to 1 px before masking.
- Color fringing (halo) — enable Decontaminate Colors, or use Layer → Matting → Defringe.
- Missing hair details — switch from magic wand to channel or hair masking.
- Amputated edges — never trust one-click removers on translucent subjects; paint back with a soft white brush on the mask.
- Compressed exports — export as PNG-24, not PNG-8, to keep smooth alpha gradients.
- Destructive erasing — never use the Eraser Tool where a Layer Mask does the same job reversibly.
- Rebuilt shadows that look painted — sample the original ground plane color before painting a shadow.
- Different edge feathering across a catalogue — set a single feather value and reuse it for consistency.
For a photographer’s perspective on which flaws to fix in-camera versus in post, our post on the best background removal methods breaks down the tradeoffs.
AI vs. Manual Background Removal: Which One Wins in 2026?
Both approaches have a role. Speed, budget, and image complexity decide the pick.
| Factor | AI Removal | Manual Clipping Path |
|---|---|---|
| Speed | 2–10 seconds | 5–30 minutes per image |
| Cost per image | Free–$0.20 | $0.30–$5+ |
| Best for | Simple, high-contrast images | Complex edges, jewelry, hair |
| Accuracy | 78–95% (varies by image) | 99–100% |
| Bulk friendly | Yes (batch APIs) | Yes (with a team) |
| Layered edits later | No | Yes (multi-path PSD) |
| Ideal user | Solo sellers, marketers | Studios, agencies, premium brands |
The real winner is a hybrid workflow: let AI do the first pass in seconds, then a human refines the last 5–10% where money is actually made. That is why brand-focused studios keep hand editors on staff even in an era of one-click tools.
Troubleshooting Guide: Fixing the Cutouts AI Gets Wrong
| Problem | Cause | Fix |
|---|---|---|
| White halo around edges | Original background pixels bled into mask | Layer → Matting → Defringe (1–2 px) or enable Decontaminate Colors |
| Hair cut off flat | AI removed low-opacity strands | Channel masking on the highest-contrast channel |
| Glass looks solid | AI treats transparency as background | Manual path + reduce mask opacity on translucent zones |
| Reflections vanish | Auto-remove killed mirror pixels | Use Photoshop Remove Reflections (2026), then blend on a new layer |
| Jagged jewelry facets | AI smoothed vector-like edges | Pen Tool clipping path with 0.3 px feather |
| Motion blur on subject | Blur was baked into the source photo | Reshoot; software cannot recover unblurred edges |
| Amputated fingers or ears | Model missed small protrusions | Paint back on the mask with a soft white brush |
| Fringe of complementary color | Chroma spill from a colored backdrop | Layer → Matting → Remove Black/White Matte, or targeted Hue/Saturation on the fringe |
How Do You Add Realistic Shadows and Composites?
A perfect cutout still looks fake if it floats in mid-air. Depth work sells the illusion.
- Drop shadow — a soft, offset shadow anchors the subject to the surface.
- Natural shadow — recover the original shadow from the source photo, then blend into the new background.
- Reflection shadow — mirror the subject below with reduced opacity for glass-shelf shots.
- Ambient occlusion — dark tones directly under the object add weight and realism.
- Harmonize (Photoshop 2026) — auto-matches lighting direction and color temperature to the new backdrop.
Adding shadow work takes an extra two to three minutes per photo but transforms your composite from “obvious cutout” into “premium product shot.” E-commerce brands see the biggest lift here because shadowed cutouts feel three-dimensional even on flat marketplace listings.
Need to choose between drop, natural, or reflection shadows?
Our versatile Drop Shadow service delivers the exact effect your brand needs.
How Do You Batch-Process Hundreds of Cutouts?
Editing one image is easy. Editing 500 for a Shopify catalogue is not — unless you automate.
Best batch options in 2026:
- remove.bg API — pay per image, integrates with Zapier, Bannerbear, and custom scripts.
- PhotoRoom Batch — drag-and-drop hundreds of images, choose a template, export instantly.
- Photoshop Actions + Image Processor — record one Select Subject workflow, apply to a folder.
- Slazzer, Pixelbin, Claid.ai — bulk cloud-based cutouts with white or transparent output.
- Professional editing outsourcing — hand-drawn quality at bulk pricing for premium catalogues.
Batch APIs and outsourcing become essential once your catalogue passes 50 SKUs, where per-image savings compound quickly.
Mini Glossary of Terms Used Above
- Alpha channel — the invisible layer inside PNG/WebP files that stores transparency (0 = fully transparent, 255 = fully opaque).
- Clipping path — a vector outline traced with the Pen Tool that defines what stays visible.
- Layer mask — a non-destructive grayscale overlay that hides or reveals parts of a layer.
- Refine Edge / Refine Hair — Photoshop tools that separate translucent detail from the background.
- Feathering — softening a selection edge across a small pixel range.
- Decontaminate Colors — Photoshop function that removes leftover background color from edge pixels.
- Magic Cut — Photopea’s AI background removal command.
- Lift Subject — iPhone’s built-in subject isolation gesture.
- Firefly — Adobe’s family of generative AI models powering Fill, Expand, and Harmonize inside Photoshop 2026.
Frequently Asked Questions
What is the easiest way to cut out the background of a picture for free?
Use remove.bg, Photopea, or iPhone’s built-in Lift Subject gesture. All three deliver a transparent PNG in seconds without installing software. Canva’s free tier includes limited background removal on mobile, and Adobe Express also offers a free basic remover.
Can I remove a background in Photoshop 2026 with one click?
Yes. Open the image, go to Properties → Quick Actions → Remove Background, and Photoshop applies a layer mask automatically. Switch Image Processing to Cloud for cleaner hair edges, then refine with Select and Mask if needed.
Which format keeps the background transparent — PNG, JPG, or WebP?
PNG-24, WebP, and AVIF all support transparency; JPG does not. Save transparent cutouts as PNG-24 for maximum compatibility, or WebP for smaller file sizes on modern websites.
Why does my AI cut have jagged edges or a white halo?
The halo appears when the AI keeps original background pixels along the subject edge. Fix it with Decontaminate Colors in Photoshop, Layer → Matting → Defringe (1–2 px), or by contracting the mask by 1 pixel and re-feathering.
How do professionals handle hair and fur cutouts?
Pros combine channel masking, the Refine Hair button in Photoshop 2026, and hand-painted mask corrections. Complex portraits often need 10–20 minutes of manual refinement even after AI selection.
Is manual clipping path still better than AI in 2026?
Yes for jewelry, glass, luxury products, and high-end fashion. Manual paths preserve exact geometry and produce zero color contamination — accuracy AI tools still cannot guarantee. For simple product shots, AI is faster and cheaper.
Can I remove a background on my phone without downloading an app?
Yes. iPhone users long-press the subject in Photos (iOS 16 and later). iOS 18 added Clean Up for object removal, and iOS 26 adds background editing. Android users on Google Photos and Samsung Gallery get similar built-in tools — no third-party app required.
How do I remove backgrounds from hundreds of images at once?
Use PhotoRoom Batch, the remove.bg API, or Photoshop’s Image Processor with an Action. For premium quality at scale, outsource to a professional clipping path or masking service.