

TF vs MicroSD vs SD Card: Meaning & Differences Explained
July 25, 2026
Amazon Image Requirements 2026: Size, Specs & Guidelines
July 29, 2026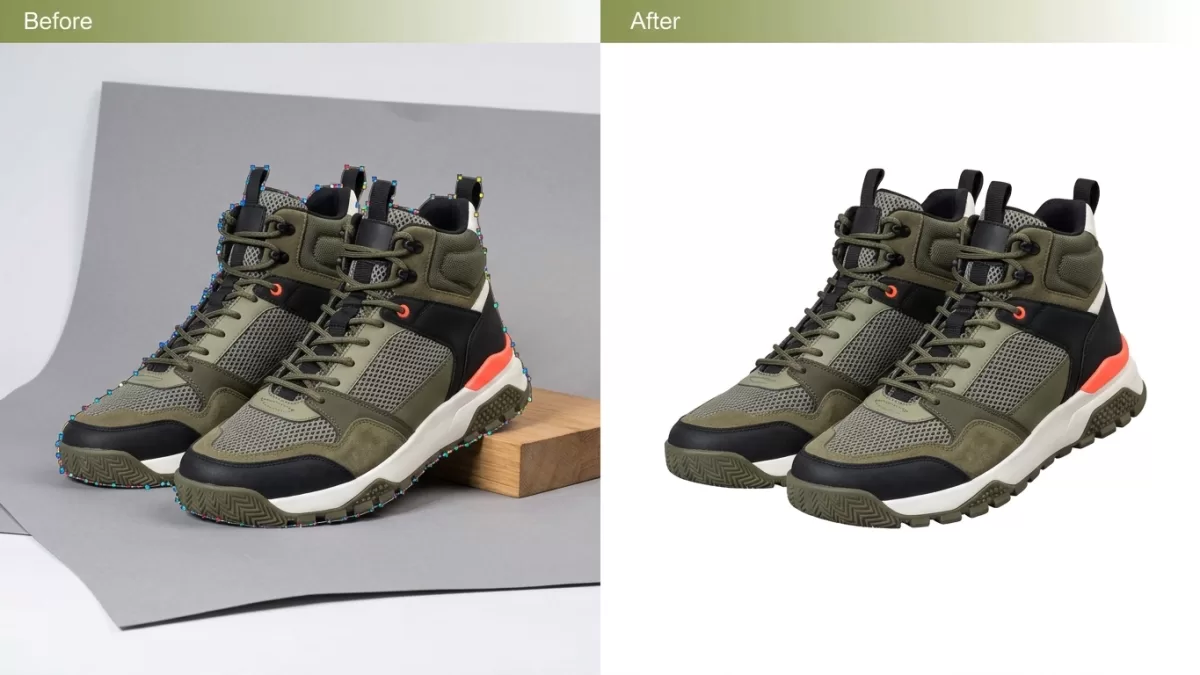
- Quick Answer: What Is a Clipping Path in Photoshop?
- What Exactly Is a Clipping Path?
- Why Clipping Paths Matter for E-commerce and Design
- Types of Clipping Paths: From Basic to Super Complex
- What You Need Before You Start
- How to Create a Clipping Path in Photoshop: Step-by-Step Tutorial
- Convert the Path to a Selection (Optional but Powerful)
- Pro Pen Tool Tips That Save Hours
- Clipping Path vs Clipping Mask vs Image Masking
- Saving and Exporting Your Clipping Path for Print and Web
- Common Clipping Path Mistakes (and How to Avoid Them)
- DIY vs Professional Clipping Path: When to Outsource
- Real-World Use Cases for Clipping Paths
- Advanced Workflow: From One Photo to a Full Product Grid
- FAQ: Clipping Path in Photoshop
- Final Thoughts: Why Clipping Paths Still Rule Photo Editing
Quick Answer: What Is a Clipping Path in Photoshop?
A clipping path in Photoshop is a closed vector outline — drawn with the Pen Tool — that isolates a subject from its background so you can remove, replace, or edit around it. The path acts like a stencil: everything inside stays visible, everything outside gets clipped. Designers and e-commerce sellers rely on it for razor-sharp, hand-crafted cutouts on products with hard edges, such as bottles, shoes, jewelry, and electronics. Adobe’s own editing paths documentation confirms that a path is made of one or more straight or curved segments joined by anchor points, and Photoshop lets you save, edit, and export those paths as reusable vectors.
Key facts at a glance
- A clipping path is a manual, pen-drawn vector outline — not an AI selection.
- It produces razor-sharp edges best suited to hard-edged products.
- Photoshop saves the path inside PSD, TIFF, or EPS files for reuse in InDesign, Illustrator, and QuarkXPress.
- Professional studios charge as little as $0.25–$0.60 per image for basic work in 2026.
- Use image masking, not a clipping path, for hair, fur, or translucent glass.
What Exactly Is a Clipping Path?
The definition in plain English
A clipping path is a vector shape saved inside a raster image. That shape hides everything outside its boundary. Because it is a vector, you can scale it infinitely without pixelation and you can edit its anchor points at any time. Wikipedia’s clipping path entry puts it simply — a closed vector path used to cut out a two-dimensional image, so only the area inside the path appears when placed into a page-layout program.
Why editors still call it “hand-drawn”
Automatic tools like the Magic Wand, Quick Selection, or AI background remover only guess where the edge lives. A clipping path, by contrast, is plotted point by point by a human using the Pen Tool. That is why professional studios still hand-draw thousands of paths every day — the trained eye beats algorithms on straight edges, glossy surfaces, and repetitive product batches. Our professional clipping path guide walks through the full production pipeline if you want to see how a studio structures the work.
Where designers use clipping paths
- E-commerce product photos for Amazon, Shopify, eBay, and Walmart
- Print catalogs, brochures, and magazine layouts placed via InDesign
- Marketing banners and social ads that need transparent PNGs
- Color variation shots — one photo turned into many product colors
- Composite images that merge several subjects into one scene
Why Clipping Paths Matter for E-commerce and Design
High-quality visuals move the sales needle directly. Retail research from Shopify and BigCommerce consistently shows that clean, consistent product images lift conversion rates because shoppers judge a listing within a fraction of a second. A hand-drawn clipping path delivers that visual consistency by producing:
- Pure white backgrounds that meet marketplace rules
- Uniform product angles and margins across an entire catalog
- Fast color swaps from one hero shot into ten variants
- Print-ready cutouts with sharp edges at 300 DPI
- Reusable assets — one saved path serves web, print, and social
Marketplaces enforce these rules strictly. Amazon’s official product image guide states that main product images must sit on “a pure white background (RGB color values: 255, 255, 255)”. A pen-drawn clipping path is the safest, most repeatable way to hit that exact value across thousands of SKUs, especially when sellers scale their Amazon product listings into new categories.
Types of Clipping Paths: From Basic to Super Complex
Not every product is a simple bottle. Studios grade every job by edge complexity, and pricing follows the same tiers. Most work falls into six well-known categories:
- Basic clipping path — one product, straight edges, no holes. Books, phones, boxes. Fastest and cheapest.
- Simple clipping path — one product with mild curves. Watches, mugs, wallets.
- Medium clipping path — moderate curves plus a few inner holes (like a mug handle) or embedded details.
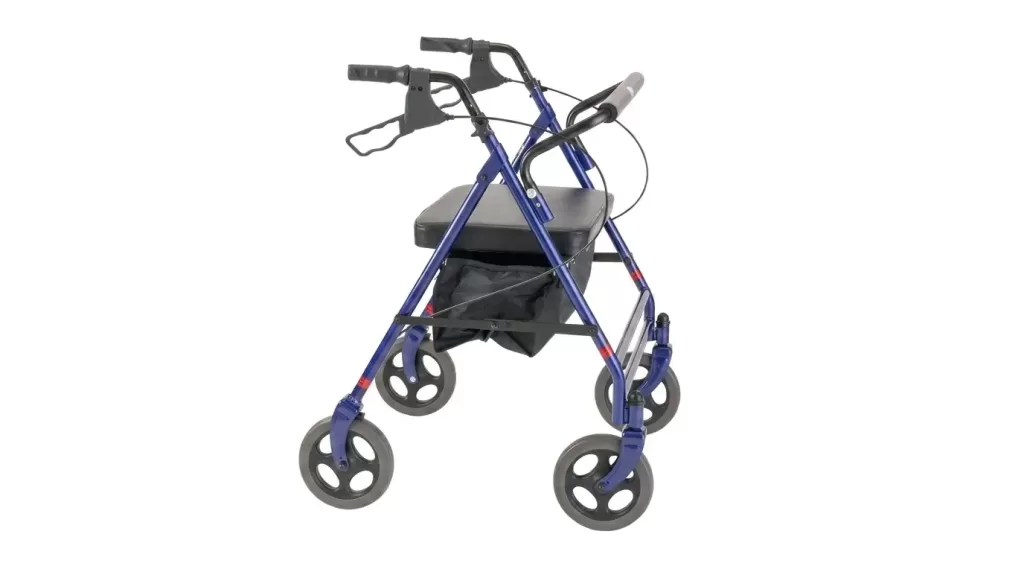
- Complex clipping path — multiple curves and inner cuts, or group shots. Furniture, bicycles, chandeliers.
- Super complex clipping path — dense meshes, chains, gemstone jewelry, motorcycles, spring coils.
- Multiple clipping paths — each part of the subject gets its own path so a designer can edit parts independently.
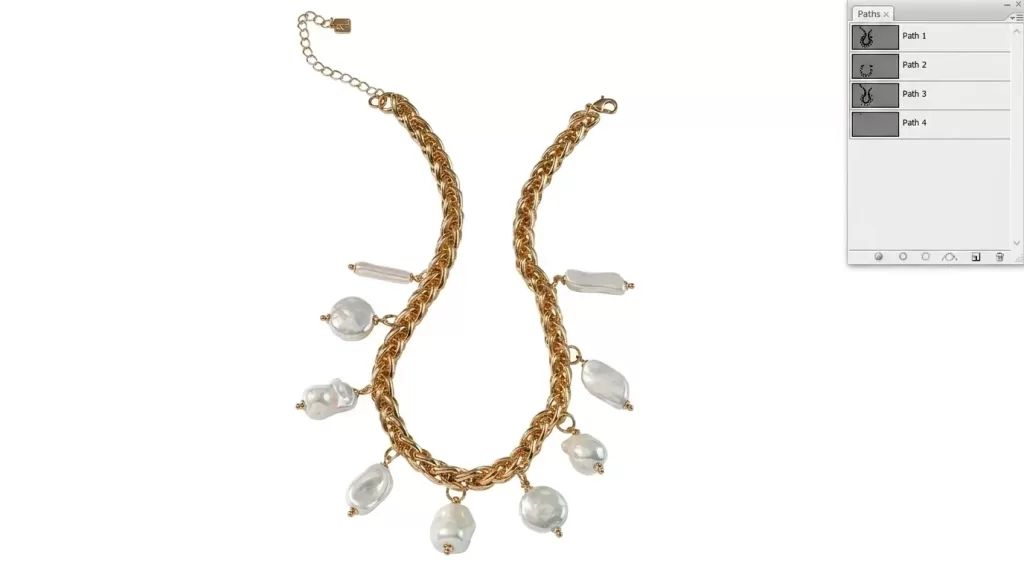
Why multiple paths matter: apparel with zippers, buttons, stitching, and fabric panels often needs six to ten separate paths so a designer can recolor the shirt without touching the buttons. Shoes (laces, sole, upper, tongue) and cars follow the same logic.
Want to speed up your post-production process?
Let us handle the complex layering with our efficient Multi-Clipping Path Service
What You Need Before You Start
Line these up first so the workflow flows without interruption:
- Photoshop CC (any recent version from 2020 onward supports every step here)
- A mouse or graphics tablet — a Wacom or Huion tablet makes curves easier
- Your source photo at the highest resolution possible (RAW or high-JPEG)
- The Paths panel and Layers panel visible (Window → Paths, Window → Layers)
- 15–30 quiet minutes for your first clean path
If the interface still feels crowded, our overview of the Photoshop tools toolbar explains every icon you will touch in this tutorial.
How to Create a Clipping Path in Photoshop: Step-by-Step Tutorial
Follow these seven steps and you will have a saved, reusable clipping path around any product. This walkthrough mirrors the workflow that Adobe documents in its official Pen Tool guide, and it matches how professional studios still cut out most product photos today.
Step 1: Open your image and duplicate the layer
- Drag your photo into Photoshop, or click File → Open.
- Right-click the Background layer and choose Duplicate Layer (or press Ctrl/Cmd + J).
- Rename the copy “Working Layer” so you always keep a safety net.
- Zoom in to 300–400% so you can see individual pixels along the product edge.
Working non-destructively is the golden rule. If the path breaks, the original stays untouched.
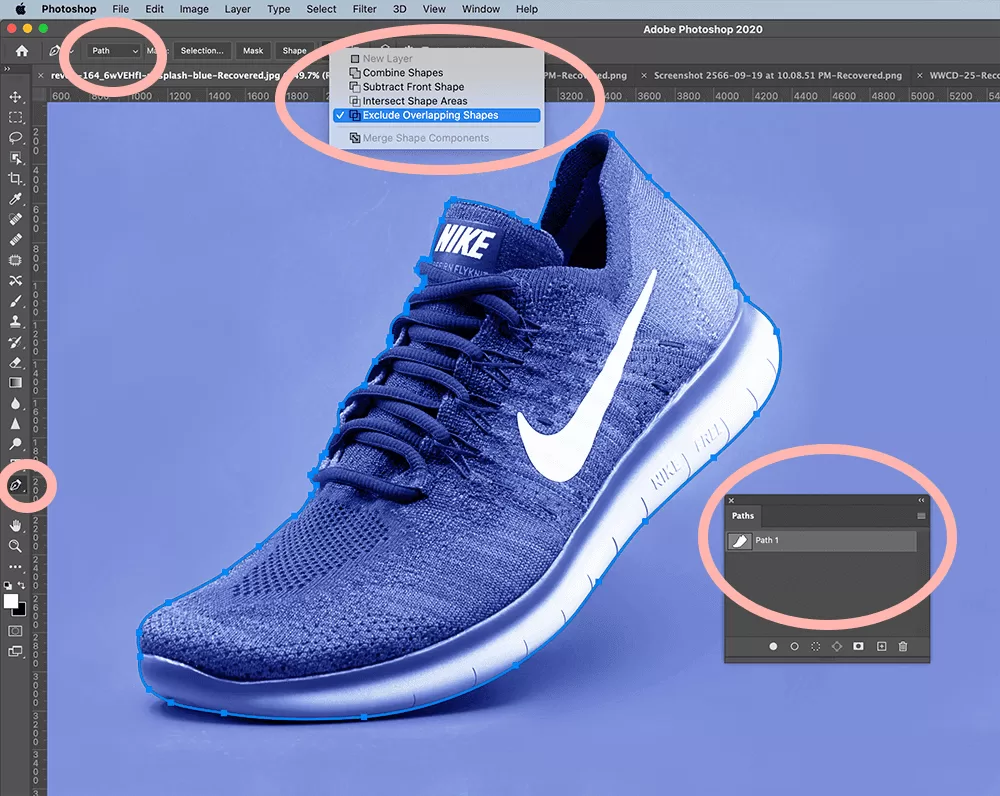
Step 2: Select the Pen Tool
- Press P on your keyboard, or click the fountain-pen icon in the toolbar.
- In the top options bar, set the mode to Path (not Shape).
- Leave Rubber Band unchecked until you are comfortable — it can distract new users.
The Pen Tool draws vectors, not pixels. That distinction is what makes clipping paths so precise.
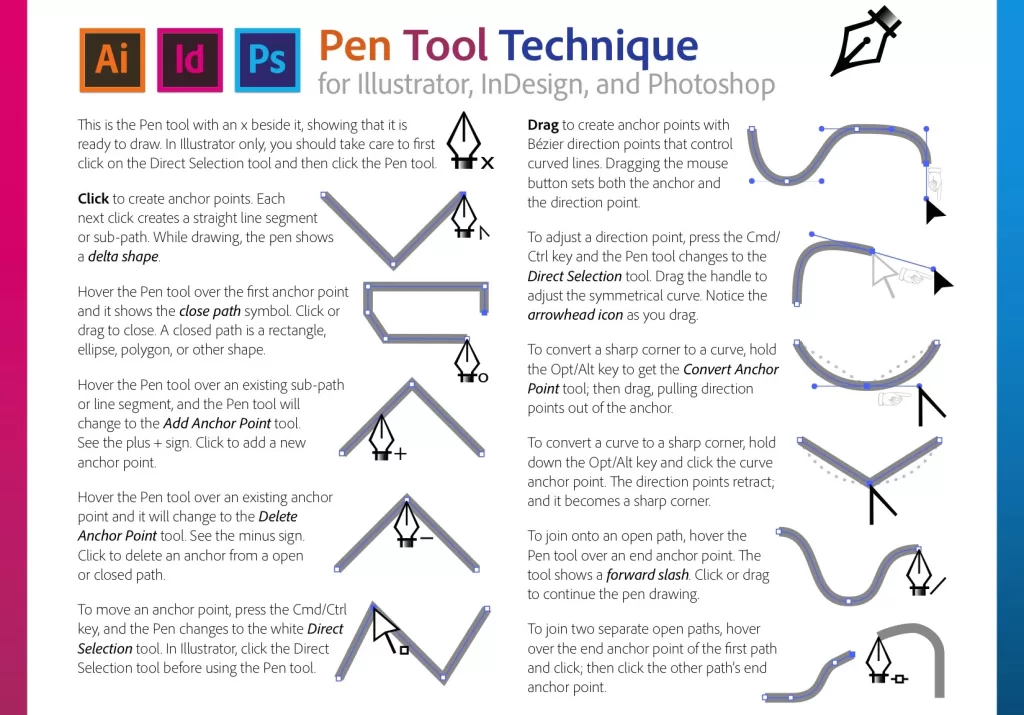
Step 3: Place your first anchor point
- Click just inside the edge of the product — about 1 pixel in. Working slightly inside prevents a bright halo of background from bleeding into the cutout.
- The click creates your first anchor point.
- Move to the next corner or curve and click again for the second point.
Anchor points mark the ends of every segment, and Photoshop lets you add, remove, or convert them at any time.
Step 4: Draw curves with direction handles
Straight lines are easy. Curves take practice. Use this professional method:
- Click and drag as you place a point — the drag pulls out two “direction handles” that shape the curve.
- Drag in the direction the curve is heading.
- Keep handles roughly one-third the length of the curve for smooth arcs.
- Hold Alt/Option and click a handle to break it — useful when you go from a curve into a corner.
- Use fewer points than you think you need. Fewer anchors equal smoother curves.
Step 5: Close the path
- Continue around the product until you circle back to your very first anchor.
- Hover over that starting point — a tiny circle appears next to the pen cursor.
- Click once to close the path. A closed path is essential for a valid clipping path.
Step 6: Save the path in the Paths panel
- Open Window → Paths.
- You will see “Work Path” in italics — italics mean it is temporary and can be lost.
- Double-click “Work Path,” give it a clear name (for example, “Product_Cutout”), and click OK.
- The name switches to regular text, meaning Photoshop has now baked the path into the file.
Step 7: Turn the saved path into a clipping path
- With the path selected, click the flyout menu in the top-right corner of the Paths panel.
- Choose Clipping Path….
- Pick your saved path name in the dialog.
- Leave Flatness empty for screen use, or type 1–3 pixels for print production.
- Click OK.
You now have an official clipping path baked into your file. Save the image as PSD, TIFF, or EPS to keep the path alive when you place it in InDesign or QuarkXPress.
Convert the Path to a Selection (Optional but Powerful)
Sometimes you skip the saved clipping path and want a live selection instead.
- With the path selected, press Ctrl/Cmd + Enter to load it as a selection.
- Alternatively, hold Alt/Option and click the “Load path as a selection” icon at the bottom of the Paths panel to open the dialog with feather options.
- Add a layer mask (Layer → Layer Mask → Reveal Selection) to keep the edit non-destructive.
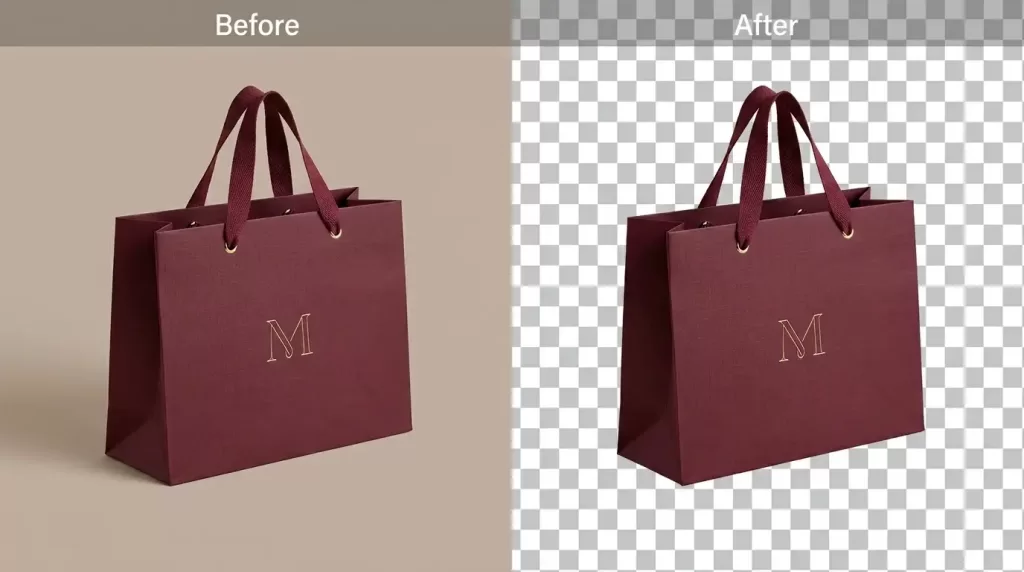
- Delete the background layer, and the product now sits on a transparent background ready for PNG export.
Pro Pen Tool Tips That Save Hours
Small habits separate hobbyists from professional path artists:
- Zoom often. Use Ctrl/Cmd + + to zoom in and spacebar to pan. Never draw at 100% for critical edges.
- Use as few points as possible. Adobe evangelist Julieanne Kost, in her respected 15 Pen Tool tips, stresses that fewer anchor points produce smoother, more professional curves.
- Hold Shift to constrain a line segment to 45° angles — perfect for boxes and screens.
- Ctrl/Cmd + click on the canvas to temporarily switch to the Direct Selection Tool and nudge an anchor.
- Save incrementally. Ctrl/Cmd + S every couple of minutes prevents heartbreak.
- Keep the color space consistent — sRGB for web, Adobe RGB or CMYK for print.
- Toggle path visibility by clicking below the paths list to preview the image cleanly.
Want to keep your image editing costs low without sacrificing quality?
Enjoy premium, hand-drawn Clipping Path services starting at just 30¢ per image.
Clipping Path vs Clipping Mask vs Image Masking
Beginners confuse these three constantly. Here is the plain difference:
- Clipping path — a vector outline drawn with the Pen Tool. Best for hard, defined edges like glass bottles, phones, and furniture.
- Clipping mask — a layer-based technique that confines a top layer to the shape of the layer below it (Layer → Create Clipping Mask). Best for text effects, texture fills, and photo-in-shape compositions.
- Image masking — pixel-level masking (Refine Edge, Channels, or brushes) that keeps soft, semi-transparent edges. Essential for hair, fur, smoke, and translucent fabric.
If your subject has feathery hair, mesh, or blurry motion edges, reach for image masking. If it has clean geometry, use a clipping path. Many real jobs need both — a path for the body and a mask for the hair, then combined into one final cutout. Our roundup on how to remove background from image compares every method side by side.
Saving and Exporting Your Clipping Path for Print and Web
The strength of a clipping path is that other programs can read it. Adobe’s guide on placing Photoshop images in other applications lists the exact steps, and the format you choose matters:
- PSD — keeps every path, layer, and mask; the best format for InDesign and Illustrator round-trips.
- TIFF — retains the path inside the file, works in most DTP software, and prints cleanly.
- EPS — the historic print standard; supports clipping paths natively and prints reliably on RIP servers.
- PDF — carries paths and vectors; ideal for client proofs and print-ready delivery.
- PNG with alpha — flatten the file after applying the path if the destination cannot read paths (most websites).
- JPEG with embedded path — possible, but not every browser or CMS respects the path.
Tip for InDesign users: after placing a PSD or TIFF, go to Object → Clipping Path → Options and pick “Photoshop Path” to activate your saved outline. The background turns transparent inside the layout, and text will wrap around the product naturally.
Want to test our quality before committing to a large order?
Try our Image Background Removal Services risk-free with a free trial.
Common Clipping Path Mistakes (and How to Avoid Them)
Even seasoned editors slip up. Watch for these traps:
- Drawing on the edge itself. Always stay 1 pixel inside the subject to avoid background halos.
- Too many anchor points. Bumpy, jittery curves usually mean 30 points where 8 would do.
- Leaving the path open. An open path cannot become a clipping path.
- Working at 100% zoom. You will miss stray pixels every time.
- Forgetting to save. A “Work Path” left unnamed disappears the moment you start a new one.
- Using clipping paths for hair. Hair needs masking, not vectors.
- Ignoring color space. The path may be fine, but the wrong ICC profile will shift colors in print.
- Feathering too aggressively. A 2-pixel feather can soften edges into mush at print resolution.
- Skipping a test print. Always proof once before ordering a run of 5,000 catalogs.
Our post on common photo editing mistakes that ruin image quality goes deeper into related pitfalls.
DIY vs Professional Clipping Path: When to Outsource
Doing your own clipping paths feels empowering, but it also devours time. A skilled in-house designer averages 15–45 minutes per product at medium complexity. Multiply that by 500 SKUs and the launch calendar disappears.
Consider outsourcing when you have:
- More than 50 images per week
- Complex subjects like jewelry, chains, furniture, or motorcycles
- Deadlines tighter than 24 hours
- A need for consistent style across an entire catalog
- Multiple output formats (web, print, ads) from the same shoot
Independent surveys and our own clipping path pricing benchmarks put 2026 rates in these tiers:
- Basic products (boxes, bottles): $0.25 – $0.60 per image
- Medium complexity (apparel, furniture): $0.50 – $1.00 per image
- Complex (jewelry, group shots): $1.00 – $3.00 per image
- Super complex (bicycles, chandeliers, chains): $3.00 – $10.00+ per image
Reputable studios throw in unlimited revisions, 24-hour turnaround, and free trials — clear signals that real path artists are behind the work, not a rebranded AI tool.
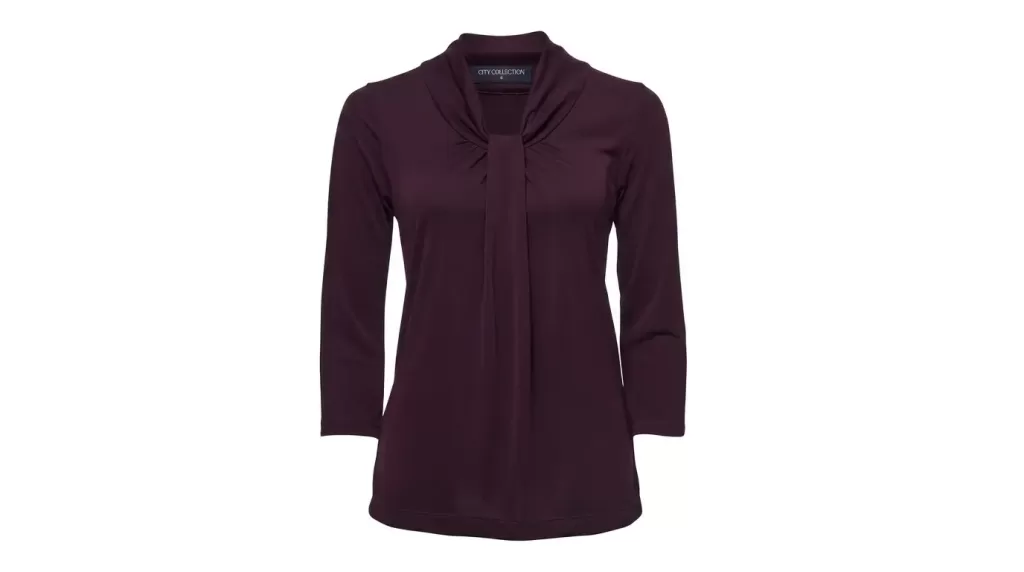
Need to remove distracting mannequins from your product shots?
Let our experts seamlessly blend and retouch with our Ghost Mannequin Photo Editing Services
Real-World Use Cases for Clipping Paths
Clipping paths are the invisible plumbing behind millions of images you see every day. Here is where they earn their keep:
- Amazon and Shopify listings that require pure white RGB 255,255,255 backgrounds
- Fashion catalogs where the same jacket appears in six colors
- Real estate flyers that swap sky or floor textures behind furniture
- Automotive brochures with dozens of trim-level variations
- Cosmetics and jewelry campaigns where every gem needs its own path
- Food packaging mockups placed on gradient or lifestyle backgrounds
- Educational content where cutout objects overlay diagrams
- Composite marketing banners with multiple subjects layered together
Color swaps become almost effortless once separate paths exist. Pair a clipping path with our tutorial on changing object color in Photoshop and a single product photo can generate an entire color grid overnight.
Advanced Workflow: From One Photo to a Full Product Grid
A clean master clipping path speeds up everything downstream:
- Duplicate the file and shift the color inside the path using Hue/Saturation or Selective Color.
- Add a natural drop shadow so the product still feels grounded on white.
- Batch-export via File → Export → Export As at preset dimensions — 2000 px longest side for Amazon, 2048 px square for Shopify, and 1080 px for Instagram.
- Run Photoshop actions or Adobe Bridge to apply the same recipe across hundreds of files.
- Archive the layered PSD with the named path — future you will send flowers.
For studios juggling many editing apps, our comparison of the best photo editing software for 2026 shows which programs read Photoshop paths reliably.
FAQ: Clipping Path in Photoshop
1. What is the difference between a clipping path and background removal?
A clipping path is the vector outline used to isolate the subject. Background removal is the outcome — the background disappears once the path or mask is applied. Clipping path is the tool; background removal is the goal.
2. Can I make a clipping path without the Pen Tool?
Technically yes — you can convert a Quick Selection into a work path from the Paths panel flyout menu, then refine it. In practice, real professionals still start with the Pen Tool because algorithmic selections rarely produce publication-ready edges on their own.
3. How long does a clipping path take?
- Basic product: 2–5 minutes
- Medium complexity: 10–20 minutes
- Complex jewelry or furniture: 30–90 minutes
- Super complex (motorcycles, chains): 2 hours or more
4. Does a clipping path work for hair and fur?
No. Hair, fur, and smoke need image masking, which handles soft, semi-transparent edges through channels, brushes, and Select and Mask. A vector path cuts off individual strands and looks unnatural.
5. Which file formats keep the clipping path?
PSD, TIFF, EPS, and PDF all preserve saved clipping paths. JPEG can technically embed a path, but not every downstream program reads it. PNG uses alpha transparency instead of paths.
6. Are AI background removers as good as a hand-drawn clipping path?
AI is fast and improving, but it still misses tiny details, transparent surfaces, and dense meshes. For hero product images that anchor a brand, human-drawn clipping paths remain the gold standard for print-grade sharpness.
7. How much does a professional clipping path service cost in 2026?
Prices start around $0.25 per image for basic subjects and can climb to $10 or more for super complex shots. Bulk contracts typically shave 20–40% off the average.
8. Can I reuse a clipping path across multiple photos?
Not directly, because paths are shape-specific. But you can copy a path from one file, paste it into another with the same product framing (like a repeated packshot), and adjust a few anchors instead of redrawing from scratch.
Final Thoughts: Why Clipping Paths Still Rule Photo Editing
The Pen Tool has anchored Photoshop for more than three decades, yet no algorithm has matched its precision on hard-edged subjects. A clipping path costs pennies per image, keeps catalogs looking consistent, unlocks unlimited color variations, and travels cleanly from Photoshop into InDesign and print. Whether you draw them yourself or hand them to a specialist studio, mastering clipping paths remains one of the highest-ROI skills in modern product photography.
Start small. Cut out one bottle. Save the path. Repeat with a shoe, then a watch, then a chair. Within a week you will trust the Pen Tool more than any AI shortcut — and your product images will start converting like the top listings on Amazon and Shopify.