

How Big Is a Wallet Photo? Printing & Size Guide
March 6, 2026
How Big Is a 16×20 Photo
March 11, 2026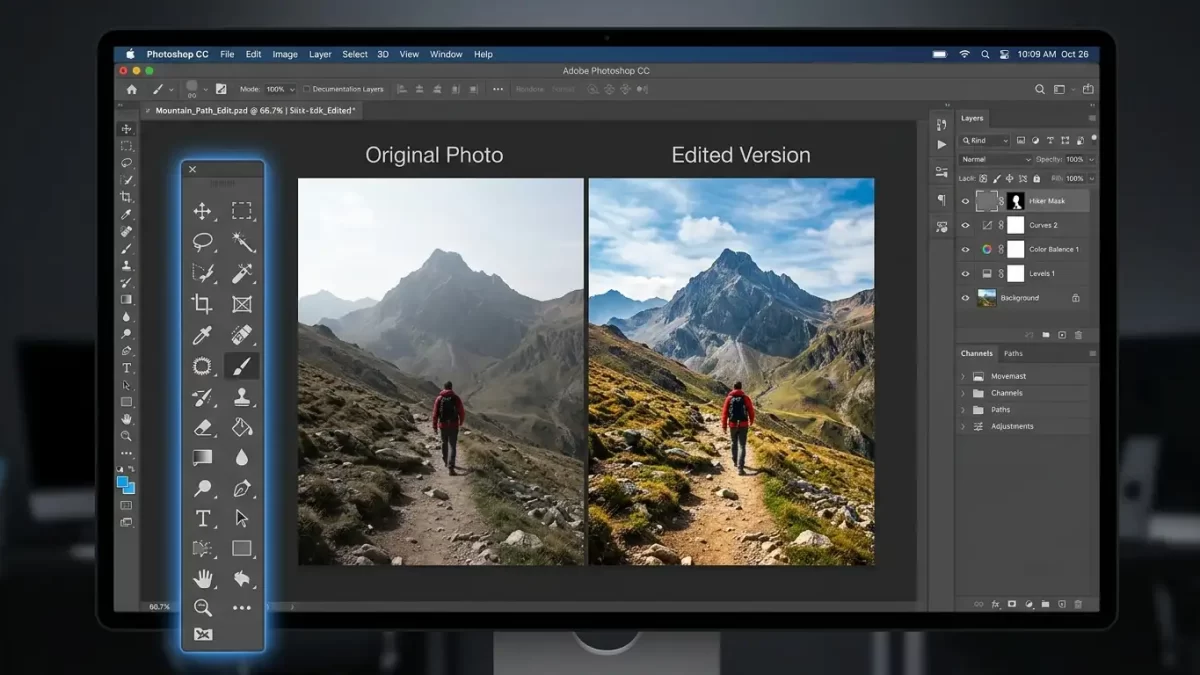
Photoshop stands as the world’s most powerful image editing and graphic design software. Whether you’re a complete beginner or a seasoned professional, the toolbar is your command center—the place where every creative action begins. Adobe designs the toolbar to give you instant access to nearly 70 tools, ranging from simple selection options to advanced AI-powered features.
This guide walks you through everything you need to know about Photoshop’s tools and toolbar. You’ll learn how the toolbar organizes its tools, how to uncover hidden ones, and how to customize the layout for your specific workflow. By the end, you’ll navigate the toolbar with confidence and significantly speed up your editing process.
For an official reference, Adobe maintains a comprehensive Photoshop tools gallery that lists every tool with descriptions.
Mastering the toolbar takes time – outsourcing takes seconds. Try our clipping path service free on 2 images
- Understanding the Photoshop Toolbar Layout
- Customizing Your Toolbar for Maximum Efficiency
- Complete Guide to Photoshop Selection Tools
- Retouching and Painting Tools Explained
- Drawing and Type Tools for Design Work
- Navigation Tools for Moving Around Your Canvas
- AI-Powered Tools in Modern Photoshop
- Essential Keyboard Shortcuts for Every Tool
- The Options Bar: Your Tool's Control Panel
- Contextual Task Bar: Your New Best Friend
- Hidden Tools You Might Have Missed
- Common Photoshop Workflows and the Tools You Need
- Conclusion
- Frequently Asked Questions
Understanding the Photoshop Toolbar Layout
Photoshop’s toolbar sits along the left edge of your workspace by default. You’ll find it in every version of Photoshop, from the desktop app to the web and mobile versions. The toolbar displays icons representing individual tools or groups of related tools.
Single Column vs. Double Column View
The toolbar starts as a long, single column. However, you can expand it into a shorter, double-column layout by clicking the double arrows at the top. This switch helps you see more tools at once without scrolling. Click the double arrows again to return to the single-column view.
Logical Grouping of Tools
Photoshop arranges its tools in a logical order, grouping related functions together. The top section holds Move and Selection tools. Right below them come Crop and Slice tools. Next are Measurement tools, followed by Retouching and Painting tools. The Drawing and Type tools appear further down, and the Navigation tools sit at the very bottom.
This organization follows a typical editing workflow: you select something, then you modify or paint it, and finally you navigate around your canvas.
Accessing Hidden Tools
Here’s a crucial point many beginners miss: most toolbar spots hold more than one tool. A small triangle in the bottom right corner of a tool icon indicates hidden tools underneath. Click and hold on the icon, or right-click (Windows) or Control-click (Mac) on it. A fly-out menu appears, showing all the additional tools available in that group.
For example, the Rectangular Marquee Tool icon hides the Elliptical Marquee Tool, the Single Row Marquee Tool, and the Single Column Marquee Tool. Simply click the name of the tool you want to use.
Pro tip: Hidden tools appear in a specific order. The tool you see on the toolbar is the last one you selected from that group. Photoshop remembers your choice for your next session.
Customizing Your Toolbar for Maximum Efficiency
You don’t have to stick with Adobe’s default toolbar arrangement. Photoshop lets you customize the toolbar to match your specific needs. This feature saves you time and keeps your workspace focused on the tools you actually use.
How to Customize the Toolbar
Go to Edit > Toolbar from the top menu. The customization dialog opens, showing two columns: the main toolbar on the left and an “Extra Tools” section on the right. Drag any tool from the main column to the extra column to remove it. Drag tools from the extra column to the main column to add them.
Creating Toolbar Presets
Photoshop allows you to create multiple toolbar presets. Save one preset for photo retouching, another for graphic design, and a third for digital painting. Switch between them depending on your project. This flexibility keeps your workspace clean and your workflow smooth.
Spring-Loaded Shortcuts for Temporary Tool Switching
Here’s a pro technique: spring-loaded shortcuts. Hold down a keyboard key to temporarily switch to a different tool. When you release the key, Photoshop automatically returns you to your previous tool. This trick works brilliantly when you need quick access to the Hand Tool or Zoom Tool while using the Brush Tool.
Adding Frequently Used Tools as a Custom Group
You can also create entirely new tool groups in the customization dialog. Drag two or more tools together, and Photoshop nests them under a single icon. This feature helps you build a personalized toolbox that reflects your daily editing habits.
Complete Guide to Photoshop Selection Tools
Selection tools let you isolate specific parts of an image for editing. Without selections, every adjustment you make affects the entire picture. Mastering these tools gives you surgical precision in your edits.
Marquee Tools (M)
The Marquee tools create geometric selections. The Rectangular Marquee Tool draws square or rectangular selections. The Elliptical Marquee Tool creates circular or oval selections. Two additional hidden tools—the Single Row Marquee Tool and the Single Column Marquee Tool—select single-pixel-wide lines across your image.
Use the Marquee tools for quick selections of buildings, frames, buttons, or any object with straight or curved edges.
- Shift + drag adds to an existing selection
- Alt + drag subtracts from a selection
- Shift + Alt + drag creates an intersection of two selections
Lasso Tools (L)
The Lasso family gives you freeform selection capabilities. The standard Lasso Tool lets you draw selections completely freehand. The Polygonal Lasso Tool creates straight-edged selections by clicking points around an object. The Magnetic Lasso Tool snaps to edges automatically, making it excellent for selecting objects with high contrast against their backgrounds.
Magic Wand and Quick Selection Tools (W)
The Magic Wand Tool selects areas of similar color with a single click. Adjust its tolerance setting in the options bar to control how broad or narrow your selection becomes. The Quick Selection Tool works like a brush—you paint over the area you want to select, and Photoshop intelligently finds the edges.
Object Selection and Select Subject
The Object Selection Tool identifies and selects entire objects when you draw a rough rectangle or lasso around them. The Select Subject feature analyzes your entire image and automatically selects the main subject with one click. These AI-powered tools save enormous time on complex selections.
Adobe provides a detailed guide to selection tools that covers advanced techniques like color range and focus area.
Retouching and Painting Tools Explained
Once you’ve made your selections, retouching and painting tools help you fix imperfections, add color, and transform your images.
Spot Healing Brush and Healing Brush (J)
The Spot Healing Brush Tool quickly removes blemishes, spots, and small imperfections. Simply click on the problem area, and Photoshop blends it with surrounding pixels. The standard Healing Brush Tool requires you to sample a source area first (hold Alt and click), then paint over the imperfection. It matches the texture, lighting, and shading of the sampled area.
Clone Stamp Tool (S)
The Clone Stamp Tool copies pixels from one area of your image and paints them onto another area. Hold Alt to set your source point, then paint to clone. Use this tool for removing larger objects, duplicating elements, or covering up unwanted details.
- Alignment options: Choose “Aligned” to continue cloning from the same relative source point; uncheck to restart from the original source each time.
- Sample panel: You can clone from all layers, current layer, or current and below.
Clone Stamp heals imperfections – we heal entire batches. Check our retouching portfolio and rates
Patch Tool
The Patch Tool works similarly to the Healing Brush but uses selection-based workflows. Draw a selection around an imperfection, then drag the selection to a clean area. Photoshop blends the patch with the surrounding image.
Brush Tool (B)
The Brush Tool is your primary painting instrument. You can adjust its size, hardness, opacity, and flow from the options bar. Photoshop offers hundreds of brush presets, and you can download thousands more from the community. The Pencil Tool, hidden in the same spot, creates hard-edged strokes without anti-aliasing.
Gradient Tool (G)
The Gradient Tool fills an area with smooth transitions between multiple colors. Click and drag across your canvas to create linear, radial, angular, reflected, or diamond gradients. The Paint Bucket Tool, hidden in the same group, fills an area with a solid color.
Drawing and Type Tools for Design Work
Photoshop isn’t just for photo editing. These tools help you create graphics, add text, and build vector artwork.
Pen Tool (P)
The Pen Tool is one of Photoshop’s most powerful drawing instruments. It creates precise vector paths with anchor points and handles, giving you complete control over curves and straight segments. Use the Pen Tool for complex selections, custom shapes, and precise clipping paths. The Curvature Pen Tool offers a simplified approach for drawing smooth curves.
Shape Tools (U)
The Shape Tools include rectangles, rounded rectangles, ellipses, polygons, lines, and custom shapes. Each shape can be drawn in three modes: Shape (creates a vector shape layer), Path (creates a work path), or Pixels (draws directly as pixels). Hold the Shift key while dragging to maintain perfect proportions.
Horizontal and Vertical Type Tools (T)
The Type Tools add editable text to your designs. Click anywhere on your canvas to create point type, or click and drag to create a paragraph text box. The options bar gives you control over font family, size, color, alignment, and leading. Photoshop 2025 includes improved font management and missing font detection.
Navigation tools help you view and move around your image, especially when zoomed in on fine details.
Hand Tool (H)
The Hand Tool pans your image within its window. Activate it temporarily by holding the Spacebar while using other tools—this shortcut alone will save you countless clicks. Double-click the Hand Tool icon to fit your entire image to the screen.
Zoom Tool (Z)
The Zoom Tool magnifies or reduces your view of the image. Click to zoom in, Alt-click to zoom out. Drag a rectangle around a specific area to zoom directly into that region. Double-click the Zoom Tool icon to return to 100% view.
Rotate View Tool (R)
The Rotate View Tool rotates your canvas without transforming the actual image. This tool helps when drawing or retouching at unusual angles. After rotating, double-click the tool icon to reset the view.
AI-Powered Tools in Modern Photoshop
Adobe has integrated artificial intelligence throughout Photoshop. These tools dramatically reduce editing time and open creative possibilities that were impossible just a few years ago.
Generative Fill and Generative Expand
Generative Fill lets you add, remove, or replace objects in your images using simple text prompts. Select an area, type a description of what you want, and Photoshop generates multiple AI-powered options. Generative Expand extends your canvas boundaries and fills the new areas with content that matches your existing image.
Remove Tool
The Remove Tool erases unwanted objects more realistically than ever. Paint over the object you want to remove, and Photoshop’s AI analyzes the surrounding area to fill the gap seamlessly. The latest Firefly model produces fewer artifacts and delivers share-ready results.
Harmonize Tool
The Harmonize Tool adjusts lighting, color, and shadows to seamlessly blend objects into any scene. When you composite multiple images together, Harmonize makes them look like they were shot in the same environment.
Super Resolution (formerly Generative Upscale – corrected)
Correction made: The original article mentioned “Generative Upscale” with a choice between Adobe Firefly and Topaz Labs. In fact, Photoshop’s native AI upscaling feature is called Super Resolution (found in Camera Raw). It increases image resolution while preserving and even enhancing detail, producing a new image with four times the original pixel dimensions. You can access it by opening a raw or JPEG file in Camera Raw, right-clicking, and selecting “Enhance” > “Super Resolution.”
Photoshop AI Assistant (Beta)
Adobe recently released an AI Assistant for Photoshop on web and mobile. You can describe what you want in plain language—”remove the person in the background” or “make the colors more vivid”—and the assistant applies those changes automatically. This tool is currently in beta, with unlimited generations for paid users through April 2026.
Learn more about Adobe’s Firefly AI models on the official Adobe Firefly page.
Essential Keyboard Shortcuts for Every Tool
Keyboard shortcuts transform how you work in Photoshop. Instead of clicking icons, you press a single key to switch tools instantly.
| Tool | Windows Shortcut | Mac Shortcut |
|---|---|---|
| Move Tool | V | V |
| Marquee Tools | M | M |
| Lasso Tools | L | L |
| Quick Selection/Magic Wand | W | W |
| Crop Tool | C | C |
| Spot Healing/Healing Brush | J | J |
| Brush Tool | B | B |
| Clone Stamp Tool | S | S |
| History Brush Tool | Y | Y |
| Eraser Tool | E | E |
| Gradient/Paint Bucket | G | G |
| Blur/Sharpen/Smudge | Shift + R | Shift + R |
| Dodge/Burn/Sponge | O | O |
| Pen Tool | P | P |
| Type Tool | T | T |
| Path Selection Tool | A | A |
| Shape Tools | U | U |
| Hand Tool | H | H |
| Zoom Tool | Z | Z |
| Rotate View Tool | R | R |
| Eyedropper Tool | I | I |
Photoshop also offers powerful global shortcuts. Press Ctrl + Z (Windows) or Command + Z (Mac) repeatedly to step backward through your actions. You can press Ctrl + Alt + Z or Command + Option + Z for additional undo steps. Press Ctrl + S or Command + S frequently to save your work.
To view or customize keyboard shortcuts, go to Edit > Keyboard Shortcuts or press Alt + Shift + Ctrl + K (Windows) or Option + Shift + Command + K (Mac).
For a printable list, visit Adobe’s keyboard shortcuts reference.
The Options Bar: Your Tool’s Control Panel
When you select any tool from the toolbar, the Options Bar at the top of your screen displays that tool’s specific settings. For the Brush Tool, you’ll see size, hardness, opacity, and flow controls. For the Type Tool, you’ll see font family, size, color, and alignment options. And for the Marquee Tools, you’ll see feather, style, and selection mode buttons.
The Options Bar changes dynamically based on your active tool. Always check it after switching tools, it often contains the exact control you need.
Contextual Task Bar: Your New Best Friend
Photoshop now includes a Contextual Task Bar that appears as a floating menu on your canvas. It shows options relevant to your current task, eliminating the need to navigate through multiple panels and menus. When you select a shape, the Contextual Task Bar offers fill and stroke options. When you work with type, it gives you quick font and alignment controls. You can dock, float, or hide this bar according to your preferences.
Hidden Tools You Might Have Missed
Beyond the usual suspects, Photoshop hides several gems that many users overlook:
- Color Replacement Tool (under Brush Tool) – Paints over a specific color without affecting others.
- History Brush Tool (Y) – Paints a previous snapshot of your image onto the current state.
- Vanishing Point Tool (under Filter menu, not a toolbar tool but worth knowing) – Allows perspective-aware cloning.
- Count Tool (under Eyedropper) – Manually count objects in an image.
Exploring these hidden tools can unlock faster, more creative workflows.
Common Photoshop Workflows and the Tools You Need
Here’s how professional editors combine multiple tools to achieve common results.
Portrait Retouching Workflow
- Use the Spot Healing Brush to remove blemishes and small imperfections.
- Switch to the Healing Brush to fix larger skin irregularities.
- Apply the Clone Stamp Tool for removing stray hairs or background distractions.
- Use Dodge and Burn Tools to brighten catchlights in eyes and deepen shadows.
- Finish with the Sharpen Tool on key facial features like eyes and lips.
Background Removal Workflow
- Click Select Subject to automatically select the main subject.
- Use the Quick Selection Tool to refine the selection edges.
- Switch to the Pen Tool for precise manual adjustments.
- Right-click and choose Layer via Copy to isolate the subject.
- Add a layer mask for non-destructive refinement.
Digital Painting Workflow
- Select the Brush Tool and open the Brush Settings panel.
- Choose a brush preset that matches your desired texture.
- Create a new layer for each major element of your painting.
- Use the Eyedropper Tool (I) to sample colors directly from your reference.
- Blend colors using the Smudge Tool for smooth transitions.
Adding External Links to Your Workflow
When you need high-quality textures or brushes, sites like Brushes by Adobe offer free resources. Always verify your sources to avoid copyright issues.
Conclusion
The Photoshop toolbar puts incredible creative power at your fingertips. From basic selections to AI-powered generative tools, each instrument serves a specific purpose in your editing workflow. Take time to explore each tool group, learn the keyboard shortcuts, and customize your toolbar to match how you work. The Contextual Task Bar and spring-loaded shortcuts will speed up your daily tasks significantly. With practice, you’ll switch between tools without thinking, leaving you free to focus entirely on your creative vision.
Stop clicking – start selling. Request a free trial of our professional editing service (we know every tool so you don’t have to)
Frequently Asked Questions
Q1: Why can’t I see all my tools in the Photoshop toolbar?
Many toolbar spots hide additional tools behind them. Look for a small triangle in the bottom right corner of any tool icon. Click and hold on that icon, or right-click it, to reveal the hidden tools in that group.
Q2: How do I reset my Photoshop toolbar to its default arrangement?
Go to Edit > Toolbar in the top menu. In the customization dialog, click the Restore Default button. This returns your toolbar to Adobe’s original layout.
Q3: What’s the fastest way to switch between tools without clicking icons?
Learn keyboard shortcuts. Each tool has a single-letter shortcut: V for Move Tool, B for Brush Tool, T for Type Tool, and so on. Memorizing these shortcuts will double your editing speed.
Q4: Which Photoshop tool is best for removing large objects from a photo?
The Remove Tool works best for most large-object removals thanks to its AI-powered content-aware filling. Alternatively, the Clone Stamp Tool gives you manual control for complex removals.
Q5: How do I select hair or furry edges in Photoshop?
Start with Select Subject, then go to Select and Mask from the options bar. Use the Refine Edge Brush to paint along hair edges. The AI-powered Select Subject Cloud feature handles complex hair selections with excellent results.
Q6: My toolbar disappeared. How do I get it back?
Go to Window > Tools in the top menu. Clicking this toggles the toolbar on and off. You can also reset your workspace by going to Window > Workspace > Essentials (Default).
Q7: What’s the difference between the Healing Brush and the Clone Stamp?
The Clone Stamp Tool copies pixels exactly from one area to another. The Healing Brush Tool also copies pixels but blends them with the surrounding texture, lighting, and tone for more natural results.
Q8: How do I use Generative Fill in Photoshop?
Select an area of your image using any selection tool. Then click Generative Fill in the Contextual Task Bar or the Edit menu. Type a text description of what you want to add, and Photoshop generates multiple AI-powered options.