

Best Photo Scanner Apps 2026: Free & Paid Picks Compared
July 20, 2026
TF vs MicroSD vs SD Card: Meaning & Differences Explained
July 25, 2026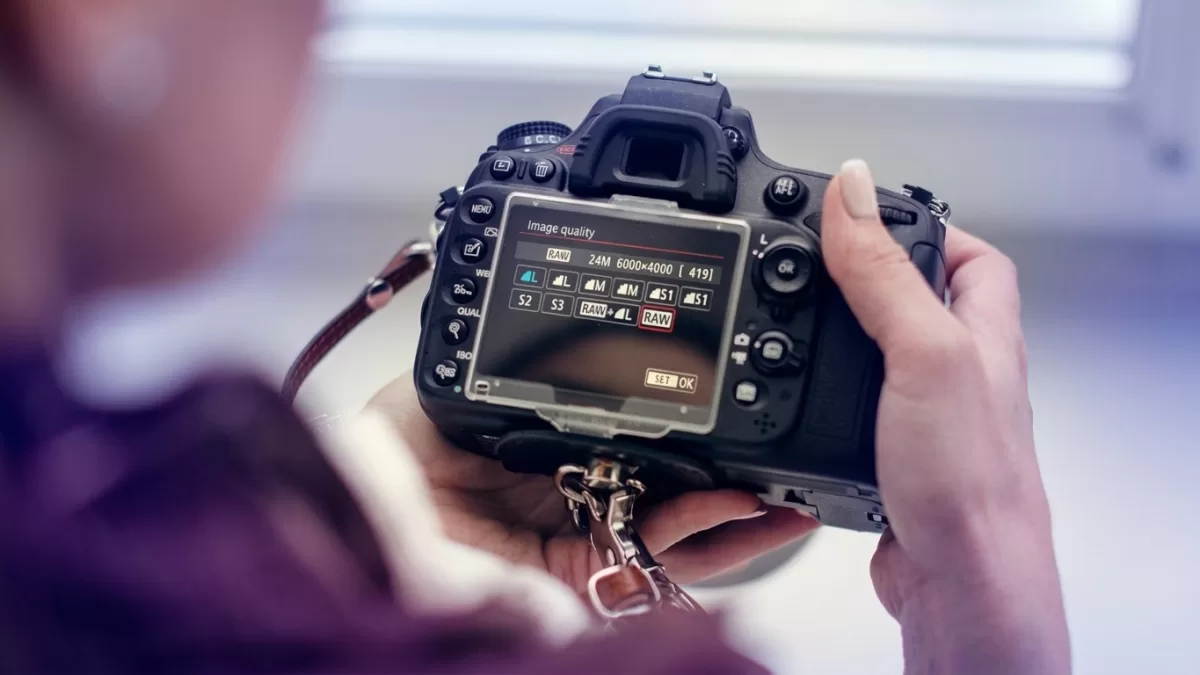
Have you ever wondered why a friend’s photos look sharper, richer, and more cinematic than yours — even when you shoot with a similar camera? The answer often comes down to one word: RAW. RAW is not a brand. It is not one single file type either. It is a philosophy of capture that preserves every drop of light your sensor collected, so you decide later what the picture should look like.
This guide breaks down what a RAW image file format actually is, how it compares to JPEG, the different flavors used by Canon, Nikon, Sony, Fujifilm, and other brands, and the exact workflow professionals use to squeeze every last pixel of quality out of a shoot.
Quick answer: A RAW file stores unprocessed image data straight from your camera’s sensor. It behaves like a digital negative and keeps maximum detail, dynamic range, and color information for later editing.
- What Is a RAW Image File Format?
- How a RAW File Actually Works (Behind the Sensor)
- RAW vs JPEG: The Real Differences
- The Main Types of RAW File Formats
- Bit Depth and Dynamic Range: Why RAW Preserves More
- Advantages of Shooting RAW
- Disadvantages of Shooting RAW
- When Should You Shoot RAW?
- How to Open and Edit RAW Files
- Converting RAW to JPEG, TIFF, or DNG
- RAW File Workflow for E-Commerce and Product Photography
- Storage, Backups, and Managing RAW Files
- RAW Photography Myths — Debunked
- Tips for Getting the Most Out of RAW
- Frequently Asked Questions (FAQ)
- Final Thoughts
What Is a RAW Image File Format?
The digital negative, explained
A RAW image file format is a container of unprocessed sensor data captured directly by a digital camera. It records the light values hitting each photosite without baking in color, sharpening, contrast, or compression. Because nothing has been “cooked” into the image, you keep full creative control during post-production.
That is why photographers call RAW the digital equivalent of a film negative. You develop it in software the same way a darkroom technician developed film in chemicals.
Key characteristics at a glance
- Unprocessed: No permanent in-camera adjustments.
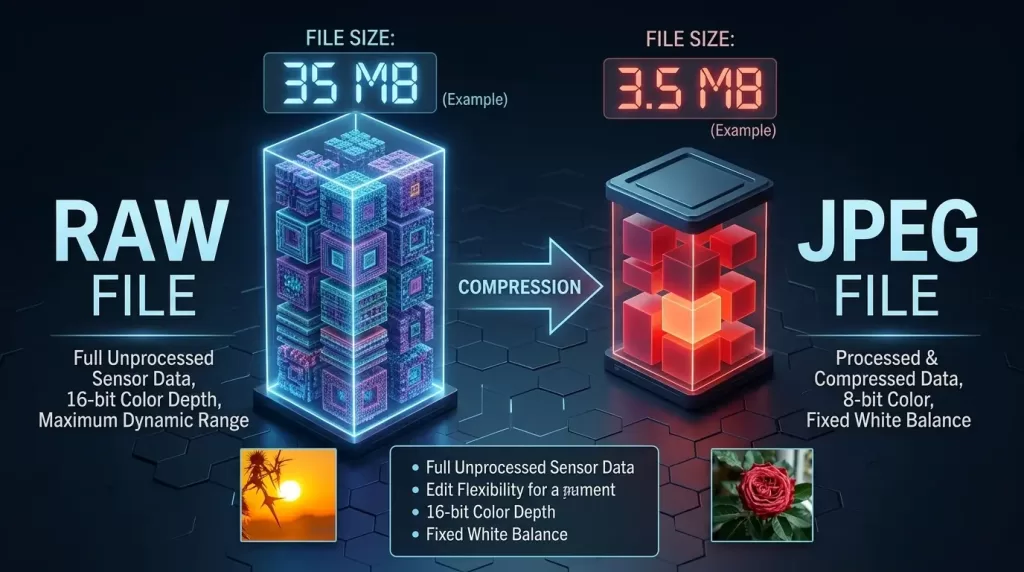
- High bit depth: Most RAW files store 12-bit or 14-bit data per channel (JPEG stores only 8-bit).
- Wider dynamic range: More shadow and highlight detail survives.
- Larger file size: Typically 2–6× the size of an equivalent JPEG.
- Requires software: RAW files need a converter before they display like a finished photo.
For a deeper look at how modern sensors capture the world, see our overview of the parts of a camera.
How a RAW File Actually Works (Behind the Sensor)
To understand RAW, you need to understand what happens the moment you press the shutter. Every digital camera records light through millions of tiny photosites arranged on a sensor. A color-filter array — usually a Bayer pattern made up of 50% green, 25% red, and 25% blue filters — determines which wavelength each photosite measures.
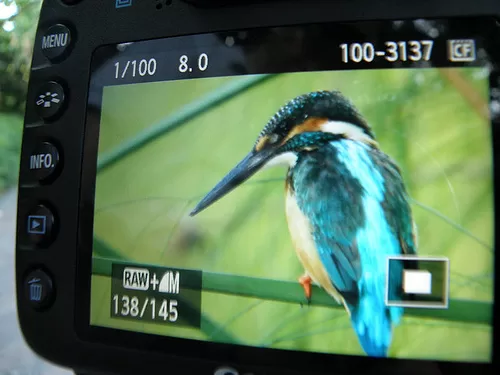
A JPEG-shooting camera immediately runs that raw signal through an internal image processor. It applies white balance, tone curves, sharpening, noise reduction, and lossy compression, then discards the original numbers permanently. A RAW-shooting camera skips that processing. It writes the untouched sensor data — plus metadata like ISO, shutter speed, aperture, and lens information — directly to your memory card.
The result is a file that looks flat and dull straight out of camera, but contains vastly more editable information than a JPEG. This muted appearance is a feature, not a flaw — it simply means nothing has been thrown away yet.
For a fuller technical treatment, Wikipedia’s Bayer filter article is a solid resource.
RAW vs JPEG: The Real Differences
The RAW vs JPEG debate is the most searched question in digital photography. Both formats have valid uses, but the technical gap between them is enormous.
Side-by-side comparison
| Feature | RAW | JPEG |
|---|---|---|
| Processing | None (unprocessed) | Fully processed in-camera |
| Bit depth | 12-bit / 14-bit | 8-bit |
| Tonal values per channel | 4,096 – 16,384 | 256 |
| Dynamic range | Up to 14 stops | 6–8 stops |
| File size | 20–50 MB typical | 3–10 MB typical |
| Editing flexibility | Very high | Very limited |
| Compression | Lossless / lightly compressed | Lossy |
| Ready to share | No — needs export | Yes — instantly |
A 12-bit RAW file holds around 68 billion possible color values, and a 14-bit RAW jumps to roughly 4.4 trillion. JPEGs top out at about 16.7 million colors — enough to look good on a screen, but limiting when the image needs heavy editing.
Where JPEG still wins
- Speed: Fires faster in burst mode and fills the buffer more slowly.
- Storage: Smaller files fit more shots per memory card.
- Instant sharing: Ready for social media, email, and the web with zero conversion.
- Simplicity: No editing software required.
Where RAW dominates
- Recovers blown highlights and crushed shadows.
- Fine-tunes white balance non-destructively.
- Preserves detail after cropping or heavy retouching.
- Delivers client-ready images with consistent color across a shoot.
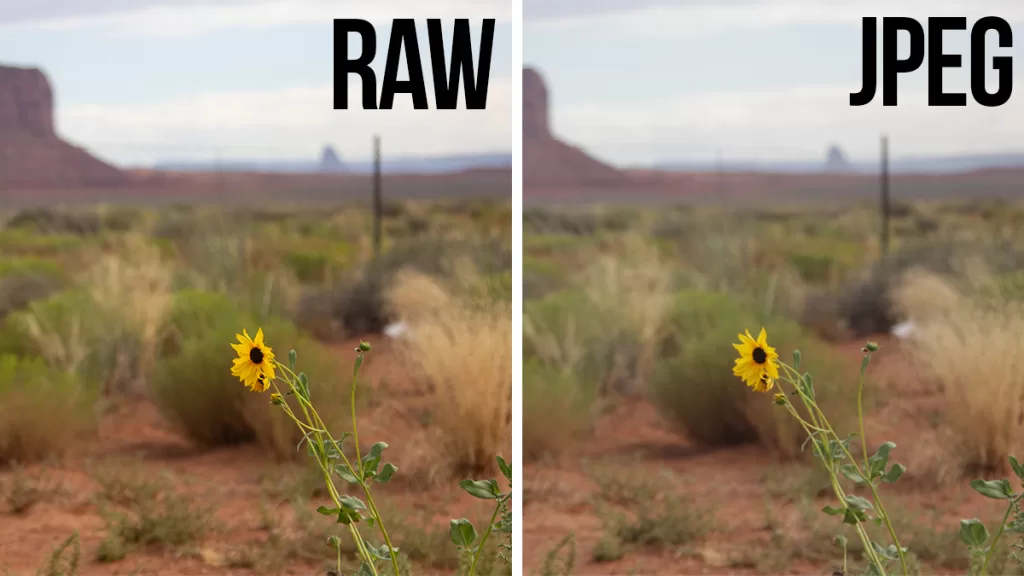
Curious about the newer formats challenging JPEG’s throne? Our comparison of HEIF vs JPEG shows where the industry is heading.
Ready to transform your raw photos into professional assets?
Get a custom, no-obligation quote tailored to your specific volume and needs. Explore Clipping Expert Asia
The Main Types of RAW File Formats
No single “RAW” format exists. Every camera brand uses its own proprietary version, each engineered around that brand’s sensor design, color science, and processing pipeline.
Common proprietary RAW extensions
- .CR2 / .CR3 — Canon (CR3 is the newer, more efficient variant)
- .NEF / .NRW — Nikon Electronic Format
- .ARW / .SRF / .SR2 — Sony (based on TIFF)
- .RAF — Fujifilm
- .ORF — Olympus / OM System
- .RW2 — Panasonic
- .PEF — Pentax
- .SRW — Samsung
- .3FR / .FFF — Hasselblad
- .IIQ — Phase One
The universal option: DNG
Adobe’s Digital Negative (DNG) is an open, publicly documented RAW format designed to work across manufacturers. Because DNG is not tied to a single company, files remain readable decades from now — even if the original camera brand disappears or drops support for older bodies. Many photographers convert proprietary RAW files to DNG for long-term archival safety.
Why so many formats exist
Each manufacturer engineers its sensor differently. Pixel layout, color-filter array variations, and analog-to-digital conversion all vary between brands. Their proprietary RAW format bundles this hardware-specific data with metadata about lens corrections, focus points, and camera settings. This lets their own software render images that match the brand’s signature color science.
The trade-off is a fragmented ecosystem — a topic covered thoughtfully in PetaPixel’s coverage of camera-industry file standards.
Bit Depth and Dynamic Range: Why RAW Preserves More
Bit depth is the technical reason RAW blows JPEG out of the water. A 12-bit sensor captures roughly 12 stops of dynamic range, and a 14-bit sensor pushes that to around 14 stops. That extra data buys you enormous flexibility during editing.
What that means for you
- More recoverable highlights in bright skies and reflective surfaces.
- Cleaner shadow lifting without introducing noise or banding.
- Smoother gradients in sunsets, blue skies, and studio backdrops.
- Greater tolerance for exposure mistakes on set.
A real-world example
Imagine a beach scene at sunset. The sky glows bright, the sand sits dark, and your subject stands somewhere in between. A JPEG usually crushes the shadows or blows out the clouds. A 14-bit RAW file holds enough tonal data to recover both — often with a single slider move in Lightroom.
For photographers who chase perfect exposure in tricky light, mastering the exposure triangle alongside RAW gives you total creative control. If you want to see the raw math behind bit depth, DPReview’s technical breakdown is worth bookmarking.
Advantages of Shooting RAW
RAW is not just for pros. It works for anyone who cares about final image quality. Here are the biggest advantages, grouped by real-world benefit.
Creative flexibility
- Adjust exposure by several stops without visible quality loss.
- Change white balance completely after the shoot.
- Fine-tune shadows, highlights, whites, and blacks independently.
- Recover detail from over- or under-exposed areas.
Color accuracy
- Access a much wider color gamut than JPEG.
- Produce smoother gradients with fewer banding artifacts.
- Maintain consistent color grading across an entire shoot — critical for weddings, product photography, and portrait sessions.
Non-destructive editing
- Every adjustment lives in a sidecar file (.xmp) or catalog entry.
- The original RAW file is never overwritten.
- You can revisit and re-edit years later with better software.
Better print output
- More tonal range means cleaner large prints.
- Reduced posterization in soft skin tones and open skies.
Want to enhance colors and contrast without losing realism?
Trust our experts to perfect your images with our Photo Retouching Service
Disadvantages of Shooting RAW
Nothing is free. RAW comes with real trade-offs, and understanding them helps you decide when to use it.
File-size reality check
- A single RAW file from a 45-megapixel camera runs around 45 MB uncompressed, or roughly 22 MB in a compressed variant.
- A full day of shooting can easily consume 100+ GB.
- Fast, high-capacity memory cards become essential — see how many images fit on different memory card sizes.
Post-processing is mandatory
- Every RAW image needs to be developed in software.
- You cannot email a .NEF or .CR3 to most clients — they will not open.
- The learning curve is real, especially for beginners.
Slower workflow
- Larger files buffer more slowly during burst shooting.
- Import, culling, and export take longer than JPEG batches.
- Backups eat more storage — cloud storage for photos becomes a serious consideration.
Compatibility hurdles
- Not every device or app opens proprietary RAW files natively.
- New camera models often outrun software support by weeks or months.
- Obscure or discontinued RAW formats can become hard to open years later.
When Should You Shoot RAW?
RAW is not always the right answer. Match the format to the situation instead of defaulting to one setting forever.
Situations where RAW is the clear winner
- Weddings and events — You cannot re-shoot the vows or the first kiss.
- Landscape photography — Skies, sunsets, and shadow detail demand maximum tonal range.
- Portrait sessions — Skin tones survive editing without turning waxy or plastic.
- Product and e-commerce photography — Consistent color across dozens of frames matters.
- Low-light and night photography — Cleaner noise reduction later in post.
- Any paid work — Clients expect the highest possible quality delivery.
Situations where JPEG is fine
- Casual snaps and family gatherings.
- Sports and press photography where fast delivery beats maximum quality.
- Long timelapse sequences that require thousands of frames.
- Extended travel when storage is genuinely limited.
Many modern cameras let you shoot RAW + JPEG simultaneously. This hybrid approach gives you a JPEG for instant sharing and a RAW as your quality safety net.
How to Open and Edit RAW Files
Because RAW files are not standard images, you need a RAW converter — software designed to interpret sensor data and render a viewable photo.
The most popular RAW editors
- Adobe Lightroom Classic — industry standard, catalog-based workflow.
- Adobe Photoshop (Camera Raw) — opens RAW files through the ACR plug-in.
- Capture One — professional favorite for tethered studio work.
- DxO PhotoLab — praised for optical corrections and noise reduction.
- ON1 Photo RAW — all-in-one editor with strong AI tools.
- RawTherapee — powerful, cross-platform, and completely free.
- darktable — another respected open-source alternative.
- Apple Photos — native RAW support on macOS and iOS.
If you’re weighing paid vs. free workflows, our roundup of the best AI photo editing software in 2026 covers modern picks in depth. Free-software fans can grab RawTherapee directly from its official site.
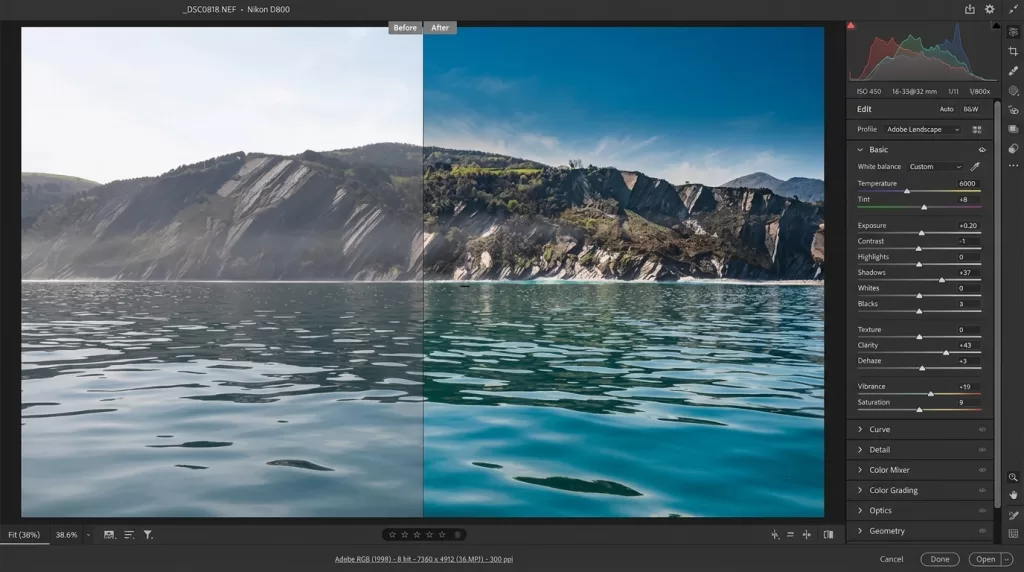
A simple RAW editing workflow
- Import RAW files into your editor of choice.
- Cull — reject blurry, closed-eye, or duplicate frames first.
- Set white balance using a neutral point or a preset.
- Adjust exposure, contrast, shadows, and highlights.
- Add clarity, texture, and vibrance carefully.
- Correct lens distortion and chromatic aberration.
- Sharpen and reduce noise at 100% zoom.
- Export to JPEG, TIFF, or PNG for delivery.
Converting RAW to JPEG, TIFF, or DNG
Once your edits are locked in, you need to export to a shareable format. Choosing the right one depends on where the image will live.
Common export destinations
- JPEG (.jpg) — best for web, social, email, and quick client previews.
- TIFF (.tif) — lossless, best for print or further heavy editing.
- PNG — good for images with transparency or graphics.
- DNG — Adobe’s universal RAW alternative for archiving.
Why convert to DNG?
- Files often shrink 15–20% versus the original proprietary RAW.
- One universal extension replaces dozens of brand-specific formats.
- Metadata and edits can live inside the DNG rather than in a sidecar file.
- Better long-term compatibility across editors and archives.
You can grab Adobe’s free DNG Converter to batch-convert files from hundreds of supported cameras.
Common export mistakes to avoid
- Choosing the wrong resolution for the delivery platform.
- Over-sharpening for the web (it looks crunchy on screens).
- Picking the wrong color space (sRGB for web, Adobe RGB for print).
- Forgetting to embed metadata like copyright and contact info.
For a wider view of file formats, our guide to JPEG, PNG, WebP, AVIF, and HEIC is worth bookmarking.
RAW File Workflow for E-Commerce and Product Photography
E-commerce sellers who ship hundreds of photos per month need RAW’s flexibility. Tiny errors in exposure or white balance become massive problems when a single product must look identical across Amazon, Shopify, and a brand’s own website.
Where RAW shines in commercial workflows
- Consistent color across batches shot in different lighting.
- Precise skin tones for fashion and beauty products.
- Recoverable highlights on reflective surfaces like glass, jewelry, and metal.
- Cleaner cut-outs — RAW’s sharper edges make background removal faster and more accurate.
RAW plus retouching equals e-commerce gold
Once your RAW files are dialed in, professional retouching turns them into marketplace-ready assets — clean backgrounds, sharp product edges, and consistent color across your entire catalog.
Do automated tools fail on your multi-part products?
Rely on 100% hand-drawn precision with our Multiple Clipping Path Service
Storage, Backups, and Managing RAW Files
RAW files eat storage. Plan for it before your card fills up mid-shoot.
Smart storage habits
- Use fast, high-capacity SD, CFexpress, or CFast cards rated for your camera.
- Follow the 3-2-1 backup rule: three copies, two different media types, one offsite.
- Keep an external SSD for active projects and a NAS or cloud archive for finished work.
- Rename files with a consistent system (date + client + sequence).
- Rate and flag images in Lightroom for faster retrieval later.
Common backup destinations
- External SSDs — fast for active editing.
- NAS drives — great for home studios and small teams.
- Cloud services like Backblaze, Google Drive, or Adobe Creative Cloud.
- Off-site hard drives — the last line of disaster recovery.
Poor backup habits are one of the fastest ways for a photographer to lose a client — an issue we cover in depth in our post on how photographers lose clients from inconsistent editing.
RAW Photography Myths — Debunked
Even seasoned photographers still repeat outdated ideas about RAW. Let’s clear the air.
Myth 1: “RAW files always look better than JPEG.”
Straight out of camera, they usually look worse — flat, dull, low-contrast. Their power only appears after editing.
Myth 2: “RAW is only for professionals.”
Any hobbyist who edits photos benefits from RAW’s flexibility. Modern cameras and free software have democratized the format.
Myth 3: “You cannot shoot RAW on a phone.”
You absolutely can. Flagship iPhones and most premium Android phones support ProRAW or DNG capture natively.
Myth 4: “RAW files are too big to be practical.”
Storage has never been cheaper. A 1 TB SSD now costs less than a mid-range prime lens.
Myth 5: “You need Photoshop to open RAW files.”
Free tools like RawTherapee, darktable, and Apple Photos handle RAW beautifully — no subscription required.
Tips for Getting the Most Out of RAW
- Expose to the right (ETTR) — brighten slightly without clipping highlights to maximize shadow data.
- Enable lens profile corrections during import.
- Batch-sync white balance across a series shot in the same light.
- Watch the histogram, not the LCD, to judge exposure.
- Start with presets, then refine manually for a signature style.
- Calibrate your monitor — otherwise your edits will look different on every screen.
Ready to elevate your brand’s visual presence?
Partner with Clipping Expert Asia for fast, secure, and premium image editing starting at just 25¢. Explore all our services
Frequently Asked Questions (FAQ)
1. What is a RAW image file format in simple terms?
A RAW file is an unprocessed image straight from your camera’s sensor. It stores all the light data captured during exposure, without in-camera edits, so you can adjust exposure, color, and detail during post-processing with maximum flexibility.
2. Can you open a RAW file without editing software?
Not fully. Windows Photos and macOS Preview show basic previews, but real editing requires software like Lightroom, Capture One, RawTherapee, or Photoshop’s Camera Raw plug-in.
3. Is DNG better than proprietary RAW formats?
DNG is more universal and future-proof, and files can shrink up to 20% versus the original. However, some manufacturers embed extra proprietary data — like advanced focus-point mapping — that gets stripped away during conversion.
4. Should beginners shoot RAW?
Yes — if you are willing to edit. Beginners who learn RAW early build stronger editing habits and gain the ability to fix exposure or white-balance mistakes that would otherwise ruin a JPEG.
5. Does RAW capture affect autofocus or shutter speed?
Not directly. However, larger RAW files can slow down buffer clearing during continuous burst shooting, which matters most for sports and wildlife photographers.
6. Do smartphones capture RAW?
Yes. Apple’s ProRAW on iPhone Pro models and DNG capture on most flagship Android phones let you shoot RAW with mobile devices and edit in Lightroom Mobile or Snapseed.
7. How long can I safely store RAW files?
Indefinitely, as long as you maintain multiple backups. Migrate old proprietary RAWs to DNG for archives, verify file integrity yearly, and refresh storage media every 3–5 years.
8. Are RAW files copyrighted?
Yes. The moment you press the shutter, the RAW file belongs to you. Learn how to protect that ownership in our guide on checking if an image is copyrighted.
Final Thoughts
RAW is the closest photography gets to a time machine. It captures more of what your sensor actually saw and hands the creative decisions back to you. Yes, RAW files are bigger, slower, and demand editing time — but for anyone serious about image quality, the trade is well worth it.
If your goal is to publish stunning, sellable, and consistent images, learning RAW is not optional. It is the foundation of modern digital photography. Once you shoot RAW for a full week, going back to straight JPEGs will feel like painting with only half a palette.