


How to Recover Deleted Photos & Videos from a GoPro SD Card After a Trip
October 8, 2026
How to Restore Old Photos: Step-by-Step Guide to Clear, Repaired Pictures 2026
October 10, 2026
- TL;DR: The Short Answer
- Why Blur a Photo, and Which Blur Should You Use?
- Method 1: The Blur Tool (Paint Blur Directly)
- Method 2: Gaussian Blur (The Workhorse)
- Method 3: Lens Blur (Realistic Bokeh and Depth of Field)
- Method 4: Motion Blur and Radial Blur (Creative Effects)
- Method 5: Blur Gallery (Field, Iris, Tilt-Shift, Path, Spin)
- How to Blur the Background of a Photo (The Most Common Request)
- How to Blur the Edges of a Picture in Photoshop
- How to Blur Faces, License Plates, and Sensitive Information
- Free and Online Blur Tools (No Photoshop Needed)
- 6 Pro Tips and Common Mistakes to Avoid
- Frequently Asked Questions
- Final Verdict
TL;DR: The Short Answer
To blur a picture in Photoshop, duplicate your layer (Ctrl/Cmd+J), go to Filter > Blur > Gaussian Blur, and adjust the Radius slider — that blurs everything. To blur only the background, use Select > Subject, invert the selection (Ctrl/Cmd+Shift+I), expand it by 3–5 pixels to avoid halos, then apply Gaussian or Lens Blur to the background layer behind a mask. To blur the edges of a picture, draw an Elliptical or Rectangular Marquee around what you want sharp, go to Select > Modify > Feather (20–50px), invert, and blur the outer area. For creative directional blur, use Motion Blur or the Blur Gallery (Field Blur, Iris Blur, Tilt-Shift). Always work on a duplicate layer or Smart Object so the blur is reversible. On your phone, Portrait mode and free tools like Canva, Fotor, and Snapseed blur backgrounds in one tap. This guide covers every method, when to use each, and the common mistakes that make blurs look fake.
Why Blur a Photo, and Which Blur Should You Use?
Blurring is one of the most useful edits in photography and design. You blur to: make a subject pop against a busy background (simulating shallow depth of field), soften distracting edges into a clean vignette, hide faces or sensitive information for privacy, add motion or speed to a static shot, or create dreamy, atmospheric backgrounds for text. The right blur depends entirely on what you are trying to achieve.
| Blur method | What it does | Best for |
|---|---|---|
| Blur Tool | Brush-based, paints blur directly onto pixels | Local touch-ups, small areas |
| Gaussian Blur | Smooth, even blur controlled by Radius | General background blur, softening |
| Lens Blur | Simulates real camera bokeh and depth | Realistic portraits, product shots |
| Motion Blur | Directional linear blur | Speed, movement, action |
| Radial Blur | Spin or zoom blur from a center point | Zoom burst, spinning effects |
| Blur Gallery | Field, Iris, Tilt-Shift, Path, Spin | Creative, multi-point, gradient blurs |
Method 1: The Blur Tool (Paint Blur Directly)
The Blur Tool is a brush — you paint blur onto exactly the pixels you want softened. It lives in the toolbar, grouped with the Sharpen and Smudge tools (shortcut R cycles through them). In the options bar, set Strength (start at 50%) and choose Sample All Layers if you want to work non-destructively on a blank layer.
How to use it: Zoom in, pick a soft-edged brush, set Strength 30–60%, and paint over the area you want to blur. Go over it a few times to build up the effect. This is best for small, targeted areas — softening a wrinkle, a distracting background detail, or a harsh shadow edge. It is not ideal for whole backgrounds because painting large areas by hand is slow and uneven.
Method 2: Gaussian Blur (The Workhorse)
Gaussian Blur is the most-used blur in Photoshop. It applies a smooth, even blur across a layer or selection, controlled by a single Radius slider. Adobe’s official guide to blurring an image covers the same basic flow.
How to blur an entire image:
- Duplicate your background layer (Ctrl/Cmd+J) — never blur the original.
- Go to Filter > Blur > Gaussian Blur.
- Drag the Radius slider. 1–5px is subtle softening; 10–30px simulates a shallow depth of field; 50px+ turns the image into abstract color.
- Click OK. Lower the layer opacity if you want a mix of sharp and soft.
Pro tip: Convert the layer to a Smart Object first (right-click > Convert to Smart Object) before applying Gaussian Blur. The blur becomes a Smart Filter — you can double-click it anytime to change the Radius, mask it, or delete it entirely.
Method 3: Lens Blur (Realistic Bokeh and Depth of Field)
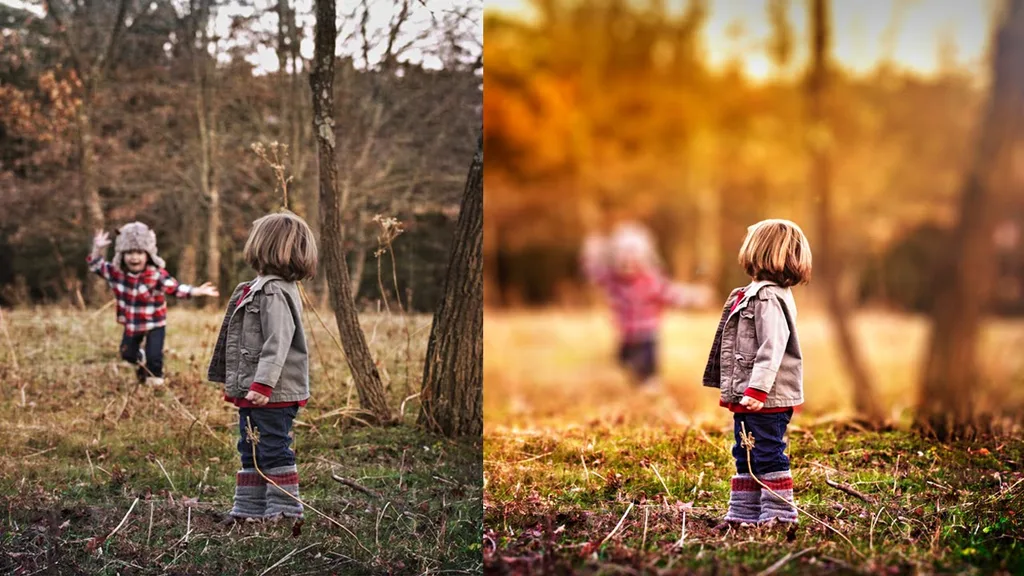
Lens Blur simulates how a real camera lens blurs out-of-focus areas. It renders circular bokeh highlights, controls aperture shape, and can even use a depth map to blur things at different distances. For portraits and product photos where you want the background to look like it was shot at f/1.4, Lens Blur beats Gaussian every time.
How to use it: Select your background layer (or Smart Object), go to Filter > Blur Gallery > Lens Blur (in newer Photoshop versions) or Filter > Blur > Lens Blur in older versions. Adjust the Light Bokeh and Bokeh Color sliders to make highlights glow naturally, and set the Source to a depth map or layer mask if you want graded blur (foreground less blurry than far background). For ecommerce shots where a clean, soft background sells the product, our ecommerce product photo editing guide pairs this with clipping paths for perfect edge isolation.
Method 4: Motion Blur and Radial Blur (Creative Effects)
Motion Blur adds a directional streak — perfect for making a static car, runner, or waterfall look like it is moving. Go to Filter > Blur > Motion Blur, set the Angle to match the direction of movement, and adjust Distance (5–30px for subtle, 50+ for dramatic). Use a layer mask so only the moving object (or its background) gets the streak — keep the subject’s face sharp.
Radial Blur has two modes: Spin (circular rotation, like a spinning wheel) and Zoom (radial burst from a center point, like a zoom lens rushing in). Go to Filter > Blur > Radial Blur, pick your mode, set the center point, and adjust Amount. Use Zoom mode for dramatic sports or concert shots.
Method 5: Blur Gallery (Field, Iris, Tilt-Shift, Path, Spin)
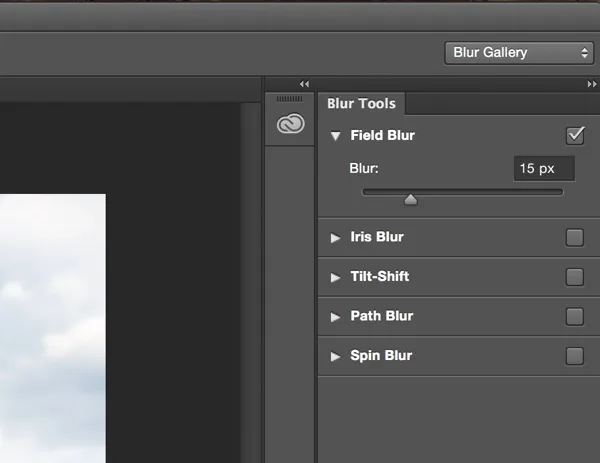
The Blur Gallery (Filter > Blur Gallery) gives you interactive, on-image controls for five creative blurs. Adobe’s official Blur Gallery reference covers all five.
- Field Blur — place multiple “pins” on the image, each with its own blur amount. Photoshop smoothly blends between them. Great for graded depth.
- Iris Blur — an elliptical area of sharpness that fades to blur around it, like a lens’s focal plane. Drag the ring to control the transition zone. Perfect for quick portrait background blur without selections.
- Tilt-Shift — a horizontal band of sharpness with blur above and below, simulating a tilt-shift lens. Used to make real scenes look like miniature models.
- Path Blur — blur follows a path you draw, for realistic motion along curves.
- Spin Blur — circular rotation blur around a point, for wheels or propellers.
Each one includes Bokeh controls (Light Bokeh, Bokeh Color, Light Range) so out-of-focus highlights look like real camera bokeh, not digital mush.
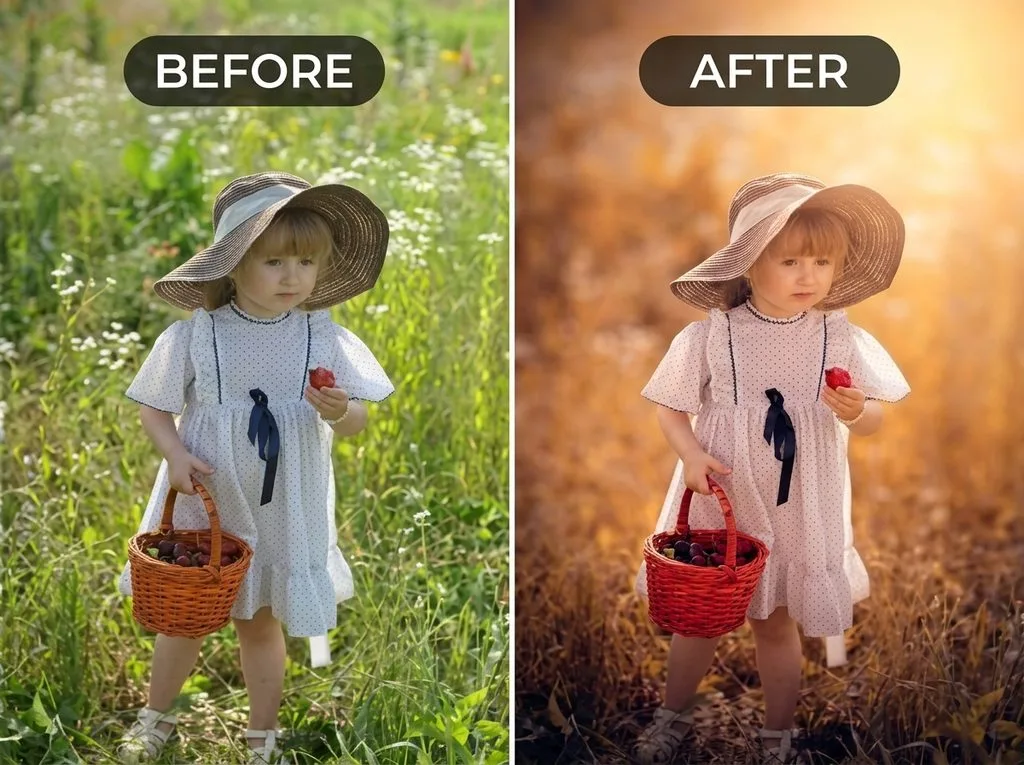
How to Blur the Background of a Photo (The Most Common Request)
This is the #1 reason people blur photos — turning a busy snapshot into a professional portrait with a soft background. Adobe’s official blur background guide recommends the same selection-first approach.
- Duplicate the layer (Ctrl/Cmd+J). Work on the copy.
- Select the subject. Go to Select > Subject. Photoshop’s AI detects the person or object in seconds. For fine hair or complex edges, refine with Select and Mask (Radius ~1–2px, Shift Edge -10 to -20% to prevent fringing).
- Expand the selection by 3–5 pixels. Go to Select > Modify > Expand and enter 3–5. This tiny expansion prevents a thin, sharp halo of original background around the subject’s edges — the #1 giveaway of fake background blur.
- Invert the selection (Ctrl/Cmd+Shift+I) so the background is selected, not the subject.
- Copy the background to its own layer (Ctrl/Cmd+J) — you now have the subject on one layer and the background on another.
- Blur the background layer. Select it, go to Filter > Blur > Gaussian Blur (Radius 10–30px) or Lens Blur for realism.
- Check the edges at 100% zoom. If you see a sharp halo, use a soft black brush on the background layer mask to clean it. If the blur looks too uniform, vary it — objects closer to the subject should be less blurry than objects far away.
For a faster, lower-precision version, skip the layer split: apply Gaussian Blur to the whole duplicate layer, then add a black layer mask and paint white over the background with a soft brush. Either way, a solid photo editing guide will put masking at the center of your workflow. If you also want to replace the background entirely, our best background remover tools comparison covers the fastest ways to isolate a subject.
How to Blur the Edges of a Picture in Photoshop
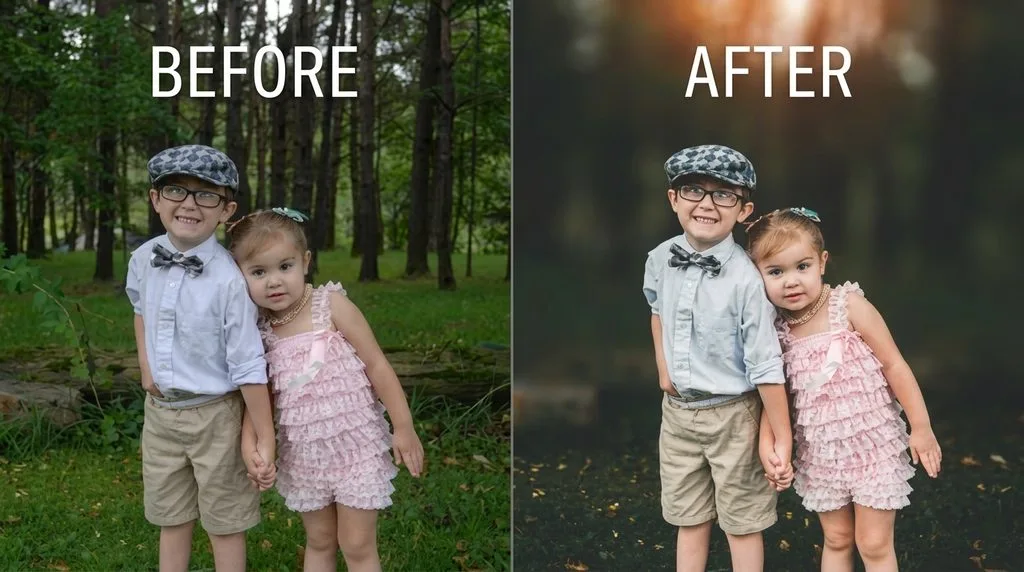
Blurring edges creates a soft, vignette-like frame that draws the eye to the center. It is popular for portraits, wedding photos, and social media posts. Adobe’s guide on smoothing edges covers the feathering step in detail.
- Duplicate the layer (Ctrl/Cmd+J).
- Pick a selection tool. Use the Elliptical Marquee for a classic round vignette, or Rectangular Marquee for a straight-edge fade. Draw a shape around the area you want to keep sharp.
- Feather the selection. Go to Select > Modify > Feather (or Shift+F6) and enter 20–50 pixels (more for high-res files). This feather is what creates the soft, gradual blur — a hard edge would look like a frame, not a fade.
- Invert the selection (Ctrl/Cmd+Shift+I) so the edges are selected.
- Apply Gaussian Blur (Filter > Blur > Gaussian Blur, Radius 5–20px) or simply delete the selected edge area to reveal a solid color or texture underneath.
- Lower the layer opacity if you want a subtler effect.
For a non-destructive version, skip the blur and use a layer mask: add a black mask, draw a white feathered ellipse in the center, and apply the blur to the layer itself — the mask reveals only the blurred edges.
How to Blur Faces, License Plates, and Sensitive Information
For privacy — blurring a stranger’s face, a license plate, a screen, or a document — you want a localized blur, not a gradient.
- Use the Lasso Tool to draw a rough selection around the face or object. Feather it by 2–5px (Select > Modify > Feather) so the blur edge blends.
- Duplicate that area to a new layer (Ctrl/Cmd+J).
- Apply Gaussian Blur (Radius 10–30px) to that layer, or use Filter > Pixelate > Mosaic for a censor-block look.
- If the object moves in a video or series of frames, track it with a mask. For still photos, one blur is enough.
Always double-check that you blurred the right thing — an unblurred license plate in a “privacy” edit is a common and embarrassing miss.
Free and Online Blur Tools (No Photoshop Needed)
You do not need a subscription to blur a photo. These tools cover the basics:
| Tool | Platform | Cost | Best for |
|---|---|---|---|
| Canva | Web, iOS, Android | Free tier | Quick background blur while designing |
| Fotor | Web | Free tier | One-click background blur, no install |
| Pixlr | Web | Free tier | Selective blur, Photoshop-like |
| Snapseed | iOS, Android | Free | On-device selective blur (Lens Blur tool) |
| iPhone Portrait mode | iOS | Free | In-camera background blur |
| GIMP | Desktop | Free | Full desktop editor, Gaussian/Lens blur |
Snapseed’s Lens Blur tool is surprisingly powerful — place a focus point, adjust the blur strength, and it mimics a real lens. For desktop, GIMP’s Filters > Blur menu includes Gaussian, Lens, and Motion blur at zero cost. If you are deciding whether to pay for an editor, our best photo editing software 2026 roundup compares the full field.
6 Pro Tips and Common Mistakes to Avoid
- Always duplicate or use Smart Objects. Blurring the original pixel layer is destructive. Work on a copy or Smart Filter so you can change your mind.
- Expand selections by 3–5px before blurring backgrounds. This kills the sharp halo around hair and shoulders that screams “fake blur.”
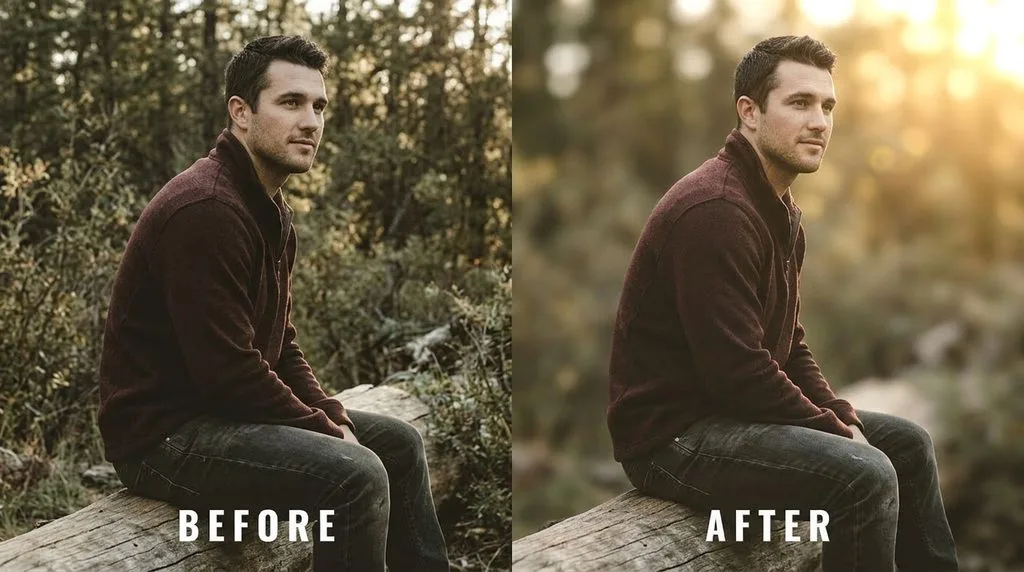
- Vary the blur with depth. A background 1 meter behind the subject should be less blurry than one 10 meters behind. Uniform blur looks artificial.
- Match the blur to the light. Out-of-focus highlights should glow (bokeh). Use Lens Blur or Blur Gallery’s Bokeh controls, not flat Gaussian, for highlights.
- Feather everything. A hard-edged blur transition looks like a sticker. Feather masks and selections by 10–50px.
- Check at 100% zoom. A blur that looks fine on a thumbnail may reveal halos, banding, or missed edges at full size.
If you are blurring as part of a portrait retouch, pair it with our portrait retouching techniques so skin, eyes, and background all sit in the same realistic depth.
Frequently Asked Questions
How do I blur a picture in Photoshop?
Duplicate your layer (Ctrl/Cmd+J), go to Filter > Blur > Gaussian Blur, and adjust the Radius slider. For a reversible edit, convert the layer to a Smart Object first so the blur becomes an editable Smart Filter.
How do I blur the background of a photo?
Use Select > Subject to select the subject, expand the selection by 3–5 pixels, invert it (Ctrl/Cmd+Shift+I), copy the background to its own layer, and apply Gaussian or Lens Blur. Use a layer mask to clean up edges.
How do I blur the edges of a picture in Photoshop?
Draw an Elliptical or Rectangular Marquee around the area you want sharp, go to Select > Modify > Feather and enter 20–50 pixels, invert the selection, then apply Gaussian Blur to the edges. Lower opacity for a subtler effect.
What is the difference between Gaussian Blur and Lens Blur?
Gaussian Blur applies a smooth, even blur with one Radius control. Lens Blur simulates a real camera lens — it renders circular bokeh highlights, controls aperture shape, and can use a depth map for graded blur. Use Lens Blur for realistic portraits and Gaussian for general softening.
How do I blur a face or sensitive information?
Draw a rough selection with the Lasso Tool, feather it by 2–5px, copy to a new layer, and apply Gaussian Blur (10–30px) or Filter > Pixelate > Mosaic for a censor-block effect.
Can I blur a photo for free?
Yes. Canva, Fotor, and Pixlr offer free online background blur. Snapseed (free, iOS/Android) has a powerful Lens Blur tool. GIMP is a free desktop editor with Gaussian, Lens, and Motion blur. iPhone Portrait mode blurs backgrounds in-camera.
What is the Blur Gallery in Photoshop?
The Blur Gallery (Filter > Blur Gallery) includes Field Blur, Iris Blur, Tilt-Shift, Path Blur, and Spin Blur — each with on-image controls and Bokeh settings for creative, realistic blurs without manual selections.
Why does my background blur look fake?
Usually because the blur is uniform (no depth variation), there is a sharp halo around the subject (expand the selection 3–5px), or out-of-focus highlights are flat instead of glowing (use Lens Blur or Bokeh controls). Feather your masks and vary the blur with distance.
Final Verdict
Blurring is one of the fastest ways to make a photo look professional — but only when you match the blur to the job. Use Gaussian Blur for general softening, Lens Blur for realistic portrait backgrounds, Motion/Radial for creative effects, and the Blur Gallery for graded, bokeh-rich looks. Always duplicate your layer or use a Smart Object, expand selections by 3–5px to kill halos, feather every edge, and vary the blur with real-world depth. Do that, and your blurred backgrounds will look like they came from a fast prime lens, not a filter menu.