

The Complete Portrait Retouching Guide 2026: 13 Techniques Every Photographer Needs
August 29, 2026
How to Remove a Person From a Photo in Photoshop: 5 Easy Methods
September 1, 2026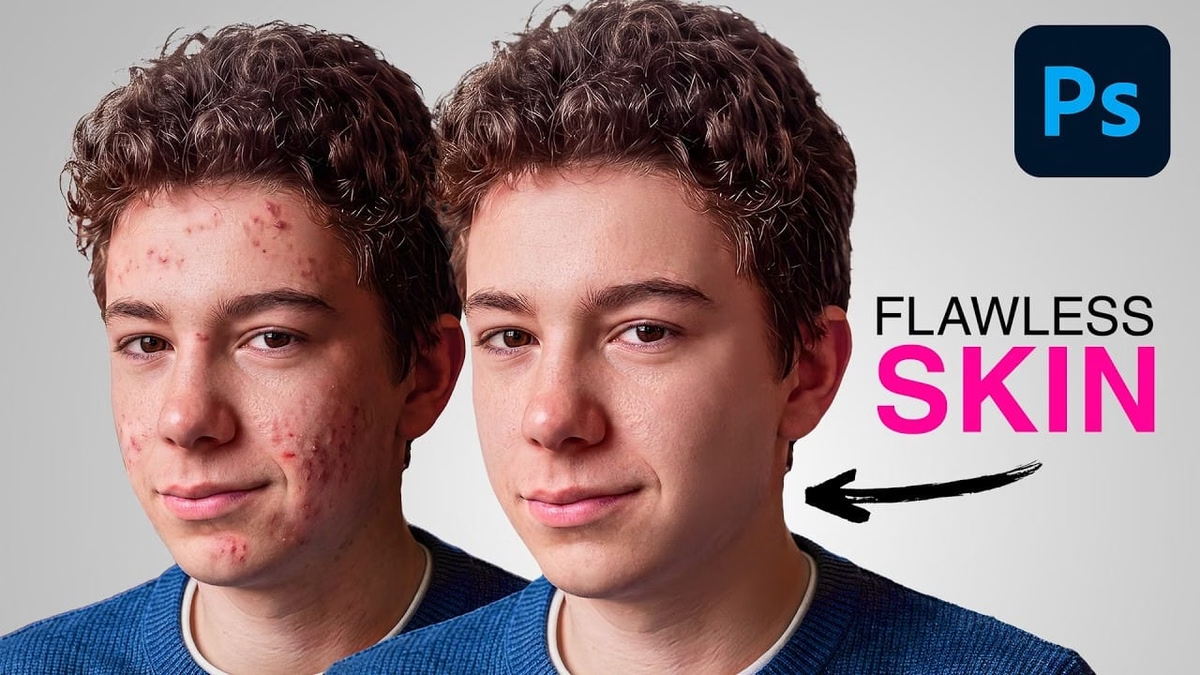
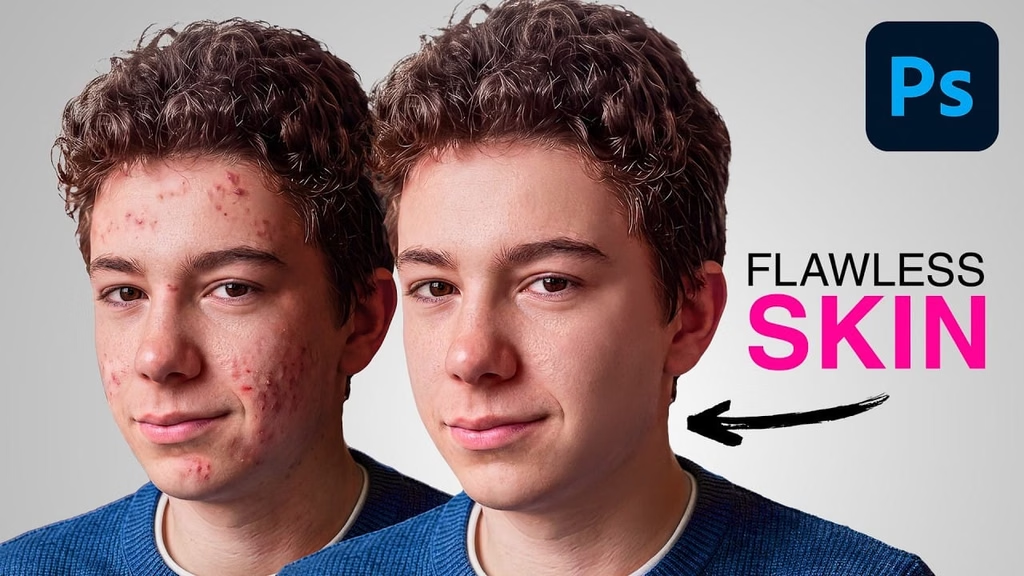
Perfect skin doesn’t exist in real life — but in photos, viewers still expect clean, believable results. Whether you shoot portraits, weddings, headshots, beauty, or e-commerce lifestyle images, knowing how to remove blemishes in Photoshop is one of the highest-ROI skills a photographer or retoucher can own. This guide walks you through every method that actually works in 2026, from the classic Spot Healing Brush to Camera Raw’s new AI Blemish Removal, frequency separation, and dodge & burn — without the plastic, over-airbrushed look that instantly screams “over-edited.”
- Quick Answer: The Fastest Way to Remove Blemishes in Photoshop
- Why Blemish Removal Matters More Than You Think
- Before You Start: Set Up a Non-Destructive Workspace
- Method 1: The Spot Healing Brush Tool (Best for Beginners)
- Method 2: The Healing Brush Tool (More Control)
- Method 3: The Patch Tool (Best for Larger Areas)
- Method 4: The Remove Tool (2024–2026 Modern Workhorse)
- Method 5: Camera Raw’s AI Blemish Removal (New in 2026)
- Method 6: The Clone Stamp Tool (For Fine Control)
- The Pro Move: Frequency Separation for Flawless Skin
- Dodge & Burn: The Final Touch for Natural Skin
- Bonus: High Pass Filter for Subtle Skin Smoothing
- Neural Filters: When AI Skin Smoothing Actually Works
- Common Mistakes That Ruin Skin Retouching
- Which Tool Should You Use? Quick Decision Table
- A Complete Real-World Workflow (10-Step Portrait)
- Preserving Skin Character: The Rule of Realism
- Speed Tips: Retouch Faster Without Losing Quality
- Related Skills Worth Learning
- Frequently Asked Questions
- Final Thoughts
Quick Answer: The Fastest Way to Remove Blemishes in Photoshop
If you only have 30 seconds, here’s the short version:
- For one or two pimples: Grab the Spot Healing Brush (J), set the brush slightly larger than the blemish, and click once. Done.
- For groups of acne, redness, or texture issues: Use the Remove Tool (J) or Camera Raw’s new AI Blemish Removal slider.
- For high-end, magazine-quality skin: Combine Frequency Separation + Dodge & Burn on separate non-destructive layers.
- Golden rule: Never destroy skin texture. Real skin has pores. Airbrushed mannequin skin is the #1 giveaway of an amateur edit.
Now let’s break it down properly.
Why Blemish Removal Matters More Than You Think
A distracting pimple on the forehead pulls the viewer’s eye away from the subject’s expression, the light, and the story. In commercial work, it’s worse — clients reject images because of a single spot near the jawline. According to Adobe, the Spot Healing Brush “quickly removes blemishes and imperfections from photos” by “blending the surrounding pixels to fill in the selected area”, and that one small feature has quietly saved millions of portraits since 2005.
Good skin retouching also affects conversion rates. E-commerce studies consistently show clean, professional imagery increases trust and click-through. If you’re editing product-adjacent people shots (fashion, beauty, jewelry try-ons), the same rules apply — and you can dig deeper into workflow choices in this guide on portrait retouching techniques.
Want your images to look professionally edited, not over-processed?
Achieve natural, high-end perfection with our skilled Photo Retouching Service
Before You Start: Set Up a Non-Destructive Workspace
Skip this step and you’ll regret it two hours in. Retouching is layered work. If you paint directly on the background, you can’t reverse a mistake without losing everything after it.
Do this every single time you open a portrait:
- Duplicate the background layer — press
Ctrl+J(Windows) orCmd+J(Mac). - Rename it “Blemish Removal” so future-you doesn’t get lost.
- Convert to Smart Object when using filters (right-click → Convert to Smart Object).
- Create a new empty layer above for the Spot Healing Brush — set the tool’s “Sample” dropdown to “Current & Below”.
- Add a mask to every retouching layer for painting effects in/out later.
Method 1: The Spot Healing Brush Tool (Best for Beginners)
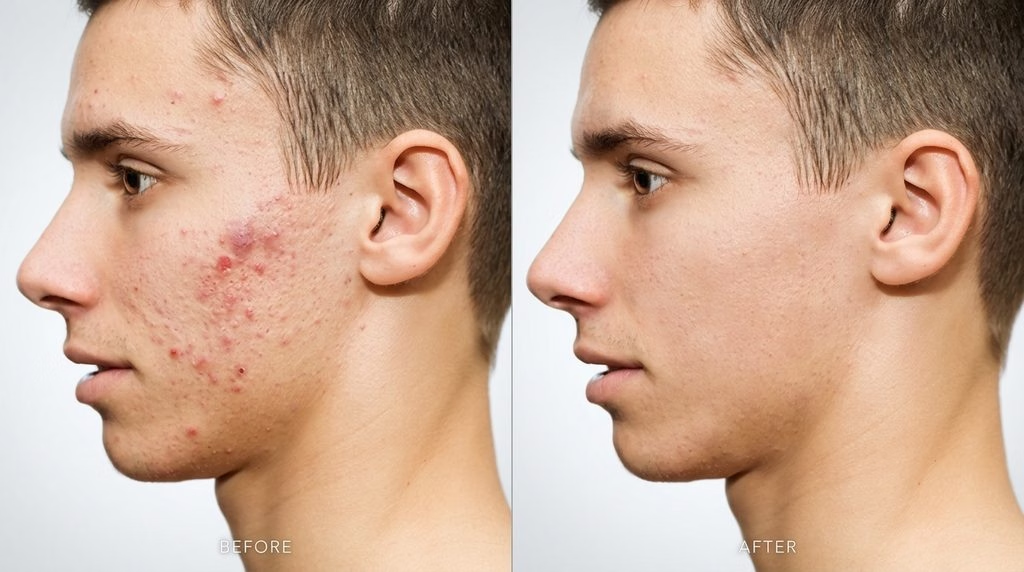
The Spot Healing Brush is the fastest, easiest tool for how to remove blemishes in Photoshop. It automatically samples surrounding pixels and blends them into the spot you click.
Step-by-Step
- Open your image and duplicate the background layer (
Ctrl+J/Cmd+J). - Press J to activate the Spot Healing Brush (cycle with
Shift+Jif needed). - In the top options bar, choose “Content-Aware” as the Type.
- Check “Sample All Layers” so you can paint on an empty layer above.
- Size the brush slightly larger than the blemish — use
[and]keys to adjust. - Click once on each blemish. Don’t scrub — a single click works best.
- Zoom in to 100% and clean up methodically, moving across the face in one direction.
When It Shines
- Small isolated pimples
- Freckles you want minimized (not removed)
- Small scabs, scars, and stray marks
- Dust and sensor spots on clean areas
Where It Fails
The Spot Healing Brush struggles near edges — the eyebrow, hairline, lips, or nostril. It’ll smear textures together when it can’t guess correctly. PetaPixel notes it’s “unreliable with edges, often deforming them” (PetaPixel). Switch tools when you hit those areas.
Method 2: The Healing Brush Tool (More Control)
The Healing Brush is the manual sibling of the Spot Healing Brush. Instead of guessing the source, you pick it. This matters when texture and skin tone shift across the face — think forehead vs. cheek, or under-eye vs. jawline.
How to Use It
- Select the Healing Brush (
J, thenShift+Jto cycle). - Hold Alt (Windows) or Option (Mac) and click a clean patch of skin near the blemish to sample.
- Release the key, then click the blemish. Photoshop blends the sampled texture with the target’s color and luminosity.
Pro Tips
- Re-sample often — every 3–5 clicks — to avoid a repeating pattern.
- Sample from the same lighting direction (don’t grab bright cheek pixels to fix a shadowed jaw).
- Keep the brush hardness at around 50% for smoother edges.
- Match pore direction: sample horizontally for a horizontal blemish area.
The Healing Brush is my go-to whenever the Spot Healing Brush produces a smudge instead of a fix.
Method 3: The Patch Tool (Best for Larger Areas)
Groups of acne, dark circles, or a red patch across the cheek call for the Patch Tool. Instead of clicking, you draw a selection around the problem and drag it to clean skin.
Workflow
- Press
Jand cycle to the Patch Tool. - In the options bar, set the mode to Normal or Content-Aware (Content-Aware often blends better on skin).
- Draw a loose selection around the blemished area.
- Click inside the selection and drag it to a clean region.
- Release. Photoshop blends texture from the destination into the source location.
- Press
Ctrl+D/Cmd+Dto deselect and repeat.
The Patch Tool is especially strong for acne clusters, birthmarks you want temporarily hidden, or shadowed under-eye bags. It’s also perfect when the Spot Healing Brush leaves a smudge because it lets you visually confirm the source area first.
Method 4: The Remove Tool (2024–2026 Modern Workhorse)
Adobe introduced the Remove Tool to Photoshop and it has quietly become one of the best options for skin work. It’s smarter than Spot Healing at protecting edges, and in 2024 Adobe added the ability to remove people or objects by simply dragging an outline around them.
Why It’s Different
- Uses an advanced content-aware algorithm (with an optional Generative AI mode).
- Preserves the integrity of edges far better than the Spot Healing Brush.
- Doesn’t need a source point — just paint over the blemish.
- Fills the area with convincing new detail rather than blending averages.
Best Use Cases for Skin
- Blemishes near the hairline, eyebrows, or lips
- Wrinkles that curve along facial contours
- Small tattoos or scars you’re temporarily removing for a client
- Distracting stray hairs across the face
Method 5: Camera Raw’s AI Blemish Removal (New in 2026)
The August 2026 Camera Raw update introduced AI-powered blemish removal that automatically detects and cleans skin imperfections while distinguishing between temporary blemishes (pimples, redness) and permanent features (moles, birthmarks). Adobe’s tool “treats blemishes and moles separately so editors stay in control” (Photoshop Roadmap via SPSPhoto).
How to Use It
- Open your image in Camera Raw (
Filter → Camera Raw Filter, or right-click a RAW file → Open with Camera Raw). - In the right panel, expand the Blemish Removal section (new AI feature).
- Adjust the Amount slider to control how aggressively Photoshop removes spots.
- Use the Fade slider to reduce intensity — perfect for keeping freckles at 40–60%.
- Toggle “Preserve Moles” so permanent features stay untouched.
- Refine manually with the classic Spot Removal brush for anything AI missed.
This one feature has cut typical portrait cleanup time from 10 minutes to under 60 seconds for most everyday work. But there’s a catch: AI is a starting point, not a finishing tool. Always audit the result at 100% zoom — sometimes AI over-smooths skin texture or misinterprets shadows as blemishes.
Method 6: The Clone Stamp Tool (For Fine Control)
The Clone Stamp isn’t a “healing” tool — it copies pixels exactly, without any color or luminosity blending. That makes it perfect for rebuilding texture near edges where healing tools mush everything together.
Use Clone Stamp when:
- Fixing a blemish that sits right on the hairline or eyebrow edge.
- Restoring pore detail after over-aggressive smoothing.
- Copying eyelash detail from one eye to another.
- Removing a stray piercing or earring.
Set opacity to around 20–40% and build up the effect gradually. Match brush hardness to the sharpness of surrounding pixels.
The Pro Move: Frequency Separation for Flawless Skin
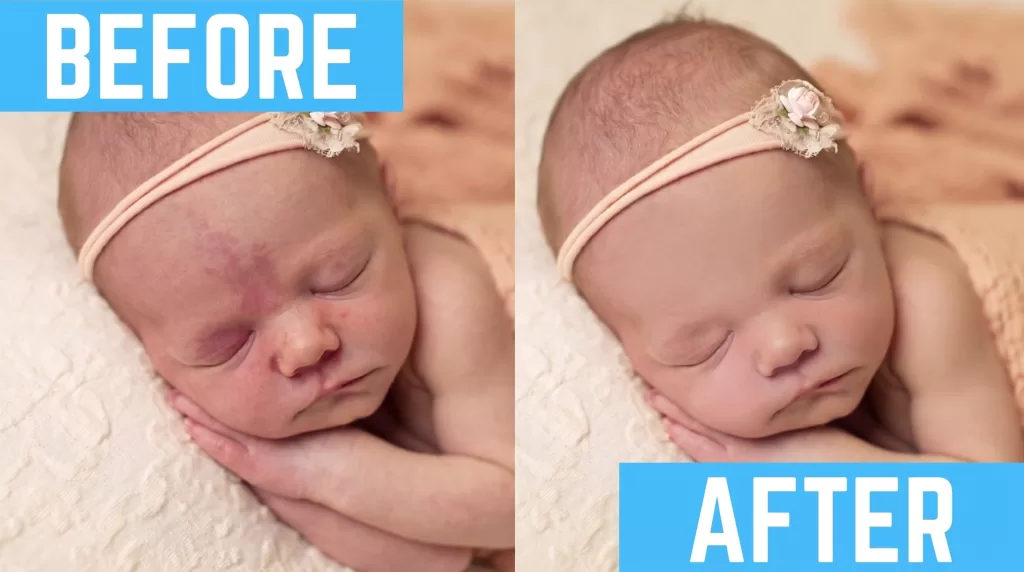
Frequency Separation is the technique magazine retouchers use to smooth skin while keeping pore texture intact. It separates the image into two layers: color/tone (low frequency) and texture (high frequency). You retouch each independently, so smoothing color patches never destroys skin detail.
Quick Setup
- Duplicate the background twice. Rename the bottom copy “Low Frequency” (color) and the top “High Frequency” (texture).
- On the Low Frequency layer, go to Filter → Blur → Gaussian Blur. Set the radius until pores disappear but the face is still recognizable (typically 4–8 px).
- Select the High Frequency layer. Go to Image → Apply Image. Choose the Low Frequency layer as source, set Blending to Subtract (for 8-bit) with Scale 2 and Offset 128, or Add (for 16-bit) with Scale 2 and Offset 0, inverted.
- Change High Frequency’s blend mode to Linear Light.
What to Do on Each Layer
- Low Frequency (color): Use a soft Mixer Brush or Lasso + Gaussian Blur to even out red patches, uneven tones, and shadows under the eyes.
- High Frequency (texture): Use the Healing Brush (sample: Current Layer) to remove pimples and scabs while preserving pore structure.
Done well, frequency separation retouching produces skin that looks lived-in and real — not plastic.
Want to enhance colors and contrast without losing realism?
Trust our experts to perfect your images with our Photo Retouching Service
Dodge & Burn: The Final Touch for Natural Skin
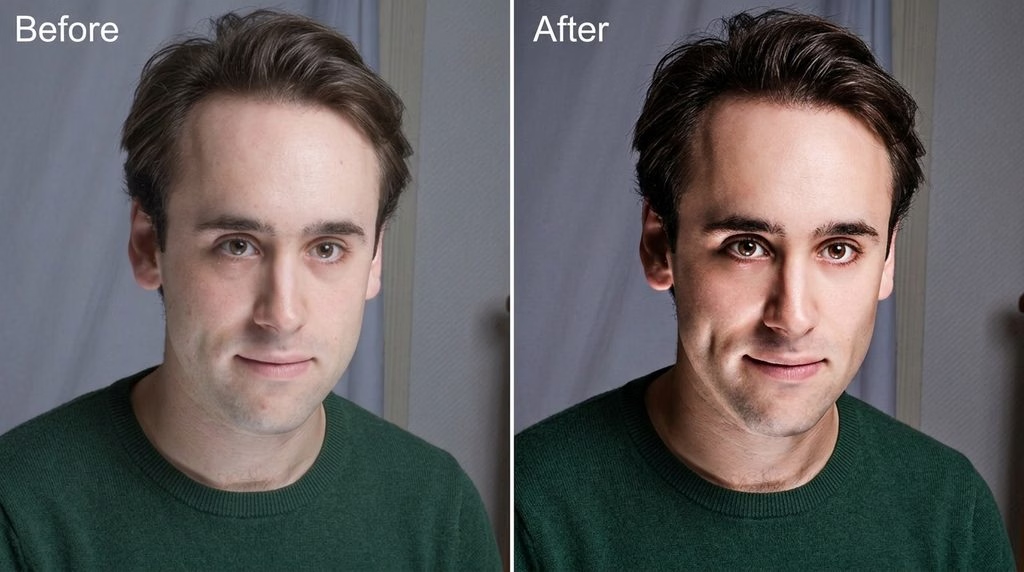
Even after every blemish is gone, skin often looks flat or blotchy. Dodge and burn rebuilds shape and evenness by selectively lightening (dodge) and darkening (burn) micro-areas of skin — no blur required.
The Non-Destructive Curves Method
- Create a Curves adjustment layer. Pull the midpoint up slightly (lighter). Rename it “Dodge”.
- Invert its mask (
Ctrl+I/Cmd+I) so it starts black. - Duplicate the Curves layer. Pull the midpoint down (darker). Rename it “Burn”. Invert its mask.
- Grab a soft white brush at 1–3% opacity. Paint on the Dodge mask to brighten dark blotches; paint on the Burn mask to darken shiny areas.
- Zoom to 100–200%. Work slowly. Use a graphics tablet if possible.
Fstoppers rightly points out that this technique keeps texture intact where blurring destroys it (Fstoppers). Dodge & burn is why beauty campaigns look luminous instead of over-processed.
Bonus: High Pass Filter for Subtle Skin Smoothing
The High Pass filter is a quicker alternative to frequency separation for softer smoothing effects.
- Duplicate the background layer.
- Go to Filter → Other → High Pass. Set the radius so pores are visible but blemishes are muted (typically 2–4 px).
- Change the blend mode to Linear Light.
- Invert the layer (
Ctrl+I) to flip the effect from sharpening to smoothing (for some workflows). - Add a mask, invert it to black, then paint white over skin only — avoiding eyes, lips, hair, and jewelry.
This is one of the fastest ways to reduce fine texture noise without going full frequency separation. For softer, editorial-style skin, keep the layer opacity at 40–60%.
Neural Filters: When AI Skin Smoothing Actually Works
Photoshop’s Neural Filters include a Skin Smoothing filter that uses machine learning to detect skin and smooth it. It’s tempting to slam the sliders to 100 and call it a day — don’t.
Recommended Neural Filter workflow:
- Convert your layer to a Smart Object first, so you can re-edit the filter later.
- Go to Filter → Neural Filters → Skin Smoothing.
- Set Blur to 25–40 and Smoothness to 40–50 max.
- Click OK, then reduce the Smart Filter’s opacity to 50–70%.
- Add a mask to protect the eyes, lips, eyebrows, and hairline.
Neural Filters shine for social media, headshots, and quick e-commerce turnaround. They fall apart in high-resolution beauty work — that’s where frequency separation still wins.
Common Mistakes That Ruin Skin Retouching
These are the errors that instantly mark an edit as amateur:
- Over-smoothing texture — the “plastic doll” effect. Fix by lowering opacity and preserving pores.
- Erasing every mole and freckle — kills character. Keep the ones that define the person.
- Making eyes unnaturally bright or big — a red flag flagged by DPS.
- Uneven color patches left behind from selective blur.
- Ignoring the neck and chest — the face is spotless but the collarbones look untouched.
- Using the same brush size for every blemish — always match size to spot.
- Not zooming to 100% during work and missing artifacts.
- Over-liquifying facial features — reshaping jaws, noses, or eyes distorts identity.
A useful sanity check: step away for 10 minutes, then come back. If anything looks obviously edited on first glance, dial it back.
Which Tool Should You Use? Quick Decision Table
| Situation | Best Tool | Why |
|---|---|---|
| Single small pimple in open skin | Spot Healing Brush | Fastest, one click |
| Blemish near hairline or eyebrow | Remove Tool or Clone Stamp | Preserves edges |
| Under-eye bags or large red area | Patch Tool | Drag-to-source control |
| High-volume acne cleanup | Camera Raw AI Blemish Removal | Automated, texture-aware |
| Uneven skin tone patches | Frequency Separation (Low) | Fixes color without blur |
| Rebuilding lost texture | Frequency Separation (High) + Clone Stamp | Full texture control |
| Final polish, luminosity | Dodge & Burn | Adds depth non-destructively |
| Quick social media edit | Neural Filter Skin Smoothing | Fast AI results |
A Complete Real-World Workflow (10-Step Portrait)
Here’s the exact sequence I use for a paid portrait job:
- Open in Camera Raw → fix exposure, white balance, minor spots with new AI Blemish Removal.
- Open in Photoshop → duplicate the background and convert to Smart Object.
- Create an empty layer above; use Spot Healing Brush on obvious pimples.
- Switch to Healing Brush for edge-adjacent blemishes.
- Use the Patch Tool on any grouped acne clusters or dark under-eye areas.
- Frequency Separation — smooth uneven color patches on the low layer.
- High-frequency healing to fix stubborn texture without color shifts.
- Dodge & Burn with 1–3% curves brushes to rebuild depth.
- Selective skin color balancing using Hue/Saturation or Selective Color adjustment layers.
- Final sharpening with High Pass at 40% opacity, masked to eyes and lips only.
The whole process takes 8–20 minutes depending on the image. For batch work, this is where an outsourced photo retouching partner starts to make financial sense.
Preserving Skin Character: The Rule of Realism
The number one thing separating a professional edit from a filter-heavy one? You can still tell it’s a real person. Freckles, faint lines, subtle asymmetry, minor pore variation — these are what make skin believable.
Follow these principles:
- Remove temporary blemishes (pimples, redness, cuts). Leave permanent ones (moles, distinctive freckles) unless the client asks.
- Reduce, don’t erase wrinkles. Drop the opacity of your healing layer to 50–70%.
- Keep pore texture across at least 80% of visible skin.
- Match retouch intensity to the medium. A billboard needs cleaner skin than a family photo album.
- Ask for consent on how far to go — especially with kids, editorial subjects, and elderly clients.
Ethical retouching isn’t just about aesthetics; it’s about respect for the subject. Adobe’s frequency-separation guide emphasizes preserving natural detail rather than eliminating it.
Speed Tips: Retouch Faster Without Losing Quality
Working faster doesn’t mean cutting corners. It means eliminating friction:
- Assign keyboard shortcuts to your most-used tools (
J,S,B). - Save an Action for your frequency separation setup — cuts 60 seconds every image.
- Use a graphics tablet. Even an entry-level Wacom cuts dodge & burn time in half.
- Batch process similar images through Camera Raw.
- Save a custom Workspace with only the panels you need (Layers, Actions, History, Properties).
- Use 32-bit brushes at low opacity to build up subtle changes.
Retouching 40+ images per week? Consider whether it’s time to outsource photo editing — the ROI is often surprising.
Related Skills Worth Learning
Blemish removal rarely lives alone. These paired techniques take portraits further:
- Color grading for consistent skin tones — see this color grading guide.
- Background cleanup for messy studio walls or distracting elements.
- Fixing exposure and shadow issues before retouching skin — skin looks different at every exposure.
- Sharpening for output — never sharpen before retouching; always after.
- Preserving natural shadows to keep the face three-dimensional.
For photographers building an end-to-end workflow, this photo editing guide covers everything from RAW to export.
Frequently Asked Questions
1. What’s the fastest way to remove blemishes in Photoshop?
For single spots, the Spot Healing Brush (J) with Content-Aware mode is the fastest — one click per blemish. For bulk cleanup, Camera Raw’s AI Blemish Removal (2026) can handle an entire face in seconds. For higher-end results, combine both with the Remove Tool for edges.
2. How do I remove acne without making skin look fake?
Preserve texture at all costs. Use the Healing Brush on an empty layer at 80–90% opacity, then apply subtle frequency separation and dodge & burn. Never blur skin globally. Keep at least some pore detail visible at 100% zoom.
3. Which is better — Spot Healing Brush or Remove Tool?
Spot Healing Brush is faster for isolated blemishes in plain areas. The Remove Tool is smarter near edges (hairline, eyebrows, jawline) and handles complex textures better. Use both in the same session depending on where the blemish sits.
4. Can I remove blemishes in Photoshop on a laptop?
Yes. Photoshop runs well on modern laptops. For heavy retouching, aim for 16GB RAM minimum, an SSD, and a color-accurate display. A calibrated monitor matters more than raw specs for skin work.
5. Do I need frequency separation for every portrait?
No. For casual social media or family portraits, spot healing + a light Neural Filter is enough. Save frequency separation for beauty, editorial, commercial, and hero shots where skin quality is scrutinized at high resolution.
6. How do I keep freckles while removing pimples?
Isolate your edits. Use the Healing Brush on an empty layer, then erase parts of that layer where freckles should remain visible. Or lower the opacity of the retouch layer to 60–70% so freckles show through subtly.
7. What’s the best Photoshop version for skin retouching in 2026?
Photoshop 2026 (v27+) with the latest Camera Raw update is ideal. It includes the AI Blemish Removal tool, improved Remove Tool, upgraded Neural Filters, and Generative Fill with multiple partner models directly in the menu.
8. Should I use AI tools or manual techniques?
Use both. AI handles bulk cleanup fast; manual work polishes the critical 20% that AI misses (edges, texture matching, dodge & burn shaping). The best retouchers treat AI as a first pass, never a final result.
Final Thoughts
Learning how to remove blemishes in Photoshop isn’t about erasing every imperfection — it’s about knowing which spots to fix, which to leave, and how to preserve the character that makes a face feel real. Master the Spot Healing Brush first, add the Patch Tool and Remove Tool to your toolkit, then graduate to frequency separation and dodge & burn when quality demands it.
The 2026 AI tools have accelerated everything, but the fundamentals haven’t changed: non-destructive layers, precise sampling, and restraint. Nail those three, and your skin retouching will look intentional — never obvious.
If deadlines are tight or your volume is climbing, our team handles skin retouching, portrait cleanup, beauty edits, and product retouching at scale, with fast turnarounds and unlimited revisions.
Ready to transform your raw photos into professional assets?
Get a custom, no-obligation quote tailored to your specific volume and needs. Explore Clipping Expert Asia