
What Is Framing in Photography? The Complete 2026 Guide (Techniques, Examples & Mistakes to Avoid)
October 30, 2026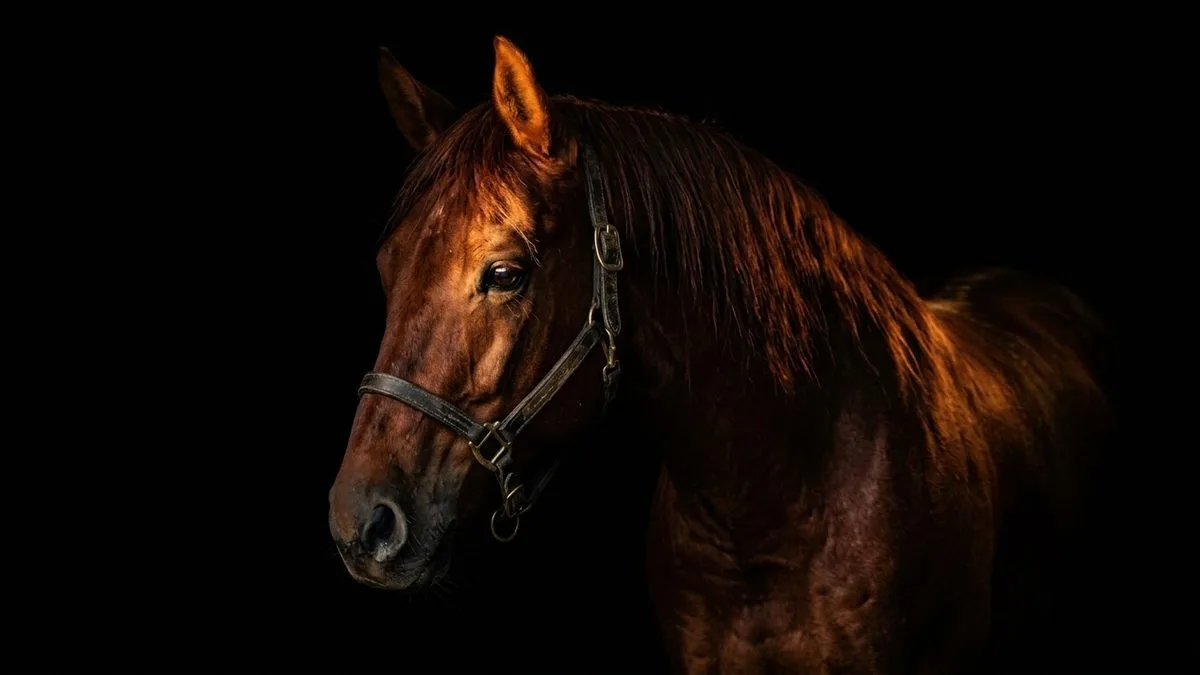
Here is what actually moves the needle in horse photography: shoot with a 70–200mm f/2.8 lens (or anything 100mm+), lock your shutter speed at 1/1000s or faster for action, set aperture to f/4–f/5.6 so the whole horse stays sharp, use continuous autofocus (AF-C) with burst mode, and shoot during golden hour. Get the ears forward, keep all four legs visible, focus on the eye, and never use a flash. Everything else — the presets, the camera body, the props — is secondary. Nail those basics and your photos go from snapshot to wall-art.
This guide covers everything: safety, gear, camera settings by discipline, lighting (including the black background trick), composition, pre-session prep, posing, action shots, portraits, the full editing workflow, AI tools, outsourcing, and real pricing data so you can actually build a business.
- Why This Matters More Than You Think
- Safety First: This Is Non-Negotiable
- Gear: What to Buy, What to Skip
- Camera Settings: The Exact Numbers by Discipline
- Lighting: When to Shoot and How to Use It
- Composition & Perspective: Get on the Horse's Level
- Pre-Session Prep: Ten Minutes Saves an Hour of Editing
- Posing the Horse: Legs, Ears, and Weight
- Capturing Action: Timing Is Everything
- Portraits & the Bond: Capture the Soul
- Editing Equine Photos: The Full Workflow
- When to Outsource Your Editing (And What It Costs)
- Pricing & Building Your Business
- Common Mistakes That Ruin Horse Photos
- Frequently Asked Questions
- Final Thought
Why This Matters More Than You Think
Horses are not big dogs. They weigh 1,000 pounds, they spook at plastic bags, and a wrong angle turns a majestic animal into something with a giant head and toothpick legs. That is why equine photography is its own discipline — you cannot just point and shoot.
And the stakes are emotional. Horse owners do not hire you for a pretty picture. They hire you because their horse is a partner, a competitor, family. One day that horse will be gone, and the photos you take will be what is left. Every equine photographer has a story about a client who lost a horse and said the photos were the most valuable thing they owned. Treat every session like it matters, because it does.
Safety First: This Is Non-Negotiable
Before f-stops, let’s talk about not getting hurt. If you are new around horses, take a few handling lessons first. Even the calmest horse can spook at a flapping dress, a camera strap, or the sound of your shutter. Horses will run over you and your client to get away from something they fear.
- Wear boots, never open-toe shoes. A 1,000-pound animal does not look where it steps.
- Learn horse body language. Wide eyes, pinned ears, dancing feet, raised tail — the horse is stressed. Stop shooting and give it a break.
- Never stand directly behind a horse. Kick range is real. If you must be behind, stay close to the hip and talk so the horse knows you are there.
- Never use a flash. It spooks horses. Period. If you need more light, raise your ISO or come back at a better time.
- Let the handler lead. The person who knows the horse best calls the shots. If they say the horse is done, the session is done.
Horses pick up on your anxiety. If you are nervous, the horse will be nervous. Stay calm, move slowly, and let the horse get used to you and the shutter sound before you start shooting for real.
Gear: What to Buy, What to Skip
You do not need the newest camera body. You need a good lens. If you can only buy one thing, buy a used 70–200mm f/2.8. It is the workhorse of equine photography — long enough to keep a safe distance, fast enough for low light, sharp enough for big prints. The lens will outlast two or three camera bodies.
| Equipment | What it’s for | Typical budget |
|---|---|---|
| Full-frame body with fast AF (Canon R6 II, Sony A7 IV, Nikon Z6 III) | Fast autofocus, high ISO, 12+ fps burst | $2,000–$3,500 |
| 70–200mm f/2.8 | The universal lens — covers 80% of situations | $1,500–$2,800 (used from $900) |
| 100–400mm or 150–600mm | Cross-country, racing, polo — when you cannot get close | $1,000–$2,000 |
| 85mm or 135mm prime | Intimate portraits, gorgeous bokeh | $300–$1,200 |
| Second body (backup) | Never miss a shot at events | $1,000–$3,000 |
| Laptop + Lightroom/Photoshop | Editing and delivery | $1,500–$3,000 |
A full professional starter kit runs $5,000–$12,000. But you can start with a used body and a used 70–200mm f/2.8 for under $2,000 and grow from there.
Avoid wide-angle lenses for horse portraits. Anything below 70mm distorts proportions. Shoot from at least 5–8 meters away and zoom in. For phone shooters, use optical zoom (2x, 3x) — never digital zoom.
Extras you will actually use: fast memory cards (you will shoot thousands of bursts), spare batteries (cold mornings kill them), and a comfortable camera strap or harness so your camera is always ready.
Camera Settings: The Exact Numbers by Discipline
Print this table. Tape it to your camera bag. Adjust from there.
| Scenario | Shutter Speed | Aperture | ISO | Focus Mode |
|---|---|---|---|---|
| Action (gallop, jumping) | 1/1000s+ | f/4–f/5.6 | As low as possible | AF-C, single point or small zone |
| Cross-country eventing | 1/800s+ (1/500s if panning well) | f/4–f/5.6 | Raise as needed | AF-C, burst mode |
| Indoor arena (jumping/dressage) | 1/500–1/800s | f/2.8–f/5 | 1600–6400 (noise beats blur) | AF-C, spot metering |
| Dressage (outdoor) | 1/640s+ | f/4–f/5.6 | 100–400 | AF-C |
| Racing / polo | 1/1000s+ | f/4–f/5.6 | As low as possible | AF-C, 100–400mm lens |
| Portraits (static) | 1/100s+ | f/1.2–f/5 (keep head sharp) | 100–400 | Single AF, focus on eye |
| Conformation / standing | 1/250s+ | f/5.6–f/8 | 100–400 | Single AF, focus on shoulder |
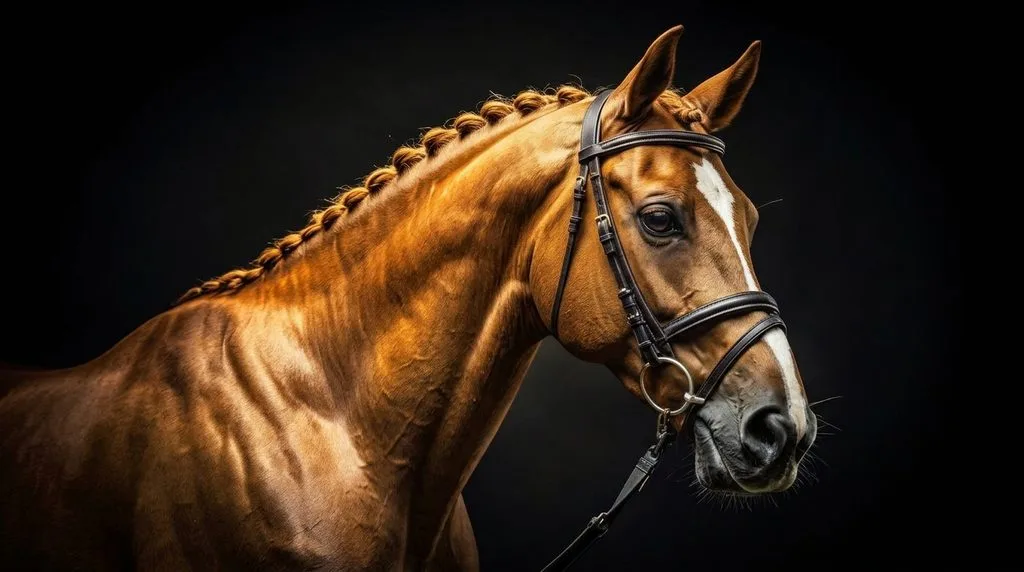
| Black background portraits | 1/1000s (freeze ear movement) | f/5.6–f/8 | Adjust, underexpose 1–2 stops | Single AF, focus on eye |
Shoot in Manual mode. Cameras try to average everything to middle grey, and horses come in every color from black to white — the camera will guess wrong. If Manual scares you, use Manual with Auto ISO: you set shutter speed and aperture, the camera picks ISO.
Use continuous autofocus (AF-C / AI Servo). Single-shot AF is fine for a standing horse, but if the horse moves even a little, your focus will be behind. For action, use burst mode — you will take 20 shots to get one perfect one, and that is normal.
Focus on the eye. Always. If the eye is sharp, the viewer forgives almost everything else. If the eye is soft, the photo feels wrong no matter what else is perfect.
Pro trick for setting exposure: photograph a patch of green grass at the same angle as your subject. Adjust exposure until the histogram peak sits 1/3 to 2/3 above the middle. Green grass is close to middle grey, and this works no matter what color the horse is.
Lighting: When to Shoot and How to Use It
Light matters more than your camera. The best horse photos are taken in the first hour after sunrise or the last hour before sunset — golden hour. The light is low, warm, and soft. It rakes across the coat, highlights muscle definition, and makes the mane and tail glow.
Avoid midday sun. Direct overhead light creates harsh shadows under the jaw, in the eye sockets, and along the belly. A dark horse becomes a featureless black blob. If you must shoot at midday, find open shade — under a big tree, beside a barn — where the light is even and soft.
Overcast days are great for portraits. Clouds act like a giant softbox. The light is flat but flattering, and it is especially good for dark horses where you want to show coat detail.
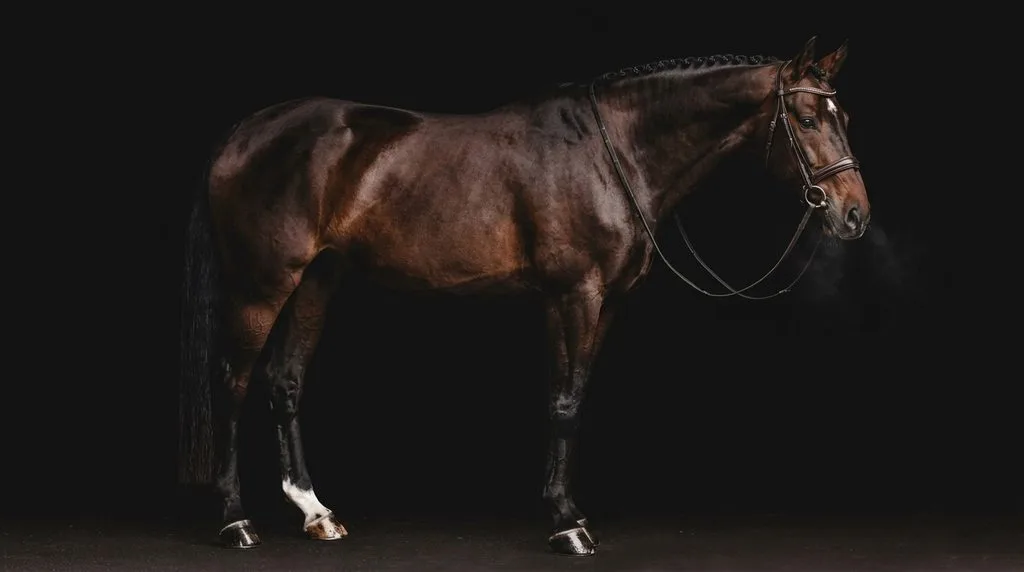
Black background portraits are the signature equine look, and you do not need a studio. Position the horse just inside a barn doorway or arena entrance, with light hitting the horse from the front or side and the interior behind them in deep shadow. Turn off all indoor lights. Use spot metering on the horse. Underexpose by 1–2 stops — the camera will try to brighten the dark background and overexpose the horse. The background falls to black naturally.
Backlight and silhouettes. Shoot into the sun at sunset, get low, and you get gorgeous rim light on the mane and tail. For pure silhouettes, expose for the sky — the horse becomes a striking black shape against color. These are some of the most emotional shots you can take.
Indoor arenas are the hardest lighting situation. Push your ISO to 1600–6400. A little grain is infinitely better than motion blur. Modern cameras handle high ISO beautifully. Shoot RAW so you have maximum flexibility in editing.
Composition & Perspective: Get on the Horse’s Level
The number one beginner mistake is shooting from standing height, looking down at the horse. It makes the horse look small and squat. Get on your knees. For a full-body shot, the camera should be around the horse’s hip height. For a head portrait, get to eye level — often that means kneeling or even sitting on the ground.
A slightly low angle makes the horse look majestic and powerful. Just do not go too low — shooting from directly under the head makes the nose enormous and the ears disappear.
Check all four corners of the frame before you press the shutter. Is there a fence post growing out of the horse’s back? A parked car? A random person? A bright distracting spot? One step to the left or right usually fixes it.
Use the rule of thirds. Place the horse’s eye or head at an intersection point, not dead center. Leave room in the frame in the direction the horse is looking or moving — a horse crammed against the edge feels cramped.
Keep backgrounds simple. A distant treeline, an open field, the sky, or a dark barn interior. Busy backgrounds kill horse photos. If you cannot move the horse, move yourself, or open up the aperture to blur the background more.
For full-body shots, leave space around the horse. Never crop at the legs or hooves — a horse without feet looks wrong. If you are shooting action, leave room in front of the horse so it has somewhere to go in the frame.
Pre-Session Prep: Ten Minutes Saves an Hour of Editing
Before you shoot:
- Bathe the horse and let the coat dry. Brush the body, mane, tail, and forelock. Pick out the hooves and wash them.
- Clean the eyes and nostrils with a damp cloth, and keep the cloth handy during the shoot.
- Use fly spray sparingly — too much leaves wet shiny spots that reflect light.
- Clean the tack. Leather should be clean and conditioned, metal bits polished. All buckles done up, loose straps tucked in, reins even.
- Hang the lead rope below the horse’s head — it makes it much easier to remove in editing.
- Bring two assistants if you can. One to handle the horse, one to get the ears up.
Getting the ears forward is an art. Pro tricks: rustle a plastic bag, shake a bucket of feed, wave a hat, use a squeaky toy, or put a crinkly peppermint wrapper inside a glove and rub it. Horse-sound apps work too, but use them sparingly — some horses, especially stallions, get amped up. The window where the horse looks curious and alert is only 2–3 seconds, so be ready: camera up, focus locked, finger on the shutter.
Posing the Horse: Legs, Ears, and Weight
A well-posed horse looks majestic. A poorly posed horse looks like a drunk giraffe. Here is the checklist.
Ears forward. This is the single most important thing. Ears back means angry or stressed. Ears lolling sideways means bored. Ears forward means alert, interested, alive. Wait for it. It is worth waiting for.
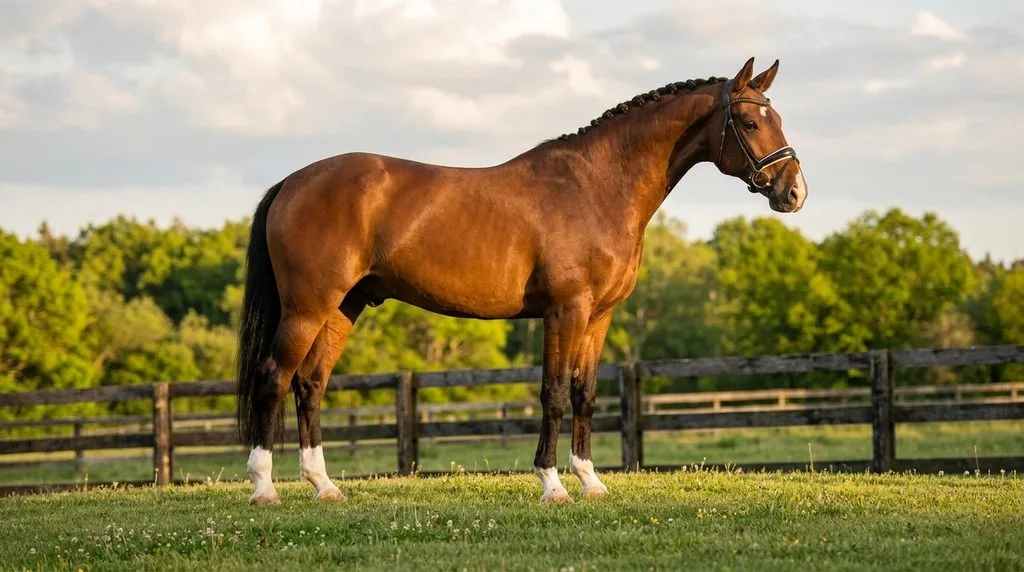
Legs square or parked out. For conformation shots, you want all four legs visible and the hooves roughly square. A cocked hind leg looks relaxed and sloppy. If the horse will not stand still, shoot in motion — a horse mid-step often looks better than one standing awkwardly.
Weight centered. The horse should not lean forward or back. Weight balanced over the front hooves gives a strong chest and shoulder.
Hind legs under the body. The back leg closest to the camera should be set under the hock. This gives the hindquarters a round, muscular look instead of a weak triangular shape.
Neck bend — not too much, not too little. Under-bent shortens the neck. Over-bent stretches the topline and looks unnatural. Learn the breed standard — a western pleasure horse poses differently from a dressage horse, which poses differently from a halter horse. Do a little research before the shoot. When in doubt, ask the owner. It shows you care.
Check the details. Grass in the mouth? Wipe it. Slobber on the chin? Wipe it. Dirt in the nostrils? Clean it. Flyaway mane? Smooth it. Bridle keepers straight? Reins even? These tiny things are the difference between a good photo and a great one.
If the horse is tense, stop. A tense horse never looks good. Walk the horse, give it a break, let it relax. The expression matters more than any pose.
Capturing Action: Timing Is Everything
Action photography is anticipation, not reaction. By the time you see the perfect moment and press the shutter, it is already gone. You have to predict it.
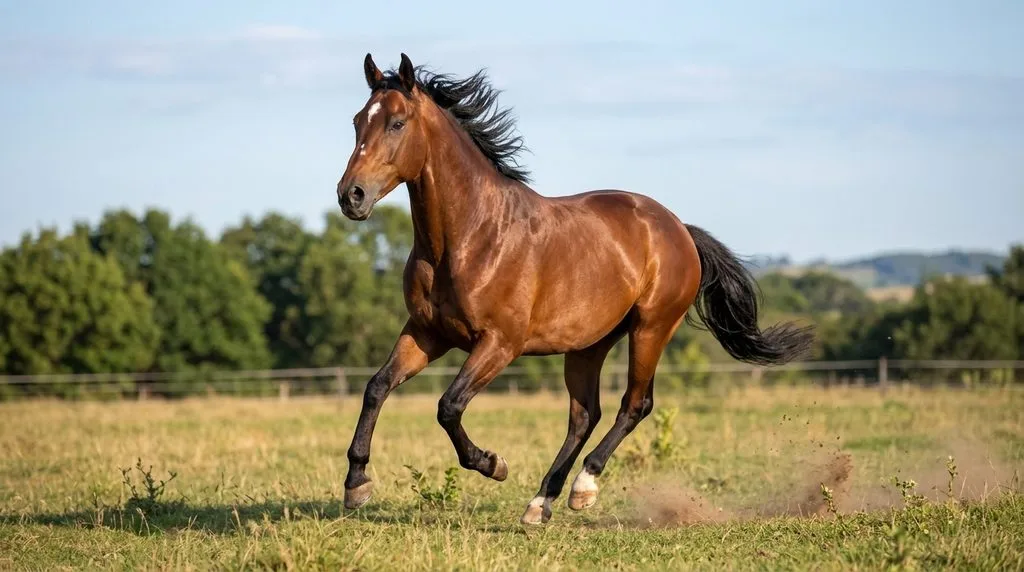
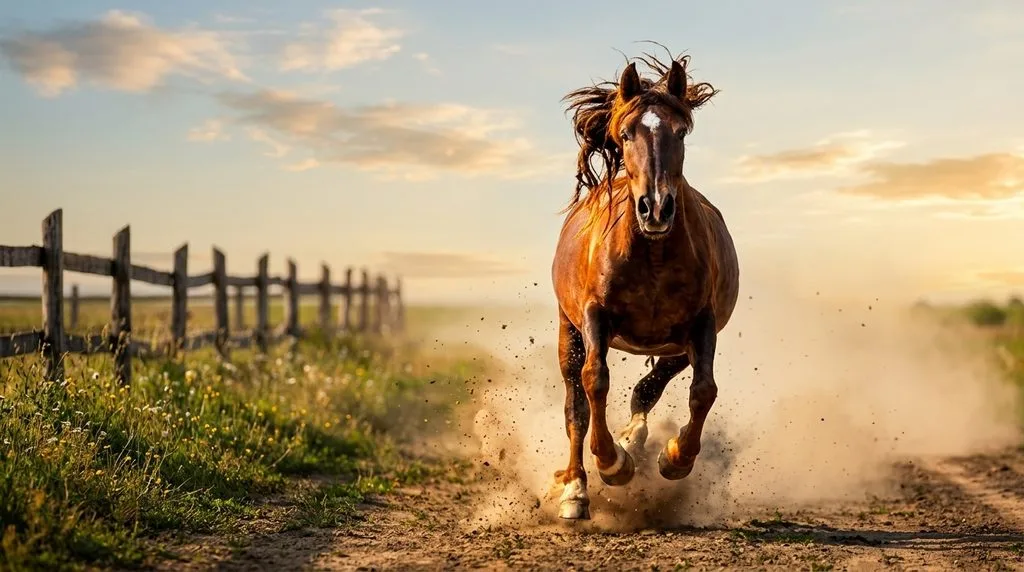
- Learn the gait. At a gallop, there is a moment of suspension where all four legs are off the ground — that is your money shot. At a jump, the peak of the arc is where you want to fire. Watch a few rounds before you start shooting to learn the rhythm.
- Pan with the horse. Keep the horse in the same spot in the frame as you move the camera. This keeps the horse sharp and blurs the background, which gives a sense of speed.
- Use burst mode. Hold the shutter down through the whole jump or gallop pass. You will get 10–20 frames; one will be perfect.
- Position yourself for the light. You want the sun behind you, hitting the horse. Never shoot into the sun for action unless you specifically want a silhouette.
- Leave room in the frame. A horse running needs space to run into. Put it on the left third if it is moving right, and vice versa.
- Focus on the chest or shoulder for action — the eye moves too fast. With f/4–f/5.6, the depth of field will cover the head and body.
Portraits & the Bond: Capture the Soul
The best equine portraits do not just show what a horse looks like — they show who it is. Technical perfection is the baseline. The art is in capturing personality.
Focus on the eye. A catchlight — that little reflection of light in the eye — brings the horse to life. If the eye is dead and dark, the whole photo feels dead.
Shoot the details. The eye, the muzzle, the mane, a unique marking, a heart-shaped spot on the leg, the owner’s hand resting on the neck. These close-ups tell the story as much as the full-body shots.
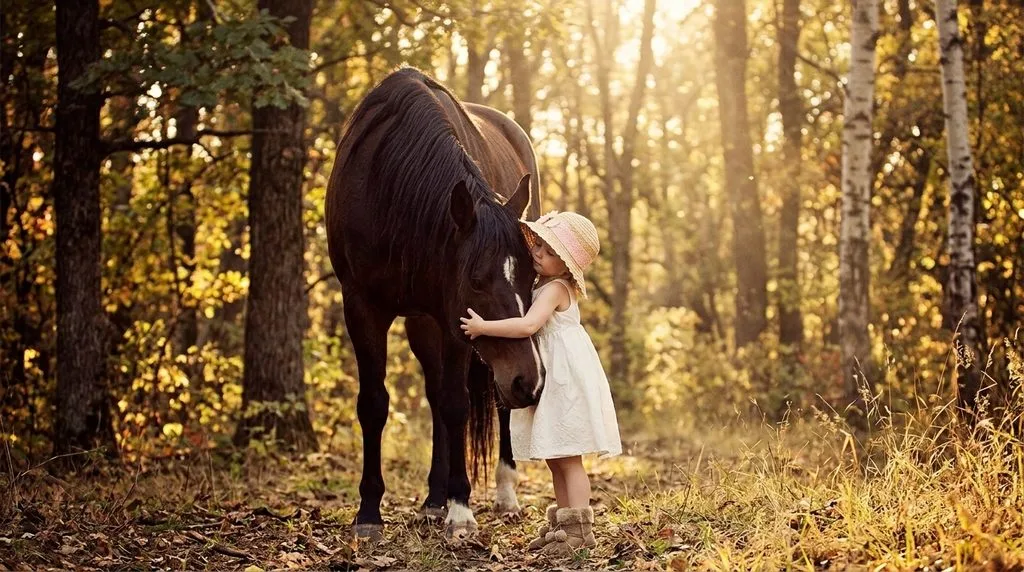
Capture the bond. The best moments are rarely posed. It is the owner whispering to the horse, the horse nuzzling a shoulder, a quiet grooming moment, a forehead-to-forehead. Have your camera ready between setups. Some of the best horse photography tips emphasize exactly this: the candid, unplanned moments are the ones clients cry over.
Try silhouettes at sunset. Get low, shoot into the sun, expose for the sky. The horse and rider become a shape against color. These shots are dramatic, emotional, and hide a multitude of sins — a dirty horse, a distracting background, an awkward pose.
Editing Equine Photos: The Full Workflow
Editing is where good shots become great. But over-editing is where great shots become fake. Here is the pro workflow.
In Lightroom (culling and global edits):
- Cull ruthlessly. You only need the best 10% of what you shot.
- Fix exposure, white balance, and contrast first.
- Use the HSL panel to adjust greens (pastures often look neon) and browns (coat color). Black horses often get a blue or purple cast in shadows — warm them back to rich chocolate tones.
- Apply a consistent color grade across the whole session so the gallery feels cohesive. A consistent color grading guide approach is what makes a portfolio recognizable.
- Sharpen carefully — horses have fine hair detail that looks great when sharp, but over-sharpening creates halos. Learn how to sharpen an image properly.
In Photoshop (precision work):
- Black background workflow: Use Select Subject, refine the mask around mane and tail, darken the background gradually with a soft black brush at 20–30% opacity (never pure black — depth comes from subtle tonal variation). Replace the floor if it is uneven, and hand-paint shadows under the hooves so the horse does not look like it is floating.
- Remove halters and lead ropes with a combination of Clone Stamp, Patch Tool, and the AI Remove Tool. Always check texture consistency at 100–200% zoom.
- Dodge and burn to sculpt muscle definition, jawline, and shoulder. This is where the horse gets depth.
- Enhance the eye — deepen the pupil, add a natural catchlight, remove unwanted reflections.
- Do not remove tack when a rider is present. A saddle-less rider looks wrong and unnatural.
- Do not change the horse’s conformation. Shortening the back, lengthening the neck, or slimming the legs is lying — and horse people will notice immediately.
For coat and skin retouching, frequency separation retouching lets you smooth texture without destroying detail.
AI tools are changing the game. Imagen learns your personal editing style from your Lightroom catalog and applies it across an entire shoot. Aftershoot and Evoto do AI culling and batch editing. Topaz Photo AI handles noise reduction and sharpening. Generative Fill in Photoshop can remove halters and distractions, but always verify the results — AI can warp anatomy, and horse people will catch it.
The golden rule: edit to remove distractions, not to change the horse. A client wants their horse, not a perfect fake version of their horse.
When to Outsource Your Editing (And What It Costs)
Once you are shooting paid sessions, editing becomes the bottleneck. A single black background portrait can take 20–30 minutes of detailed Photoshop work. A full gallery can eat 5–10 hours. That is time you could spend shooting more sessions or marketing.
Professional retouching services handle halter removal, background cleanup, floor replacement, color grading, and consistency across hundreds of images. The photo editing cost per image varies by complexity, but for consistent batch work it is almost always cheaper than the hours you would spend doing it yourself. And because specialists do it every day, the results are more consistent.
If you are doing the color work yourself, this color grading in photography guide will help you build a consistent signature look.
The sign that you should outsource: you dread the edit more than the shoot. When that happens, hand it off and go shoot more horses.
Pricing & Building Your Business
Real pricing data from working equine photographers (2026):
| Service | Typical Price Range |
|---|---|
| Mini portrait session (30–45 min, 5–10 digitals) | $199–$300 / £199–£250 / €80–€150 |
| Full portrait session (1–2 hrs, 15–30 digitals) | $450–$650 / £250–£500 / €150–€400 |
| Premium / luxury session (2+ hrs, 45+ digitals, prints) | $950–$1,700 / £1,100–£1,700 |
| Event / show coverage (full day) | $350–$800 / €300–€800 + photo sales |
| Fine art prints (wall art) | $100–$450 per piece |
| Albums / folio boxes | $500–$1,200 |
Most full-time equine photographers earn $25,000–$50,000+ per year after 2–3 years. The key is diversifying: portraits + events + breeders + commercial brand work + print sales. Digital files alone rarely build a profitable business — wall art and albums are where the real revenue is.
To get started: shoot for free or cheap to build a portfolio. Horse owners talk — a great gallery for one client leads to three more referrals. Specialize (black background portraits, eventing, wild horses, horse-and-rider fine art) so people know exactly what you are known for. Price your editing time into the session fee — the shoot is half the work. And deliver more than you promise.
Common Mistakes That Ruin Horse Photos
- Shooting too close with a wide lens — distorted proportions, giant head, tiny body. Step back and zoom.
- Slow shutter speed — motion blur on the legs, mane, or tail. 1/1000s is your friend.
- Cutting off legs or hooves — always leave room at the bottom. A horse without feet looks broken.
- Ears back or sideways — the horse looks angry or bored. Wait for ears forward.
- Busy backgrounds — fence posts, cars, people, bright spots. Check the corners before shooting.
- Shooting from above — makes the horse look small and squat. Get on their level.
- Over-editing — oversaturated colors, plastic-looking coats, fake skies. Subtlety reads as professional.
- Ignoring the horse’s mood — a stressed horse never looks good. Take breaks. End on a good note.
Frequently Asked Questions
What is the best camera setting for horse photography?
For action, use 1/1000s shutter speed, f/4–f/5.6 aperture, ISO as low as possible, AF-C continuous focus, and burst mode. For static portraits, you can drop to 1/250s and open the aperture to f/2.8 for background blur. Always focus on the eye.
What lens is best for equine photography?
The 70–200mm f/2.8 is the universal workhorse. It keeps you at a safe distance, avoids distortion, and gives beautiful background blur. For intimate portraits, an 85mm or 135mm prime is stunning. For sports and racing, a 100–400mm zoom gives you reach.
How do you get a horse’s ears forward in photos?
Use sound: rustle a plastic bag, shake feed in a bucket, use a squeaky toy, or rub a crinkly peppermint wrapper inside a glove. Horse-sound apps work too, but use sparingly. The window of alertness is only 2–3 seconds, so be ready to shoot immediately.
What time of day is best for horse photography?
Golden hour — the first hour after sunrise and the last hour before sunset. The light is warm, soft, and low, raking across the coat and highlighting muscle. Overcast days are also excellent for portraits because clouds diffuse the light evenly.
How do you photograph a black horse without losing detail?
Expose for the horse, not the background. Use spot metering on the coat. Shoot in RAW. Overcast days or open shade work best for dark horses because harsh direct sunlight turns them into featureless black shapes. Avoid overexposing the background to compensate.
Should you edit horse photos?
Yes, but subtly. Fix exposure, white balance, and contrast. Remove halters, lead ropes, and distracting background elements. Clean up minor blemishes. Never change the horse’s conformation or coat color — horse owners will notice immediately and it destroys trust.
How much do equine photographers charge?
Portrait sessions typically range from $200–$950+ depending on experience and location. Event day rates run $350–$800+. Fine art prints and albums are where the real revenue is. Always price your editing time into the session fee — the shoot is half the work.
How do you pose a horse for conformation shots?
Stand the horse square with all four legs visible, weight centered, ears forward, neck slightly arched but not over-bent. Shoot from the side at hip height. Position the horse on slightly higher ground to look more majestic. Focus on the shoulder. Keep the lead rope below the head for easy editing removal.
Final Thought
Great equine photography is 20% camera settings and 80% patience, empathy, and timing. The technical stuff — shutter speed, aperture, lenses — you can learn in a weekend. The hard part is learning to read a horse, to wait for the right moment, to make the animal trust you, and to know when the session is over. The photographers who succeed in this niche are the ones who love horses first and photography second. Bring that energy to every shoot, and the photos will take care of themselves.