Product Photo Editing: Ultimate Guide to Ecommerce Success
December 5, 2025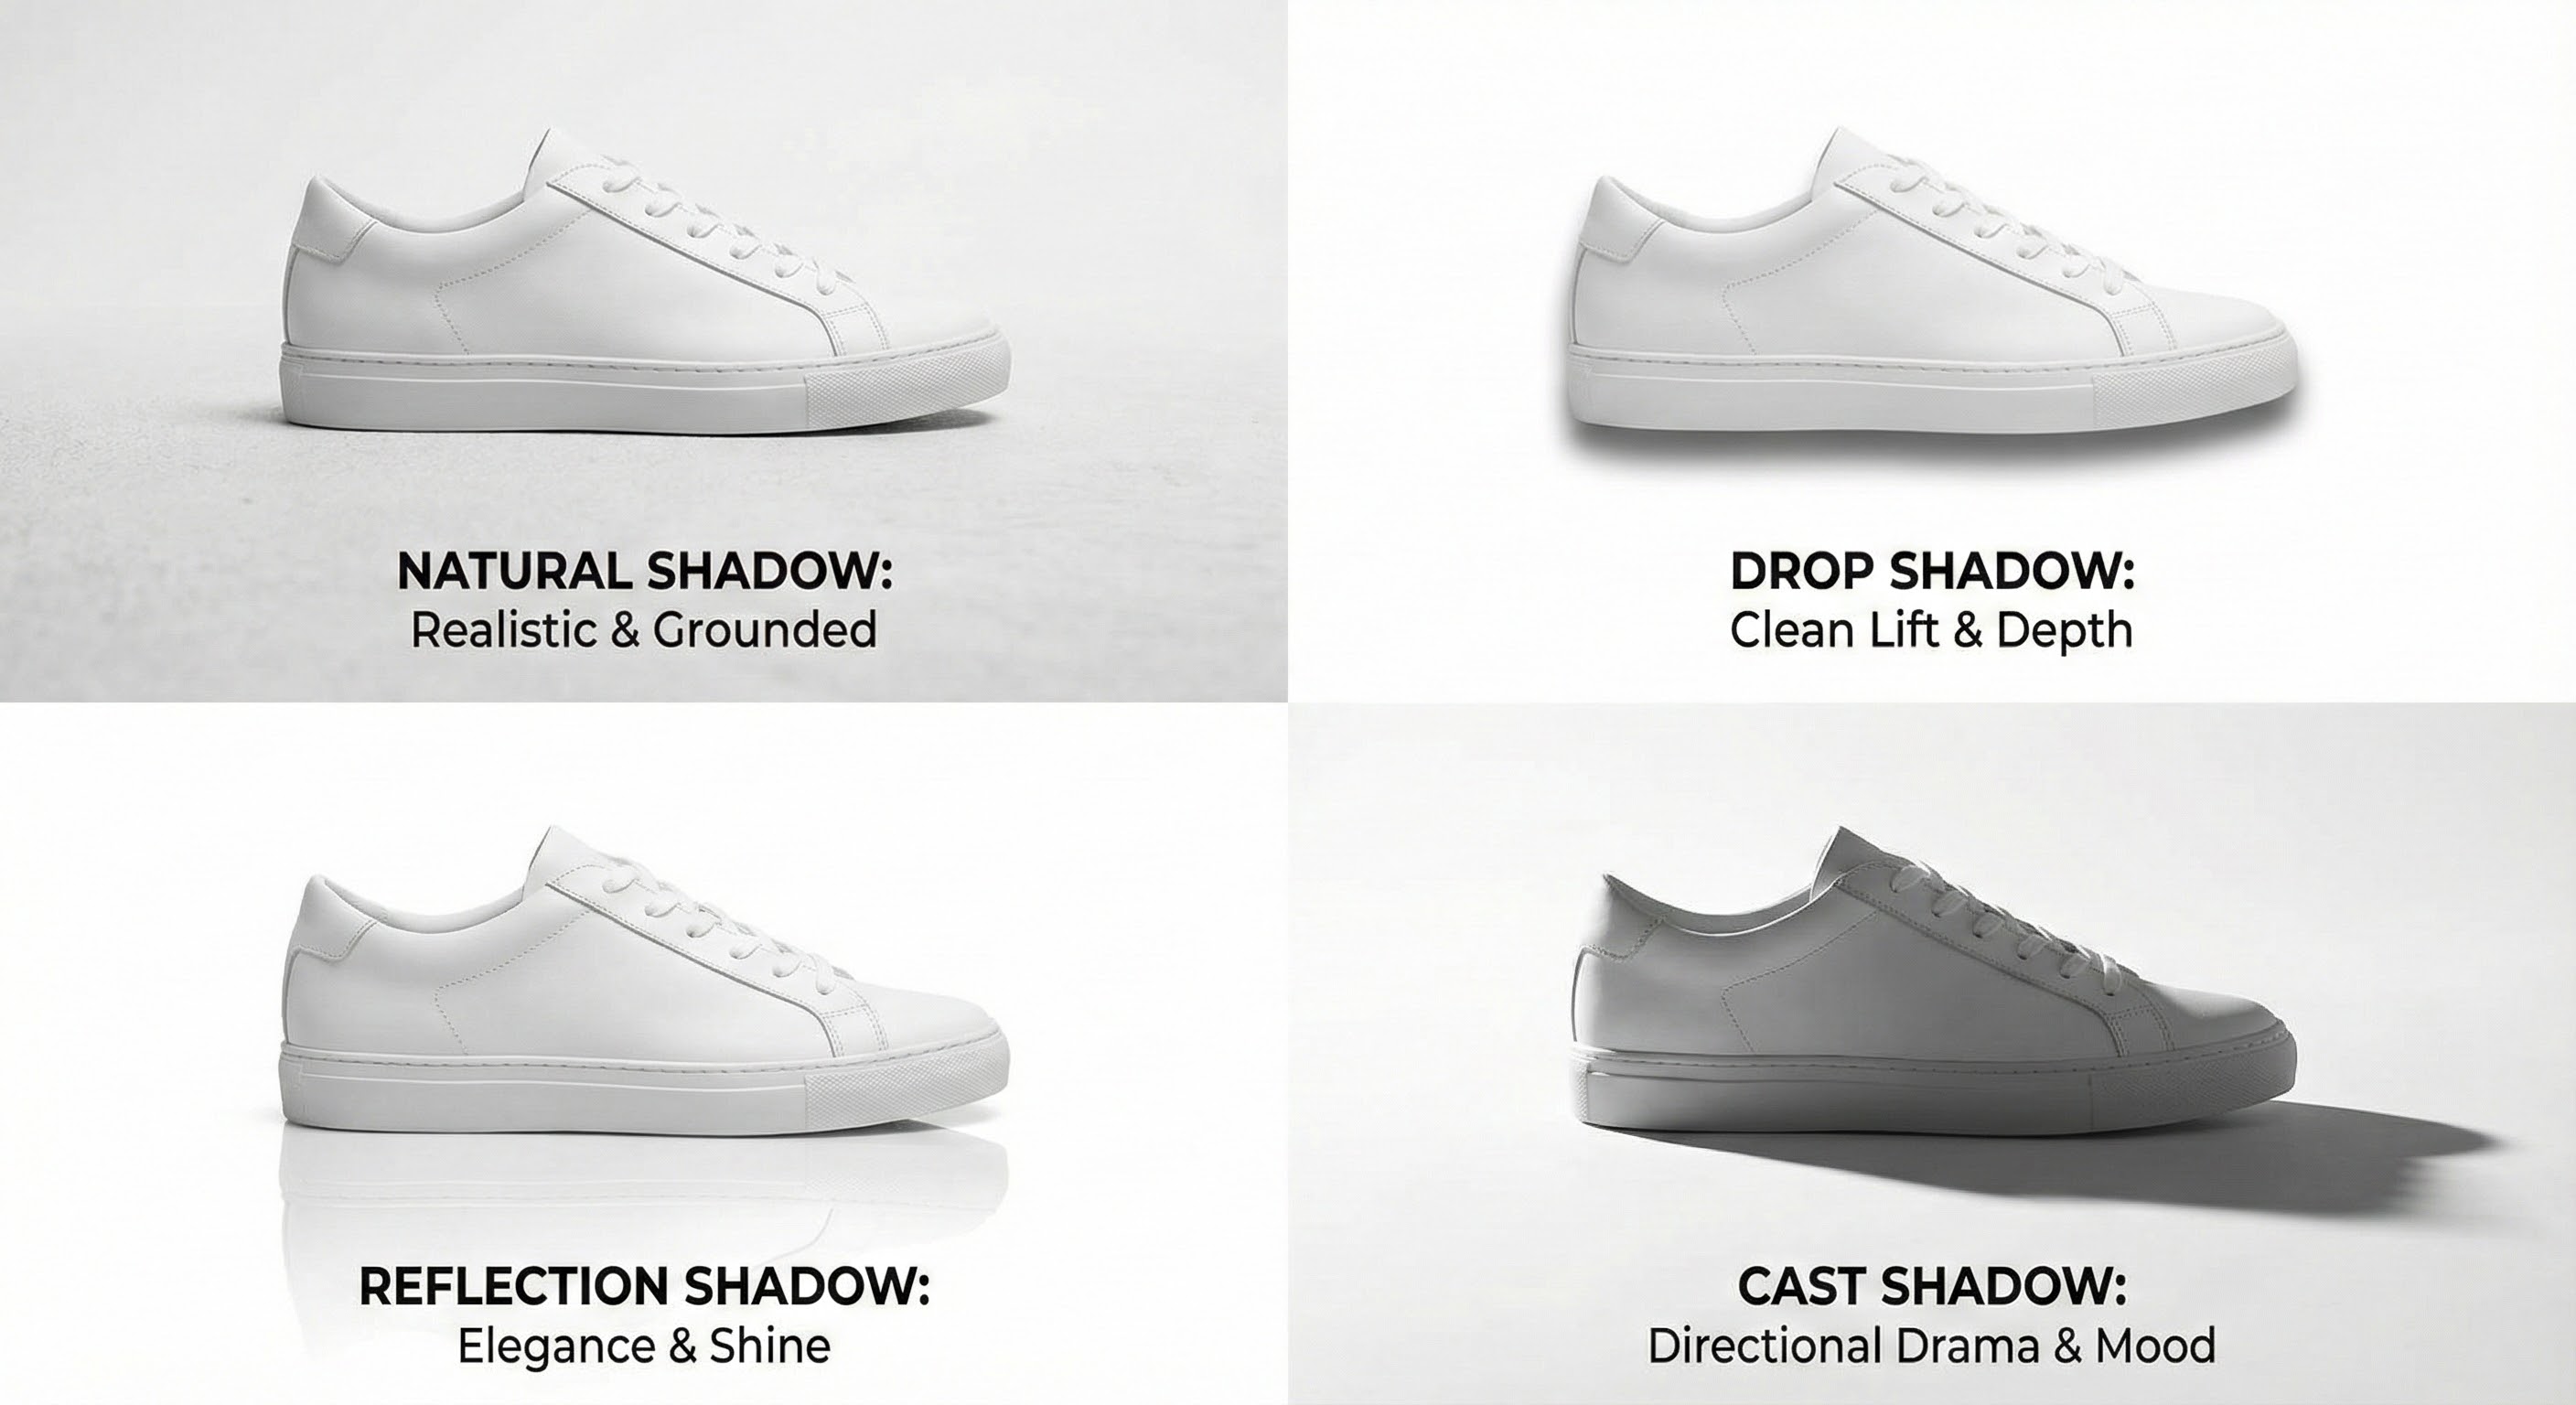
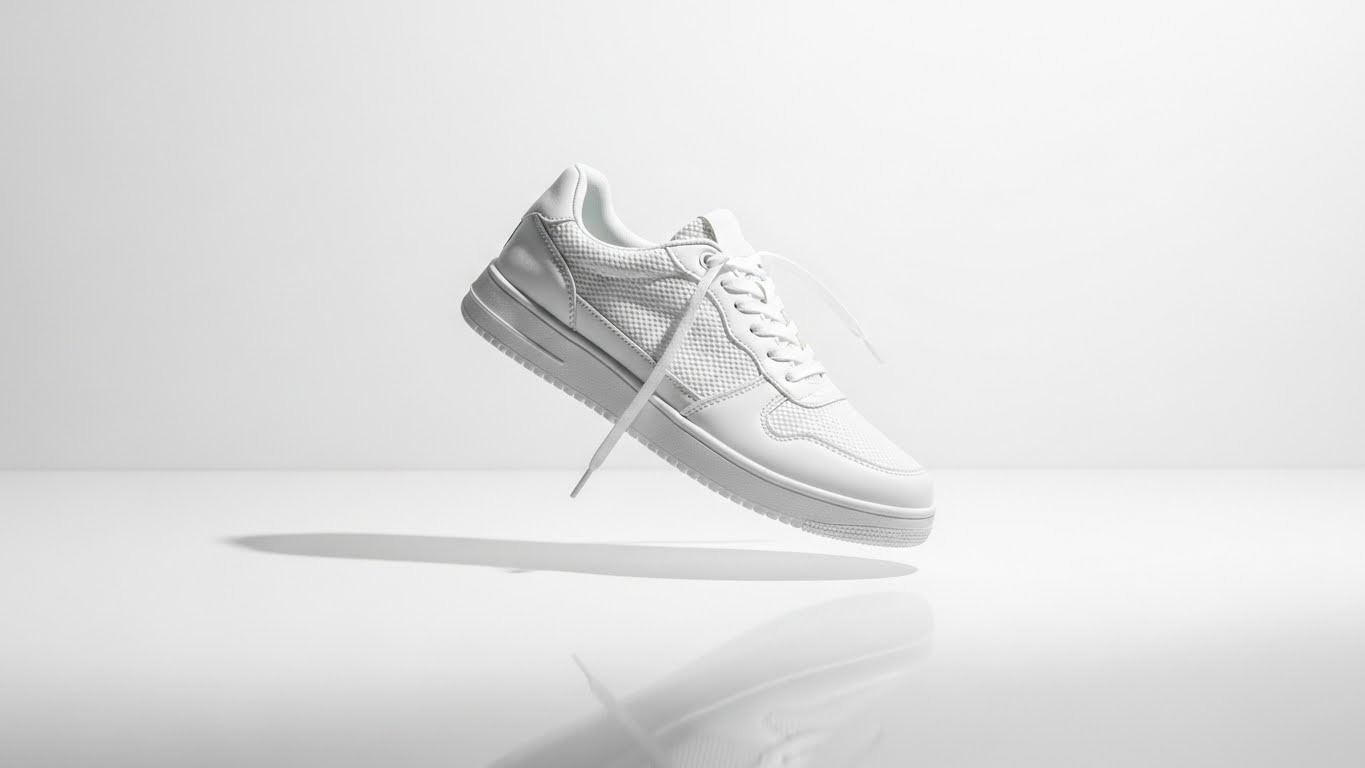
Shadow Creation in Product Photography for Realistic Images
December 24, 2025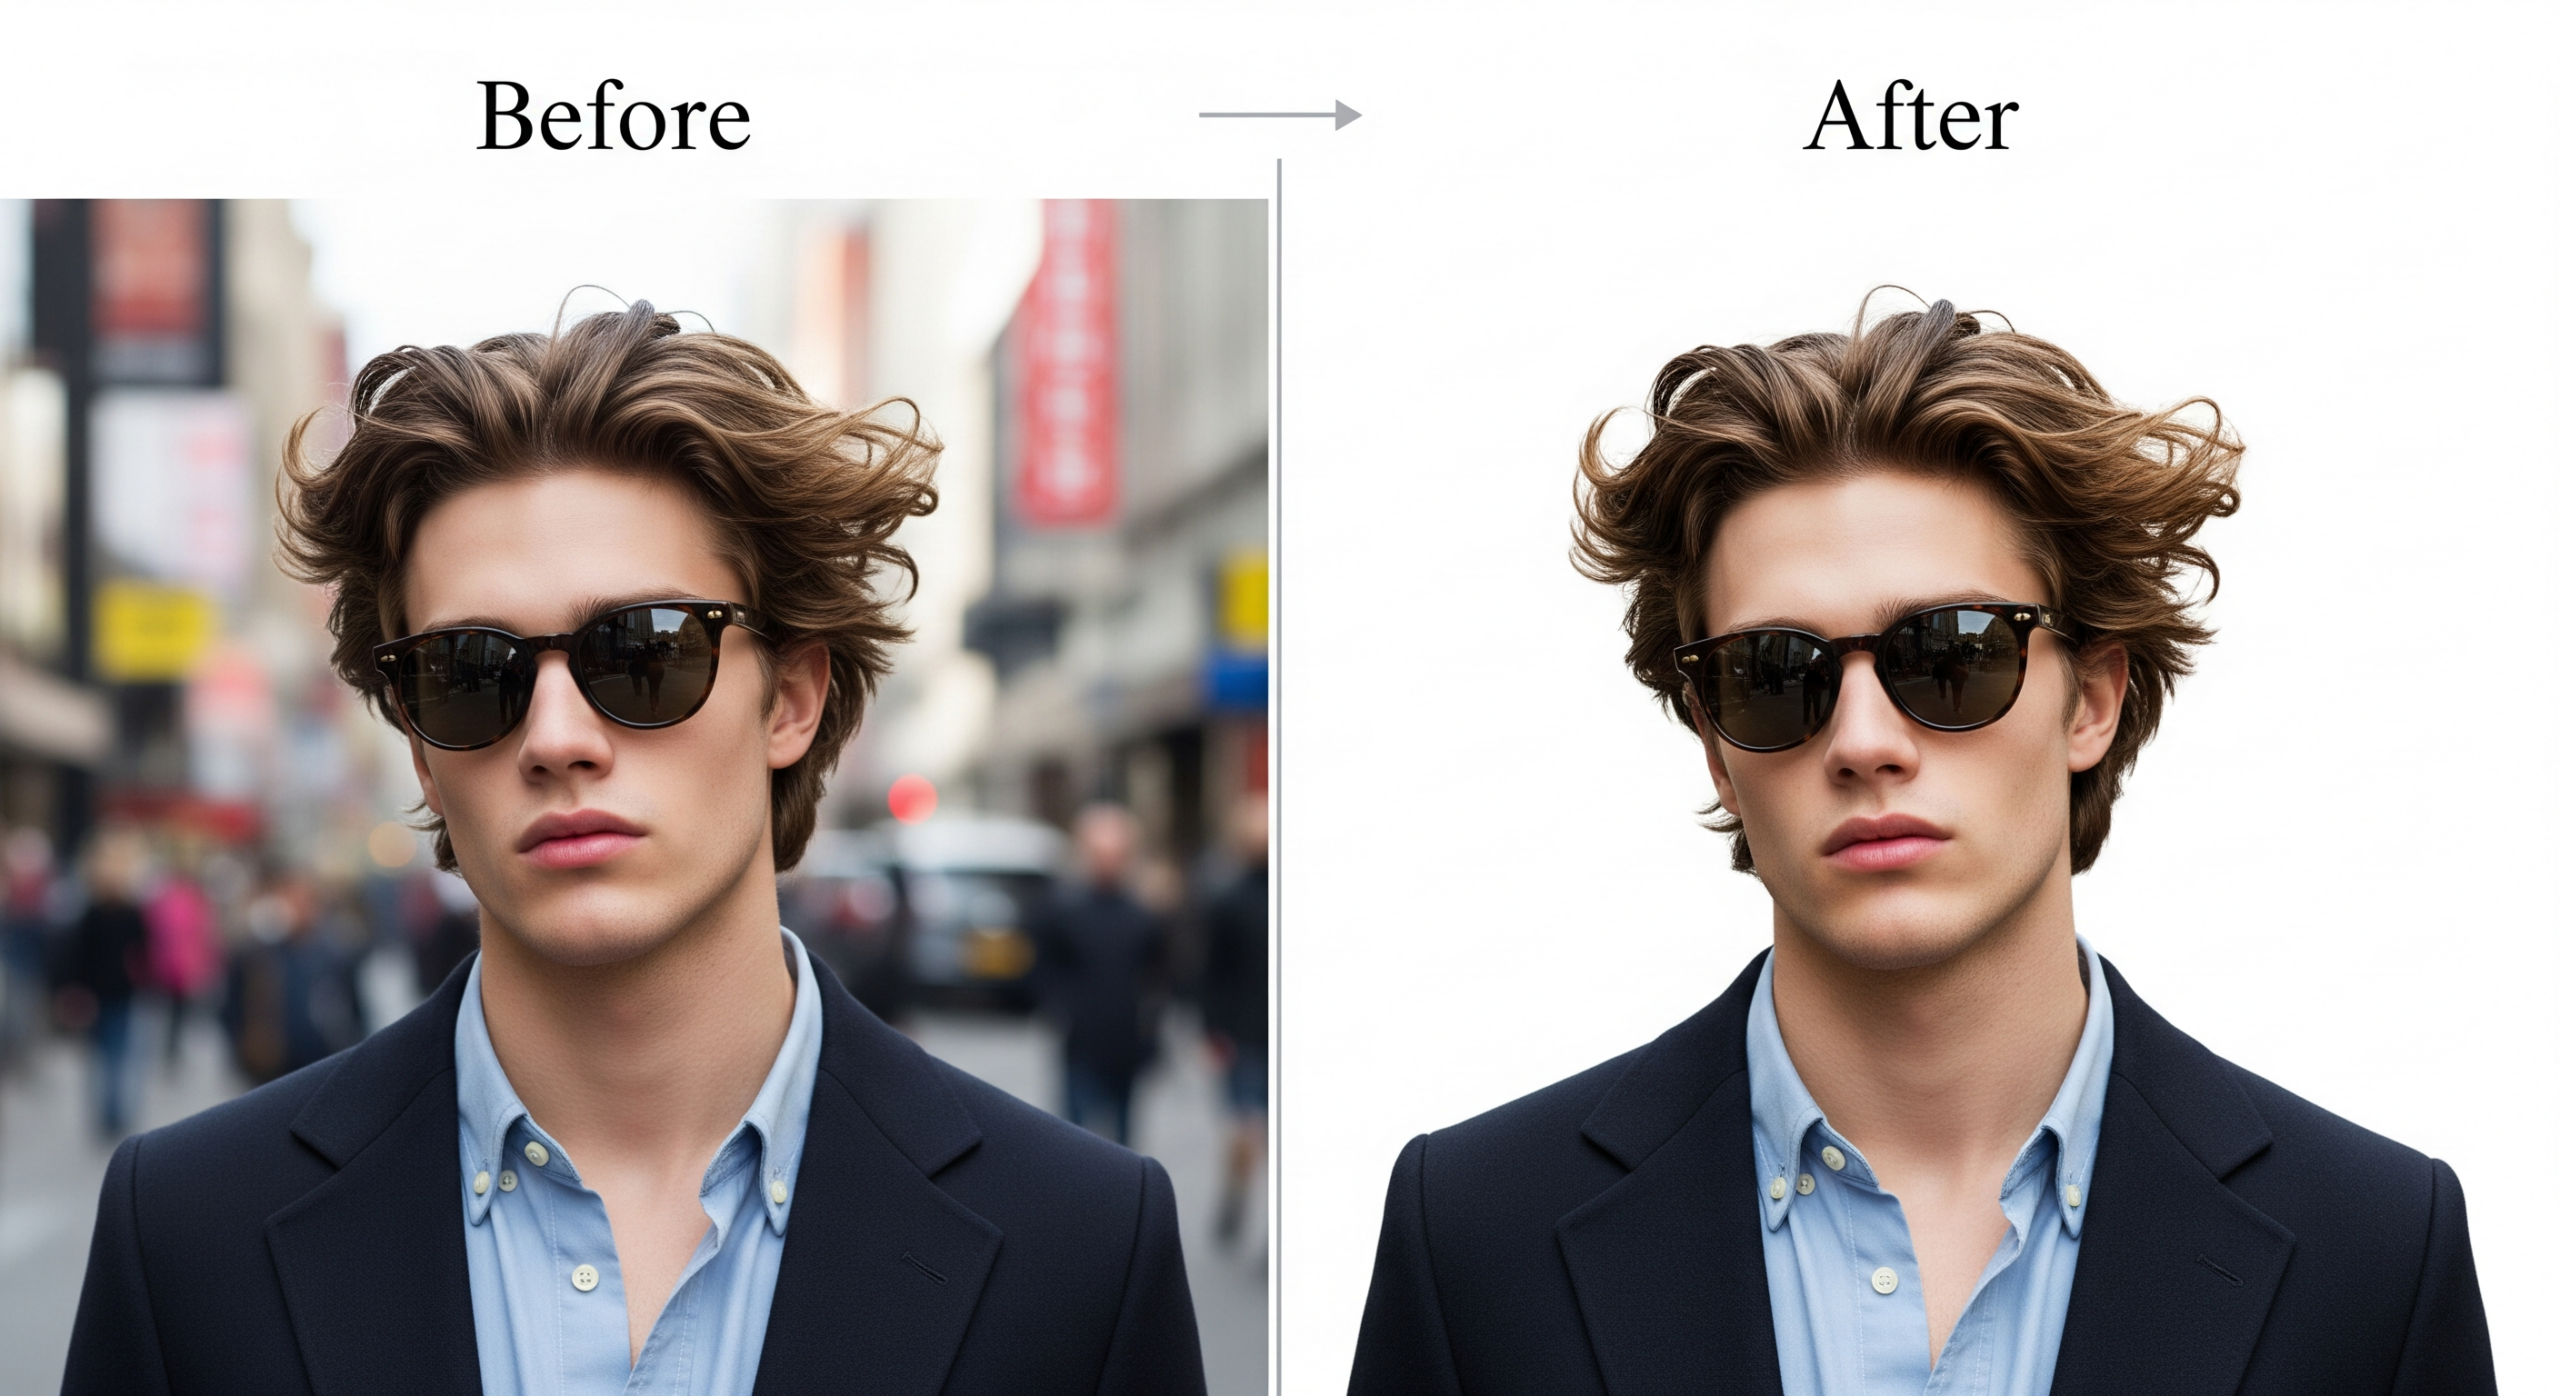
From Rough Selections to Flawless Cutouts in Photoshop
Want flawless cutouts that make your subject pop? Background removal stands as one of the most valuable skills any designer, photographer, or marketer can own. Whether you prepare product photos for e-commerce, create social media graphics, or build composite images, removing backgrounds cleanly changes everything.
Why Background Removal Matters More Than Ever in 2026
Clients and followers notice messy edges instantly. A single stray pixel ruins the entire illusion. Clean background removal builds trust, boosts conversions, and makes your visuals look expensive. E-commerce stores using transparent backgrounds see higher click-through rates. Social media posts with isolated subjects stop scrolls. Professional designers charge premium rates simply because they nail this skill consistently.
Photoshop remains the gold standard because it offers multiple tools for every situation. You no longer need to settle for “good enough.” Master these techniques and you control the final look completely.
Preparation: Set Yourself Up for Success
Great background removal starts before you touch any selection tool. Follow these steps and you cut your work time in half:
- Work on a duplicate layer (Ctrl/Cmd + J) so the original stays safe
- Zoom in to 100–200% when refining edges – never guess
- Use a contrasting background color temporarily (solid red or green) to spot missed areas
- Save selections (Select → Save Selection) in case you need them later
- Keep your canvas larger than needed – you can crop later
Method 1: Quick Selection + Select and Mask (The Everyday Hero)
Most background removal jobs finish with this combo in under five minutes.
- Grab the Quick Selection Tool (W)
- Set brush size to 20–50 px and click-drag over your subject
- Hold Alt/Option to subtract areas Photoshop grabs by mistake
- Click Select and Mask in the top bar
- Choose Onion Skin or On Black view mode to see edges clearly
- Increase Radius to 2–5 px for hair and fur
- Use the Refine Edge Brush (second icon) and paint over flyaway hair – watch Photoshop rebuild strands magically
- Adjust Shift Edge slightly inward (-10 to -30%) to avoid halos
- Output to New Layer with Layer Mask
Pros use this method 80% of the time because it balances speed and quality perfectly.
Method 2: Background Removal with Channels (For Impossible Contrast)
Some images fight every automatic tool. Pull channels when the subject and background share similar colors.
Here’s the pro workflow:
- Open the Channels panel
- Click each channel (Red, Green, Blue) to find the one with strongest contrast
- Drag that channel to the “New Channel” icon to duplicate it
- Hit Ctrl/Cmd + L for Levels and crush the blacks/whites until your subject separates dramatically
- Paint with white brush on black areas (or vice versa) to clean up
- Ctrl/Cmd-click the channel thumbnail to load it as a selection
- Return to Layers panel and add a layer mask
This old-school technique still outperforms every automated tool on wedding veils, glassware, and sheer fabrics.
Method 3: Remove Background Using the Object Selection Tool (2025–2026 Update)
Adobe keeps improving this tool dramatically.
- Select the Object Selection Tool (nested under Quick Selection)
- Choose Rectangle or Lasso mode
- Draw a rough box around your subject
- Photoshop analyzes and snaps to edges automatically
- Click Select Subject if it misses – the latest versions rarely do
- Jump straight to Select and Mask for final refinement
This method shines with solid objects against busy backgrounds – think product shots on location.
Method 4: Color Range for Super-Fast Solid Background Removal
Got a pure green screen or solid color backdrop? Color Range crushes it.
- Go to Select → Color Range
- Click on the background color
- Increase Fuzziness until the preview turns mostly white (background) and black (subject)
- Use the eyedroppers with + and – to add/subtract colors
- Check “Invert” if needed
- Hit OK and add a mask
Two clicks and you’re done. Perfect for batch processing studio portraits.
Advanced Hair & Fur Background Removal Secrets
Hair remains the ultimate test. Here’s what actually works in 2025:
- Always use Refine Edge Brush in Select and Mask – paint slowly along the hair edge
- Switch view mode to Overlay to see missed strands in red
- Increase Contrast in Select and Mask to sharpen transition areas
- After outputting, paint black on the mask with a soft low-flow brush to recover lost hairs
- Use Decontaminate Colors sparingly – it can introduce artifacts on dark hair
Pros duplicate the subject layer, mask both, then paint one version slightly larger to create a natural fringe.
For the highest quality hair extraction possible, many professionals combine Photoshop work with specialized image masking services on the toughest shots.
Removing Backgrounds from Transparent or Semi-Transparent Objects
Glass bottles, wedding veils, and smoke demand special care.
Trick #1: Keep the natural highlights and shadows that suggest transparency
Trick #2: Use Blend If (double-click layer → Blend If) to drop out the old background while preserving bright highlights
Trick #3: Create a new blank layer underneath and paint subtle reflections/shadows manually
Never fully delete these areas – viewers spot fake transparency instantly.
Fixing Common Background Removal Mistakes
Even experts run into these issues:
- White halos: Contract the mask or use Defringe (Layer → Matting → Defringe)
- Jagged edges: Smooth selection before masking (Select and Mask → Smooth slider)
- Lost detail in shadows: Paint with low-opacity white on the mask to recover
- Color contamination: Turn on Decontaminate Colors and output to New Layer (not mask)
Non-Destructive Workflow Every Pro Uses
- Duplicate background layer
- Add layer mask with your final selection
- Group the layer (Ctrl/Cmd + G) and name it “Subject”
- Add blank layer below for new background
- Clip adjustment layers (Curves, Hue/Saturation) to the subject group only
This setup lets you change backgrounds instantly forever.
Batch Background Removal for Hundreds of Images
Need to process 500 product photos? Here’s the real workflow:
- Record an Action (Window → Actions) using the Object Selection + Select and Mask method
- Go to File → Automate → Batch
- Choose your action and source folder
- Set destination folder for transparent PNGs
- Let it run overnight
Many studios still outsource massive batches to dedicated background removal services because human QA beats automation on consistency.
Ready to take your skills further? Download the latest version of Photoshop from the official Adobe website and start practicing today.
Final Thoughts
Background removal transforms ordinary photos into powerful visuals that demand attention. Master the Quick Selection + Select and Mask workflow first – it handles 80% of real-world jobs beautifully. Move to channels and advanced refining only when needed. Practice on ten different images with hair, fur, glass, and solid objects this week. Within days you’ll spot your own mistakes instantly and deliver flawless cutouts clients rave about.
Clean background removal isn’t magic – it’s muscle memory built through deliberate practice and the right techniques. Start today, and watch your portfolio quality skyrocket.
FAQs
1. How long does professional background removal take per image?
Simple product shots take 2–5 minutes. Complex fashion or hair images can take 15–45 minutes for perfection.
2. Can I remove backgrounds perfectly with free tools?
Free tools work great for basic shapes. They struggle badly with fine hair, transparency, and color contamination that Photoshop handles easily.
3. Should I save as PNG or PSD after background removal?
Always keep the master PSD with layers. Export PNG-24 with transparency for web and social use.
4. Why do I still see a white fringe after removing the background?
You probably need to use Defringe or shift the mask edge inward slightly. Decontaminate Colors in Select and Mask also helps.
5. Is it worth learning channels for background removal in 2025?
Absolutely – channels remain the nuclear option when every automatic tool fails. Every serious retoucher still uses them weekly.