

What Is a Clipping Path? Complete 2026 Guide with 20 Real-World Use Cases
August 13, 2026
Clipping Path, Deep Etch & Silhouette: The Real Difference
August 15, 2026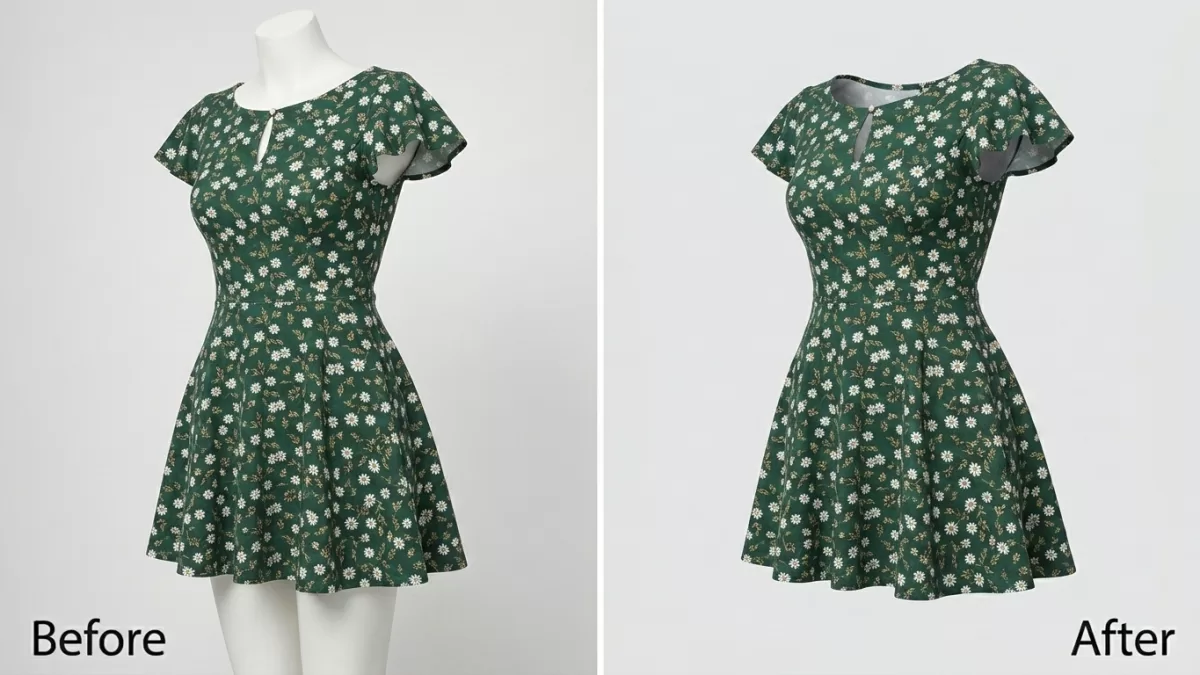
Ghost mannequin photography is a post-production apparel technique that composites two or more garment photographs — one on a mannequin plus one interior shot — into a single image where the mannequin is digitally removed. The finished image displays the garment’s shape, drape, and inner details as if worn by an invisible figure.
- TL;DR — Key Takeaways
- Who This Guide Is For
- What Is Ghost Mannequin Photography?
- Why Fashion Brands Choose Ghost Mannequin Over Flat Lay and Live Models
- Ghost Mannequin Equipment Checklist
- Camera Settings for Ghost Mannequin Photography
- The 8-Step Studio Workflow
- The Three Ghost Mannequin Joint Techniques
- The Photoshop Editing Workflow (Step-by-Step)
- Ghost Mannequin Cost Breakdown in 2026
- AI Ghost Mannequin vs Manual Editing — What Actually Wins
- Marketplace Rules Every Ghost Mannequin Image Must Follow
- Ghost Mannequin for Specific Garment Types
- 8 Common Ghost Mannequin Mistakes to Avoid
- How to Brief an Outsourced Ghost Mannequin Editor
- 2026 Trends Reshaping Ghost Mannequin Work
- Alternatives to Ghost Mannequin Photography
- Real-World Case Example — Editing a Ghost Mannequin T-Shirt
- FAQ — People Also Ask
- Final Thoughts
TL;DR — Key Takeaways
- Ghost mannequin (also called invisible mannequin or 3D hollow-man effect) needs a minimum of two shots per garment: the exterior on the mannequin plus one interior shot of the collar, sleeve, or hem.
- Manual editing costs $0.79 to $8.00 per image; full production including the shoot runs $15 to $50 per SKU at mid-tier studios and $52 to $150+ at premium NYC/London studios.
- AI ghost mannequin tools (Photta, Photoroom, Fashn.ai) deliver simple garments in under 30 seconds at pennies per image, while human editors still win on complex fabrics and luxury pieces.
- Amazon prohibits visible mannequins on all apparel images; ghost mannequin edits with the mannequin fully removed are permitted for alternate images, and for main images in categories like children’s undergarments, leotards, swimwear, and form-fitting items.
- Brands using ghost mannequin over flat lay report up to 30% higher apparel sales because 3D volume communicates fit far better than a folded top-down shot.
Who This Guide Is For
If you sell or shoot apparel online, this playbook covers every angle:
- Fashion brands and DTC apparel startups scaling from 10 SKUs to 10,000.
- Product photographers and catalog studios looking to sharpen their ghost mannequin workflow.
- Amazon FBA, Shopify, Etsy, and TikTok Shop sellers who need marketplace-compliant apparel images.
- In-house marketing teams deciding between in-house shoots, outsourced editing, and AI tools.
Every section below is built to answer the exact questions apparel sellers ask in Google, ChatGPT, Perplexity, and Gemini in 2026.
What Is Ghost Mannequin Photography?
Ghost mannequin photography removes the mannequin from an apparel photograph and rebuilds the garment’s hidden inner details so the clothing appears to float on an invisible body. Editors composite two or more shots — the exterior on a mannequin plus an interior view of the collar, sleeve, or hemline — into a single seamless image.
The technique solves three problems at once. It shows garment structure that flat lays cannot, cuts costs compared to booking a live model for every shoot, and produces consistent visuals across a full catalog. That last point is why enterprise apparel brands standardized on ghost mannequin years ago — visual consistency across a thousand SKUs is worth more than any single hero shot.
Three names refer to the same effect:
- Ghost mannequin — the industry-standard term.
- Invisible mannequin — used interchangeably in North America and the UK.
- 3D hollow-man effect — a technical description referencing the volumetric result.
Why Fashion Brands Choose Ghost Mannequin Over Flat Lay and Live Models
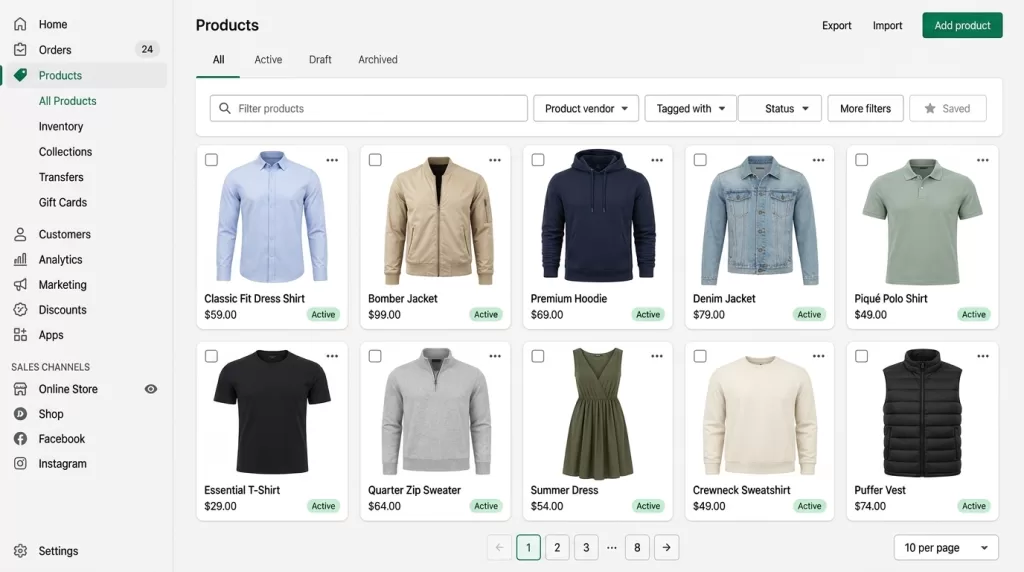
The choice between the three main apparel formats depends on cost, consistency, and how much fit information the shopper needs before checkout.
| Format | Cost per image | Consistency | Best for |
|---|---|---|---|
| Flat lay | $5–$25 shoot + minimal edit | Medium | Accessories, socks, folded knitwear, social feeds |
| Ghost mannequin | $15–$50 mid-tier full production | Very high | Large catalogs where fit + volume matter |
| On-model | $75–$500+ per look | Low without art direction | Hero images, editorial content, lifestyle brands |
Ghost mannequin sits in the sweet spot. It costs less than a full model shoot, shows fit far better than a flat lay, and generates images that look identical from shirt #1 to jacket #500. Brands using the format report meaningfully higher fashion sales because 3D volume communicates fit accuracy in ways a folded top-down shot cannot.
For deeper analysis of related image-cost economics, our recent piece on white background production covers the studio side of the same equation.
Want a professional 3D apparel look without live models?
Create seamless, neck-joint perfection with our expert Ghost Mannequin Service
Ghost Mannequin Equipment Checklist
A professional ghost mannequin setup does not require a huge studio — it needs the right pieces in the right positions.
Camera and lens:
- DSLR or mirrorless body with manual controls.
- 50 mm, 85 mm, or 105 mm prime lenses work best. A 24–70 mm zoom set between 50 mm and 85 mm is the versatile alternative.
- Wide-angle lenses distort shoulders and hems — never use them for apparel.
Lighting:
- Two continuous LED lights or strobes with softboxes form the foundation.
- Place them at 45-degree angles on each side of the mannequin, five to six feet away, at chest-to-hip height.
- Add a third light behind the mannequin aimed at the backdrop, blowing it out 1 to 1.5 stops brighter than the garment. This makes background removal effortless in post.
- White foam boards bounce fill light into underarms and other recessed shadows.
Mannequin:
- Choose a modular ghost mannequin with removable neck, arm, torso, and leg sections. Detachable parts let you shoot the interior of a garment without disturbing the mannequin’s position.
- Match the mannequin size to your target garment. A size-6 dress form on a size-16 shirt looks wrong and no editor can fix it cleanly.
Support gear:
- A sturdy tripod locks camera height across every shot.
- Pins, clips, tape, and tissue paper solve fit and shape issues on set.
- A grey card or color checker anchors accurate white balance for post-production.
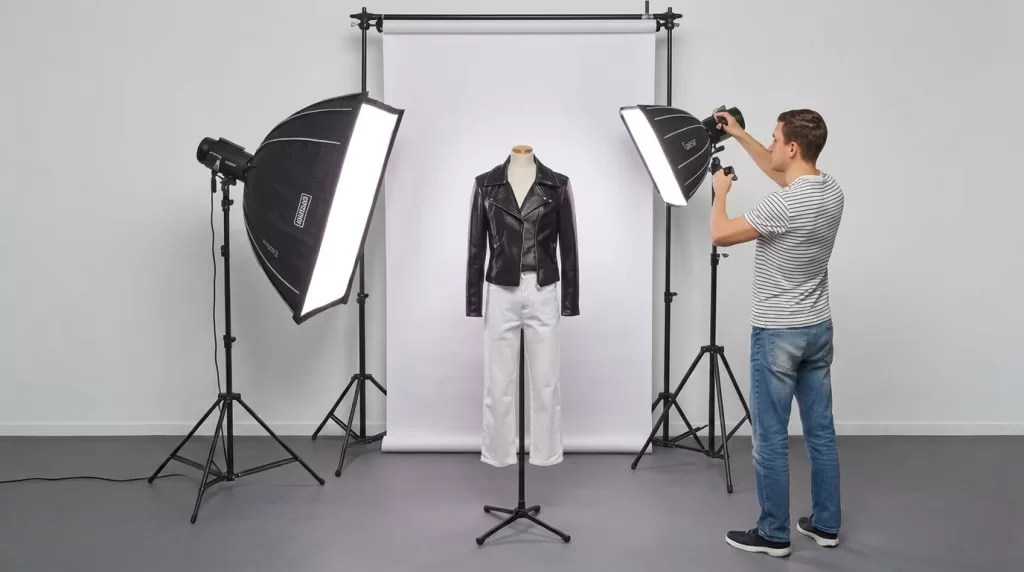
Solid gear alone will not save a poorly-framed shot. Understanding basic composition photography principles matters as much as any lens you buy.
Camera Settings for Ghost Mannequin Photography
Lock these settings before the first frame and every image in the shoot stays consistent:
- Mode: Manual (M).
- Aperture: f/8 to f/11 — the sharpest range on most lenses, deep enough for full garment focus.
- ISO: 100 to 200 for cleanest files.
- Shutter speed: matched to your lighting; 1/125 s is typical with strobes, 1/60 s or slower for continuous LEDs on a tripod.
- White balance: fixed (not auto). Set with a grey card or color checker.
- File format: RAW for maximum editing latitude in post.
- Focus: single-point autofocus locked to the center chest of the garment.
Once dialed in, tape a printout of the settings to the studio wall. Every following garment shoots at the same aperture, ISO, shutter, and white balance so post-production stays fast and consistent.
The 8-Step Studio Workflow
Every professional ghost mannequin shoot follows the same sequence. Skipping steps costs hours of retouching later.
- Prep the garment. Steam it, lint-roll it, remove tags. Every wrinkle you skip becomes retouching time.
- Dress the mannequin. Center the placket, straighten shoulders, align seams. Pin excess fabric vertically along the back — always behind the mannequin, never on the camera side.
- Lock camera settings. Manual mode, f/8–f/11, ISO 100, fixed white balance, RAW.
- Position the camera. Middle of the garment’s height for a neutral perspective. Tape the tripod position on the floor so every shot starts from the same distance.
- Shoot the front. Frame with equal margin on all four sides. Use a level.
- Shoot the back. Rotate the mannequin — never move the camera.
- Shoot the interior. Two options: lay the garment on white foam board and photograph the inside of the collar/hem, or use a detachable mannequin panel to shoot the interior in place. Capture the brand label clearly.
- Grab detail shots. Cuffs, hood interiors, hardware, prints, hems. Do this while lighting is still set up — these become alternate listing images.
Add a tethered QC review between shots. Catching a wrinkle or misalignment on set costs seconds. Catching it in post costs minutes per image, multiplied across the whole catalog.
The Three Ghost Mannequin Joint Techniques
Post-production for ghost mannequin work centers on rebuilding whichever part of the garment the mannequin covered. Editors call these regions joints, and three variations cover the entire apparel catalog.
Neck Joint
The neck joint reconstructs the interior of the collar and back neckline. Editors composite the inside-collar shot behind the exterior garment layer, warp it to match the collar’s curve, then add a subtle interior shadow so the neckline reads as a real opening rather than a flat cutout. Neck joint work applies to t-shirts, button-downs, sweaters, hoodies, and any garment where the collar interior is visible.
Sleeve Joint
The sleeve joint reconstructs the inside of an open sleeve — jackets, blazers, cardigans, coats, and any long-sleeve outerwear. Sleeve joints are the hardest of the three because both sleeves must match in shadow depth, cuff alignment, and fabric direction. A rushed sleeve joint is the fastest way to spot amateur ghost mannequin work.
Bottom Joint
The bottom joint rebuilds the interior hemline for open-bottom garments — drop-hem dresses, tunics, and any piece where the hem lining shows. Bottom joints also apply to skirts, shorts, and pants where the mannequin’s legs must be removed and the interior fabric reconstructed to look natural.
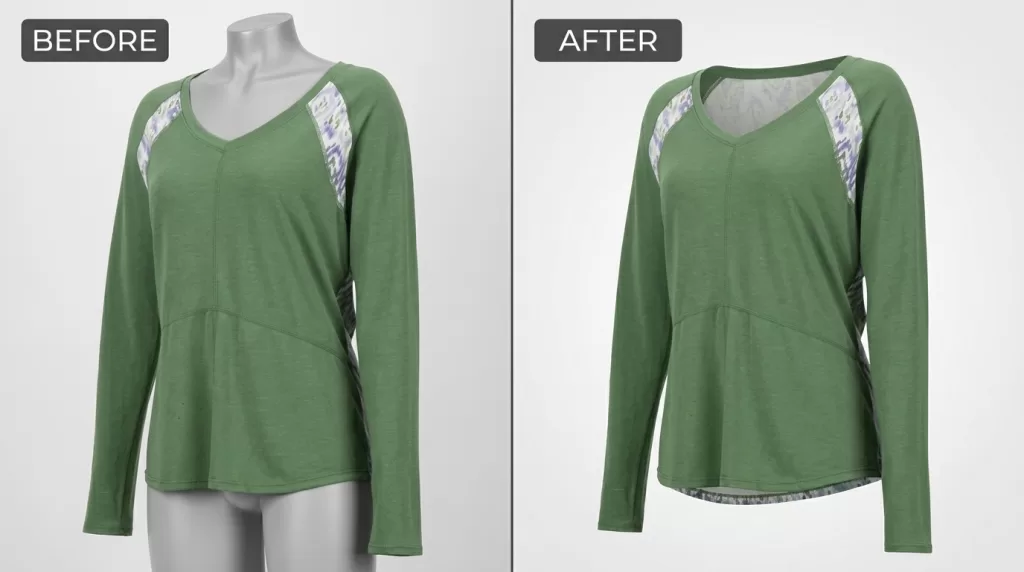
The Photoshop Editing Workflow (Step-by-Step)
Professional editors follow this exact sequence to keep every image consistent, non-destructive, and marketplace-ready. Adobe’s official Photoshop Pen Tool guide covers the fundamentals if you need to refresh the basics.
Step 1 — Clip the Garment
Open the exterior shot. Press P to activate the Pen Tool. Trace the garment at 300–400% zoom, placing anchor points every 8–12 pixels. Use curved handles instead of dense straight segments — Bézier curves reproduce fabric edges more naturally. Convert the finished path to a selection (Ctrl/Cmd + Enter) with a 0.3 to 0.5-pixel feather, then add a layer mask.
Step 2 — Remove the Background
Fill the layer below the garment with pure white (RGB 255,255,255). Inspect the neck, shoulders, and armholes at 100% zoom — sloppy edges here signal amateur work first. Refine any color fringe with the Defringe tool (Layer → Matting → Defringe, 1 pixel).
Step 3 — Composite the Interior Layer
Drop the inside-collar or hem shot onto a layer behind the main garment. Reduce opacity to 50% while positioning. Use Edit → Transform → Warp to bend the interior layer to match the collar’s curve — pull the center handle upward first, then adjust the corner points. Once aligned, restore opacity to 100% and mask the interior layer to reveal only the visible neckline area.
Step 4 — Build the Interior Shadow
Add a new blank layer between the garment layer and the interior layer. Set blend mode to Multiply at 10–20% opacity. With a soft round brush at low flow (15–20%), paint a subtle shadow along the inner rim of the collar. This shadow transforms a “sticker on white” appearance into a convincing 3D opening.
Step 5 — Restore the Brand Label
Ensure the brand label sits visibly against the neck joint. Buyers use the label to verify authenticity, and marketplaces flag missing labels in certain categories. If the label rotated or shifted during compositing, fix orientation with Free Transform.
Step 6 — Final Cleanup and QC
Flip the canvas horizontally (Image → Image Rotation → Flip Canvas Horizontal) to catch asymmetry your eye missed. Fix lint, threads, or dust with the Healing Brush (J) sampled from clean areas. Match exposure between the garment and interior layers using a Curves adjustment. Crop to the marketplace’s target aspect ratio.
Step 7 — Export
Convert the file to sRGB (Edit → Convert to Profile). Export a marketplace-compliant JPEG at 2,048 × 2,048 px and archive a layered PSD for future revisions. Google’s WebP compression benchmark shows WebP files run 25–34% smaller than equivalent JPEGs at the same visual quality, so many apparel stores now export WebP alongside JPEG to boost Core Web Vitals scores.
Want your images to look professionally edited, not over-processed?
Achieve natural, high-end perfection with our skilled Photo Retouching Service
Ghost Mannequin Cost Breakdown in 2026
Ghost mannequin pricing swings widely based on complexity, volume, and whether the number includes just editing or full production.
Editing only (per-image rates from established studios):
- Simple neck joint (t-shirts, basic tops): $0.79 – $1.79
- Medium complexity (button-downs, blazers, dresses): $1.79 – $3.00
- Complex (jackets with linings, patterned fabrics): $3.00 – $5.00
- Super complex (bridal, sheer, multi-layer, embellished): $5.00 – $8.00
Full production per SKU (shoot + edit combined):
- Bundled mid-tier studios: $15 – $50
- Premium NYC / London studios: $52 – $150+
- Editorial and luxury sessions: $150 – $500+
Volume discount structure standard across the industry:
- 50+ images → 10% off
- 100+ images → 20% off
- 500+ images → 30% off
- 1,000+ images → 40% off
For catalogs above 200 SKUs per season, the editing itself dominates the budget. That is why studios processing thousands of images monthly publish tiered pricing — they can offer 40% discounts and still stay profitable because throughput multiplies faster than costs.
AI Ghost Mannequin vs Manual Editing — What Actually Wins
The AI ghost mannequin space matured fast in 2026. Tools like Photta, Photoroom, and Fashn.ai deliver usable output on simple garments in under 30 seconds at pennies per image. The question is not whether to use AI, but where.
Where AI Wins in 2026
- Simple t-shirts, hoodies, and basic tops with clean cuts.
- High-volume catalogs where speed and cost dominate quality debates.
- Rapid draft images for internal design or merchandising review.
- Early-stage brands validating designs before investing in a full shoot.
Where Manual Editing Still Wins
- Sheer, lace, or highly reflective fabrics where AI misreads transparency.
- Luxury and bridal apparel with complex embellishment.
- Amazon apparel main images where every fringe pixel matters for compliance.
- Any garment with irregular construction, asymmetric detailing, or non-standard silhouettes.
- Any situation requiring a documented revision policy and human accountability.
The best 2026 studios run a hybrid workflow: AI handles bulk background masking in seconds, humans handle the neck joint, sleeve joint, and quality-control pass. That combination gives you both scale and craft.
| Approach | Cost per image | Time per image | Best for |
|---|---|---|---|
| Traditional manual editing | $0.79 – $8.00 | 15 – 55 minutes | Complex garments, hero images, luxury |
| AI-only tools | Under $1 | 15 – 30 seconds | Simple garments, high volume, drafts |
| Hybrid (AI + human QC) | $0.50 – $3.00 | 3 – 10 minutes | Most professional catalogs in 2026 |
Struggling with inconsistent cutouts from automated software?
Switch to 100% manual, expert Clipping Path for guaranteed perfection.
Marketplace Rules Every Ghost Mannequin Image Must Follow
Every online channel enforces different apparel image rules. Break them and listings get suppressed no matter how clean the ghost mannequin edit looks.
Amazon Apparel Rules — the Real Picture
Amazon’s guidance is nuanced and worth reading precisely:
- Visible mannequins are prohibited on any apparel image. Every part of the mannequin must be digitally removed — no framework, no shoulders, no arms peeking out.
- Ghost mannequin (mannequin fully removed) is fully allowed for off-figure / alternate images across all apparel categories.
- Main-image rule for adult clothing: the garment must be shown on a live model in most categories. Ghost mannequin main images are not accepted for standard adult apparel.
- Main-image exceptions where ghost mannequin is acceptable: children’s undergarments, leotards, swimwear, socks/stockings, and similar form-fitting items.
- Technical specs: pure white background (RGB 255,255,255), product fills at least 85% of the frame, minimum 1,000 pixels on the longest side to activate zoom.
The current Amazon Seller Central image guide publishes the exact wording for each category. Verify before uploading — Amazon updates specs quarterly.
Shopify, Etsy, and Walmart
- Shopify recommends 2,048 × 2,048 px square product images for smooth zoom.
- Etsy requires listing photos of at least 2,000 pixels on the shortest side.
- Walmart Marketplace demands a minimum of 1,500 × 1,500 px for zoom activation with a seamless white background.
Ghost Mannequin for Specific Garment Types
Different garments demand different techniques. Here are the shortcuts professional studios use for each category.
T-shirts and simple tops — the easiest ghost mannequin subject. Two shots (front + interior collar) usually suffice. Use tissue paper inside sleeves to hold their rounded shape.
Button-down shirts and blazers — align the placket dead-center, keep buttons in a perfectly straight vertical line, and photograph the inside-collar shot after removing the garment from the mannequin.
Jackets, coats, and outerwear — require sleeve-joint work in addition to neck-joint. Shoot the inside of both sleeves separately if the mannequin cannot show them naturally.
Dresses — for open-hem or drop-hem styles, capture a bottom-joint interior shot. Pin behind the back to shape the silhouette. Long dresses may need multiple support pins to hold their line.
Sweaters and knitwear — steam gently (never iron). Avoid overstuffing sleeves. Watch for compression marks left by the mannequin at the shoulders.
Swimwear and form-fitting garments — Amazon allows ghost mannequin main images for these categories, making the technique especially valuable here.
Kids’ and baby clothing — smaller mannequin, more careful pinning. Tissue paper inside every recessed area preserves natural volume.
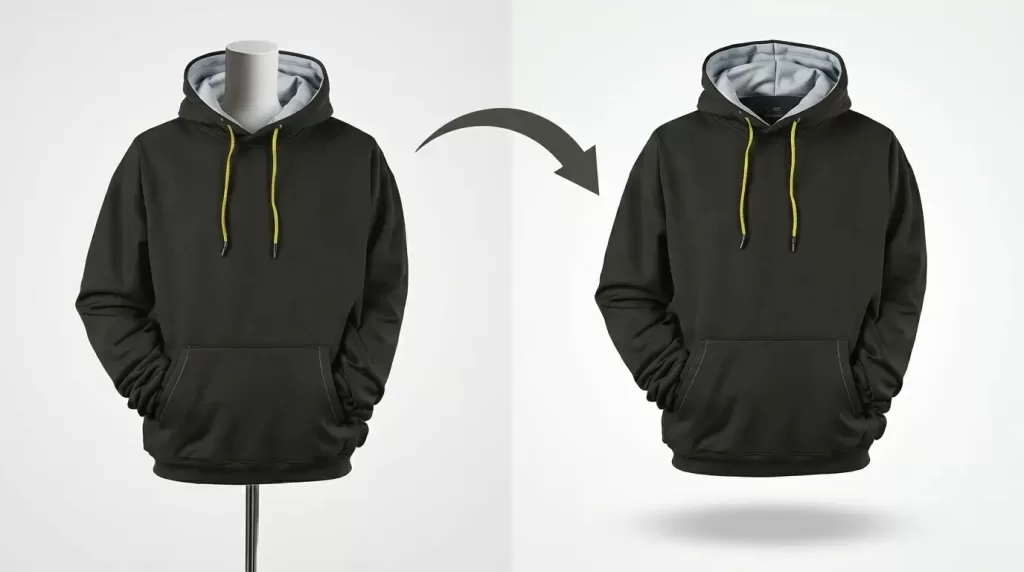
Struggling with complex hair or fur edges?
Let our experts deliver flawless, natural cutouts with our advanced Image Masking Service
8 Common Ghost Mannequin Mistakes to Avoid
The same handful of mistakes shows up in almost every rejected ghost mannequin image. Fix these and quality jumps overnight.
- Wrinkled or poorly fitted garments. Steam every piece and use pins behind the mannequin to control excess fabric.
- Uneven lighting between exterior and interior shots. Lock your camera and lights before shooting — every frame must match.
- Visible pins or clips in the final image. Pin from behind. Never from the side the camera sees.
- Wide-angle lens distortion. Stay at 50 mm or longer to keep shoulders and hems from stretching unnaturally.
- Sloppy edges around neck, shoulders, and armholes. Zoom to 100% during the mask review — these three areas make or break the illusion.
- Missing interior shadow at the neckline. A flat neck joint looks like a paper cutout. A Multiply layer at 10–20% opacity fixes it.
- Inconsistent white background hex values. #FFFFFF is not the same as #FCFCFC. Marketplaces detect the difference and can flag or reject the listing.
- Uploading Adobe RGB files instead of sRGB. Colors flatten in every browser. Always convert to sRGB before web export.
Consistency across a catalog is the single strongest trust signal a brand sends. Photographers who lose clients frequently lose them over inconsistent editing, not over the initial shoot.
How to Brief an Outsourced Ghost Mannequin Editor
Outsourcing ghost mannequin work saves money — but only if the brief is written well. A documented brief cuts revision rounds by more than half.
Include the following in every brief:
- Two or three reference “gold standard” images that represent your ideal output.
- Background color hex (usually #FFFFFF), cropping ratio, and margin around the garment.
- File naming convention — for example,
SKU12345_front.jpg,SKU12345_back.jpg,SKU12345_detail.jpg. - Export specs — dimensions, file format, color profile (sRGB), maximum file size, marketplace destination.
- Joint style preferences — how deep the interior shadow should sit, how visible the brand label should be.
- Do-not-touch list — labels, prints, hardware, embroidery, or any product feature that must remain unchanged.
- Turnaround SLA and revision policy — hours to first draft, plus how many revision rounds are included.
Studios that receive one-line briefs deliver one-line-quality output. Studios that receive documented briefs deliver work that ships to a marketplace without re-checking every frame.
2026 Trends Reshaping Ghost Mannequin Work
Six trends define the year:
- AI-first bulk editing. Brands push entire secondary-image catalogs through AI, reserving humans for hero images only.
- Amazon AI-compliance risk. Some sellers have received policy warnings when AI-generated apparel visuals don’t match the physical product. Ghost mannequin edits from real photographs remain the safest option.
- Hybrid ghost mannequin + on-model shoots. One shoot day produces ghost mannequin for PDP grids and on-model for hero banners.
- Vertical crops for social and mobile. 4:5 and 9:16 ratios now dominate Instagram Shop, TikTok Shop, and Reels-driven traffic.
- 360-degree ghost mannequin. Spin animations built from 24 to 36 ghost mannequin frames per garment now appear on premium apparel sites.
- AI-generated color variants from a single shoot. One master shoot produces every colorway digitally, and our color grading primer walks through the technique.
Alternatives to Ghost Mannequin Photography
Ghost mannequin is not the only format. Depending on catalog stage, budget, and product category, one of these may fit better:
- Flat lay photography — fastest and cheapest. Best for accessories, folded knitwear, and social feeds. Weak on fit information.
- On-model photography — highest engagement for lifestyle-driven brands. Mandatory for most Amazon adult clothing main images. Most expensive to produce consistently.
- AI ghost mannequin generation — Photta, Photoroom, Fashn.ai. Best for high-volume simple garments and rapid prototyping.
- AI on-model generation — new tools generate synthetic model images from a flat lay input. Compliance risk remains high; use for testing, not marketplace publication.
- 360-degree spin photography — immersive product views built from 24–36 ghost mannequin frames per garment.
- Hybrid catalogs — the professional default in 2026: ghost mannequin for PDP grids, on-model for hero banners, flat lay for accessories, AI for drafts.
Our ghost mannequin service page compares each format side by side.
Real-World Case Example — Editing a Ghost Mannequin T-Shirt
You photograph a plain white t-shirt for a Shopify store. Here is exactly how the editing runs from RAW to final export:
- Two shots captured on set — the exterior on the mannequin and the interior of the back collar photographed on white foam board.
- Clip the exterior with the Pen Tool at 400% zoom, anchor points every 8–12 pixels, convert to selection with 0.3-pixel feather, add layer mask.
- Drop the interior shot behind the exterior layer at 50% opacity; use Warp to bend it into the collar curve.
- Mask the interior layer so only the visible collar interior shows through.
- Paint a soft Multiply shadow at 15% opacity around the inner rim of the collar.
- Confirm the brand label is centered and rotate if it shifted during compositing.
- Flip canvas horizontally to check symmetry, heal any lint with the Healing Brush.
- Convert to sRGB, export as JPEG at 2,048 × 2,048 px, archive a layered PSD for revisions.
Total editing time on a simple t-shirt: 6 to 12 minutes for an experienced editor, or under a minute for AI-only pipelines. Quality tracks that time closely.
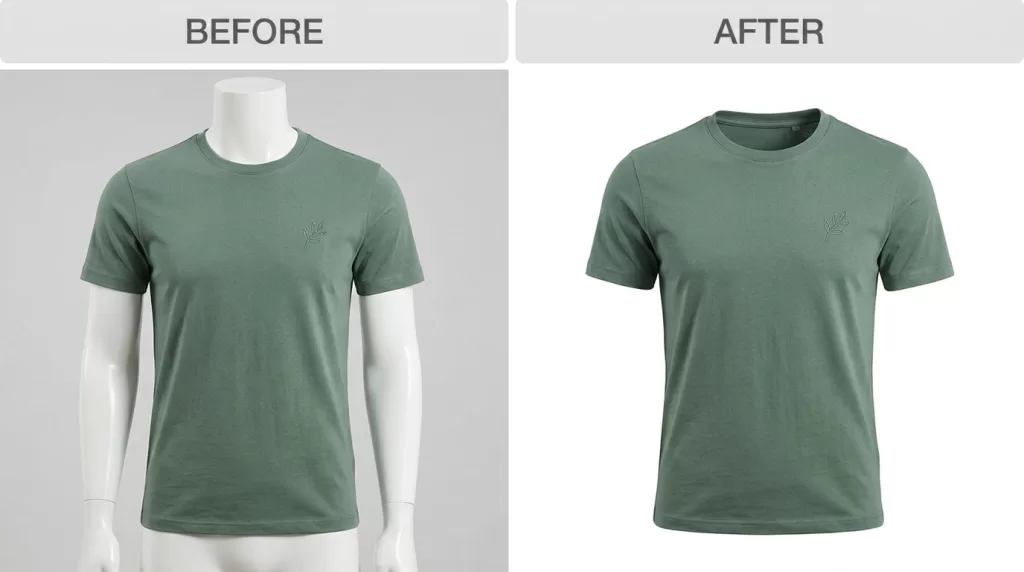
FAQ — People Also Ask
What is the difference between ghost mannequin and invisible mannequin?
There is no technical difference — both terms describe the same effect. “Ghost mannequin” is the industry-standard term; “invisible mannequin” appears more in casual copy. Some retailers also use “3D hollow-man effect” to describe the volumetric outcome.
How many photos do I need for one ghost mannequin image?
At minimum, two: the exterior garment on the mannequin plus one interior shot of the neck, sleeve, or hem lining. Complex garments — coats, dresses with visible interiors, multi-layer pieces — need three to five shots to reconstruct every hidden panel cleanly.
Can I shoot ghost mannequin photography at home with a smartphone?
Yes, at entry level. A recent iPhone or Pixel captures front, back, and interior shots suitable for basic editing. Lighting matters more than the phone body — invest in two softboxes and a plain white backdrop before upgrading to a DSLR body.
How much does professional ghost mannequin editing cost per image in 2026?
Editing alone runs $0.79 to $8.00 per image depending on garment complexity. Full production (shoot + edit) ranges from $15 to $50 per finished image at mid-tier studios and $52 to $150+ per image at premium NYC/London studios.
Does Amazon allow ghost mannequin images for apparel?
Amazon allows ghost mannequin fully for off-figure/alternate images across all apparel categories, provided the mannequin is completely erased from the final image. Most adult clothing main images must show the garment on a live model. Ghost mannequin main images are permitted for children’s undergarments, leotards, swimwear, and other form-fitting items.
What software do professionals use for ghost mannequin editing?
Adobe Photoshop remains the industry standard. Editors combine the Pen Tool, layer masks, Warp transforms, and Multiply blend modes for the effect. AI tools like Photta, Photoroom, and Fashn.ai now automate large portions of the workflow.
How long does ghost mannequin editing take per image?
Manual editing on a simple garment takes 6 to 12 minutes for an experienced editor and 15 to 55 minutes for complex garments with multiple joints. AI tools complete comparable output in 15 to 30 seconds per image.
Is AI ghost mannequin good enough for luxury or bridal brands?
Not yet. AI performs well on simple, symmetrical garments but struggles on sheer, textured, embellished, or highly asymmetrical pieces. Luxury and bridal catalogs still rely on manual editing for hero images and any garment with intricate construction.
Final Thoughts
Ghost mannequin photography sits at the intersection of craft and scale. Done well, it delivers three-dimensional apparel images that outperform flat lays on almost every metric that matters — perceived quality, catalog consistency, and time-to-purchase. Done poorly, it looks like a sticker pasted onto white and destroys trust before the shopper reaches the size chart.
The 2026 formula is straightforward: shoot cleanly with two lights, one modular mannequin, and a locked-in camera position. Edit the neck, sleeve, or bottom joint with a Multiply shadow at 10–20% opacity to build convincing 3D depth. Convert every export to sRGB, respect each marketplace’s technical rules, and use AI where speed matters more than craft.
For catalogs above 50 SKUs per month, outsource the editing and keep creative direction in-house. For smaller catalogs, invest in one modular mannequin, one documented Photoshop workflow, and a style guide. Either path puts your apparel visuals ahead of most competitors in the same category.
Ready to transform your raw photos into professional assets?
Get a custom, no-obligation quote tailored to your specific volume and needs. Explore Clipping Expert Asia