

Best Camera Glasses 2026: Top Smart Video Spectacles
June 27, 2026
How to Do a Reverse Image Search from Your Phone (2026)
July 2, 2026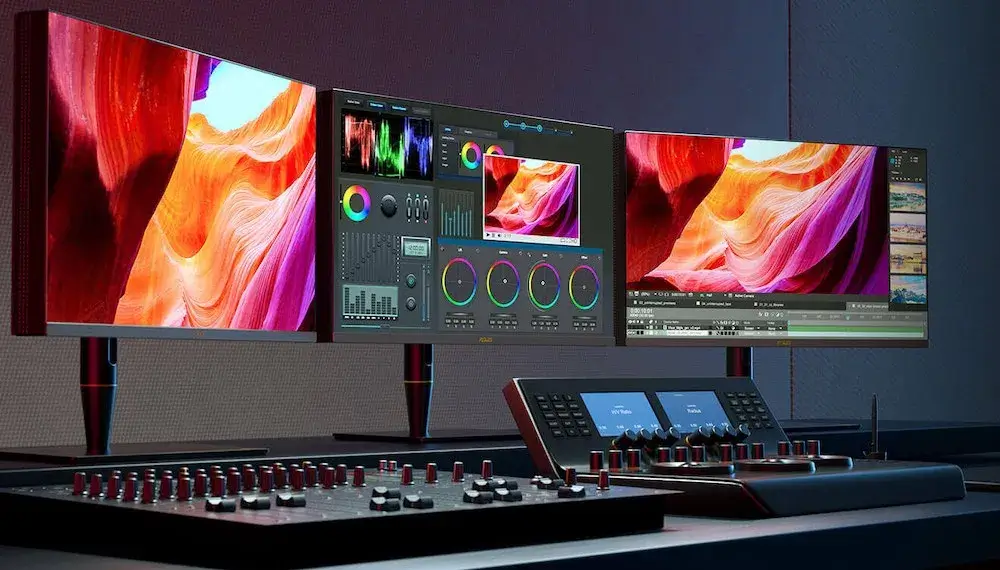
Great videos are not born in the camera — they come alive on the timeline. Whether you are a content creator chasing your first viral reel, a small-business owner producing product demos, or a wedding filmmaker assembling a 90-minute feature, the editing room is where raw footage becomes a story. The good news? You no longer need a film school degree or a $10,000 workstation to cut polished, professional video. You need a smart workflow, a handful of proven techniques, and the discipline to apply them every single project.
This guide pulls together the most effective video editing tips and techniques working creators use in 2026 — covering software choices, cutting fundamentals, audio balance, color grading, B-roll, transitions, exporting, and the tiny habits that separate amateur edits from pro-grade work. By the end, you will know exactly what to do the next time you open a fresh timeline.
Ready to publish content that looks studio-grade without the studio price tag? Pair these editing tips with crisp, distraction-free visuals using our professional background removal service — perfect for thumbnails, intro frames, and product cutaways.
- 1. Start With a Story, Not the Software
- 2. Pick the Right Editing Software for Your Skill Level
- 3. Organize Files Before You Edit — Future You Will Thank You
- 4. Learn the Cuts — They Are Your Vocabulary
- 5. Trim Ruthlessly — Pacing Is Everything
- 6. Master Audio Before Visuals
- 7. Use Transitions With Restraint
- 8. Add B-Roll to Hide Edits and Enrich Context
- 9. Color Correct First, Color Grade Second
- 10. Learn Keyboard Shortcuts (Seriously)
- 11. Add Captions and Subtitles — Always
- 12. Stabilize, Sharpen, and Polish the Picture
- 13. Export Smart — Different Platforms, Different Settings
- 14. Build a Personal Style Library
- 15. Get Feedback, Then Sleep On It
- Common Video Editing Mistakes to Avoid
- Quick-Reference Video Editing Workflow
- Frequently Asked Questions (FAQ)
- Final Thoughts: Editing Is a Practice, Not a Destination
1. Start With a Story, Not the Software
Why planning beats panic-editing every time
Before you drag a single clip onto the timeline, decide what story you actually want to tell. Editors who skip this step waste hours scrubbing through footage hoping a narrative appears. Editors who plan first finish in half the time and produce twice the impact.
Ask yourself three questions before opening any editor:
- Who is watching? A wedding family, a TikTok audience, and a B2B buyer all want different pacing.
- What is the single takeaway? One video, one message — anything else becomes B-roll.
- What emotion should the viewer leave with? Curiosity, joy, urgency, calm — pick one.
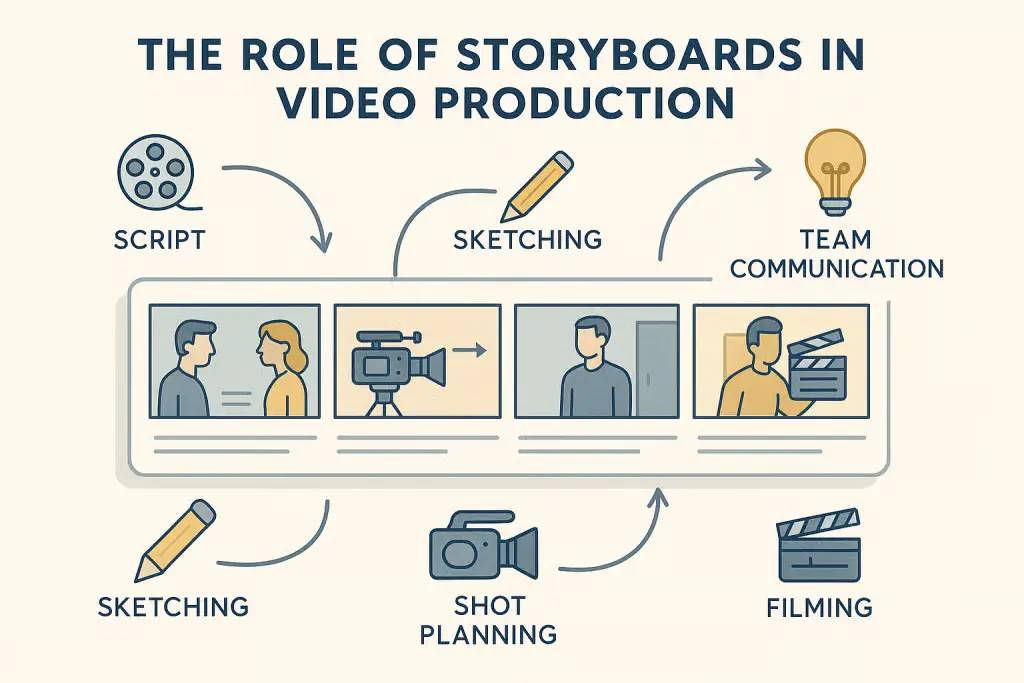
A loose shot list or a hand-drawn storyboard works just as well as a polished one. Even a sticky note that reads “open with the close-up, end with the wide” will keep you focused. The American Society of Cinematographers has long argued that “every cut should be a decision, not an accident” — and that decision starts well before the edit (ASC).
2. Pick the Right Editing Software for Your Skill Level
Match the tool to the task — not to the trend
Choosing software is less about which app is “best” and more about which app fits your project, hardware, and budget. The good news: every tier now has a serious option.
Beginner-friendly (free or low-cost):
- iMovie (macOS/iOS) — drag-and-drop simplicity, great for vlogs.
- CapCut Desktop — superb for short-form social content with built-in AI tools.
- Clipchamp (Windows) — Microsoft’s free editor with cloud sync.
- DaVinci Resolve (Free) — surprisingly the most generous free pro tool in the market.
Intermediate to professional:
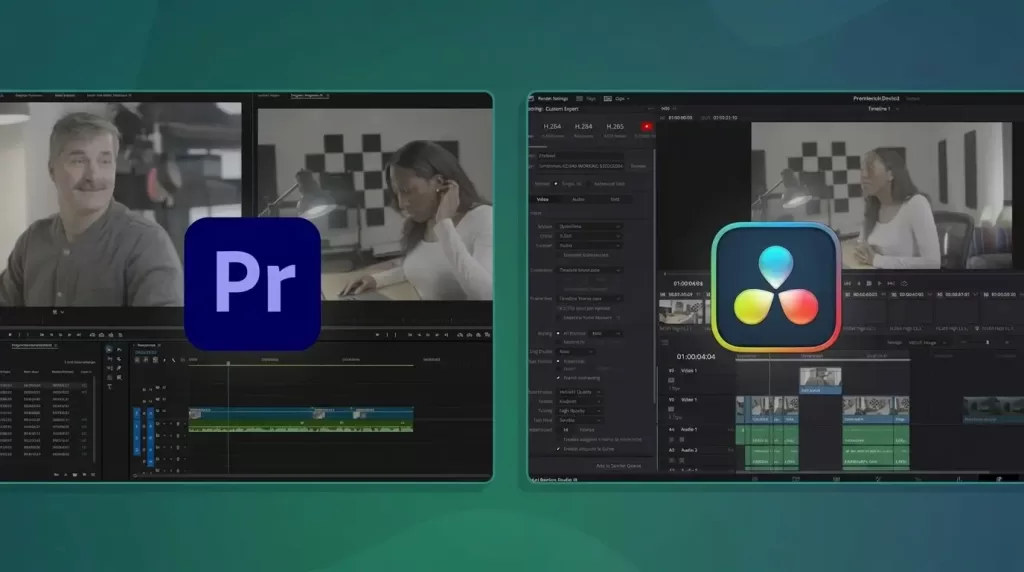
- Adobe Premiere Pro — the industry workhorse with the deepest plugin ecosystem.
- Final Cut Pro — magnetic timeline genius for macOS users.
- DaVinci Resolve Studio — unmatched color grading and now a full NLE.
Mobile-first creators:
- CapCut, InShot, LumaFusion, Premiere Rush — all capable of pro output from a phone or tablet.
Match the tool to your computer’s horsepower. A four-year-old laptop will choke on Premiere Pro 4K timelines but cruise through Clipchamp or CapCut. Blackmagic Design even publishes minimum-spec guidance for Resolve, which is worth checking before you install (Blackmagic Design).
3. Organize Files Before You Edit — Future You Will Thank You
A clean project folder is the cheapest productivity upgrade you can make
Disorganized media is the silent killer of editing speed. Build the same folder structure every time and your projects will start themselves.
A bulletproof folder template:
01_Footage(sub-folders by camera or scene)02_Audio(dialogue, music, SFX)03_Graphics(logos, lower thirds, PNGs)04_Project_Files(your editor’s working files)05_Exports(final renders, dated)
Pair this with the 3-2-1 backup rule: three copies of your project, on two different media types, with one copy off-site or in the cloud. Drives fail at the worst possible moment — usually the night before the deadline.
Inside your editing app, color-code clips by type: dialogue in blue, B-roll in green, music in purple. You will save hours of squinting at the timeline.
4. Learn the Cuts — They Are Your Vocabulary
Seven essential cuts every editor should master
Editing is a language. Cuts are its words. Most cinema-grade edits use just a handful, but they use them with intent.
- Standard (Hard) Cut — the workhorse; clip A ends, clip B begins.
- J-Cut — audio from the next scene arrives before the visual, easing the viewer into a new location.
- L-Cut — audio from the current scene lingers under the next visual, useful for emotional bridges.
- Jump Cut — same subject, slightly different position; perfect for vlogs and time compression.
- Match Cut — visual or auditory similarity bridges two unrelated scenes (think the bone-to-spaceship cut in 2001).
- Cross-Cut (Parallel Edit) — alternating between two storylines happening simultaneously.
- Cutaway — brief shot of something else, hiding edits and adding context.
Pro tip: Always cut on the action. If a character reaches for a door, cut mid-reach to the next angle — motion masks the edit and the brain reads continuity instead of interruption.

5. Trim Ruthlessly — Pacing Is Everything
If a clip does not move the story forward, it does not belong
The single biggest difference between an amateur reel and a pro edit is how much footage gets cut. Beginners cling to clips because they remember filming them. Pros delete anything that does not serve the viewer.
A simple trimming checklist:
- Cut the first and last second of every spoken clip — pre-roll silence and post-roll hesitation kill momentum.
- Remove every “um,” “uh,” and unnecessary pause longer than half a second.
- If two clips say the same thing, keep only the stronger one.
- Watch each scene at 1.5× speed; anything that still feels slow needs another trim.
Pacing changes by platform. A YouTube tutorial can breathe at 8–10 seconds per shot, while a TikTok or Instagram Reel often demands cuts every 1–2 seconds to fight scroll-away. Match your rhythm to the watch context.
6. Master Audio Before Visuals
Viewers tolerate bad video, but they leave bad audio
Sound carries more emotional weight than picture — yet beginners almost always treat it as an afterthought. A YouTube study from Google’s own content team has repeatedly shown that audio quality correlates more strongly with watch time than resolution does (Think with Google).
Build your audio mix in this order:
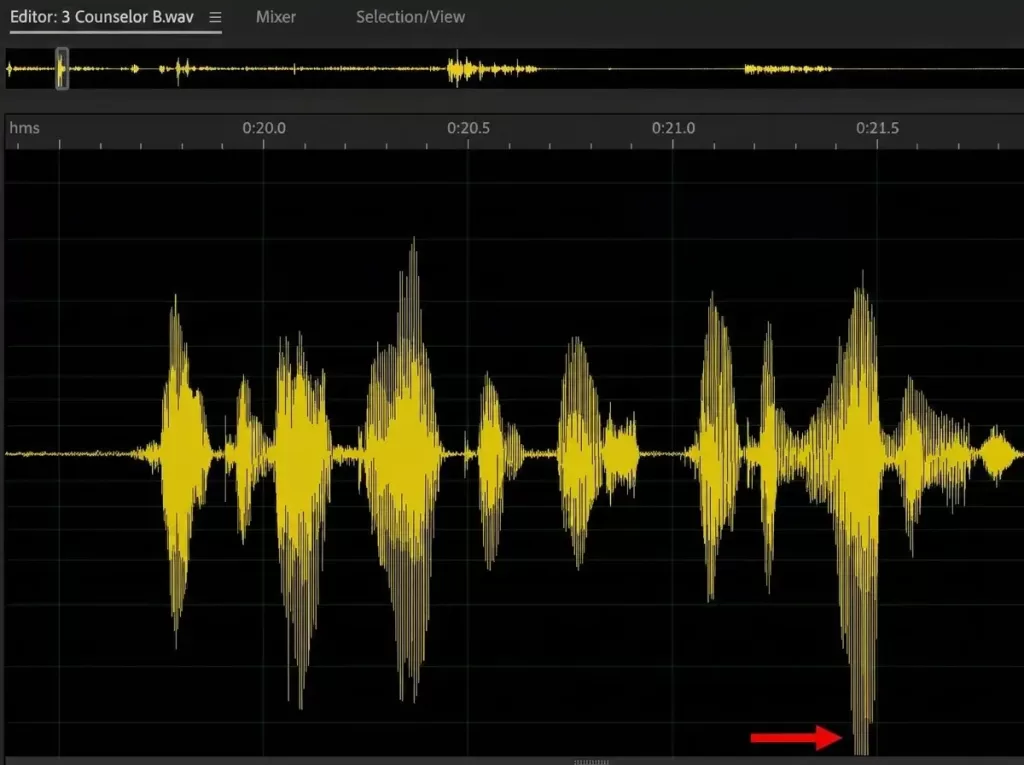
- Dialogue first — normalize to around −12 dB to −6 dB peaks, with an average of roughly −16 LUFS for spoken voice.
- Sound effects next — quieter than dialogue, around −18 to −24 dB; they support, not compete.
- Music last — typically −20 to −30 dB under dialogue, ducking automatically when someone speaks.
Use noise reduction (Premiere’s DeNoise, Resolve’s Voice Isolation, or third-party plugins like iZotope RX) to clean room tone before you EQ. Always preview on cheap earbuds and good headphones — your audience will use both.
7. Use Transitions With Restraint
Cuts are confident; transitions are a choice
The fastest way to spot a beginner edit? Star wipes, spinning cubes, and 3D page-turns. The fastest way to look pro? A clean cut almost every time, with the occasional cross-dissolve when the story actually needs it.
When transitions earn their place:
- Cross-dissolve — passage of time or emotional softening.
- Fade to black — chapter break or scene close.
- Whip pan / match cut — energetic location change, common in travel vlogs.
- Audio J/L crossfades — almost mandatory between dialogue clips to avoid pops.
If you cannot explain why a transition belongs at that exact frame, replace it with a straight cut. Restraint reads as confidence.
8. Add B-Roll to Hide Edits and Enrich Context
B-roll is the editor’s safety net and storytelling spice rack
B-roll covers awkward jump cuts, illustrates what your narrator is describing, and adds production value with almost no extra shooting time. A talking-head video with three B-roll inserts per minute will outperform the same video shot in a single static angle every time.
B-roll best practices:
- Shoot 3–5 seconds longer than you think you will need.
- Capture wide, medium, and close-up of the same subject.
- Layer ambient sound from the B-roll under the dialogue for realism.
- Resist the temptation to use unrelated stock B-roll — viewers can tell.
Selling apparel or fashion online? B-roll only sells when the product looks impeccable. Our ghost mannequin photo editing service gives garments that hollow, professional shape — ideal for product reels and Amazon hero shots.
9. Color Correct First, Color Grade Second
Two stages, two different goals
These two terms get blurred constantly, but separating them is the secret to a cinematic look.
- Color correction = technical. You balance exposure, white balance, and contrast so every clip in the scene matches.
- Color grading = creative. You apply a stylistic look — teal-and-orange blockbuster, muted documentary, warm wedding glow — using LUTs, color wheels, and curves.
A simple grading workflow:
- Set black and white points on the waveform scope.
- Correct white balance using the picker on a neutral surface.
- Match shots to your hero clip (the best-looking one in the scene).
- Apply a base LUT (try ARRI 709 or Rec.709 starter LUTs).
- Refine with HSL qualifiers — push skin tones toward a healthy peach, sky toward cyan-teal.
For deeper grading craft, No Film School consistently publishes tutorials from working colorists worth bookmarking.
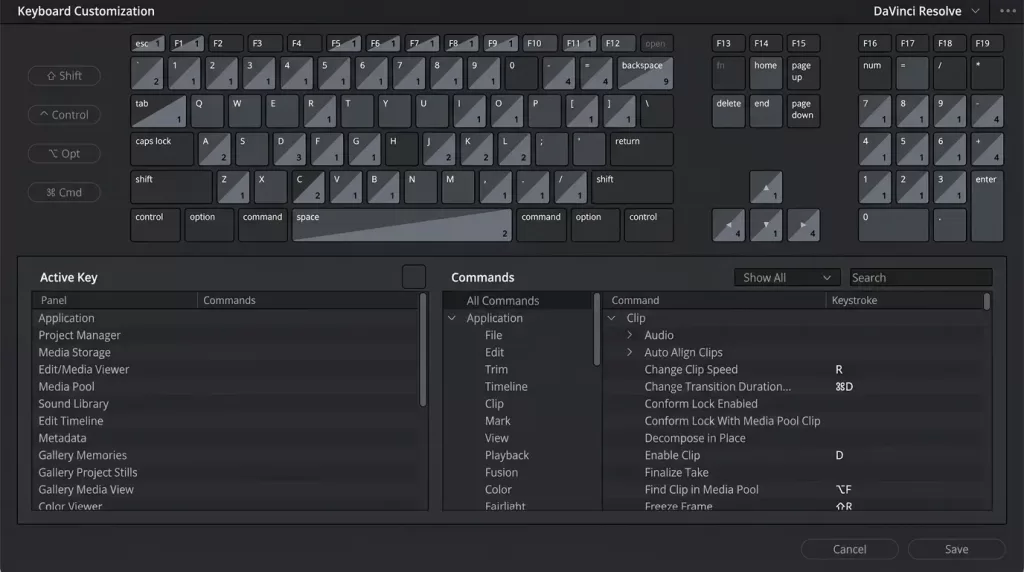
10. Learn Keyboard Shortcuts (Seriously)
Speed compounds — every shortcut saves minutes per project
Mouse-only editors plateau quickly. Editors who learn even ten core shortcuts cut 30–40% faster within a week. Start with these universal essentials:
- J / K / L — rewind, pause, play forward (tap multiple times for variable speed).
- I / O — mark in and out points.
- C — razor/blade tool.
- V — selection tool.
- Cmd/Ctrl + K — split clip at playhead.
- Spacebar — play/stop.
- Shift + Arrow — nudge clips one frame.
Stick a printed cheat sheet next to your monitor for two weeks. After that, your hands will move automatically.
Editing portrait, beauty, or lifestyle content? Pristine skin and clean detail elevate every frame. Try our high-end photo retouching service for thumbnail-ready stills and intro cards your audience will pause on.
11. Add Captions and Subtitles — Always
Silent viewing is the default now, not the exception
Sharethrough’s widely cited research found that around 75% of viewers watch mobile video on mute, and captioned videos see significantly higher completion rates. Captions also boost SEO because search engines crawl the text.
How to add captions efficiently:
- Use built-in auto-transcribe in Premiere Pro, Final Cut Pro, or CapCut.
- Clean up the AI output — homophones and proper nouns trip up every algorithm.
- Burn in for social platforms; use sidecar .SRT files for YouTube and Vimeo.
- Translate into one or two extra languages if your audience is global.
Accessibility is not optional either — captions help viewers who are deaf or hard of hearing, plus anyone in a noisy café or quiet library.
12. Stabilize, Sharpen, and Polish the Picture
Small finishing touches that scream “professional”
After the edit locks, walk through this final-polish checklist:
- Stabilization — apply Warp Stabilizer (Premiere) or Stabilization (Resolve) to shaky handheld shots; turn it off for tripod shots.
- Speed ramps — accelerate dull middle sections, decelerate dramatic moments for emphasis.
- Subtle sharpening — add 10–15 units of sharpen to compressed footage; do not overdo it.
- Vignette — a gentle dark edge focuses the eye on the subject.
- Grain or film emulation — adds texture and hides minor compression artifacts.
Watch the final cut on three different screens before exporting: your editing monitor, a phone, and a TV if possible. Issues invisible on one will jump out on another.
13. Export Smart — Different Platforms, Different Settings
One master export, then platform-specific renders
Each platform has its own preferred specs, but the principles are similar.
| Platform | Resolution | Frame Rate | Codec | Bitrate |
|---|---|---|---|---|
| YouTube (long-form) | 1080p / 4K | 24/30/60 fps | H.264 / H.265 | 12–50 Mbps |
| Instagram Reels / TikTok | 1080×1920 (9:16) | 30 fps | H.264 | 8–15 Mbps |
| 1080p | 30 fps | H.264 | 10 Mbps | |
| Vimeo (showcase) | 1080p / 4K | Native | H.264 / ProRes | 20–50 Mbps |
Always export a master file (ProRes 422 HQ or DNxHR HQ) first, then transcode smaller H.264 versions from that master. You will save hours every time a client asks for “just one tiny change.”
For deeper export guidance, the DJI Osmo Pocket 4 review on Photofixal is also a useful read if you shoot on compact cameras and want export-ready settings straight from the device.
14. Build a Personal Style Library
Reusable assets turn good editors into fast editors
After a few projects, save the things you keep recreating:
- LUT presets — your signature color grade in one click.
- Title templates — lower thirds, outros, end cards.
- Sound effect packs — whooshes, risers, UI clicks, ambience beds.
- Adjustment-layer recipes — sharpen-plus-vignette, log-to-Rec709 conversion.
- Project templates — pre-built bins, sequences, and export presets.
Treat these like your editor’s mise en place. The chef who preps before cooking always plates faster — and so will you.
Producing video ads or marketplace listings? Crisp product cutouts and layered compositions start with clean image masking. Our advanced image masking service handles fur, hair, glass, and motion blur that simple clipping can’t touch.
15. Get Feedback, Then Sleep On It
Fresh eyes catch what tired eyes miss
After hours on a timeline, your brain stops registering tiny issues — a frame flash here, a clipping audio peak there. Two cheap habits fix this:
- Sleep on it. Watch the final cut the next morning before exporting. You will catch 5–10 things every single time.
- Ask one outside viewer to watch without context. Their first 30-second reaction tells you whether the hook is working.
Avoid feedback loops with too many cooks. Two trusted opinions beat ten contradictory ones.
Common Video Editing Mistakes to Avoid
A quick cheat sheet of pitfalls I see in nearly every beginner project:
- ✕ Using transitions to mask bad cuts.
- ✕ Music louder than dialogue.
- ✕ Over-saturated, “teal-and-orange-on-steroids” grades.
- ✕ Center-frame everything (ignore the rule of thirds at your peril).
- ✕ Ignoring loudness standards before export (−14 LUFS for YouTube, −16 LUFS for podcasts).
- ✕ Forgetting to save incremental versions (
project_v01,project_v02…). - ✕ Exporting once and uploading everywhere with the same file.
Quick-Reference Video Editing Workflow
For readers who like a one-glance summary, here is the workflow most working editors actually follow:
- Plan the story and shot list.
- Ingest and back up all media (3-2-1 rule).
- Organize bins and color-code clips.
- Rough cut — assemble in order, no polish.
- Fine cut — trim aggressively, refine pacing.
- B-roll pass — cover edits, add visuals.
- Audio mix — dialogue → SFX → music.
- Color correct, then grade.
- Titles, graphics, captions.
- Polish pass — stabilize, sharpen, vignette.
- Review on multiple screens, sleep on it.
- Export master + platform versions.
Need lifelike product shadows for your video thumbnails or e-commerce stills? Our natural shadow creation service adds depth and realism that flat cutouts simply cannot deliver.
Frequently Asked Questions (FAQ)
1. What is the easiest video editing software for absolute beginners?
CapCut Desktop, iMovie (Mac), and Clipchamp (Windows) are the gentlest starting points. They use drag-and-drop timelines, include AI-assisted captions, and run on modest hardware. Once you are comfortable, graduate to DaVinci Resolve’s free version — it scales all the way to Hollywood-grade work.
2. How long should a YouTube video be in 2026?
It depends on the topic, but data consistently shows tutorials perform best at 7–15 minutes, vlogs at 8–12 minutes, and short-form content at 30–60 seconds. Focus on watch-time percentage, not raw length — a tightly edited 6-minute video beats a bloated 14-minute one every time.
3. Do I need a powerful computer to edit video?
For 1080p editing, a modern laptop with 16 GB of RAM and an SSD handles most projects. For 4K, RAW, or multicam work, aim for 32 GB+ RAM, a dedicated GPU, and fast NVMe storage. Proxy workflows let you edit heavy footage on lighter machines by working with smaller stand-in files.
4. What is the difference between color correction and color grading?
Color correction is technical — balancing exposure, contrast, and white balance so every clip matches. Color grading is creative — applying a stylistic look, like the warm tones of a wedding film or the cold blues of a thriller. Always correct first, then grade.
5. How do I make my audio sound professional?
Record clean audio at the source with a dedicated mic, edit dialogue first to a consistent loudness around −16 LUFS, layer music well below voice, and use noise reduction sparingly. A good mix on cheap earbuds is the real test.
6. Should I use AI tools when editing?
Absolutely — for the boring parts. AI now handles auto-captioning, silence removal, voice isolation, scene detection, and rough transcription extremely well. Use it to speed up grunt work, but keep creative decisions (pacing, story, music choice) human.
Use 9:16 vertical for TikTok, Instagram Reels, and YouTube Shorts; 1:1 square for Instagram feed; 16:9 horizontal for YouTube, LinkedIn, and Facebook landscape posts. Shoot wider than your delivery aspect so you have room to reframe.
8. How do I avoid copyright strikes on music?
Use royalty-free libraries like Epidemic Sound, Artlist, YouTube Audio Library, or Soundstripe. Read every license — “free” often means “free for personal use only.” When in doubt, commission custom music or use platform-licensed catalogs built into Reels and TikTok.
Running a product-heavy channel with dozens of SKUs in every video? Save hours of manual masking with our multi-clipping path service — perfect for color-changing, background swapping, and complex compositing in your edits.
Final Thoughts: Editing Is a Practice, Not a Destination
The editors I admire most still describe themselves as “always learning.” Every project teaches you something — about pacing, about audio, about your own attention span. The tips in this guide will compress that learning curve, but the real growth happens the moment you open a fresh timeline tomorrow and apply just one of them.
Pick the technique that intimidates you the least and use it in your next cut. Then the next. Within a month, your edits will look noticeably tighter, and within a year, viewers will start asking who edited your videos — even when the answer is “I did, on my laptop.”
Cut with intention. Trim without mercy. And remember: the goal is never to show off your editing — it is to make the audience forget you were ever there.