
4×6 vs 5×7 Photo Size Which One Should You Choose?
February 12, 2026
Best Free Photoshop Alternatives in 2026
February 14, 2026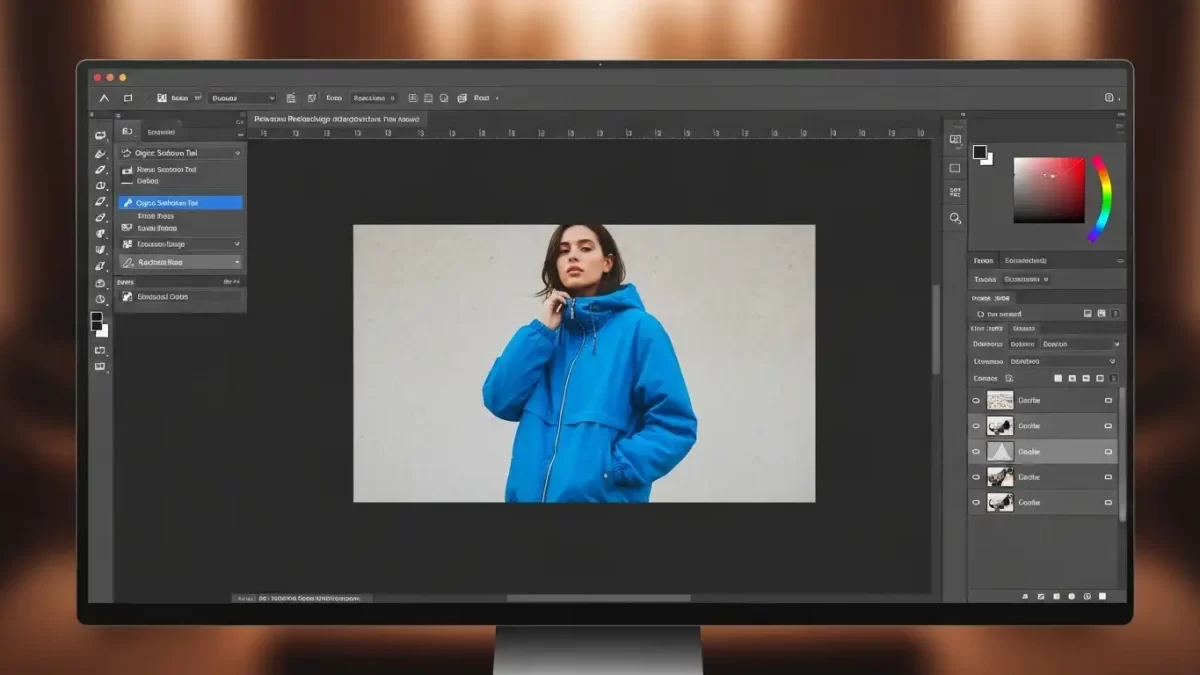
You spot a stunning photo, but something feels off—the vibrant red dress clashes with the scene, or that sleek black car just doesn’t pop against the city lights. What if you could instantly transform it into the perfect shade? Changing the color of an object in Photoshop gives you that creative power. Whether you’re a photographer tweaking client shots, a designer mocking up products, or a hobbyist experimenting with your social media content, this skill opens up endless possibilities.
In this in-depth guide, you will learn multiple proven methods to recolor objects with precision and realism. You will discover non-destructive techniques that let you experiment freely, quick tools for fast edits, and pro tips to make your changes look natural every time. By the end, you will confidently handle everything from simple clothing swaps to complex product variations.
Why You Need to Master Recoloring Objects in Photoshop
Photoshop stands as the gold standard for photo editing, and recoloring objects ranks among its most practical features. You save hours on reshoots by simply adjusting colors to match branding, seasons, or client preferences. E-commerce sellers use this to showcase products in multiple hues without new photoshoots. Portrait photographers enhance outfits to complement skin tones. Even casual users refresh old family photos with modern twists.
The best part? You achieve these changes non-destructively in most cases, so your original image stays safe. You experiment with bold purples, soft pastels, or exact brand matches, all while keeping the lighting, shadows, and textures intact. This guide draws from real-world workflows that professionals rely on daily, so you get techniques that deliver polished results fast.
Preparing Your Image and Workspace for Flawless Edits
You start strong by setting up your Photoshop environment correctly. Open your image in the latest version of Adobe Photoshop for the best AI-assisted tools. If you work with an older version, most methods still apply, but you miss some smart selection features.
Duplicate your background layer right away by pressing Ctrl+J (Windows) or Cmd+J (Mac). This protects your original file and lets you toggle back to the unchanged version anytime. Zoom in to 100% or higher so you spot fine details like stray hairs or fabric threads that could ruin your selection.
Organize your panels for efficiency. Keep the Layers panel, Properties panel, and Toolbar visible. If you edit products or fashion often, dock the Adjustments panel for one-click access to color tools. Save your workspace as a custom preset so you jump straight into recoloring mode next time.
A clean, high-resolution image makes the biggest difference. Avoid low-quality JPEGs with heavy compression, they lead to jagged edges after you change colors. Work in RGB mode for vibrant results, and convert to CMYK only at the final export for print projects.
Choosing the Right Method to Change Object Colors
Not every image demands the same approach. You pick the method based on the object’s complexity and your desired control. Simple solid-colored items respond beautifully to quick tools. Intricate objects with textures or transparency need layered, mask-based techniques.
Here are the four most effective methods you will master:
- Hue/Saturation Adjustment Layers: Best for non-destructive, flexible changes on most objects.
- Solid Color Fill Layers: Ideal when you need an exact color match from your brand palette.
- Color Replacement Tool: Perfect for quick, brush-based edits on smaller areas.
- Replace Color Command: Great for targeting specific hues across an entire image.
You combine these methods often for the most realistic outcomes. For instance, you start with a selection, apply Hue/Saturation, then refine brightness with a Levels adjustment.
Method 1: Non-Destructive Recoloring with Hue/Saturation Adjustment Layers
This method tops the list for good reason. You keep full editability while transforming colors naturally. Professionals love it because the original pixels remain untouched.
Step 1: Make a Precise Selection
You grab the Object Selection Tool from the toolbar (shortcut: W). Photoshop’s AI scans the image and highlights potential objects in blue. Click directly on your target—like a shirt or a car—and watch it snap to the edges.
For tricky areas, switch to Lasso mode. You drag around the object while holding Shift to add areas or Alt/Option to subtract. Zoom in and refine edges around hair, fingers, or shadows. If the selection misses spots, you paint them back with a soft brush in Quick Mask mode.
Step 2: Create a Smart Layer Group
You select your active selection and go to Layer > New > Group. Name it something clear like “Color Change – Shirt.” This group acts as a container that holds your adjustments and mask together.
Step 3: Convert the Selection to a Layer Mask
With the group selected, you click the Add Layer Mask icon at the bottom of the Layers panel. Your marching ants turn into a perfect black-and-white mask that hides everything outside the object. You refine the mask later with a black or white brush for hair-thin precision.
Step 4: Add a Hue/Saturation Adjustment Layer
You click the Adjustment Layer icon in the Layers panel and choose Hue/Saturation. Photoshop automatically clips this layer to your group, so changes affect only the masked object.
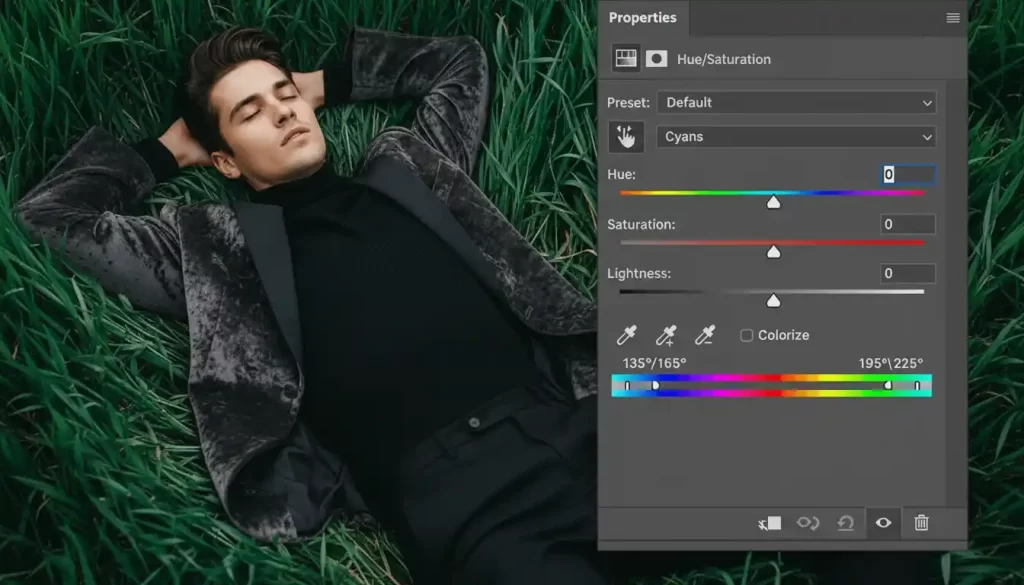
Step 5: Activate Colorize and Experiment
In the Properties panel, you check the Colorize box. This unlocks the full color wheel. You drag the Hue slider to cycle through the spectrum, watch the object shift from red to teal in real time.
You boost Saturation for punchy, vibrant results or dial it down for subtle, realistic tones. The Lightness slider brightens or darkens the object to match surrounding lighting.
Step 6: Fine-Tune with Additional Adjustments
You add a Levels adjustment layer inside the same group for brightness control. You drag the midtone slider left to lighten or right to darken. For highlights, you pull the white point slider gently.
You drag the Hue/Saturation layer above the Levels layer in the stack so color changes happen first, then brightness tweaks.
This entire process takes under two minutes once you practice. You toggle the group visibility on and off to compare before and after without destroying anything.
Method 2: Quick Recoloring with the Color Replacement Tool
You need speed? This brush-based tool delivers instant results. It works best on objects with clear, uniform colors and simpler edges.
How to Use the Color Replacement Tool
Select the tool from the Brush tool flyout (shortcut: J, then Shift+J to cycle). You sample your target color by holding Alt/Option and clicking on the new shade you want, maybe a bright yellow from elsewhere in the image.
Then set the brush size with the bracket keys and paint directly over the object. Photoshop replaces the sampled color while preserving texture and shading. You adjust Tolerance in the options bar, higher values catch more similar tones.
For best results, you work in small strokes and zoom in. You protect nearby areas by lowering the brush hardness to 50% for softer transitions.
This method shines for small details like accessories or background elements. You undo mistakes instantly with Ctrl+Z and keep going.
Method 3: Precise Control Using Solid Color Fill Layers
When you need an exact hex code match for branding, this method gives you pixel-perfect control.
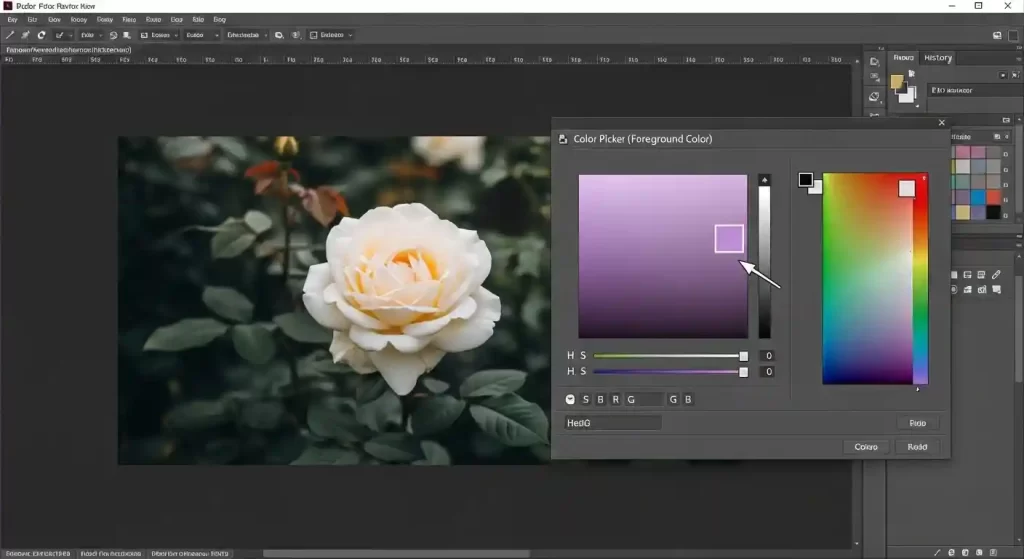
You select your object first, then go to Layer > New Fill Layer > Solid Color. Photoshop opens the Color Picker. You enter your exact RGB or hex value or sample from a color palette.
In the New Layer dialog, you change the blend mode to Color before clicking OK. This blends the solid color naturally over the object’s original brightness and texture.
You clip the fill layer to your masked group for targeted application. Double-click the color thumbnail anytime to tweak the shade.
You love this approach for product photography because you match colors across an entire catalog in seconds.
Method 4: The Replace Color Command for Targeted Hue Swaps
You want to change every instance of a specific color in one go? This hidden gem works wonders.
You go to Image > Adjustments > Replace Color. Photoshop shows a preview window. Click the eyedropper on the color you want to change—say, all the blue sky in a landscape.
Drag the Hue slider to shift it to sunset orange. You adjust Fuzziness to include more or fewer similar tones. For scattered objects, you add more sample points with the plus eyedropper.
This command works globally, so you use it carefully on simple images. You always duplicate the layer first to stay non-destructive.
Advanced Techniques for Ultra-Realistic Color Changes
You elevate your edits with these pro moves.
Match Colors from Reference Images You open a second photo with the perfect shade. You use the Eyedropper tool to sample, then apply it to your Solid Color layer. For even better matches, you add a Curves adjustment to mimic the exact lighting.
Handle Complex Objects Like Hair or Fur You refine masks in the Select and Mask workspace. You use the Refine Edge Brush to capture flyaway hairs perfectly. You feather the mask edges by 0.5–1 pixel for seamless blending.
Adjust for Realistic Lighting and Shadows After the color change, you add a Curves layer clipped to the group. You pull a gentle S-curve to boost contrast where needed. You paint on the mask with a low-opacity black brush to let original shadows show through.
Batch Process Multiple Objects You select several objects with the Object Selection Tool while holding Shift. You apply the same adjustment layer to all of them at once. This technique saves hours on catalog work.
Common Problems and How You Fix Them Fast
Edges look jagged? You refine the mask with a soft brush or run Select and Mask again.
The new color looks flat? You add a Levels or Curves layer right after the color adjustment to restore depth.
Colors shift unnaturally under different lighting? You sample the highlight and shadow areas separately and blend two fill layers with varying opacities.
You work on low-contrast areas? You boost the original layer’s contrast temporarily, make your selection, then reduce it back.
These fixes turn frustrating edits into satisfying wins.
Pro Tips That Separate Good Edits from Great Ones
You turn solid recoloring results into professional-grade work with these battle-tested habits that top editors swear by.
- Work at 200–300% zoom whenever you paint on masks or refine edges. Tiny imperfections in hair strands, fabric textures, or subtle shadows become obvious at this magnification, letting you create seamless blends that hold up even on large prints.
- Name every layer and group descriptively from the start—think “Shirt_Color_HueSat_v2” or “Car_Mask_Final”. Months later, when you reopen a project, you instantly understand your logic instead of guessing what each layer does.
- Save custom adjustment layer presets for your go-to colors and settings. After you nail a perfect skin-tone shift or brand-matched red, click the preset menu in the Properties panel, choose “Save Preset,” and reuse it across projects for lightning-fast consistency.
- Always preview your final edit on multiple devices and screens. Colors shift dramatically between a calibrated monitor, a laptop display, a phone, or a tablet—test in sRGB mode and soft-proof for print if needed to catch surprises early.
- Calibrate your monitor regularly and use Photoshop’s color management settings wisely. Stick to Adobe RGB for print work or sRGB for web/social to minimize mismatches across devices and ensure what you see matches what others see.
- Preserve texture and lighting realism by blending in small doses of the original color. After a major hue shift, add a very low-opacity (5–15%) Color blend mode layer with sampled original tones to restore natural grain and subtle variations.
- Use keyboard shortcuts relentlessly to speed up your flow—[ and ] for brush size, X to flip foreground/background colors, \ to toggle mask visibility. These tiny efficiencies add up to hours saved over time.
- Keep your file organized with color labels and layer comps. Tag groups (red for active color experiments, green for approved versions) and create layer comps to snapshot different color variations without duplicating the entire file.
These small disciplines elevate your edits from “looks okay” to “looks intentional and polished.” They also make revisions painless and help you build a personal style that clients (or your future self) will recognize instantly. For related techniques on maintaining realistic lighting and depth during edits, explore this step-by-step guide to creating natural shadows in Photoshop.
When to Call in the Professionals
You can master most object color changes with the techniques in this guide, especially once you gain confidence with selections and masks. That said, certain situations make professional assistance a smart move rather than a necessity.
Consider reaching out when:
- Tight deadlines leave no room for trial-and-error refinements.
- The subject involves highly intricate details—think fine jewelry chains, translucent fabrics, complex patterns, or detailed fur/hair where manual masking would take dozens of hours.
- You need ultra-precise, catalog-level consistency across hundreds of images (e.g., e-commerce product variations in exact brand colors).
- The project requires specialized color accuracy for print production, where subtle shifts in CMYK conversion could ruin the final output.
Professional retouchers bring speed, specialized tools, and a trained eye for lighting continuity that integrates flawlessly with your own work. For foundational guidance straight from the source, Adobe’s concise tutorial on changing the color of an object in 4 steps offers a reliable quick-start reference. When handling large-scale or highly detailed color work, resources like specialized color change services for e-commerce can provide insight into advanced workflows and precision standards.
Conclusion: Start Recoloring Today
You now have a complete, versatile toolkit for changing the color of any object in Photoshop, from fast brush strokes to fully non-destructive, layered precision edits. You understand exactly when to grab the Hue/Saturation adjustment for flexibility, when the Color Replacement Tool saves precious minutes, and how to layer in Curves or Levels so every change feels organic and believable.
Fire up Photoshop right now. Pick a photo you’ve been meaning to tweak, duplicate the background layer, and dive into the Hue/Saturation method first. Within minutes you’ll see the magic happen, and you’ll wonder why you waited so long to try it.
Keep experimenting, document the workflows that click for you, and revisit this guide whenever you hit a tricky object. With consistent practice, your speed, accuracy, and creative confidence will grow dramatically. The ability to reimagine colors at will isn’t just a skill, it’s a superpower that transforms ordinary photos into exactly what you envision.
The possibilities really are endless. Go make something beautiful.
Frequently Asked Questions
1. What is the fastest way to change the color of an object in Photoshop?
The Color Replacement Tool offers the quickest results for simple objects. You sample a new color and paint directly over the area. For more control and non-destructive edits, you use the Hue/Saturation adjustment layer method instead.
2. Can I change the color of multiple objects at the same time?
Yes! You select all objects while holding Shift with the Object Selection Tool. You then apply a single adjustment layer to the group, and all selected items update together.
3. How do I make the new color look natural and not fake?
You adjust the Lightness slider in Hue/Saturation to match surrounding lighting. You add a subtle Curves layer to restore highlights and shadows. Always check your edit at actual size on a calibrated monitor.
4. Does this work the same in older versions of Photoshop?
Most techniques work in versions from CS6 onward. Newer releases (2022+) include smarter selection tools that speed up the process dramatically.
5. How do I change hair color realistically in Photoshop?
You use the Hue/Saturation method with a carefully refined mask. You lower Saturation slightly and add a tiny amount of noise to preserve natural texture. The Refine Edge tool helps capture individual strands.
6. What is the difference between Hue/Saturation and the Replace Color command? Hue/Saturation gives you full control over the entire object and stays editable. Replace Color targets specific hues across the whole image in one command but is more destructive.
7. Can I change object colors in Photoshop Express or mobile apps?
Basic recoloring is possible in Photoshop Express, but you get far more precision and professional results in the desktop version.
8. How do I export the edited image without losing quality?
You save as PSD to preserve layers. For final delivery, you export as PNG for transparency or high-quality JPEG at 100% quality. Always keep the master PSD file.