

Nikon D4S Review: Specs, Pros, Cons & Honest Verdict
May 25, 2026
Shutter Speed in Photography: The Complete Guide to Mastering Motion, Light & Creative Exposure
May 26, 2026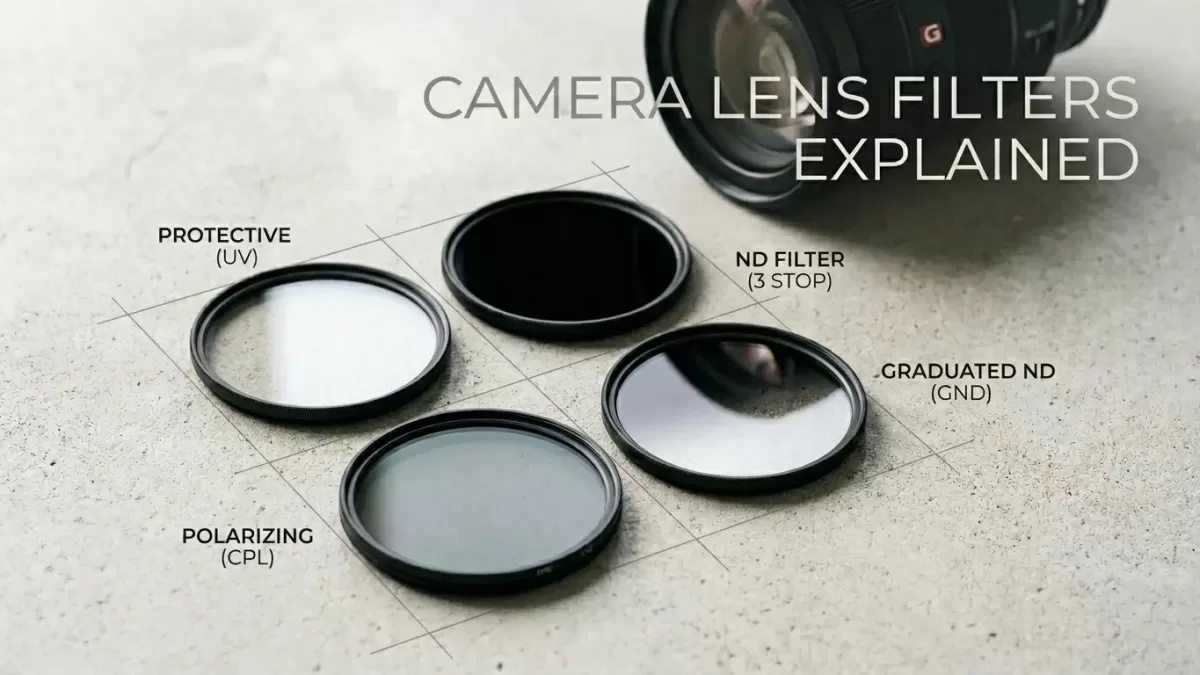
- Why a Tiny Disc of Glass Still Matters in 2026
- What Exactly Is a Camera Lens Filter?
- UV and Clear Protective Filters: The Eternal Debate
- Circular Polarizing Filters (CPL): The One Filter Every Photographer Should Own
- Neutral Density (ND) Filters: Sunglasses for Your Camera
- Variable ND Filters: One Filter, Many Stops
- Graduated Neutral Density (GND) Filters: Tamer of Bright Skies
- Diffusion and Mist Filters: The Cinematic Halation Effect
- Color, Warming, and Cooling Filters: A Vintage Toolset
- Infrared and Specialty Creative Filters
- Filter Systems: Screw-In, Square, or Magnetic?
- How to Choose the Right Filter Size
- Common Filter Mistakes That Quietly Destroy Image Quality
- Best Filter Brands in 2026
- Matching Filters to Your Photography Genre
- How Filters Affect Image Quality: The Science of Coatings
- Caring for Your Filters
- FAQ — Camera Lens Filters
- Conclusion: Build Your Filter Kit Strategically
Why a Tiny Disc of Glass Still Matters in 2026
Modern sensors have become extraordinary. Smartphone computational photography can fake a long exposure, and editing apps can drop a polarized sky into almost any landscape with one tap. Yet, walk onto any professional shoot — a coastal sunrise, a high-end car commercial, a wedding ceremony at noon — and you will still see photographers screwing small glass discs onto the front of their lenses. Why? Because optical filters do things in front of the lens that software cannot truly replicate behind it.
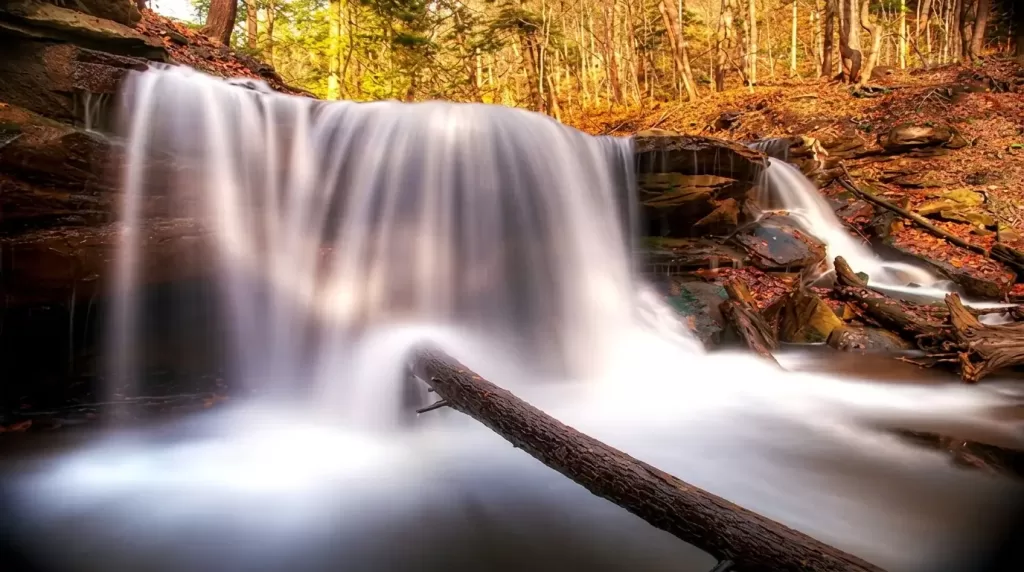
A circular polarizer cuts the glare off wet leaves before light ever reaches the sensor. A neutral density filter slows shutter speed enough to blur a waterfall into silk in a single exposure. A diffusion filter blooms highlights into a dreamy, film-like glow that no slider in Lightroom can match. According to PetaPixel, filters remain essential gear in 2026 for landscape, video, portrait, and architectural shooters — and the filter market keeps innovating with magnetic systems, ultra-thin frames, and high-transmission optical glass.
This guide unpacks every major filter type you will encounter, explains the science in plain language, recommends use cases, and warns you about the mistakes that quietly degrade image quality. Whether you shoot product photography for an e-commerce store or wander mountain ridges chasing alpenglow, you will leave this article knowing exactly which filters belong in your bag.
Shooting beautiful product or portrait images but tired of cleaning up flares, glare, and reflections in post? Let our professional photo retouching team polish every frame to commercial-grade perfection.
What Exactly Is a Camera Lens Filter?
A camera lens filter is a precision-engineered piece of optical glass — sometimes resin — that mounts in front of (or occasionally behind) your lens. Its job is to selectively manipulate the light that enters your camera. Some filters block wavelengths your sensor sees too aggressively, others reduce overall brightness, and a handful add a creative twist that lives somewhere between physics and art.
The two core jobs every filter performs
- Selective transmission — allowing certain wavelengths or polarization angles through while blocking others.
- Mechanical protection or creative modification — shielding the front element or shaping how light interacts with the sensor.
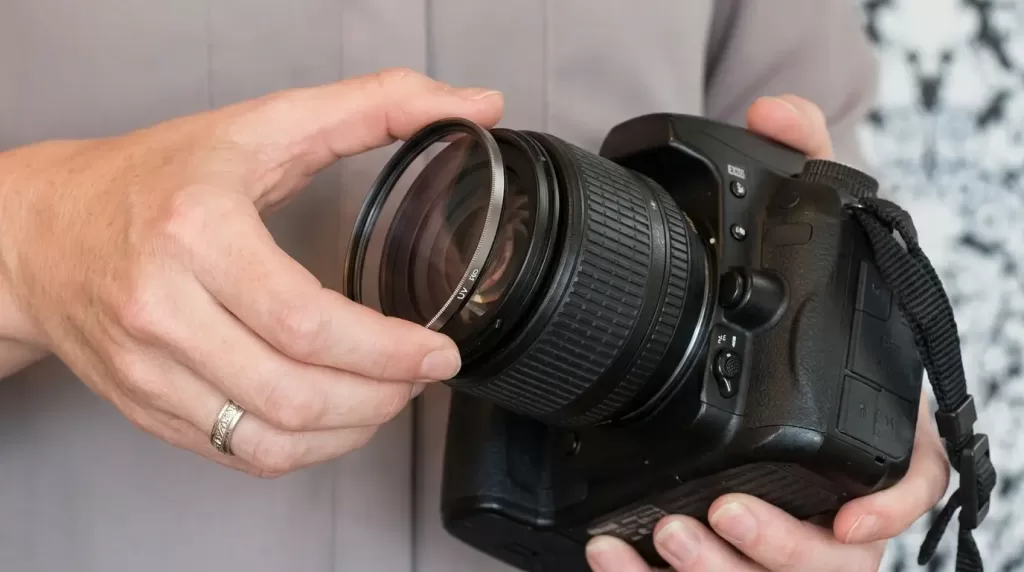
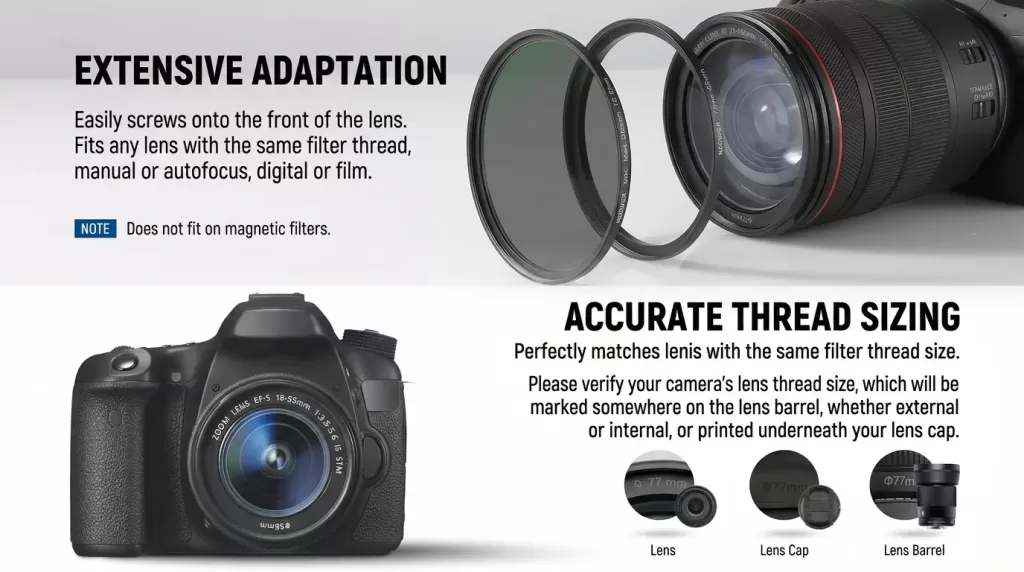
Filters attach in three common ways: they screw directly into the lens thread, slide into a square holder system, or snap on magnetically (a fast-growing format championed by brands like Kase and Haida). The thread diameter is printed on your lens — usually beside the ⌀ symbol — and it determines which filter size you need (B&H Photo).
Why filters survived the digital revolution
Many beginners assume software made filters obsolete. That belief breaks down quickly in the field. Reflections off glass and water are polarized at specific angles; no editing slider recovers what a polarizer would have removed before exposure. Likewise, you cannot fabricate a true 30-second daytime exposure of flowing water from a single 1/250-second frame. Filters still solve physical problems that pixels cannot fix retroactively.
UV and Clear Protective Filters: The Eternal Debate
UV filters once existed for a genuine optical reason — film stock reacted to ultraviolet light, producing a bluish haze at altitude or near water. Digital sensors include built-in UV cutoff filters, so the original purpose has largely evaporated. Today, photographers buy UV (or clear) filters almost exclusively for front-element protection.
The case for UV/clear protection filters
- A $40 filter is far cheaper to replace than a $1,500 front element.
- They block fingerprints, salt spray, sand, and accidental wipes with abrasive cloths.
- They make weather-sealed lenses fully sealed (most pro lenses require a front filter to complete the gasket).
The case against them
- Cheap filters introduce flare, ghosting, and a measurable drop in sharpness.
- A flying rock that would chip your front element will probably shatter a thin filter into the same element anyway.
- Reddit communities and pros remain split, with DPReview pointing out that quality matters more than the decision itself.
Practical guidance
If you shoot beaches, deserts, dusty events, or in heavy rain, a multi-coated UV or clear filter from B+W, Hoya HD, Breakthrough, or Nikon NC makes sense. If you shoot studio portraits or controlled environments, skip it. Never buy a $10 filter for a $2,000 lens — you are knee-capping your optics.
Circular Polarizing Filters (CPL): The One Filter Every Photographer Should Own
If you can only afford one filter, buy a circular polarizer. It is the single accessory that produces effects you genuinely cannot replicate in post.
What a polarizer actually does
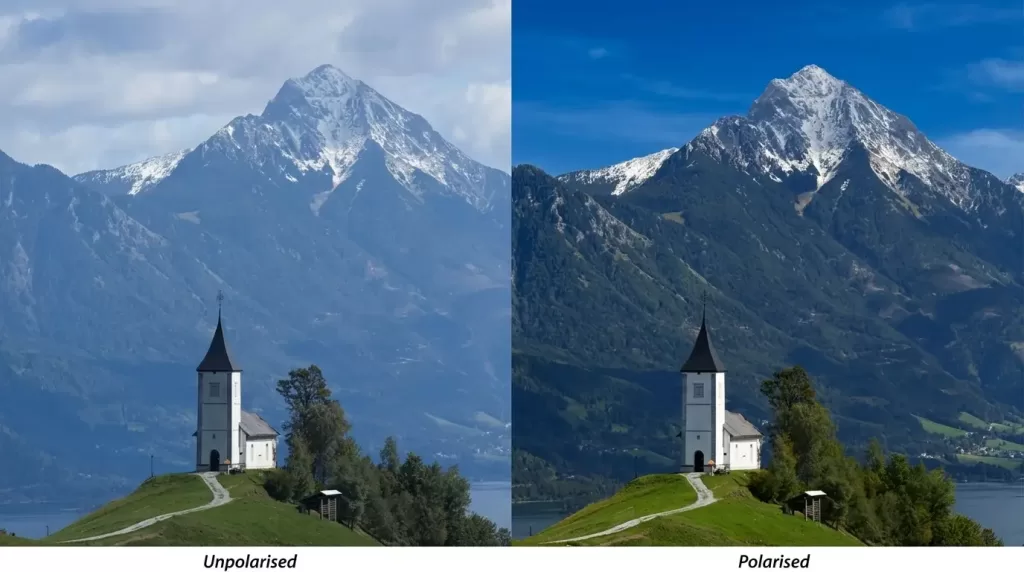
Polarized light vibrates predominantly in one plane. Reflections off water, glass, leaves, painted surfaces, and even atmospheric haze contain heavy doses of polarized light. A CPL filter contains a rotating element that blocks light vibrating at a chosen angle. As you rotate the front ring, you watch reflections fade, skies deepen to cobalt, and foliage saturate to a richer green (Hoya Filter USA).
Concrete benefits in the field
- Deeper blue skies at roughly 90° to the sun (the effect peaks perpendicular to sunlight).
- Reflection control on lakes, windows, and wet rocks, revealing what lies beneath.
- Saturation boost for autumn foliage, painted surfaces, and rainbows.
- Haze reduction in distant landscapes and cityscapes.
Limitations to remember
- A CPL costs you roughly 1 to 2 stops of light.
- Ultra-wide lenses can produce uneven sky polarization (one side darker than the other).
- Polarizers do not work well at noon when the sun is directly overhead.
Linear vs. circular polarizers
Modern autofocus systems require circular polarizers; linear polarizers interfere with phase-detect AF and metering. The “circular” in CPL refers to the polarization pattern leaving the filter, not the shape — confusingly, the filter itself is round either way.
Neutral Density (ND) Filters: Sunglasses for Your Camera
Neutral density filters block a specified amount of light without shifting color. Think of them as sunglasses that let you keep your aperture wide open in bright sun, or stretch your shutter speed long enough to smooth out moving water and clouds.
Understanding ND filter strength (stops vs. density)
ND filters use a confusing trio of labels. Here is the translation:
| Stops | Optical Density | ND Number | Light Reduction |
|---|---|---|---|
| 1 | 0.3 | ND2 | 50% |
| 3 | 0.9 | ND8 | 12.5% |
| 6 | 1.8 | ND64 | ~1.5% |
| 10 | 3.0 | ND1000 | ~0.1% |
| 15 | 4.5 | ND32000 | ~0.003% |
Each stop halves the light reaching your sensor. According to B&H Photo’s neutral density guide, “for every stop of ND filter, you halve the amount of light entering the camera.”
When you genuinely need an ND filter
- Silky waterfalls and seascapes — 6-stop or 10-stop for 1–30 second exposures.
- Blurring crowds out of architectural shots — 10 to 15 stops can turn a busy plaza empty.
- Cinematic motion blur in bright sun — keeping shutter at 1/50s for 24fps video.
- Shallow depth of field at midday — shooting wide-open portraits at f/1.4 in harsh sun.
- Cloud streaks across long exposures — sky becomes painterly in 60+ seconds.
Which ND strength to buy first
A 3-stop ND is the gentlest, useful for video and mild slow-motion water. A 6-stop is the landscape sweet spot, ideal for sunsets and waterfalls. A 10-stop is the long-exposure workhorse for daytime 30-second exposures. Heavy landscape shooters often add a 15-stop for extreme architectural work.
Captured a stunning landscape but the foreground looks dull or distracting? Our precise clipping path service isolates subjects cleanly so every detail commands attention.
Variable ND Filters: One Filter, Many Stops
A variable ND (VND) sandwiches two polarizing layers; rotating the outer ring shifts their alignment and progressively darkens the image — typically across a 2-to-5-stop or 2-to-10-stop range.
Why filmmakers love them
Light changes constantly when you shoot run-and-gun video, documentaries, weddings, or travel content. Swapping fixed NDs between scenes wastes precious seconds. A VND lets you maintain 1/50s shutter for cinematic motion blur as sunlight moves behind clouds.
Why landscape photographers should be cautious
VNDs have weaknesses that critics rightly highlight:
- Cross-polarization “X” patterns appear when you rotate near maximum density, especially on ultra-wide lenses.
- Color casts are common in budget VNDs — magenta, green, or warm shifts that complicate editing.
- Slight resolution loss compared with premium fixed NDs.
According to Kase Filters, variable ND filters work best for “documentaries, travel videos and other scenarios where lighting changes rapidly,” while fixed NDs remain the better choice for critical landscape work.
Best-of-both-worlds picks
Quality VNDs from PolarPro, Tiffen, Breakthrough, and NiSi minimize cross-polarization with hard stops that prevent rotation into the failure zone. Expect to pay $150–$400 for a VND that does not introduce visible artifacts.
Graduated Neutral Density (GND) Filters: Tamer of Bright Skies
A graduated ND filter is half-dark, half-clear, with a smooth transition between. You position the darker portion over a bright sky to balance exposure with a darker foreground — capturing both in a single frame without HDR bracketing.
The three GND varieties
- Soft-edge GND — gradual transition, ideal for landscapes with trees, hills, or uneven horizons.
- Hard-edge GND — sharp transition, perfect for ocean horizons or flat deserts.
- Reverse GND — densest in the middle, fading toward the top, designed for sunrise and sunset directly on the horizon.
Are GNDs still relevant in the age of HDR?
Modern sensors capture 14+ stops of dynamic range, and bracketing in post is straightforward. Yet many landscape pros still prefer GNDs because they:
- Preserve highlights in skies that even modern sensors clip.
- Eliminate ghosting from moving clouds or water in bracketed shots.
- Let you nail exposure in-camera rather than fix it later.
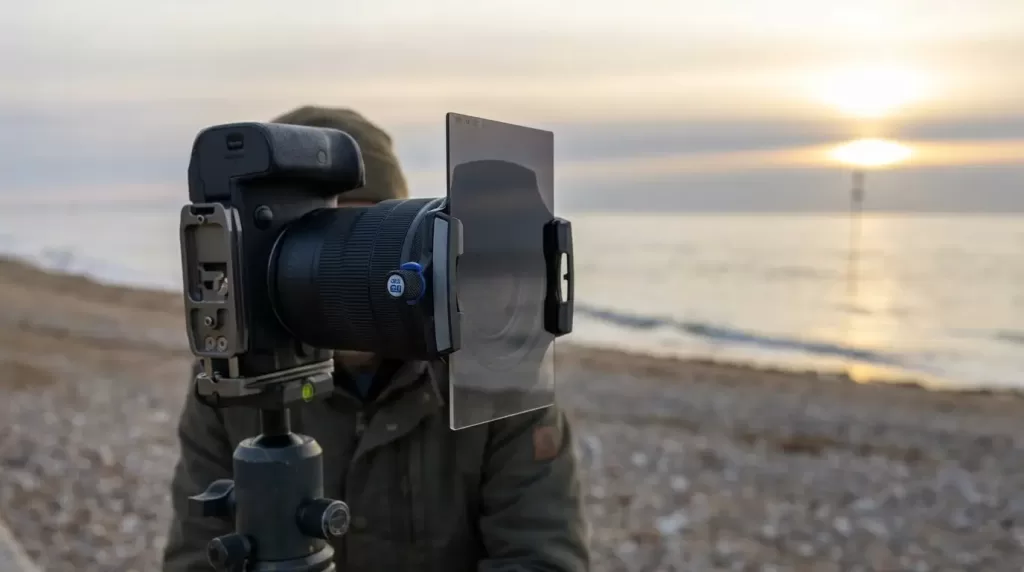
GNDs almost exclusively come in square or rectangular format, sliding into a holder so you can position the gradient precisely. Brands like Lee Filters, NiSi, Haida, and Formatt-Hitech dominate this category.
Diffusion and Mist Filters: The Cinematic Halation Effect
Diffusion filters — including the famous Tiffen Black Pro-Mist, NiSi Black Mist, and K&F Nano-X Black Mist — have exploded in popularity since digital sensors became uncomfortably sharp. They soften micro-contrast, bloom highlights, and lend footage a film-like glow that flatters skin and creates atmosphere.
How mist filters work
A diffusion filter contains microscopic particles embedded in or coated onto the glass. These particles scatter a small percentage of incoming light, especially from bright highlights, producing a gentle halation around light sources. The effect is most visible on practical lights, neon signs, candles, and backlit hair.
Strengths and what each one delivers
- 1/8 strength — the most subtle option, great for 50mm and longer focal lengths.
- 1/4 strength — the popular “all-around” choice for 24–50mm.
- 1/2 strength — strongly atmospheric, best for wider lenses or dreamy looks.
- 1 strength — heavy effect, rarely used outside specialty cinematography.
When to use them — and when to avoid them
Mist filters shine in:
- Portraits and weddings where skin texture should look natural.
- Music videos and narrative film for cinematic mood.
- Night street photography where streetlights become halated stars.
Avoid them for:
- Product, architecture, and landscape work where sharpness is the priority.
- High-contrast scenes where halation can muddy shadows.
Want product images that pop with sharp edges and transparent backgrounds for your store or marketplace? Discover our background removal service trusted by global e-commerce brands.
Color, Warming, and Cooling Filters: A Vintage Toolset
In the film era, photographers used colored filters to correct or stylize color temperature. Today, white balance handles most of that work, but a small fraternity of filmmakers and analog shooters still reach for physical color filters.
Black-and-white film contrast filters
- Red filter — darkens blue skies dramatically, separates clouds.
- Orange filter — moderate sky contrast, smooths skin in portraits.
- Yellow filter — subtle sky contrast, the classic landscape choice.
- Green filter — lightens foliage, deepens skin in B&W portraits.
Warming and cooling filters (81 and 82 series)
These slightly tint the image warmer or cooler in-camera. White balance has mostly replaced them, but some shooters still use them for film, slide work, or to bake the effect into uncompressed video pipelines.
Modern relevance
If you shoot digital RAW, you can replicate every effect of these filters in editing. If you shoot film, slide reversal, or video without color grading, physical color filters still earn their keep. According to KEH Camera, most modern digital cameras already include infrared-blocking filters, which is why modern color filters are mostly creative rather than corrective.
Infrared and Specialty Creative Filters
Capturing wavelengths beyond visible light, infrared photography produces dreamlike landscapes characterized by glowing white foliage and deep black skies.
Infrared filter basics
- 720nm filter — the classic “standard IR” look with some color retention.
- 850nm filter — pure monochrome IR with maximum contrast.
- 590nm “super color” filter — partial IR with strong false-color effect.
Most modern cameras block IR with internal cutoff filters, so you either need a dedicated full-spectrum conversion or extremely long exposures with an IR filter on stock bodies.
Other creative filters worth knowing
- Star filters — turn highlights into starburst patterns (popular for cityscapes).
- Split diopters — keep two different focus planes sharp simultaneously.
- Streak/anamorphic filters — produce horizontal lens flares for cinematic shots.
- Kaleidoscope and prism filters — create in-camera abstract effects.
These tools have surged in popularity among music video directors and TikTok creators because their effects feel handcrafted in a way digital plug-ins rarely match.
Filter Systems: Screw-In, Square, or Magnetic?
How a filter mounts is almost as important as what it does. Three dominant systems exist, each with trade-offs.
Screw-in (circular) filters
The most common format. They thread directly into the lens, are inexpensive, and stack reasonably well.
- Pros: Affordable, weather-sealed, compact, easy to use.
- Cons: You need a different size for each lens, and stacking causes vignetting on wide-angle lenses.
Square/rectangular holder systems
A holder clamps to the lens, accepting square or rectangular filters that slide into slots.
- Pros: Precise GND positioning, one set fits many lenses with adapter rings, no rotation issues.
- Cons: Bulky, expensive ($300–$1,000+ for a full kit), slower to deploy.
Magnetic filter systems
The newest format. A magnetic adapter ring threads onto your lens once, and filters snap on instantly.
- Pros: Lightning-fast swaps, excellent for cold-weather and run-and-gun shooting.
- Cons: Premium pricing, some flare risk if dust accumulates between magnets.
Step-up rings — the budget photographer’s secret weapon
A step-up ring lets you mount a larger filter on a smaller lens thread. Buy one premium 82mm filter, then use step-up rings to fit it on your 67mm, 72mm, and 77mm lenses. According to SRB Photographic, step rings are “the most cost-effective way to use one filter across multiple lenses.” Just remember that the lens hood will not fit when a step-up ring is installed.
How to Choose the Right Filter Size
Lens filter sizes correspond to the filter thread diameter, not focal length or aperture. Common sizes include 49mm, 52mm, 55mm, 58mm, 62mm, 67mm, 72mm, 77mm, and 82mm.
Where to find your lens’s filter size
- Printed on the front of the lens near the ⌀ symbol (e.g., ⌀77).
- Listed inside the lens cap.
- Available in the manufacturer’s specifications.
Recommended buying strategy
- Identify the largest filter thread in your kit (often 77mm or 82mm on pro lenses).
- Buy premium filters in that size.
- Use step-up rings to fit those filters on every other lens you own.
This approach saves hundreds of dollars over buying separate filter sets for each lens. The Photofixal blog covers gear ecosystems like this in detail for photographers building long-term kits.
Common Filter Mistakes That Quietly Destroy Image Quality
Even experienced photographers make these errors. Here is what to avoid.
Mistake 1: Stacking too many filters on a wide-angle lens
Combining a UV, polarizer, and ND on a 16mm lens almost guarantees mechanical vignetting — dark corners caused by the filter frames protruding into the field of view (PhotoNaturalist). Solutions include slim-profile filters, square holders, or larger filters with step-up rings.
Mistake 2: Buying cheap optical glass
A $15 ND filter on a $2,000 lens introduces color casts, softness, and flare. Premium filters from B+W, Hoya HD, NiSi, Breakthrough, and Kase use multi-coated optical glass that preserves resolution and color accuracy.
Mistake 3: Forgetting to remove the polarizer
A polarizer left on at twilight or indoors costs you 1–2 stops of light you desperately need. Always unscrew it when you no longer need the effect.
Mistake 4: Polarizing ultra-wide lenses badly
A CPL on a 14mm or 16mm lens produces uneven sky tone — one side darker than the other. Either accept the look, shoot panoramas without a CPL, or use shorter focal lengths when polarizing.
Mistake 5: Cleaning filters with shirt sleeves
Microfiber cloths and lens-safe fluid only. Anything abrasive scratches the coatings and reduces flare resistance.
Selling apparel or accessories online? Our ghost mannequin service creates seamless 3D-effect product photos that boost conversions and reduce returns.
Best Filter Brands in 2026
Quality varies wildly across the filter market. These manufacturers consistently earn praise from working pros and gear reviewers:
- B+W (Schneider Kreuznach) — German-engineered, exceptional UV and CPL filters with Brass frames that resist binding.
- Hoya — Japanese brand, vast range, the HD series is excellent value.
- NiSi — strong landscape system with renowned square filters.
- Breakthrough Photography — premium U.S.-based brand with X4 series CPLs and NDs that show negligible color cast.
- Kase — magnetic systems and high-end CPLs gaining serious traction.
- Tiffen — Hollywood standard for diffusion (Pro-Mist line), made in the U.S.
- Lee Filters — square holder system trusted by landscape masters worldwide.
- Haida — affordable yet professional-quality filters, especially in magnetic format.
- Formatt-Hitech / Maven / Kolari Vision — niche specialty filters including IR and rare colors.
According to Digital Camera World’s 2026 review, Tiffen’s Digital HT Ultra Clear remains a top recommendation for both professionals and amateurs seeking optical purity without compromise.
Matching Filters to Your Photography Genre
Different genres demand different filters. Here is a quick-reference guide.
Landscape photography
- Circular polarizer (essential)
- 6-stop ND (waterfalls, seascapes)
- 10-stop ND (long-exposure daytime)
- Soft GND or reverse GND (sunrise/sunset)
Portrait photography
- Black Pro-Mist 1/4 or 1/8 (skin softening, highlight bloom)
- 3-stop ND (shallow DOF in bright sun)
- Optional UV (protection in outdoor environments)
Video and filmmaking
- Variable ND (2–5 stops)
- Black Pro-Mist 1/8 (cinematic look)
- IRND filters (to prevent IR pollution in deep ND ratings)
Architecture and travel
- Circular polarizer (reflections on glass facades)
- 10-stop ND (smoothing busy crowds)
- UV/clear filter (protection in dusty environments)
Wildlife and sports
- UV/clear filter (protection)
- Rarely anything else — light is too precious
Product and e-commerce photography
- Circular polarizer (reducing reflections on glossy products)
- Clear filter (front element protection)
Strong product imagery often needs post-production help even after careful in-camera work. Our image masking service handles complex edges like hair, fur, and transparent objects that filters alone cannot perfect.
How Filters Affect Image Quality: The Science of Coatings
Not all “glass” is created equal. The difference between a $20 and a $200 filter usually comes down to coatings, glass type, and frame engineering.
Multi-coating matters
A bare glass surface reflects roughly 4% of light per side. Stacked between camera and subject, this causes ghosting and flare. Multi-coated filters (often labeled MC, MRC, or Nano) reduce this reflection to less than 0.5% per side, preserving contrast and reducing artifacts.
Optical glass versus resin
Glass filters generally outperform resin filters in scratch resistance and clarity, though premium resin from Lee or NiSi performs admirably. Resin remains popular for graduated NDs because it is easier to manufacture in large rectangular formats.
Frame quality
Brass frames resist binding (the dreaded stuck-filter problem) better than aluminum. Slim profiles help prevent vignetting on wide lenses. Some premium frames feature knurled edges for easier removal with cold or gloved fingers.
Caring for Your Filters
Filters need the same care as the lens beneath them.
Cleaning routine
- Use a rocket blower first to remove dust.
- Apply lens cleaning solution to a microfiber cloth (never directly to the filter).
- Wipe in gentle circular motions from the center outward.
- Store in padded filter pouches or cases when not mounted.
Avoiding stuck filters
Cross-threading and overtightening are the two main culprits. Always start the thread by turning counter-clockwise until you feel the threads align, then turn clockwise gently. Never force a stubborn filter — use a rubber filter wrench instead.
FAQ — Camera Lens Filters
1. Do I really need a UV filter on my lens?
Not for optical reasons. Digital sensors already block UV light internally. The only legitimate reason to use a UV filter today is front-element protection in harsh environments — beaches, deserts, rain, or dusty events. Use a high-quality multi-coated filter if you choose this route, otherwise skip it.
2. What is the difference between a polarizer and an ND filter?
A polarizer cuts reflections, glare, and atmospheric haze while deepening sky color. An ND filter simply reduces overall brightness without changing color or removing reflections. They solve completely different problems and are not interchangeable.
3. How many ND stops do I need for waterfall photography?
For silky water in shaded forest scenes, a 3-to-6-stop ND usually suffices. For midday waterfalls in bright sunlight, jump to a 10-stop ND to achieve 1–30 second exposures. Many landscape photographers carry both.
4. Can I stack a polarizer and an ND filter together?
Yes, but with caution. Stacking works fine on standard or telephoto lenses but produces vignetting on wide-angle lenses. Use slim-profile filters or a square holder system to minimize this. Always put the polarizer on first (closest to the lens) so you can rotate the ND beneath it.
5. Are variable ND filters good for photography or only video?
Variable NDs excel for video because exposure changes frequently. For landscape photography, fixed NDs deliver cleaner results without cross-polarization artifacts. If you do both, buy a premium VND like the PolarPro Peter McKinnon Edition or Breakthrough X4 to minimize compromises.
6. What size filter should I buy if I have multiple lenses?
Buy filters that match your largest lens thread (often 77mm or 82mm), then use step-up rings to adapt them to smaller lenses. This saves money and simplifies your kit. Just remember that lens hoods may not fit when step-up rings are installed.
7. Will a cheap filter hurt my image quality?
Yes — significantly. Cheap filters introduce color casts, reduced sharpness, lens flare, and ghosting. A premium filter from B+W, Hoya HD, NiSi, Breakthrough, or Kase preserves the image quality you paid for in your lens. Never put a $15 filter on a $1,000+ lens.
8. Do filters work on smartphone cameras?
Yes. Brands like Moment, Sandmarc, and PolarPro make magnetic and clip-on filter systems for iPhones and Pixel phones. They work especially well for video creators who want true optical effects rather than computational fakes.
Conclusion: Build Your Filter Kit Strategically
Camera lens filters are not relics of the film era — they are still working tools that solve real optical problems. A polarizer cuts reflections you cannot edit out. An ND filter creates time-blurred motion no slider replicates. A diffusion filter brings cinematic atmosphere that algorithms approximate but never truly match.
If you are starting out, focus on the essentials:
- One quality circular polarizer in your largest lens thread size.
- One 6-stop and one 10-stop ND for long exposure work.
- Step-up rings to share those filters across every lens.
- Optional Black Pro-Mist 1/4 if you shoot portraits or video.
Skip the bargain-bin filters. Skip the gimmicks. Invest in two or three premium pieces of glass and they will serve you for decades — long after the camera body sitting behind them becomes obsolete.
Ready to make your shots look truly magazine-grade after the shutter clicks? Pair your filtered images with our advanced shadow creation service for depth that sells.