
How to Crop an Image in Illustrator 2026: 6 Easy Methods
April 16, 2026
What Is Graphic Design? Your Complete Guide for 2026
April 21, 2026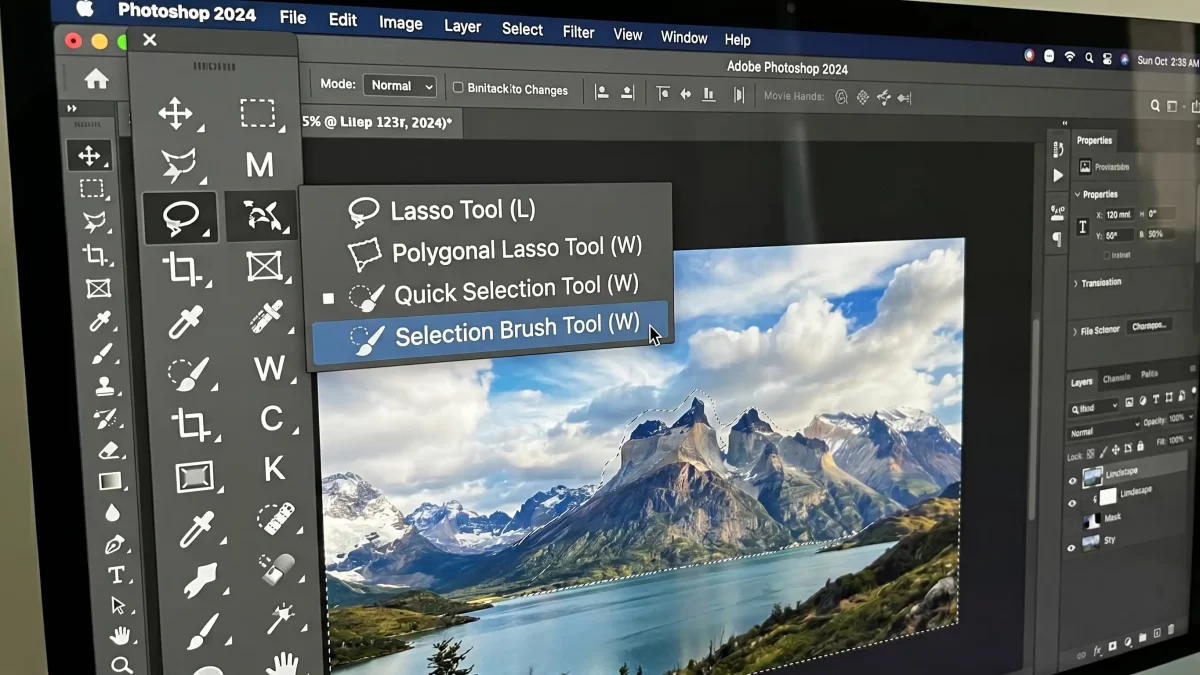
You grab the right selection tool and suddenly complex photo edits become effortless. Selection Brush and Lasso tools deliver the control you need for clean, precise cutouts in any project. Photographers, designers, and E-commerce teams rely on these tools daily to isolate subjects, remove backgrounds, and prepare images for professional results.
These tools sit together in the toolbar for a reason. You switch between them quickly and combine their strengths for faster workflows. Whether you edit product photos for online stores or refine portraits for clients, mastering them elevates your results immediately.
- Why Accurate Selections Transform Your Photo Editing Workflow
- Understanding the Lasso Tool Family in Photoshop
- How the Selection Brush Tool Delivers Fast, Intuitive Selections
- Step-by-Step Guide to Using the Selection Brush Tool
- Mastering the Freehand Lasso Tool for Custom Shapes
- Creating Straight-Edged Selections with the Polygonal Lasso Tool
- Snapping Smartly to Edges with the Magnetic Lasso Tool
- Advanced Tips for Combining Selection Brush and Lasso Tools
- Common Challenges and Smart Solutions
- Real-World Applications for E-Commerce and Product Photography
- Integrating Selections with Multi Clipping Path and Retouching
- Pro Tips That Speed Up Your Workflow Dramatically
- Take Your Selections to Professional Level Today
- FAQ
- 3. Can I add or subtract from selections while using these tools?
Why Accurate Selections Transform Your Photo Editing Workflow
You start every edit by isolating the subject, and accurate selections make the rest of the process smooth. Poor selections force you to spend extra time fixing edges, adjusting masks, or redoing entire composites. Professional editors know that clean selections save hours and deliver polished final images.
In E-commerce, sharp product cutouts boost conversion rates. You highlight every detail without distractions from messy backgrounds. Sellers who invest in precise selections see their listings perform better across platforms.
Accurate selections also protect image quality. You avoid jagged edges or color bleed that ruin prints or web displays. When you refine selections early, you apply adjustments only where they belong and keep the rest of the photo untouched.

Understanding the Lasso Tool Family in Photoshop
You access the entire Lasso family from one toolbar spot. Press Shift + L to cycle through the tools instantly. Each tool handles different selection challenges, so you choose the best one for the job.
The family includes the Selection Brush Tool for painted selections, the classic Lasso Tool for freehand drawing, the Polygonal Lasso Tool for straight edges, and the Magnetic Lasso Tool for edge-snapping automation. You combine them seamlessly in one session.
Photoshop displays your active selection as marching ants once you finish. You refine the selection further in the Select and Mask workspace whenever needed. These tools work on any layer and support add, subtract, and intersect modes in the options bar.
How the Selection Brush Tool Delivers Fast, Intuitive Selections
You activate the Selection Brush Tool and paint directly on the canvas to build your selection. The tool shows a colored overlay instead of marching ants while you paint, so you see exactly what you select in real time. Switch to any other tool and the overlay converts to a standard selection.
Adjust brush size with the bracket keys [ and ]. You control hardness and opacity in the options bar for soft or hard edges. Toggle between Add and Subtract modes to refine on the fly. Hold Alt (Windows) or Option (macOS) to switch to Subtract temporarily.
You paint large areas quickly or zoom in for fine details around hair or fabric textures. The tool works brilliantly on organic shapes where freehand drawing feels clumsy. Many editors start with the Selection Brush Tool and then clean up edges with other Lasso tools.
Step-by-Step Guide to Using the Selection Brush Tool
You select the Selection Brush Tool from the Lasso group in the toolbar. Click and drag to paint over the area you want to select. Photoshop shows the overlay immediately. Release the mouse and continue painting to add more areas.
You switch to Subtract mode in the options bar or hold Alt/Option while painting to remove parts of the selection. Change the overlay color through the gear icon if the default clashes with your image. Adjust brush hardness for crisp or feathered edges.
Finish by deselecting or switching tools to see the marching ants. You refine further with Select and Mask or Feather command. Save the selection as an alpha channel for later reuse.
Mastering the Freehand Lasso Tool for Custom Shapes
You choose the Lasso Tool when you need total freeform control. Click and drag to draw the selection border exactly where you want it. Release the mouse button to close the loop automatically.
Hold Alt (Windows) or Option (macOS) while dragging to create straight segments temporarily. Press Delete to erase the last segment if you make a mistake. You add to an existing selection by holding Shift or use the options bar modes.
The tool shines on irregular organic shapes like clothing folds or natural landscapes. You draw with precision using a graphics tablet for even better control. Feather the edges in the options bar for softer transitions.
Creating Straight-Edged Selections with the Polygonal Lasso Tool
You pick the Polygonal Lasso Tool for objects with straight lines and geometric angles. Click to set the first point, then click again for each straight segment. Photoshop connects the points with perfect lines.
Hold Shift to constrain segments to 45-degree angles. Hold Alt/Option and drag for temporary freehand segments. Double-click or click back on the starting point to close the selection. Delete erases the last segment.
Architectural elements, product boxes, and furniture benefit most from this tool. You create clean, precise paths that align perfectly with straight edges. Combine it with the Selection Brush Tool for hybrid selections on mixed shapes.
Snapping Smartly to Edges with the Magnetic Lasso Tool
You select the Magnetic Lasso Tool and click once to set the starting point. Move the cursor along the edge and the tool snaps fastening points automatically to high-contrast boundaries.
Adjust Width, Contrast, and Frequency in the options bar to match your image. Higher values work well on bold edges while lower values give finer control on softer transitions. Click manually to add extra fastening points where needed.
The tool handles complex outlines like hair strands or jewelry against busy backgrounds. You switch temporarily to freehand Lasso by holding Alt/Option. Close the selection with Enter or double-click.
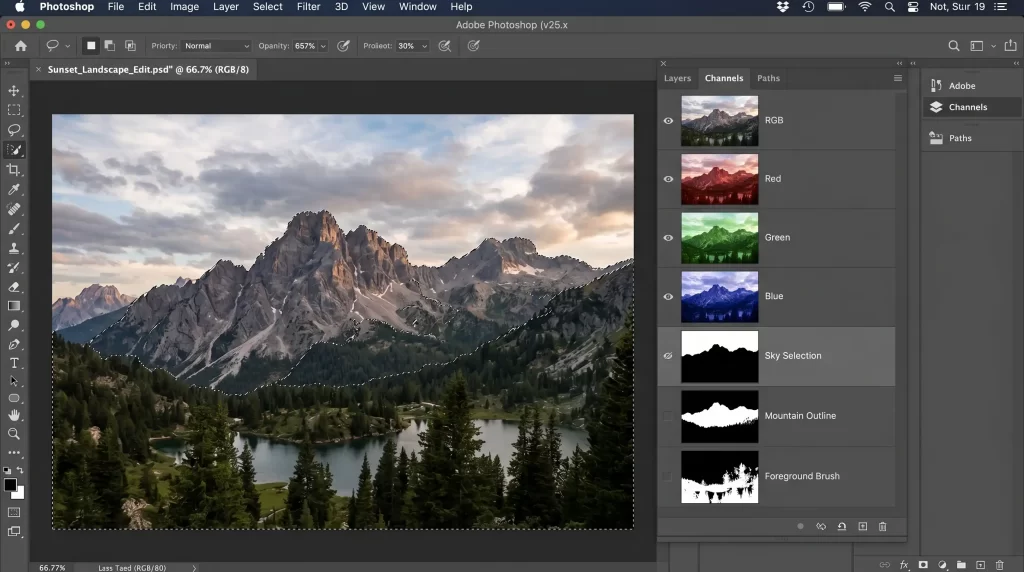
Advanced Tips for Combining Selection Brush and Lasso Tools
You start with the Selection Brush Tool for broad coverage, then switch to Polygonal or Magnetic Lasso for edge cleanup. Hold Shift to add selections from different tools. This hybrid approach speeds up complex projects dramatically.
Use the options bar to set Add, Subtract, or Intersect modes before you switch tools. Save selections as channels so you reload them later. Feather selections lightly for natural-looking composites.
Zoom in to 200% or more when refining tricky areas. Use the Refine Edge brush inside Select and Mask for final polish. These techniques turn good selections into flawless ones.
Explore our comprehensive photo editing guide to see how selections fit into complete workflows.
Common Challenges and Smart Solutions
You sometimes struggle with low-contrast edges where the Magnetic Lasso fails to snap properly. Increase Contrast in the options bar or switch to the Selection Brush Tool for manual control.
Jagged selections appear when you forget to feather edges. Always check the Feather value before you finalize. Large brush sizes on the Selection Brush Tool can overshoot fine details, so reduce size and zoom in.
Accidental deselection happens easily. Get into the habit of saving selections frequently. Practice on simple images first to build muscle memory with shortcuts.
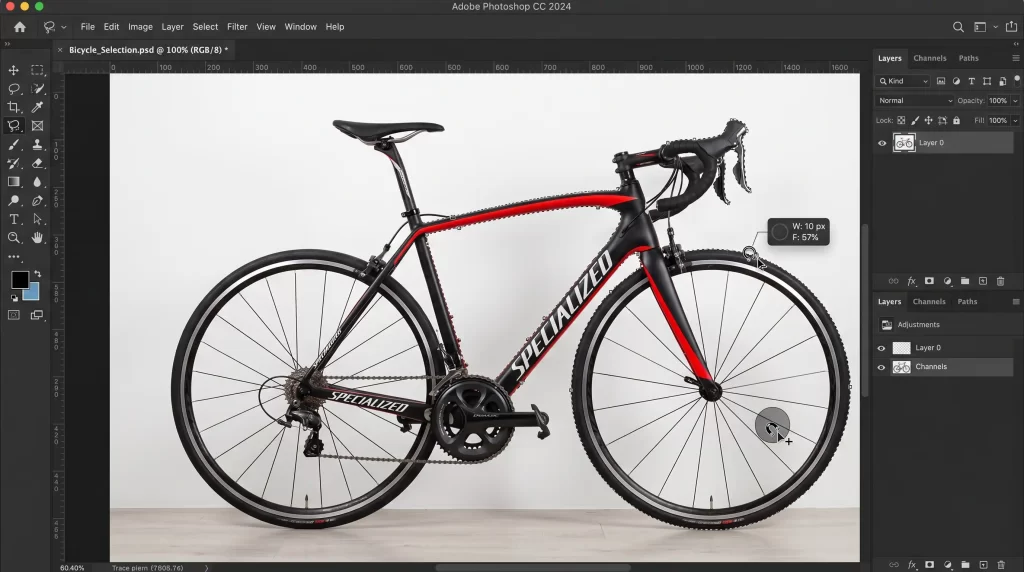
Real-World Applications for E-Commerce and Product Photography
You isolate products cleanly for online stores and create transparent backgrounds that make items pop. Amazon sellers especially benefit from sharp selections that highlight every feature without distractions.
Check out why Amazon sellers need professional photo editing to understand the impact on sales.
Fashion retailers use these tools to remove backgrounds from clothing shots while preserving fabric details. Jewelry photographers rely on the Magnetic Lasso Tool for intricate chains and settings.
Real estate editors select windows and doors precisely for virtual staging. The tools handle every scenario you encounter in professional product work.
Integrating Selections with Multi Clipping Path and Retouching
You create multi-path selections to adjust colors on individual elements within one image. The tools let you isolate buttons, logos, or trim separately for targeted edits.
Discover the power of multi clipping path service for complex product images.
After you make selections, you apply non-destructive adjustments through adjustment layers. Mask the layers with your saved selections for flexible editing.
Professional photo retouching starts with perfect selections. You remove blemishes, enhance colors, and sharpen details only where they belong.
Pro Tips That Speed Up Your Workflow Dramatically
You customize the toolbar so your favorite selection tools sit at the top. Learn all keyboard shortcuts and practice them daily until they become automatic.
Work in 16-bit or 32-bit mode for better color fidelity during selections. Use a pressure-sensitive tablet for natural brush control with the Selection Brush Tool.
Create custom workspaces dedicated to selection tasks. Save tool presets for common settings like feather values or brush hardness. These small habits compound into massive time savings.
For deeper Photoshop mastery, dive into our Photoshop toolbar mastery guide.
Take Your Selections to Professional Level Today
You now hold the complete knowledge to use Selection Brush and Lasso tools with confidence. Practice on real projects and watch your editing speed and quality improve immediately.
These tools form the foundation of professional photo editing. Combine them with smart workflows and you produce results that impress clients and customers alike.
Start your next project with the right tool for the job. Your selections will stay clean, your edits will stay fast, and your final images will stand out every single time.
FAQ
1. What is the main difference between the Selection Brush Tool and the Lasso Tool?
The Selection Brush Tool lets you paint selections with a brush and shows a live overlay. The Lasso Tool requires you to draw freehand borders manually.
2. How do I switch quickly between Selection Brush and other Lasso tools?
Press Shift + L repeatedly to cycle through the entire Lasso group in the toolbar.
3. Can I add or subtract from selections while using these tools?
Yes. Hold Shift to add, Alt/Option to subtract, or use the modes in the options bar.
4. Which tool works best for selecting hair or fine details?
Start with the Selection Brush Tool for broad coverage, then refine edges with the Magnetic Lasso Tool or Select and Mask.
5. Why does my Magnetic Lasso Tool not snap properly?
Adjust Width and Contrast settings in the options bar to match your image’s edge definition.
6. How do I save a selection for later use?
Go to Select > Save Selection and name the channel. Load it anytime through Select > Load Selection.
7. Do these tools work with generative features or only traditional editing?
They work perfectly with all traditional editing tools and adjustment layers for non-destructive workflows.
8. Should beginners start with the Selection Brush Tool or classic Lasso?
Beginners benefit most from the Selection Brush Tool because the visual overlay makes selections more intuitive and forgiving.