
32GB Memory Card Photo Capacity (JPEG vs RAW Explained)
February 14, 2026
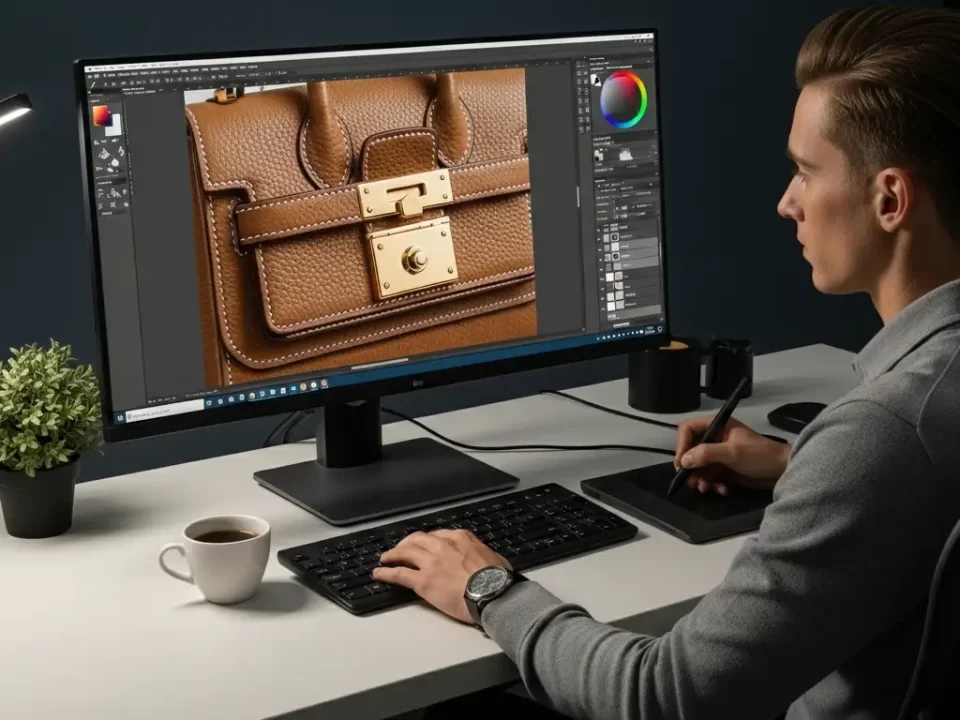
How to Create a Realistic Water Reflection Effect in Adobe Photoshop CS6
February 17, 2026
In the world of digital editing, few skills prove as versatile and impactful as altering colors in your images. Whether you edit product photos for an online store, tweak personal snapshots to match a mood, or design graphics for marketing, mastering color changes opens up endless creative possibilities. Photoshop stands out as the go-to tool for professionals and hobbyists alike because it offers precise control over every hue, shade, and tone. You can transform a red apple into a vibrant green one or shift the entire palette of a landscape to evoke a different season. This guide walks you through the process step by step, ensuring you gain confidence in handling color edits no matter your experience level.
Professionals often rely on Photoshop for its robust features that make color manipulation seamless and professional-grade. If you’re new to this, start by understanding the basics, and soon you’ll handle complex edits with ease.
Why Change Colors in Photoshop Matters for Your Projects
Color plays a pivotal role in how people perceive images. You influence emotions, highlight key elements, or align visuals with branding by adjusting hues strategically. Designers use color changes to prototype product variations without reshooting photos, saving time and resources. Photographers correct lighting issues that cause unwanted tints, ensuring their work looks polished.
Businesses in e-commerce particularly benefit from this skill. They create multiple product color options from one base image, which streamlines inventory displays and boosts sales. Hobbyists enjoy experimenting with artistic effects, like turning a daytime scene into a nighttime one by cooling the tones.
Photoshop excels here because it provides non-destructive editing options. You make changes without permanently altering the original file, allowing experimentation. Layers and masks let you target specific areas, so you change the color of a shirt in a portrait without affecting the skin tones around it.
Many users start with simple adjustments and progress to advanced techniques. This flexibility makes Photoshop indispensable for anyone serious about image editing. As you dive deeper, you’ll discover tools that automate parts of the process, making your workflow faster.
Essential Tools You Need Before Starting
Before you jump into color changes, gather your essentials. First, ensure you have Photoshop installed on your computer. Adobe offers various plans to suit different needs, from individual creators to teams.
You access a wide array of features through Adobe Photoshop, including those tailored for color editing. This software supports layers, which form the backbone of non-destructive work.
Next, prepare your image. Open a high-resolution photo where the object you want to recolor stands out clearly. Low-quality images complicate selections, so choose ones with good contrast.
Familiarize yourself with the toolbar. The Quick Selection Tool helps isolate objects quickly. The Lasso Tool offers more control for irregular shapes. Brushes come in handy for refining masks.
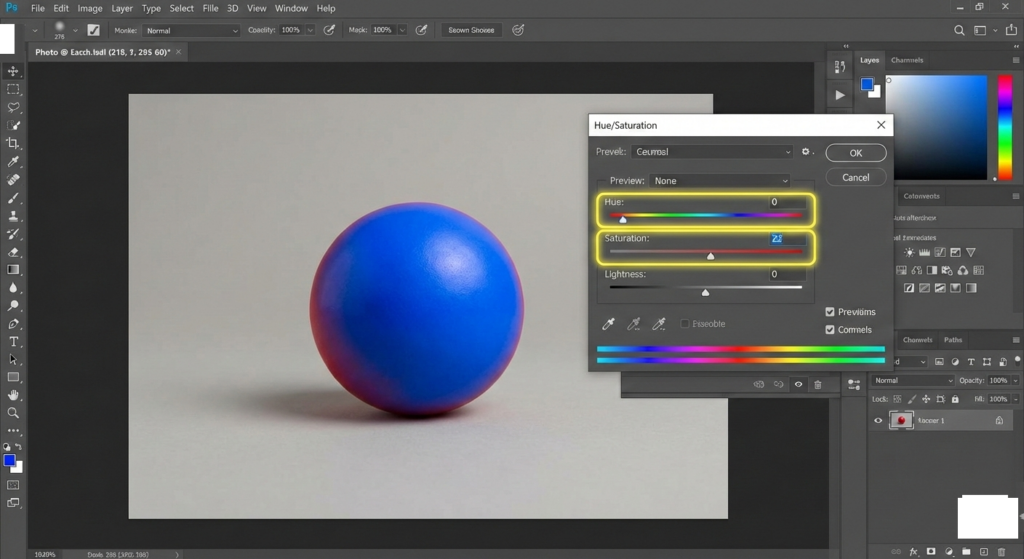
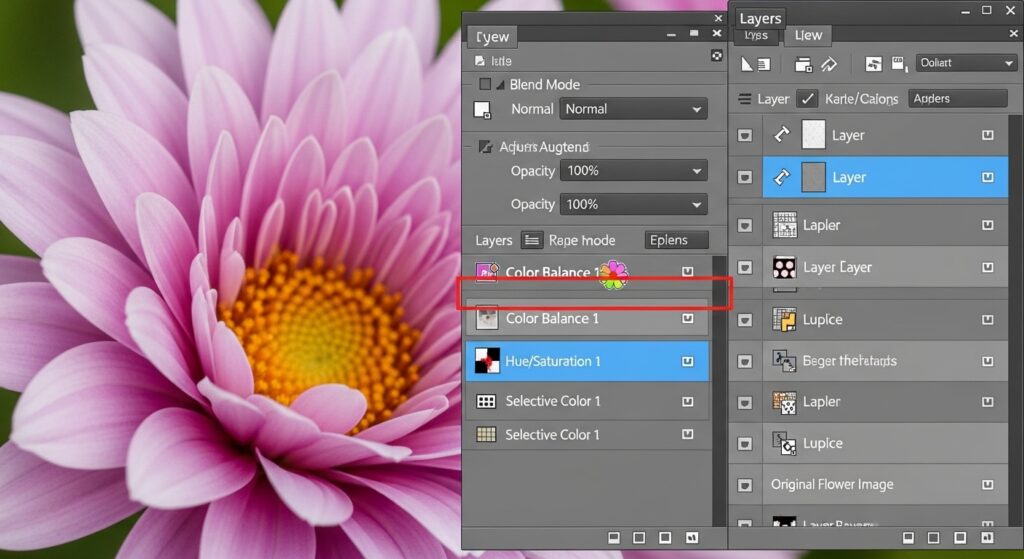
Adjustment layers sit at the heart of color changes. You find them in the Layers panel, where options like Hue/Saturation allow targeted tweaks.
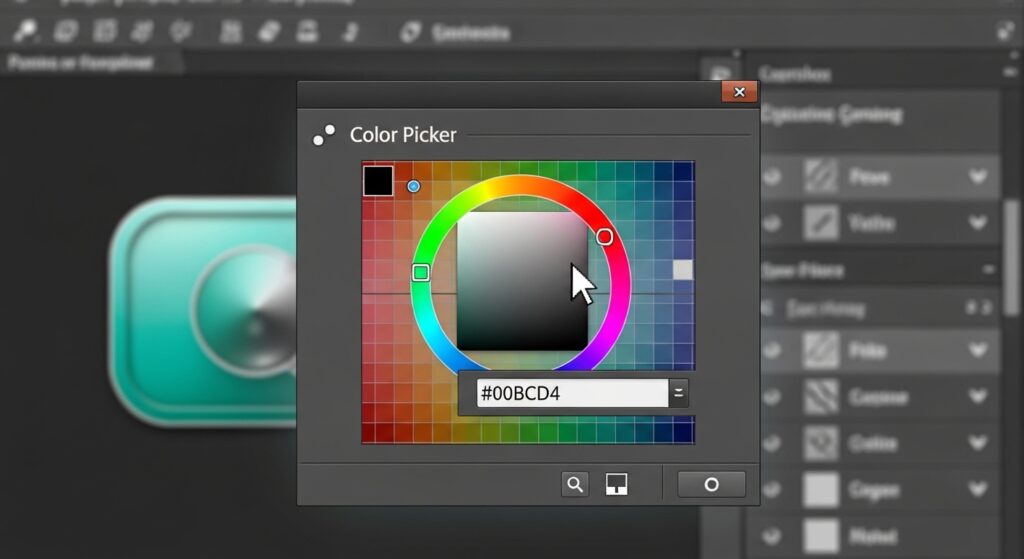
Keep your workspace organized. Customize panels to show only what you need, such as the Color Picker for choosing new shades accurately.
Practice on duplicate layers. You create a copy by right-clicking the background layer and selecting “Duplicate Layer.” This protects your original work.
With these tools ready, you set the stage for effective color editing. Beginners often overlook preparation, but it prevents frustration later.
Step-by-Step: Basic Color Replacement Method
Start with the simplest approach for quick results. Open your image in Photoshop and duplicate the layer to work safely.
Select the object using the Quick Selection Tool. Drag over the area, and Photoshop automatically detects edges. Refine with the Add or Subtract modes if needed.
Once selected, create a new adjustment layer by going to Layer > New Adjustment Layer > Hue/Saturation. This layer affects only your selection.
In the Hue/Saturation dialog, check the “Colorize” box if you want a uniform color. Slide the Hue slider to pick a new color, then adjust Saturation for intensity and Lightness for brightness.
Preview the changes in real-time. You fine-tune until the object blends naturally with the rest of the image.
For more precision, use the eyedropper to sample colors from other parts of the photo. This ensures consistency.
If edges look harsh, refine the mask. Click the mask thumbnail and paint with a soft black brush to hide areas, or white to reveal them.
Save your work as a PSD file to preserve layers. Export as JPEG or PNG for sharing.
This method works well for solid-colored objects like clothing or backgrounds. You achieve professional-looking results in minutes.
Expand your skills by practicing on various images. Try changing the color of a car in a street scene or a flower in a bouquet. Each attempt builds your intuition for how light and shadows interact with new hues.
Advanced Techniques for Precise Color Changes
Move beyond basics when dealing with complex textures or multiple colors. Advanced methods preserve details like fabric folds or metallic shines.
Use the Color Replacement Tool for targeted brushing. Find it under the Brush Tool group. Set the mode to Color, and choose your foreground color.
Brush over the area, and Photoshop replaces the underlying color while keeping texture intact. Adjust Tolerance to control how much it affects similar shades.
For objects with patterns, employ Select > Color Range. This selects all pixels of a certain color. Hold Shift to add more samples.
Create a mask from the selection and apply a Solid Color adjustment layer. You change the fill color anytime without reselecting.
Blending modes enhance realism. Set the adjustment layer to Color or Hue mode. This merges the new color with original luminosity.
Handle gradients by using Gradient Maps. Go to Layer > New Adjustment Layer > Gradient Map. Customize the gradient to map old colors to new ones.
For skin tones or natural elements, avoid over-saturating. You maintain believability by checking against reference images.
Incorporate layer styles for effects like glows that adapt to the new color. Double-click the layer to access options.
These techniques demand practice, but they elevate your edits from amateur to expert level. Professionals use them for product visualization, where accuracy matters.
Explore tutorials that dive deeper into these tools. You find inspiration in how others tackle challenging edits, adapting their approaches to your projects.
Tips to Make Your Color Edits Look Professional
Achieve standout results by following key tips. Always work in RGB mode for vibrant colors; switch via Image > Mode.
Calibrate your monitor to ensure colors display accurately. Uncalibrated screens lead to surprises in prints or shares.
Use keyboard shortcuts to speed up. Press B for Brush, Q for Quick Mask, or [ ] to resize brushes.
Layer masks offer flexibility. You erase mistakes easily by painting black on the mask instead of deleting pixels.
Match lighting when changing colors. Darken shades in shadowed areas to avoid flat looks.
Sample colors from real-world references. Use the Eyedropper Tool on photos of similar objects.
Avoid common pitfalls like ignoring color profiles. Embed them when saving to maintain consistency across devices.
Experiment with blend if sliders in Curves or Levels. These adjust contrast alongside color for balanced outcomes.
Backup your files regularly. You prevent loss of intricate edits.
Incorporate feedback from peers. Share your work and refine based on suggestions.
These practices turn good edits into great ones. You notice improvements in efficiency and quality over time.
Common Mistakes and How to Avoid Them
Everyone encounters hurdles when learning color changes. One frequent error involves poor selections that cause halos around edges.
You fix this by using Refine Edge or Select and Mask. Feather the selection slightly for smoother transitions.
Another mistake happens when you overlook layer order. Adjustment layers should sit above the target layer.
Check by rearranging in the Layers panel. You see immediate differences.
Overdoing saturation makes images look unnatural. Dial it back and compare to the original.
Forgetting to zoom in leads to missed details. Magnify to 100% or more for precision work.
Ignoring undo history limits corrections. Use Ctrl+Z (Cmd+Z on Mac) liberally, or History panel for steps back.
Rushing the process often results in mismatched tones. Take time to evaluate under different zoom levels.
By avoiding these, you produce cleaner, more professional edits. Experience teaches you to spot issues early.
When to Seek Professional Color Change Services
Sometimes, projects demand expertise beyond your current skills or time allows. Professionals handle bulk edits efficiently.
They use advanced techniques to ensure perfect results, especially for business needs like e-commerce product images.
Consider outsourcing for complex tasks. Services specialize in color changes, delivering high-quality variants quickly.
You benefit from their tools and experience, freeing you to focus on other aspects of your work.
Evaluate providers based on portfolios and reviews. Reliable ones offer revisions and fast turnarounds.
This approach scales your operations without investing in additional training or software upgrades.
Exploring Object-Specific Color Changes in Depth
Focus on specific scenarios to refine your technique. For clothing, preserve fabric textures by using the Color blending mode.
You select the garment, apply Hue/Saturation, and adjust lightly to keep folds visible.
In product photography, change backgrounds separately. Use the Pen Tool for clean cutouts, then fill with new colors.
For hair color changes, employ frequency separation. This separates texture from color, allowing independent edits.
Create high-frequency and low-frequency layers. You paint new colors on the low-frequency layer.
Vehicles require attention to reflections. Mask metallic parts and adjust hues to maintain shine.
Natural elements like leaves demand subtlety. Use Vibrance instead of Saturation to enhance without overdoing.
These targeted approaches ensure realistic outcomes. You adapt general methods to fit the subject’s unique properties.
Dedicate practice sessions to one type of object. You build specialized skills that transfer to broader projects.
Integrating Color Changes into Your Workflow
Incorporate color editing seamlessly into your daily routine. Start projects with a color plan, sketching desired palettes.
Batch process similar images using Actions. Record steps via Window > Actions, then play them on multiples.
You save hours on repetitive tasks.
Collaborate with others by sharing PSD files. They continue your color work effortlessly.
Update your software regularly for new features. Adobe often adds tools that simplify color tasks.
Track trends in color usage. Follow design blogs to inspire fresh ideas.
This integration makes color changes a natural part of creating compelling visuals.
Benefits of Mastering Photoshop Color Editing for Businesses
Businesses gain a competitive edge through skilled color manipulation. Marketers create customized ads that resonate with audiences.
You test color schemes virtually, reducing production costs.
In fashion, visualize collections in various hues before manufacturing.
E-commerce platforms thrive with accurate product representations. Customers trust what they see, lowering returns.
You maintain brand consistency across all visuals.
Investing in this skill or service pays off in enhanced engagement and sales.
Creative Applications Beyond Basic Edits
Push boundaries with creative uses. Turn photos into surreal art by swapping natural colors for fantastical ones.
You create mood boards where colors evoke specific emotions.
In graphic design, recolor elements to fit themes. Change icons or logos dynamically.
For social media, edit posts to match seasonal campaigns. Warm tones for fall, cool for winter.
Combine with other effects like filters for unique styles.
These applications spark innovation, keeping your work fresh and engaging.
Troubleshooting Advanced Color Issues
Address stubborn problems head-on. If colors shift unexpectedly, check Color Settings in Edit > Color Settings.
Synchronize with sRGB for web consistency.
When masks leak, increase contrast temporarily with Levels, select, then revert.
You isolate tricky areas better.
For print prep, convert to CMYK and adjust. Colors may dull, so compensate with boosts.
Test on proofs to avoid surprises.
These fixes keep your workflow smooth.
Continue refining through trial and error. You develop instincts for quick resolutions.
Conclusion: Elevate Your Editing Skills Today
Mastering how to change the color of something in Photoshop transforms your approach to digital imagery. You unlock creativity, efficiency, and professionalism. Practice consistently, experiment boldly, and seek resources to grow. Whether for personal projects or business needs, this skill delivers lasting value.
For in-depth insights, check out this guide on how to change the color of an object in Photoshop.
Frequently Asked Questions (FAQs)
- What is the easiest way to change color in Photoshop?
The simplest method involves using the Hue/Saturation adjustment layer. Select your object, create the layer, and slide the Hue control to pick a new color while adjusting saturation for intensity. - Can I change the color of multiple objects at once in Photoshop?
Yes, group the selections or use Color Range to target similar hues across the image. Apply a single adjustment layer to affect all selected areas simultaneously for efficiency. - Why do my color changes look unnatural in Photoshop?
This often stems from ignoring lighting and shadows. Preserve original brightness by using blending modes like Color, and refine with masks to blend edges seamlessly. - How do I match a specific color code in Photoshop?
Use the Eyedropper Tool or enter Hex/RGB values directly in the Color Picker. Apply via Solid Color fill layers for precise matching in your edits. - Is there a tool for automatic color replacement in Photoshop?
The Color Replacement Tool brushes over areas intelligently, swapping colors while retaining textures. Set tolerance levels to control the extent of changes. - What file format should I save after color edits in Photoshop?
Save as PSD to keep layers editable. For final output, export to JPEG for web or PNG for transparency, ensuring color profiles are embedded. - How can beginners practice color changes in Photoshop?
Start with simple images like fruits or shapes. Duplicate layers, experiment with adjustments, and compare results to build confidence gradually.