

4:3 Aspect Ratio Guide: History & Modern Uses
April 2, 2026
Wedding Photography Editing Workflow: Complete Guide
April 7, 2026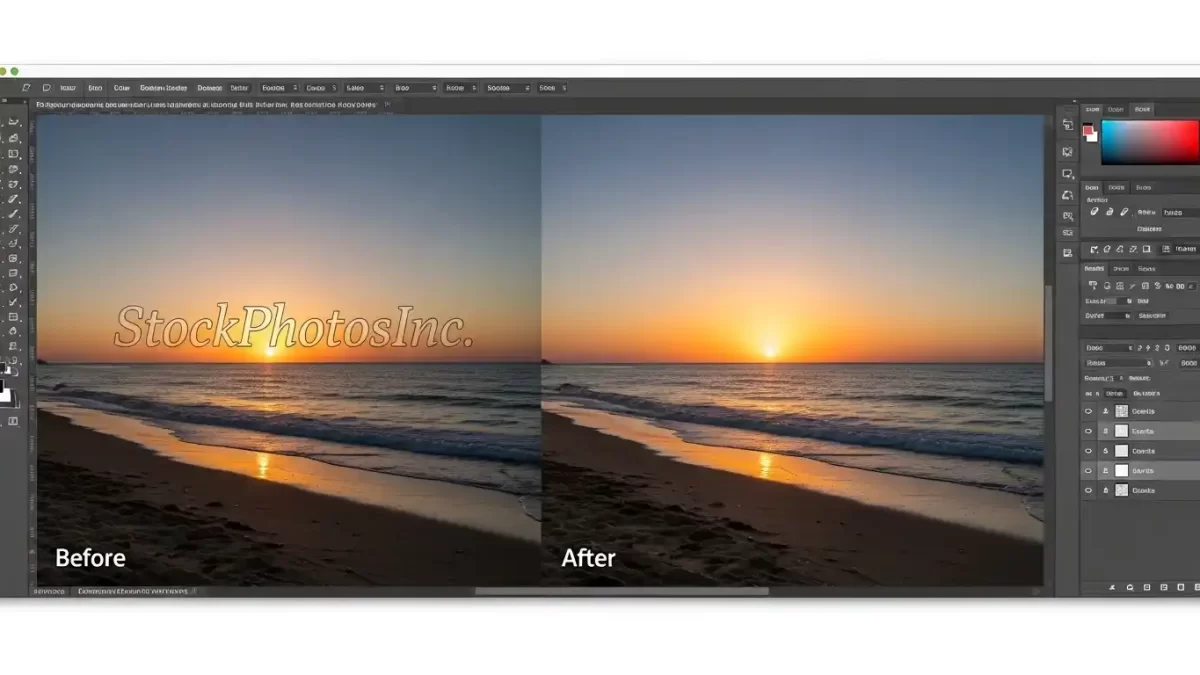
When you use Photoshop ethically and legally, it offers powerful tools to remove watermarks from images you own or have permission to edit. Learning how to remove a watermark in Photoshop is a valuable skill for photographers, designers, and content creators who need clean, professional visuals.
This step-by-step guide walks you through five proven methods for Photoshop watermark removal. You’ll master beginner techniques like the Spot Healing Brush and advanced AI-powered tools like Generative Fill. Each method works for different watermark types and backgrounds.
Once the watermark is gone, make the whole image perfect. Start with a free photo retouching test
- A Quick Note on Ethics and Copyright
- Essential Photoshop Tools for Watermark Removal
- How to Remove Watermark in Photoshop: 5 Proven Methods
- Which Method Should You Use? A Quick Decision Guide
- Advanced Techniques for Difficult Watermarks
- Professional Workflow and Pro Tips
- Frequently Asked Questions
- Final Thoughts
A Quick Note on Ethics and Copyright
Before diving into the techniques, let’s address the elephant in the room. Removing a watermark from an image you don’t own or lack permission to edit constitutes copyright infringement. Watermarks protect a creator’s hard work and intellectual property.
Always ensure you have proper authorization before removing any watermark. Legitimate scenarios include:
- Your own images: You added a watermark to a personal photo and now want the clean version
- Licensed stock photos: You purchased the image and need the watermark-free final version
- Client work with permission: A client authorizes you to remove their old logo from images
- Personal restoration: Removing date stamps or logos from your old family photos
Adobe’s official documentation emphasizes watermark removal should only be done legally and with proper authorisation. With that important note out of the way, let’s explore the tools.
Essential Photoshop Tools for Watermark Removal
Photoshop offers a variety of tools to tackle watermarks, each suited for different scenarios. Here’s a quick overview:
| Tool | Best For | Difficulty |
|---|---|---|
| Spot Healing Brush | Small, simple watermarks on plain backgrounds | Beginner |
| Content-Aware Fill | Medium-sized watermarks on textured or natural backgrounds | Intermediate |
| Clone Stamp Tool | Complex backgrounds requiring precise manual control | Intermediate |
| Patch Tool | Watermarks in areas with repeating patterns or textures | Intermediate |
| Generative Fill (AI) | Large or complex watermarks, object removal | Advanced |
You can download a free trial of Photoshop from the official Adobe website if you don’t already have it.
How to Remove Watermark in Photoshop: 5 Proven Methods
I’ll guide you through each technique step by step. For best results, always duplicate your background layer before starting. Press Ctrl+J (Windows) or Cmd+J (Mac) to create a copy. This preserves your original image.
Method 1: Spot Healing Brush – The Quick Fix
The Spot Healing Brush works like magic for small, simple watermarks. This tool automatically samples surrounding pixels and blends them to cover the unwanted area.
Step-by-step instructions:
- Open your image in Photoshop (File > Open)
- Select the Spot Healing Brush from the toolbar (look for the band-aid icon). If you can’t find it, right-click the Healing Brush tool and choose Spot Healing Brush
- Adjust the brush size slightly larger than your watermark using the Size slider in the top menu
- Set Type to Content-Aware in the Options bar for best results. This tells Photoshop to intelligently analyze surrounding pixels
- Click or drag the brush over the watermark area. Photoshop automatically blends the surroundings to remove the mark
Pro tip: Use short, single clicks rather than long drags for better control, especially on smaller watermarks. If the first attempt leaves artifacts, undo and try again with a slightly different brush size.
Method 2: Content-Aware Fill – Smart Background Reconstruction
Content-Aware Fill analyzes surrounding pixels and intelligently fills selected areas to blend naturally. This method excels at removing watermarks from textured backgrounds like grass, sky, or fabric.
Step-by-step instructions:
- Select the watermark area using any selection tool. The Lasso Tool (shortcut: L) works best for irregular shapes
- Right-click inside the selection and choose Fill
- In the Fill dialog box, set “Use” to Content-Aware
- Click OK. Photoshop processes the selection and fills it with matching surrounding pixels
Advanced refinement: For better results, access Edit > Content-Aware Fill. This opens a dedicated workspace where you can refine sampling areas and preview results before applying.
Method 3: Clone Stamp Tool – Precision Manual Control
When automatic tools produce imperfect results, the Clone Stamp Tool gives you complete control. This tool copies pixels from one area and paints them over the watermark.
Step-by-step instructions:
- Select the Clone Stamp Tool from the toolbar (shortcut: S)
- Adjust brush size and hardness in the Options bar. Use softer edges for natural blending
- Set a sample point: Hold Alt (Windows) or Option (Mac) and click on a clean area near the watermark
- Release Alt/Option and carefully paint over the watermark
- Resample frequently as you move across different areas to maintain texture consistency
Pro tip: Lower the brush opacity to 50-70% and build up the correction gradually. This creates smoother transitions and avoids obvious repeating patterns.
Method 4: Patch Tool – Pattern and Texture Matching
The Patch Tool excels at removing watermarks from areas with repeating patterns or textures, such as brick walls, fabrics, or skies.
Step-by-step instructions:
- Select the Patch Tool from the toolbar (located with the Spot Healing Brush)
- Choose “Source” in the Options bar – this tells Photoshop to replace the selected area
- Draw around the watermark to create a selection
- Drag the selection to a clean area of the image with similar texture
- Release the mouse. Photoshop replaces the watermark area with pixels from the destination
Pro tip: For complex watermarks on gradients, break the watermark into smaller sections and tackle each piece separately.
Method 5: Generative Fill – AI-Powered Removal (Photoshop 2024 or later with Firefly)
Introduced in Photoshop Creative Cloud, Generative Fill uses Adobe Firefly AI to intelligently replace selected areas with contextually appropriate content.
Step-by-step instructions:
- Select the watermark area using any selection tool
- Right-click and choose Generative Fill or go to Edit > Generative Fill
- Leave the text prompt blank for automatic filling, or type a description like “natural background continuation”
- Click Generate. Photoshop creates 3-4 variations you can cycle through
- Select your preferred result and click OK
Pro tip: For complex backgrounds, provide a descriptive prompt. For example, if removing a watermark from a grassy field, type “grass texture” to guide the AI.
Which Method Should You Use? A Quick Decision Guide
| Watermark Type | Recommended Method | Why |
|---|---|---|
| Small text on plain background | Spot Healing Brush | Fastest, requires minimal effort |
| Logo on sky or grass | Content-Aware Fill | Excellent texture matching |
| Complex background with patterns | Clone Stamp Tool | Complete manual control |
| Repeating pattern (brick, fabric) | Patch Tool | Leverages pattern repetition |
| Large watermark on varied content | Generative Fill | AI handles complexity |
| Transparent overlay watermarks | Content-Aware Fill + Clone Stamp | Combination approach works best |
Don’t stop at watermarks. Fix colours, edges, and shadows with one click – learn about our multi‑clipping path service
Advanced Techniques for Difficult Watermarks
Sometimes a single tool won’t cut it. Here are advanced approaches for challenging scenarios.
Removing Semi-Transparent Watermarks
Semi-transparent watermarks that span across detailed areas require a multi-layered approach:
- Create a Curves or Levels adjustment layer to increase contrast temporarily, making the watermark more visible for selection
- Use Color Range selection (Select > Color Range) to sample the watermark color
- Apply Content-Aware Fill to the selection
- Remove the adjustment layer to reveal the clean result
- Touch up remaining artifacts with the Clone Stamp Tool
Frequency Separation for Complex Textures
For watermarks on skin, fabric, or other detailed textures, frequency separation separates color from texture, allowing precise editing without destroying detail.
Quick setup:
- Duplicate the background layer twice
- Name the bottom copy “Color” and the top copy “Texture”
- Hide the Texture layer and apply Gaussian Blur to the Color layer (radius 5-10px)
- Select the Texture layer, go to Image > Apply Image, set Layer to Color, Blending to Subtract, Scale 2, Offset 128
- Set Texture layer blend mode to Linear Light
- Edit watermarks on the Color layer (affects color only) and Texture layer (affects detail only) separately
This technique, commonly used in professional retouching, works wonderfully for removing watermarks from portraits or detailed surfaces.
Professional Workflow and Pro Tips
Adopt these best practices for clean, natural-looking results every time.
Essential Preparations
- Duplicate your background layer (Ctrl+J / Cmd+J) before any editing. This preserves the original
- Zoom in to 200-300% for precise work around watermark edges
- Work non-destructively using adjustment layers and layer masks whenever possible
- Save interim versions as PSD files to preserve layer information
Pro Tips for Flawless Results
- Use a soft brush edge (0% hardness) when painting near detailed areas to avoid visible borders
- Sample frequently with the Clone Stamp Tool – every few strokes – to avoid repeating patterns
- Check your work at 100% zoom regularly. What looks good zoomed in may appear obvious at normal view
- Take breaks and return with fresh eyes. Watermark removal requires patience
- Combine multiple methods: Start with Content-Aware Fill for the bulk removal, then refine edges with Clone Stamp
Clean image = clean sale. Request a free trial of our professional editing service
Frequently Asked Questions
1. Is it illegal to remove a watermark from a photo?
Removing a watermark from an image you don’t own or lack permission to edit violates copyright law. Only remove watermarks from your own images or those you have explicit permission to modify.
2. Can I remove a watermark from a photo online for free?
Yes, several free online tools can remove watermarks, but they often produce lower-quality results. For professional-grade editing, Photoshop provides superior control and output quality.
3. Which Photoshop tool removes watermarks best?
No single tool works best for every situation. Content-Aware Fill handles most medium-sized watermarks effectively. For complex backgrounds, the Clone Stamp Tool offers better precision. Generative Fill (Photoshop 2024 or later) provides AI-powered results for challenging cases.
4. How do I remove a watermark from a video in Photoshop?
Photoshop doesn’t natively support video watermark removal. Use Adobe After Effects or dedicated video editing software instead.
5. Does Photoshop Elements have watermark removal tools?
Yes, Photoshop Elements includes a Spot Healing Brush and Clone Stamp Tool, but lacks Content-Aware Fill and Generative Fill found in the full version.
6. What’s the difference between Spot Healing Brush and Healing Brush?
The Spot Healing Brush requires no sampling – just paint directly over the watermark. The Healing Brush requires Alt-clicking a source point before painting, offering more control for textured areas.
7. Why does my watermark removal look blurry or smudged?
Blurry results typically occur from using too large a brush, insufficient sampling, or attempting to remove watermarks from complex backgrounds. Try a smaller brush or switch to the Clone Stamp Tool for better control.
8. Can Generative Fill remove watermarks from faces or people?
Yes, Generative Fill handles faces and people remarkably well when you provide descriptive prompts like “natural skin texture”. Always use this ethically and only on images you own.
Final Thoughts
Photoshop offers a powerful toolkit for removing watermarks, from the simple Spot Healing Brush to AI-driven Generative Fill. The key to success lies in matching the right tool to your specific watermark type and background complexity.
Always remember to use these techniques responsibly and only on images you own or have permission to edit. Respecting copyright protects creators and maintains integrity in the creative community.
For official documentation and advanced tutorials, visit the Adobe Photoshop Help Center.