
Affordable Jewelry Photo Retouch: Low Cost, High Quality
January 27, 2026
AI vs. Professional Real Estate Photo Editing: What’s Best for Your Business in 2026?
January 28, 2026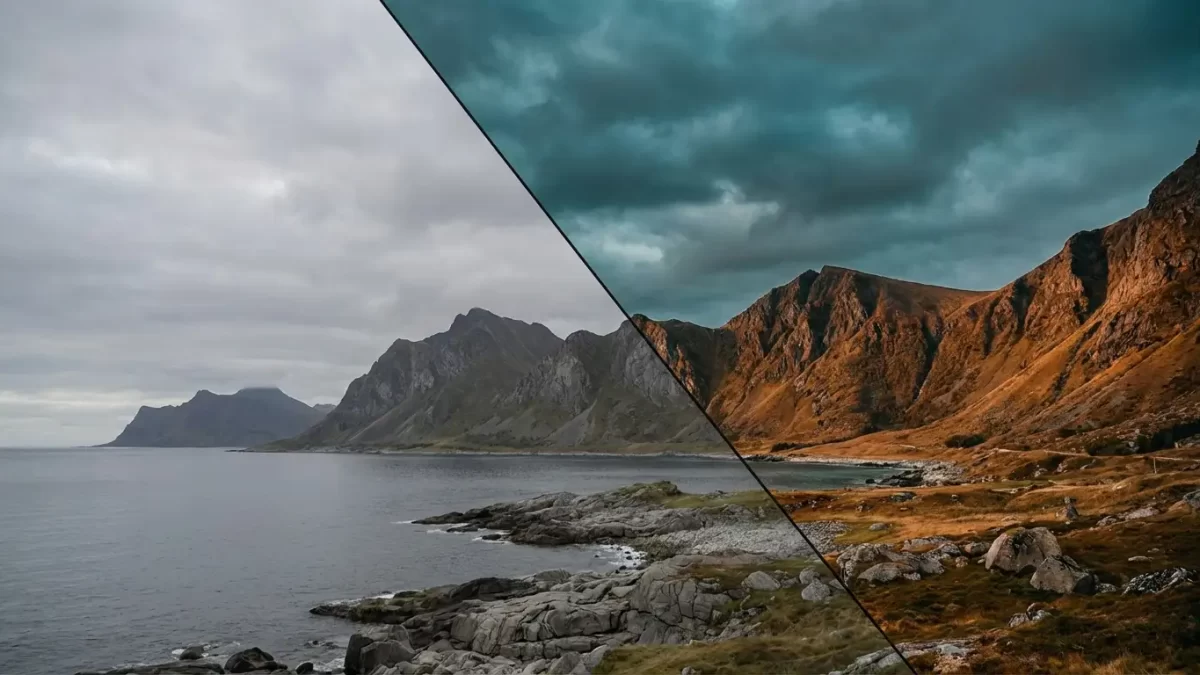
Imagine holding a photograph that doesn’t just show a scene but makes you feel it. The warm, golden glow of a sunset that feels like a cherished memory. The cold, desaturated tones of a cityscape that whisper a story of solitude. This transformative power isn’t magic; it’s the art of color grading. While many people use the terms interchangeably, color grading is distinct from color correction. Think of color correction as the technical foundation—fixing white balance and exposure so your image is clean and accurate. Color grading, on the other hand, is the creative soul. It’s the process of deliberately manipulating and enhancing the colors in your image to evoke a specific emotion, establish a visual style, or support a narrative.
Whether you are a budding portrait photographer, a seasoned wedding shooter, or a hobbyist looking to elevate your social media feed, mastering color grading will unlock a new level of creativity in your work. This guide walks you through everything you need to know, from core concepts to practical techniques you can start using today in software like Adobe Photoshop.
- What Exactly is Color Grading?
- The Critical Difference: Color Correction vs. Color Grading
- Why Should You Care About Color Grading?
- Key Tools for Color Grading in Photoshop and Lightroom
- A Simple, Step-by-Step Workflow
- Popular Color Grading Styles to Explore
- Common Mistakes to Avoid on Your Journey
- Frequently Asked Questions
What Exactly is Color Grading?
At its core, color grading is the process of altering and enhancing the colors of a video or photograph to create a particular aesthetic or mood. It moves beyond simply making colors look “real” or “natural.” Instead, it asks the question: “What should this image feel like?”
You achieve this by manipulating three main elements within your image:
- Hue: The actual color itself (red, blue, green, yellow).
- Saturation: The intensity or purity of that color (from vivid to muted).
- Luminance: The brightness or darkness of the color.
By adjusting these properties, you can guide the viewer’s eye, create depth, unify a series of photos, and, most importantly, tell a deeper story. That iconic “blockbuster movie look” with teal shadows and orange skin tones? That’s a deliberate color grade designed to make protagonists pop against their backgrounds.
The Critical Difference: Color Correction vs. Color Grading
Before you dive into the creative deep end, you must master the shallow waters of color correction. These two steps are sequential and serve very different purposes. Skipping correction and jumping straight to grading is like trying to paint a masterpiece on a dirty, uneven canvas.
Color Correction is the first step. It’s a technical process focused on accuracy. Your goals here are:
- Achieving a correct white balance so whites look white, not blue or yellow.
- Adjusting exposure so the image is neither too dark nor too bright.
- Fixing contrast to ensure a good range of tones from shadows to highlights.
- Balancing skin tones to look natural and healthy.
Think of it as your objective baseline. You are making the image look as close as possible to what the human eye would have seen.
Color Grading is the subsequent, creative step. You take that perfectly corrected, neutral image and apply your artistic vision. You might:
- Add a warm, nostalgic amber tint to the highlights of a summer wedding photo.
- Introduce cool, blue tones into the shadows of a landscape to make it feel dramatic and moody.
- Desaturate the entire image except for a single, vibrant color to draw focus.
In short, color correction is about fixing what the camera saw. Color grading is about expressing what you felt.
Why Should You Care About Color Grading?
You might wonder if this is an essential skill or just an extra flourish. For photographers looking to stand out, it’s quickly becoming essential. Here’s why investing time in learning color grading pays off:
- Evoke Specific Emotions: Colors have a powerful psychological impact. Warm reds and oranges can convey passion, energy, or warmth. Cool blues and greens often suggest calmness, sadness, or mystery. You gain direct control over the viewer’s emotional response.
- Establish a Signature Style: Think of any famous photographer or filmmaker. Chances are, you can recognize their work by its color palette alone. Developing a consistent grade across your portfolio creates a cohesive, professional body of work that becomes your visual signature.
- Guide the Viewer’s Eye: You can use color to direct attention. By making your subject slightly warmer and more saturated than a cooler, muted background, you naturally draw the viewer’s eye to the most important part of the image.
- Create Visual Cohesion: If you’re shooting an event like a wedding or a brand campaign across different locations and times of day, color grading allows you to unify all the images. You can give them a consistent color palette so they feel like they belong together in a single, beautiful story.
- Fix Lighting Inconsistencies: Sometimes, mixed lighting sources (like warm indoor lights and cool window light) can create an ugly color cast. Creative grading can help you neutralize these issues or even turn them into a stylistic advantage.
Key Tools for Color Grading in Photoshop and Lightroom
You don’t need a Hollywood studio to achieve professional grades. Software like Adobe Photoshop and Lightroom puts powerful, intuitive tools at your fingertips. Here are the primary tools you will use and how to think about them creatively.
1. The Power of the Curves Tool
The Curves tool is arguably the most precise and powerful tool for color grading. It allows you to target specific tonal ranges—shadows, midtones, and highlights—individually.
- How it works: You work with a diagonal line on a graph. By adding points and bending this line, you adjust the luminance. But the real magic happens in the individual color channels (Red, Green, Blue).
- To add a warm, golden tone to the highlights, go to the Red channel and lift the top end of the curve slightly. Then, go to the Blue channel and lower the top end slightly (adding its opposite, yellow).
- To add a cool, moody tone to the shadows, go to the Blue channel and lift the bottom end of the curve. This adds blue to the darkest parts of your image.
This tool gives you incredible control to create complex, beautiful color interactions.
2. The User-Friendly Color Grading Wheel
Inspired by tools used in the film industry, Lightroom and recent versions of Photoshop feature the dedicated Color Grading panel (formerly known as Split Toning).
- How it works: You see three wheels, each controlling the Shadows, Midtones, and Highlights. There’s also a global Blending and Balance slider.
- How to use it: Simply click on the center point inside a wheel and drag outward. The direction you drag adds a specific hue to that tonal range. The further you drag from the center, the more saturated that hue becomes.
- Example: For a cinematic look, pull the Shadows wheel towards a deep blue or teal. Then, pull the Highlights wheel towards a warm orange or yellow. Use the Balance slider to decide which tonal range dominates.
3. The Artistic HSL Panel
HSL stands for Hue, Saturation, and Luminance. This panel gives you the power to target individual colors and adjust them in isolation, without affecting the rest of the image.
- Hue: This allows you to actually change a color. You could shift a vibrant green leaf towards a more yellow-green, or change a blue sky to a deeper, more cyan blue.
- Saturation: This lets you control the intensity of a single color. Want to make a red flower pop without oversaturating the green leaves? Increase the red saturation. Want a muted, desaturated look? You can drop the saturation of specific colors like blues and greens.
- Luminance: This adjusts the brightness of a specific color. Brightening the blues can make a sky feel more airy, while darkening them can add drama and depth.
4. Getting the Basics Right: White Balance
While technically a correction tool, your white balance setting is the absolute starting point for your creative grade. You can use it to set the overall temperature of your image.
- How it works: The Temp slider moves from blue (cool) to yellow (warm). The Tint slider moves from green to magenta.
- How to use it creatively: Before you dive into the more nuanced tools, use the white balance sliders to establish your base mood. Push it towards warm for a sunny, happy feeling. Pull it towards cool for a somber, peaceful, or high-tech feel. This creates a unified foundation for your more detailed work.
A Simple, Step-by-Step Workflow
Let’s put this all together into a practical workflow you can follow with your own images.
- Start with a Perfectly Corrected Image: Open your raw file. In the basic panel, first correct the white balance (use the eyedropper on a neutral grey if possible). Then, adjust exposure, contrast, highlights, and shadows to create a balanced, detailed image. This is your blank canvas.
- Set the Overall Mood with White Balance: Decide on the primary emotion for your photo. For a portrait at golden hour, you might want to enhance the warmth. For a misty forest scene, you might want to keep it cool and desaturated. Use the Temp and Tint sliders to set this initial global tone.
- Refine with the Color Grading Wheels: Open the Color Grading panel. Ask yourself: Should the shadows be warm or cool? What about the highlights? Start gently. Add a subtle hint of blue to the shadows to create depth, or a touch of gold to the highlights to mimic sunlight. Use the Balance slider to fine-tune the interaction. Remember, subtlety is often your friend.
- Target Specific Colors with HSL: Now, zoom in on the details. Is the sky a bit too cyan for your taste? Go to the HSL Hue tab and shift blues slightly. Are the greens in the grass overpowering the subject? Go to the HSL Saturation tab and reduce the greens. Is the subject’s red jacket too bright? Go to the HSL Luminance tab and darken the reds slightly. This is where you create harmony.
- Make Final Tweaks and Save: Step away from the image for a minute, then come back with fresh eyes. Does the grade support the story you want to tell? Make any final micro-adjustments. Once you’re happy, save your work. For a series of photos from the same shoot, save your settings as a preset to apply a cohesive look quickly.
Popular Color Grading Styles to Explore
Need some inspiration? Here are a few classic styles you can try to create.
- The Teal and Orange Blockbuster Look: This is a hugely popular cinematic style. The concept is based on color theory: orange (often skin tones) and teal (often shadows or backgrounds) are complementary colors on the color wheel, creating vibrant visual tension. To achieve this, push your shadows towards teal/blue and your midtones/highlights towards orange.
- Moody and Desaturated: This style is perfect for creating atmosphere, drama, or a sense of timelessness. Reduce the overall saturation and vibrance. Then, selectively bring back a tiny bit of warmth in the highlights or a specific color. Pay close attention to deepening the shadows for a more dramatic look.
- Bright and Airy (High-Key): Popular in wedding and lifestyle photography, this look feels clean, happy, and ethereal. You achieve it by lifting the exposure, reducing contrast, and protecting your highlights from being blown out. Colors are often pastel and soft. Desaturating slightly and adding a gentle warm tint can enhance the airy feel.
- Vintage or Matched Looks: This involves mimicking the look of classic film stocks. This might mean adding a greenish tint to shadows (like old Kodak film), muting reds, or adding a subtle, warm glow to the entire image. It’s about creating nostalgia.
Common Mistakes to Avoid on Your Journey
As you start experimenting, be aware of these common pitfalls.
- Overdoing It: This is the number one mistake. Colors that are too saturated or skin tones that have an unnatural tint can make your work look amateurish. The goal is usually a polished look, not a psychedelic experiment. Always err on the side of subtlety. A great grade often goes unnoticed by a casual viewer, but they feel its effect.
- Ignoring Skin Tones: Skin tones are our anchor to reality. If you push colors too far, skin can become sickly, plastic, or unnatural. As you grade, constantly check that skin tones remain appealing and within a believable range.
- Not Calibrating Your Monitor: You might create a beautiful grade on your laptop, but it could look completely different on a phone or a calibrated print monitor. Invest in a monitor calibrator to ensure the colors you see are accurate, so your work looks its best everywhere.
- Skipping the Correction Step: As mentioned earlier, trying to grade a poorly corrected image is a recipe for frustration. The results will often look muddy or broken. Respect the process: correct first, then create.
Mastering color grading is a journey, not a destination. It requires practice, a good eye, and a willingness to experiment. Start by playing with these tools, try to emulate looks you admire, and soon you will develop your own unique visual voice. The power to transform a simple photograph into a compelling story is right at your fingertips.
Frequently Asked Questions
1. What is the difference between color grading and color correction?
Color correction is a technical process to make your image look natural and accurate, fixing issues like white balance and exposure. Color grading is a creative process where you stylize the colors to evoke a specific mood or emotion.
2. Do I need expensive software to color grade my photos?
Not at all. You can achieve professional results with accessible tools like Adobe Photoshop and Lightroom, which offer powerful panels like Curves, Color Grading, and HSL. Even many free mobile apps now include basic grading tools.
3. What are “shadows, midtones, and highlights” in color grading?
These refer to the three main tonal ranges in your image. Shadows are the darkest parts, highlights are the brightest parts, and midtones are the range of tones in between. Advanced grading tools let you add different colors to each range for complex looks.
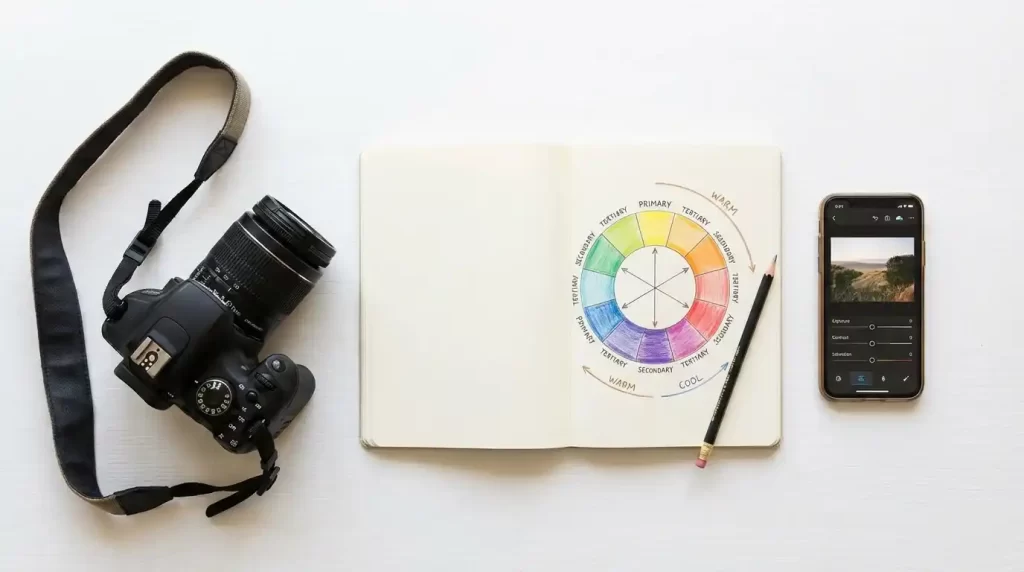
4. How do I choose colors that work well together for a grade?
A great starting point is using a color wheel. Complementary colors (opposite each other, like blue and orange) create vibrant contrast. Analogous colors (next to each other, like blue and green) create a harmonious, calming feel. The mood you want to convey should guide your choice.
5. Can I apply the same color grade to a whole batch of photos?
Yes! This is a huge time-saver for creating a cohesive look. In software like Lightroom, you can create a custom preset from an edited photo and sync it across an entire folder of images shot in similar lighting conditions.
6. Why do my graded photos look different on my phone and my computer?
This is likely due to screen calibration. Different screens display colors differently. For professional work, it’s highly recommended to calibrate your main monitor using a hardware device to ensure color accuracy across different devices.
7. What is the teal and orange look I see in so many movies?
It’s a very popular complementary color scheme. Filmmakers and photographers often grade so that skin tones fall into the orange range while pushing shadows and backgrounds towards teal (blue-green). This creates strong visual separation and makes subjects “pop.”
We hope this guide helps you on your creative path. At Clipping Expert Asia, we understand that mastering techniques like color grading takes time and dedication. If you have a backlog of images or a project with a tight deadline, our team of professional photo editors is here to help you achieve that perfect, consistent look. We handle the technical heavy lifting so you can focus on what you do best: capturing stunning moments. Explore our other photo editing tips and techniques on our blog to continue learning, or contact us for a free quote on your next project.