

How to Find Recently Deleted Photos on Any Device (2026 Quick Guide)
February 25, 2026
How Big Is an 8×10 Photo? Your Ultimate Guide to Dimensions, Uses, and More
February 26, 2026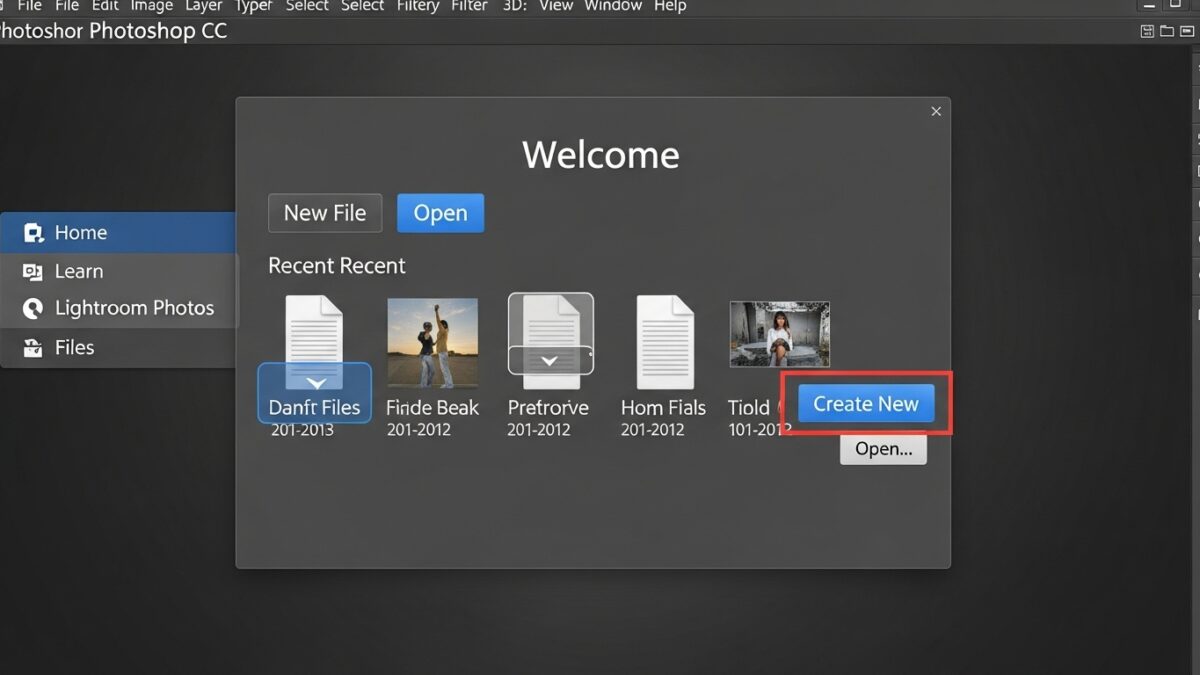
Photoshop stands as the gold standard for image editing software, empowering creators worldwide to transform ordinary photos into extraordinary works of art. You dive into a world of possibilities when you open this program, from simple adjustments like cropping and color correction to complex compositions involving layers and masks. Professionals in graphic design, photography, and digital art rely on it daily to bring their visions to life. This guide walks you through every step, whether you start as a complete novice or seek to refine your skills. You discover practical tips, essential tools, and advanced techniques that elevate your editing game. Embrace the journey, and soon you craft stunning visuals that captivate audiences.
- Getting Started with Photoshop
- Understanding the Photoshop Interface
- Essential Tools for Basic Editing
- Layer Management Techniques
- Color Correction and Enhancement
- Working with Text in Photoshop
- Advanced Selection Methods
- Filters and Effects Mastery
- Retouching Portraits Professionally
- Compositing Multiple Images
- Exporting and Saving Your Work
- Tips for Efficient Workflow
- Common Mistakes to Avoid
- Photoshop for Graphic Design
- Integrating Photoshop with Other Tools
- Staying Inspired and Learning More
- Frequently Asked Questions (FAQs)
Getting Started with Photoshop
You begin your Photoshop adventure by installing the software correctly. Head to the official Adobe website and download the latest version. Adobe offers a free trial, so you test it out before committing to a subscription. Once installed, launch the program and create a new document. You select dimensions, resolution, and background color to suit your project. For web graphics, 72 DPI works well, while print projects demand 300 DPI for sharpness.
Familiarize yourself with the workspace. Photoshop customizes layouts for different tasks like photography or web design. You switch between them via the Window menu. Organize panels such as Layers, History, and Tools to streamline your workflow. Save your custom setup for future sessions. This setup saves time and reduces frustration during editing.
Explore keyboard shortcuts early on. Press Ctrl+N (or Cmd+N on Mac) to start a new file quickly. Shortcuts like these boost efficiency as you practice. Beginners often overlook this, but pros swear by them for faster edits.
Understanding the Photoshop Interface
The interface greets you with a toolbar on the left, packed with essential tools. You find the Move tool at the top, perfect for repositioning elements. Below it sits the Marquee tool for selections, and the Lasso for freehand draws. Each tool offers options in the top bar, like feather radius for soft edges.
On the right, panels dominate. The Layers panel acts as the heart of your project. You stack images, text, and adjustments here, controlling visibility with eye icons. Double-click a layer to rename it, keeping things organized. The Properties panel adjusts settings based on your selection, such as brush size or opacity.
The menu bar at the top houses commands for file management, edits, and filters. You access Image > Adjustments for color tweaks or Filter > Blur for effects. Experiment with these to see real-time changes. Photoshop’s interface evolves with updates, so check Adobe’s resources for new features.

Customize the interface to fit your style. Drag panels to new positions or collapse them to save space. Use the Essentials workspace for starters, then graduate to more specialized ones. This personalization makes long sessions more comfortable.
Essential Tools for Basic Editing
Master the Selection tools first. You use the Rectangular Marquee to grab square areas or the Elliptical for circles. Hold Shift to constrain proportions. Once selected, copy, cut, or apply effects solely to that part.
The Brush tool paints with color. You adjust size and hardness in the options bar. Soft brushes blend seamlessly, while hard ones create sharp lines. Pair it with the Eyedropper to sample colors from your image.
Cropping refines composition. Select the Crop tool, drag borders, and hit Enter. You straighten horizons by rotating the crop box. This simple action dramatically improves photo quality.
Healing tools fix imperfections. The Spot Healing Brush samples nearby pixels to cover blemishes. You click on spots like acne or dust for instant removal. For larger areas, the Clone Stamp duplicates sections precisely.
Layer Management Techniques
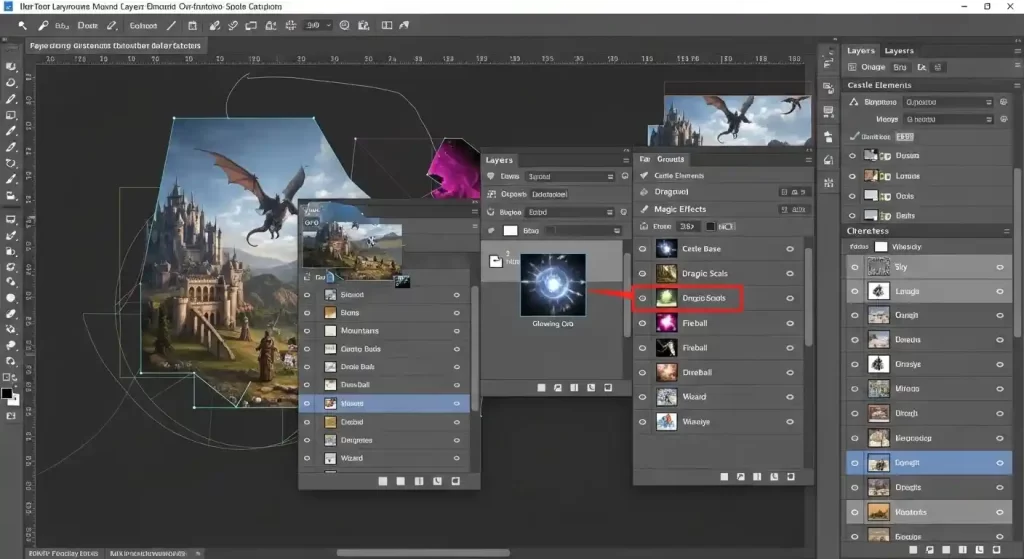
Layers form the backbone of non-destructive editing. You create a new layer via the panel’s icon, then paint or add text without altering the original. Adjust opacity to blend layers subtly.
Use Layer Masks for selective edits. Paint black on a mask to hide parts, white to reveal. This technique shines in compositing, like swapping backgrounds seamlessly.
Group layers for organization. Select multiple and press Ctrl+G. Name groups like “Background” or “Text” to navigate complex files easily.
Adjustment Layers apply changes universally or to specific areas. You add one for Brightness/Contrast, tweaking sliders for desired effects. Clip it to a layer below for targeted adjustments.
Enhance your understanding with Adobe’s official tutorials at.
Color Correction and Enhancement
Balance colors to make images pop. Access Image > Adjustments > Levels. Drag sliders to adjust shadows, midtones, and highlights. This corrects exposure issues swiftly.
Use Curves for precise control. Plot points on the graph to lift or darken tones. S-curves boost contrast naturally.
Hue/Saturation shifts colors. Increase saturation for vividness or desaturate for black-and-white effects. Target specific hues like blues in skies.
Vibrance protects skin tones while enhancing others. You apply it selectively via Adjustment Layers for professional results.
Working with Text in Photoshop
Add text with the Type tool. Click and type, then format in the Character panel. Choose fonts, sizes, and styles to match your design.
Warp text for creative effects. Select the layer, then Edit > Transform > Warp. Bend words into arcs or waves.
Apply layer styles like Drop Shadow or Bevel. Double-click the layer to open the dialog and experiment.
Combine text with shapes. Draw rectangles or ellipses, then overlay text for banners or logos.
Advanced Selection Methods
Lasso tools offer freedom. The Polygonal Lasso connects straight lines, ideal for angular subjects. Magnetic Lasso snaps to edges automatically.
Quick Selection brushes over areas, detecting boundaries. Refine with Add or Subtract modes.
The Pen tool creates precise paths. Anchor points define curves, perfect for product cutouts.
Refine Edge (or Select and Mask) smooths selections. Adjust edge detection for hair or fur.
Filters and Effects Mastery
Filters transform images creatively. Apply Filter > Blur > Gaussian Blur for soft focus. Control radius for subtlety.
Sharpen details with Unsharp Mask. Boost amount while watching for halos.
Artistic filters mimic paintings. Try Oil Paint for textured looks.
Smart Filters allow non-destructive application. Convert to Smart Object first, then edit filters anytime.
Retouching Portraits Professionally
Smooth skin with Frequency Separation. Duplicate layers, apply high-pass and blur filters separately. Blend for natural results.
Whiten teeth using Hue/Saturation. Select teeth, reduce yellows.
Enhance eyes by dodging and burning. Lighten irises, darken outlines for depth.
Reshape features subtly with Liquify. Push and pull pixels carefully to avoid distortion.
Compositing Multiple Images
Place images via File > Place Embedded. Resize and position as needed.
Blend with Layer Masks. Gradient tools fade edges smoothly.
Match colors using Match Color command. Source from one image to harmonize tones.
Add shadows for realism. Create new layers, paint soft blacks, and blur.
Exporting and Saving Your Work
Save in PSD for editable files. Use File > Save As.
Export for web with Save for Web. Optimize JPEGs or PNGs for size.
Batch process multiple files. Automate via Actions panel.
Prepare for print with CMYK mode. Check resolution and bleeds.
For high-quality image resources, explore Unsplash at .
Tips for Efficient Workflow
Record Actions for repetitive tasks. Play them on batches to save hours.
Use Bridge for asset management. Browse and organize files seamlessly.
Customize brushes. Download or create presets for unique effects.
Stay updated with community forums. Learn from others’ experiences.
Common Mistakes to Avoid
Over-editing ruins images. Step back and review often.
Ignoring resolution leads to pixelation. Set it right from the start.
Forgetting to save versions. Use History or snapshots.
Neglecting calibration. Monitor colors accurately for consistency.
Photoshop for Graphic Design
Design logos with shapes and paths. Combine for scalable vectors.
Create mockups. Place designs on templates realistically.
Build web elements. Slice and export for developers.
Incorporate typography. Experiment with kerning and leading.

Integrating Photoshop with Other Tools
Link with Illustrator for vectors. Copy-paste paths seamlessly.
Use with Lightroom for photo management. Edit raw files efficiently.
Export to Premiere for video frames. Enhance stills in motion projects.
Sync via Creative Cloud. Access files across devices.
Staying Inspired and Learning More
Follow Photoshop artists on social media. Draw ideas from their work.
Join online courses. Platforms offer structured lessons.
Practice daily challenges. Build skills through consistency.
Attend workshops. Network with peers for insights.
Discover free stock photos to practice on at Pexels.
Frequently Asked Questions (FAQs)
- What is the best way for beginners to learn Photoshop?
Start with official tutorials and practice basic tools daily. Focus on one feature at a time, like layers or selections, to build confidence gradually. - How do I install Photoshop on my computer?
Download it from Adobe’s website, sign up for Creative Cloud, and follow the installer prompts. A free trial lets you try it first. - Can I use Photoshop for free?
Adobe provides a 7-day free trial, but ongoing use requires a subscription. Look for student discounts if eligible. - What hardware do I need to run Photoshop smoothly?
A modern computer with at least 8GB RAM, a decent graphics card, and SSD storage works well. More power handles complex files better. - How do I remove backgrounds in Photoshop?
Use the Magic Wand or Quick Selection tool, then refine with Layer Masks for clean edges. - What’s the difference between Photoshop and Lightroom?
Photoshop excels in detailed editing and compositing, while Lightroom focuses on batch photo organization and adjustments. - How can I speed up my Photoshop workflow?
Learn keyboard shortcuts, customize your workspace, and use Actions for automation to edit faster.