
Best Raster Editor Software for Photo Editing
February 3, 2026
Remove Background from Images in GIMP – Complete Guide
February 4, 2026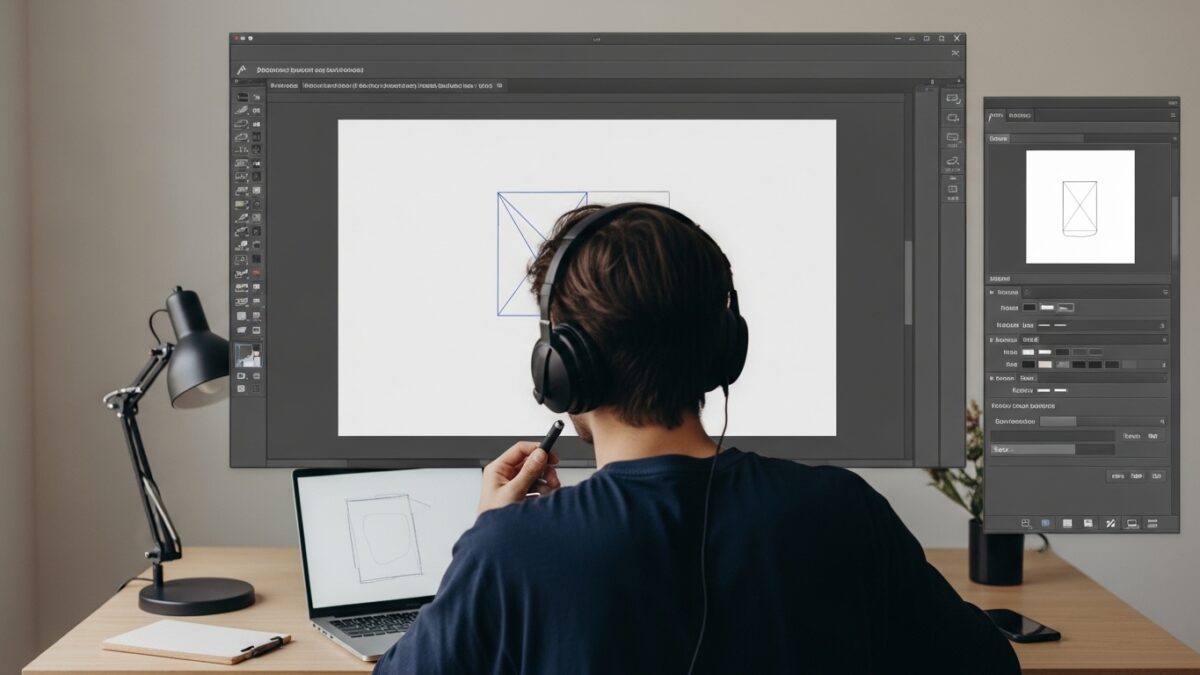
Creating a clipping path in Illustrator opens up endless possibilities for designers who want to isolate objects, remove backgrounds, or craft precise compositions. Professionals in graphic design and e-commerce rely on this technique to make their visuals pop. You draw a vector outline around your subject, then use it to mask everything else away. This method ensures clean edges and scalability without losing quality. Whether you edit product photos or build custom illustrations, mastering this skill boosts your workflow efficiency.
- What Is a Clipping Path and Why Does It Matter?
- Essential Tools and Setup for Clipping Paths in Illustrator
- Step-by-Step Guide to Creating a Basic Clipping Path
- Advanced Techniques for Complex Clipping Paths
- Clipping Paths in E-Commerce: Boosting Product Visuals
- Common Mistakes and How to Fix Them
- Tips and Tricks for Efficient Clipping Path Workflows
- When to Outsource Clipping Path Tasks
- Integrating Clipping Paths with Other Design Elements
- Conclusion: Elevate Your Designs with Clipping Paths
What Is a Clipping Path and Why Does It Matter?
You encounter clipping paths every day in polished images, from magazine ads to online stores. Essentially, a clipping path acts as an invisible boundary that cuts out a specific part of an image or shape. In Adobe Illustrator, you create this path using vector tools, which allows for precise control over curves and angles. Unlike raster-based edits, vectors remain sharp at any size.
Designers value clipping paths because they enable seamless integration of elements. For instance, you isolate a product from its background to place it on a new canvas. This technique proves essential in fields like digital marketing, where clean visuals drive engagement. You avoid jagged edges that come from quick selections in other software. Instead, you achieve professional-grade results that enhance brand presentation.
Many confuse clipping paths with masks, but in Illustrator, they function similarly. A path defines the shape, and the mask applies it. You use this for complex designs, such as layering textures or combining illustrations. Beginners often start with simple shapes, while experts handle intricate outlines. The process demands patience, yet it rewards you with versatile assets for print or web use.
Essential Tools and Setup for Clipping Paths in Illustrator
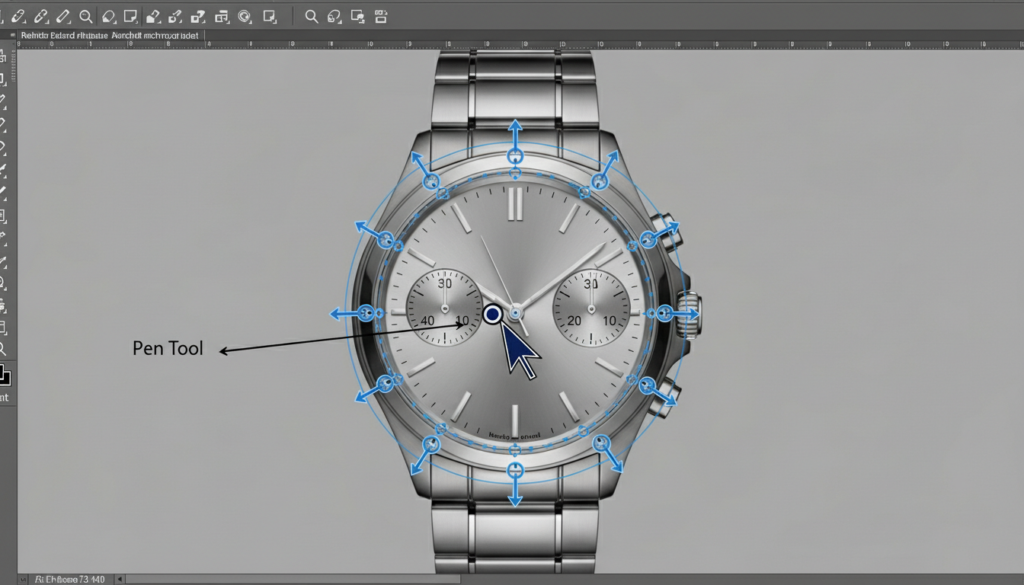
Before you dive in, gather your tools. Adobe Illustrator provides everything you need built-in. The Pen Tool stands out as the star for drawing paths. You click to place anchor points and drag to curve lines, forming a closed shape around your object.
Start by launching Illustrator and opening a new document. Import your image via File > Place. Position it on the artboard. Ensure your layers panel stays visible; you organize elements here to avoid confusion. Lock background layers if necessary to prevent accidental moves.
Customize your workspace for efficiency. Go to Window > Workspace > Essentials. This layout highlights key panels like Tools, Properties, and Layers. Set your stroke to none and fill to transparent for the path—this keeps it invisible until applied. You also benefit from zooming in closely with the Zoom Tool for detailed work.
Prepare your image by adjusting contrast if needed. High-contrast subjects make outlining easier. You trace edges more accurately this way. Remember, practice on simple objects first, like a bottle or fruit, to build confidence.
Step-by-Step Guide to Creating a Basic Clipping Path
You begin the process by selecting the Pen Tool from the toolbar. Position your cursor at the starting point on the image edge. Click to add the first anchor point. Move along the outline, clicking for straight lines or dragging for curves. Illustrator generates handles that control the bend.
Close the path by clicking back on the first point. A small circle appears, signaling completion. You now have a vector outline ready for use.
Select both the path and the image. Use the Selection Tool and hold Shift to grab multiple items. Navigate to Object > Clipping Mask > Make. Alternatively, right-click and choose Make Clipping Mask. The software hides everything outside the path, revealing only the clipped area.
Edit the mask if adjustments arise. Double-click the group in the Layers panel to enter isolation mode. You tweak anchor points with the Direct Selection Tool. Exit by double-clicking outside or pressing Esc.
Test your creation by moving it around the artboard. The clipped object behaves as one unit, maintaining its integrity. Export as PNG for transparent backgrounds or AI for further edits.
Advanced Techniques for Complex Clipping Paths
Once you master basics, explore advanced methods. Compound paths allow multiple shapes in one mask. You draw separate outlines for disjoint areas, like holes in an object. Select them all, then go to Object > Compound Path > Make. This combines them into a single clipping entity.
Handle intricate edges with the Anchor Point Tool. You convert smooth points to corners or adjust handles for tighter control. This proves useful for subjects with fine details, such as hair or fabric textures.
Incorporate text into paths for creative effects. Type your words, create outlines via Type > Create Outlines, then use as a mask. Place an image behind and apply the clipping. You produce stylized graphics this way.
Layer multiple clips for depth. Group elements and mask subgroups individually. This builds complex compositions without flattening.
Experiment with opacity masks for gradients. Unlike standard clips, these use grayscale to control visibility. You blend edges softly for artistic results.
For e-commerce pros, multi-clipping paths shine. You isolate different parts of a product, like colors or shadows, for separate edits. This boosts image editing efficiency in online stores.
Clipping Paths in E-Commerce: Boosting Product Visuals
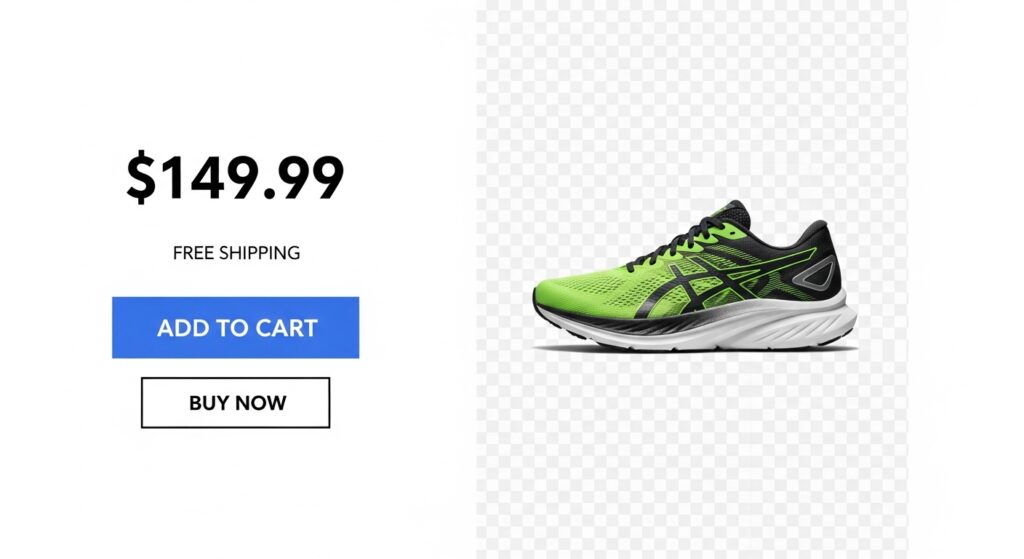
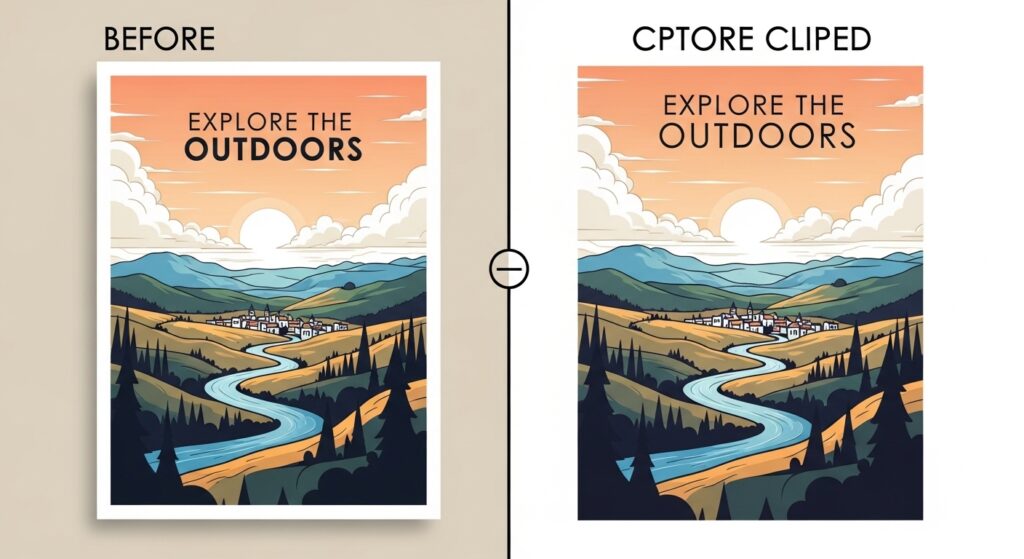
E-commerce thrives on stunning visuals, and clipping paths play a key role. You remove distracting backgrounds to focus on products, making them appealing to shoppers. Clean images increase click-through rates and conversions.
Start with high-resolution photos. Apply paths to cut out items precisely. You then place them on white or colored backdrops for consistency across listings.
Handle batches efficiently. Duplicate paths for similar products, saving time. Adjust slightly for variations.
Combine with color correction. After clipping, tweak hues to match branding. This creates a cohesive catalog.
For complex items like jewelry, use multi-paths. Isolate gems from chains for targeted enhancements. Learn everything you need to know about multi-clipping path service to refine your approach.
In competitive markets, professional-grade clips set you apart. They ensure scalability for zoom features on sites.
Common Mistakes and How to Fix Them
Beginners often rush the path drawing, leading to uneven edges. You fix this by slowing down and using fewer anchor points. Excess points create bumps; remove them with the Delete Anchor Point Tool.
Another issue involves unclosed paths. Illustrator won’t apply the mask if open. Check for the closing circle and reconnect if needed.
Misaligned layers cause frustration. Ensure the path sits above the image in the stack. Drag in the Layers panel to reorder.
Overlooking bezier curves results in straight, unnatural lines. Practice dragging handles to match contours smoothly.
If the mask doesn’t apply, verify selections. You must choose both elements correctly.
Undo mistakes quickly with Ctrl+Z. For major issues, release the mask via Object > Clipping Mask > Release, then redo.
Test on duplicates to preserve originals. This safeguards your work.
Tips and Tricks for Efficient Clipping Path Workflows
Streamline your process with shortcuts. Press P for Pen Tool, A for Direct Selection. You switch tools faster this way.
Use guides and rulers for precision. Drag from the ruler to align paths.
Zoom to 300% for detailed areas. You spot imperfections easily.
Save paths as custom shapes. Go to Edit > Define Custom Shape for reuse.
Integrate with other Adobe apps. For raster-heavy work, consider Adobe Photoshop for initial edits before importing to Illustrator.
Automate repetitive tasks with actions. Record a sequence in the Actions panel.
Join communities for feedback. Share your clips online to learn from pros.
When to Outsource Clipping Path Tasks
Sometimes, time constraints push you to outsource. Professional services handle bulk edits with expertise. You focus on creativity instead.
Look for providers offering manual paths for quality. They ensure natural results without automation flaws.
In e-commerce, dedicated services optimize images for sales. Explore a complete guide to clipping path services for e-commerce to understand the full scope.
Evaluate based on turnaround, pricing, and revisions. Top ones provide unlimited tweaks.
For intricate projects, experts use advanced tools. This saves you hours on complex outlines.
Research the best clipping path service providers to find reliable options.
Integrating Clipping Paths with Other Design Elements
Blend clipped objects with vectors. You layer shapes behind for backgrounds.
Apply effects post-clipping. Add shadows or glows via the Appearance panel.
Use for infographics. Clip data visuals into icons for impact.
In branding, mask logos with patterns. You create unique variations.
Export wisely. Choose SVG for web scalability.
Conclusion: Elevate Your Designs with Clipping Paths
You now hold the knowledge to create clipping paths in Illustrator confidently. Practice transforms this skill into second nature. Apply it to projects, and watch your work improve. For those seeking pro-level results without the hassle, consider expert help like clipping path service to elevate your visuals further.
Frequently Asked Questions (FAQs)
- What software do I need to create a clipping path?
You primarily use Adobe Illustrator for vector-based clipping paths. It offers precise tools like the Pen Tool for outlining. - How does a clipping path differ from a layer mask?
A clipping path uses vectors for sharp cuts, while layer masks rely on pixels for softer blends. Paths suit scalable designs. - Can I edit a clipping path after applying it?
Yes, enter isolation mode by double-clicking the group. Adjust points, then exit to update. - Why use clipping paths in e-commerce?
They remove backgrounds cleanly, making products stand out and improving site aesthetics for better sales. - What if my path doesn’t close properly?
Check for open ends and click the first point again. Use the Direct Selection Tool to connect. - Are there shortcuts for making clipping masks?
Press Ctrl+7 (Windows) or Command+7 (Mac) after selecting elements to apply quickly. - When should I choose professional clipping services?
Opt for them with high-volume tasks or complex images to save time and ensure quality.