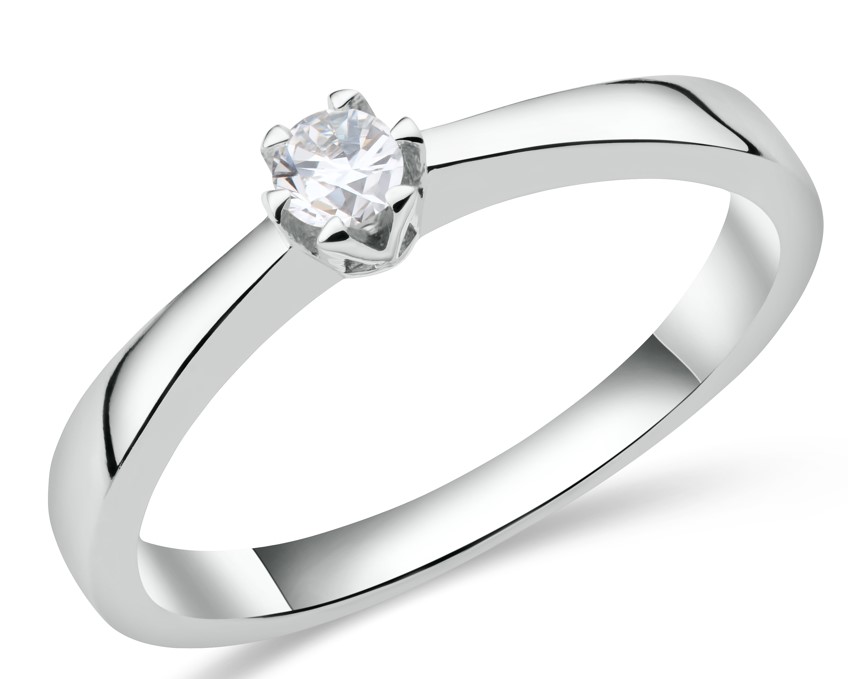
How to Edit Jewelry Photos to Make Them Shine
Capturing the brilliance of jewelry through photography is both an art and a science. While a well-executed photoshoot lays the foundation, meticulous editing transforms good images into captivating visuals that truly showcase each piece's allure. This guide delves into professional techniques to enhance your jewelry photos, ensuring they sparkle and entice potential buyers.
Why Is Editing Important for Jewelry Photography?
Jewelry pieces are intricate, with fine details that can be lost without proper editing. Post-processing is crucial to:
-
Highlight Details: Enhance facets, engravings, and textures that may not be prominent in raw images.
-
Correct Imperfections: Remove dust, scratches, or reflections that detract from the piece's beauty.
-
Ensure Color Accuracy: Adjust hues to reflect the true colors of metals and gemstones.
-
Create Consistency: Maintain a uniform look across product catalogs, reinforcing brand identity.
Effective editing not only elevates the visual appeal but also builds trust with customers by presenting products authentically.
Correct the Basics: Exposure and White Balance
Exposure and white balance are foundational to accurate and appealing jewelry photos.
-
Exposure: Adjust brightness to ensure the piece isn't too dark (underexposed) or too bright (overexposed). Proper exposure reveals details in both shadows and highlights.
-
White Balance: Correct color casts caused by lighting conditions. For instance, tungsten lighting may introduce a warm, yellowish hue, while fluorescent lighting can add a cool, bluish tint. Adjusting white balance ensures metals and gemstones display their true colors.
Tools & Techniques:
-
Use histograms to assess exposure levels.
-
Utilize white balance presets or manually adjust temperature and tint sliders in editing software like Adobe Lightroom or Photoshop.
Pre-built White Balance Presets
Most photo editing software offers white balance presets tailored for common lighting scenarios:
-
Daylight: Ideal for natural light conditions.
-
Tungsten: Corrects warm tones from incandescent bulbs.
-
Fluorescent: Adjusts for cool tones from fluorescent lighting.
Applying these presets provides a quick starting point. However, fine-tuning may be necessary to achieve precise color accuracy, especially for products like jewelry where true-to-life representation is paramount.
White Balance Selector
The White Balance Selector tool allows for precise adjustments:
-
Select the tool (often represented by an eyedropper icon).
-
Click on a neutral gray or white area in the photo.
-
The software automatically adjusts temperature and tint to neutralize color casts.
This method is particularly effective when a neutral reference point is present in the image, ensuring accurate color correction tailored to the specific lighting conditions of the shoot.
Fix Colors: Hue and Saturation
After correcting white balance, fine-tune hue and saturation to ensure colors are vibrant yet realistic:
-
Hue: Adjusts the actual color tone. For example, shifting gold to rose gold.
-
Saturation: Controls the intensity of colors. Enhancing saturation can make gemstones pop, but overdoing it may result in unnatural appearances.
Balanced adjustments ensure the jewelry looks appealing without misrepresenting its actual appearance.
How to Adjust Hue and Saturation
In Adobe Photoshop:
-
Create an Adjustment Layer:
-
Navigate to
Layer>New Adjustment Layer>Hue/Saturation.
-
-
Select Targeted Colors:
-
Use the dropdown to choose specific color ranges (e.g., Reds, Yellows).
-
Alternatively, use the hand icon to click directly on the color in the image you wish to adjust.
-
-
Adjust Sliders:
-
Hue: Shift the color tone.
-
Saturation: Increase or decrease color intensity.
-
Lightness: Modify the brightness of the selected color.
-
-
Preview and Fine-tune:
-
Toggle the visibility of the adjustment layer to compare before and after.
-
Make incremental adjustments to avoid over-editing.
-
This method allows for precise color corrections, ensuring the jewelry's colors are both accurate and visually appealing.
Sharpen the Details
Sharpening enhances the clarity of intricate details, making gemstones sparkle and metalwork stand out.
Techniques:
-
Unsharp Mask:
-
Found under
Filter>Sharpen>Unsharp Mask. -
Adjust
Amount,Radius, andThresholdto enhance edges without introducing noise.
-
-
Smart Sharpen:
-
Located at
Filter>Sharpen>Smart Sharpen. -
Offers advanced control over shadow and highlight sharpening.
-
-
High Pass Filter:
-
Duplicate the image layer.
-
Apply
Filter>Other>High Pass. -
Set the blending mode to
OverlayorSoft Light. -
Adjust opacity for desired sharpness.
-
Tips:
-
Apply sharpening selectively to areas like gemstones and engravings.
-
Avoid over-sharpening, which can introduce artifacts and make images appear unnatural.
Add a Shadow for 3D Effect
Shadows add depth, making jewelry appear more tangible. Different shadow types can be applied based on the desired effect:
Drop Shadow
-
Purpose: Simulates a light source casting a shadow behind the object.
-
Application:
-
In Photoshop, go to
Layer>Layer Style>Drop Shadow. -
Adjust parameters like distance, spread, and size to achieve a natural look.
-
Floating Shadow
-
Purpose: Creates the illusion of the jewelry hovering above a surface.
-
Application:
-
Duplicate the jewelry layer.
-
Fill the duplicate with black and apply a Gaussian Blur.
-
Position it beneath the original layer and adjust opacity.
-
Reflection Shadow
-
Purpose: Mimics the jewelry's reflection on a glossy surface.
-
Application:
-
Duplicate and flip the jewelry layer vertically.
-
Position it beneath the original.
-
Apply a gradient mask to fade the reflection.
-
Natural Shadow
-
Purpose: Replicates shadows as they would appear in natural lighting.
-
Application:
-
Use the Brush tool with low opacity to paint shadows manually.
-
Requires an understanding of light direction and intensity.
-
Enhanced Existing Shadow
-
Purpose: Strengthens shadows captured during the shoot.
-
Application:
-
Use the Burn tool to darken existing shadows.
-
Adjust exposure and hardness for subtle enhancement.
-
How to Add a Reflective Shadow
Creating a reflective shadow adds sophistication, especially for products displayed on glossy surfaces.
Steps in Photoshop:
-
Duplicate the Jewelry Layer:
-
Select the jewelry layer and press
Ctrl + J(Windows) orCmd + J(Mac).
-
-
Flip Vertically:
-
With the duplicated layer selected, go to
Edit>Transform>Flip Vertical.
-
-
Position the Reflection:
-
Move the flipped layer beneath the original, aligning edges to simulate a reflection.
-
-
Apply Gradient Mask:
-
Add a layer mask to the reflection layer.
-
Use the Gradient tool to create a fade effect, making the reflection gradually disappear.
-
-
Adjust Opacity and Blur:
-
Lower the opacity of the reflection layer to make it subtle.
-
Apply a slight Gaussian Blur (
Filter>Blur>Gaussian Blur) to soften the reflection.
-
-
Finalize:
-
Review the overall effect, ensuring the reflection looks natural and enhances the image without overpowering the jewelry.
-
Add Lighting Effects to Make the Jewelry Shine
Strategic lighting effects can accentuate the brilliance of jewelry:
-
Spotlight Effect:
-
Draws attention to the jewelry by darkening surrounding areas.
-
In Photoshop, use the
Elliptical Marquee Toolto select the jewelry area. -
Invert the selection (
Shift + Ctrl + IorShift + Cmd + I). -
Apply a
CurvesorLevelsadjustment layer to darken the background.
-
-
Glow Effect:
-
Adds a subtle glow to gemstones.
-
Create a new layer.
-
Use a soft brush with low opacity to paint around the gemstone.
-
Apply a Gaussian Blur to soften the glow.
-
Tips:
-
Use lighting effects sparingly to avoid overshadowing the jewelry.
-
Always aim for a natural enhancement that complements the piece.
How to Add a Lens Flare
A lens flare can introduce a dynamic sparkle, emphasizing the jewelry's shine.
Steps in Photoshop:
-
Duplicate the Background Layer:
-
Select the background layer and press
Ctrl + J(Windows) orCmd + J(Mac).
-
-
Apply Lens Flare:
-
Navigate to
Filter>Render>Lens Flare. -
Choose a lens type (e.g., 50-300mm Zoom) and position the flare over the desired area.
-
Adjust brightness as needed.
-
-
Blend and Adjust:
-
Set the layer's blending mode to
Screento integrate the flare. -
Use layer masks to control the flare's visibility and ensure it doesn't overpower the jewelry.
-
Note: Use lens flares judiciously to enhance, not distract from, the jewelry.
Reduce Distracting or Overbearing Glares
Glares can obscure details and misrepresent the jewelry's appearance.
Techniques to Mitigate Glares:
-
Clone Stamp Tool:
-
Sample a glare-free area (
Alt + Click) and paint over the glare. -
Useful for larger glare spots.
-
-
Healing Brush Tool:
-
Automatically blends the sampled area with the surrounding pixels.
-
Ideal for smaller, irregular glares.
-
-
Dodge and Burn Tools:
-
Dodge: Lightens areas; can reduce the intensity of dark glares.
-
Burn: Darkens areas; can tone down overly bright spots.
-
-
Adjustment Layers:
-
Use
CurvesorLevelsto selectively adjust brightness and contrast in glare-affected areas.
-
Preventive Measures:
-
During shooting, use diffused lighting to minimize glares.
-
Employ polarizing filters to reduce reflections.
Tips:
-
Always work on a duplicate layer to preserve the original image.
-
Zoom in to ensure precision when correcting glares.
Retouch Any Scratches, Smudges, or Other Imperfections
Even with meticulous handling, jewelry can exhibit minor imperfections in photos.
Common Issues:
Dust and Smudges:
Use the Spot Healing Brush Tool in Photoshop:
-
Select the tool (
Jkey), choose a small brush size, and click on the imperfection. -
For better control, switch to the Healing Brush Tool where you can sample a clean area by holding
Altand then painting over the blemish.
Scratches on Metal Surfaces:
-
Use the Clone Stamp Tool with low opacity to gently blend scratches with adjacent clean areas.
-
You may also use the Patch Tool: select the scratched area and drag to a clean spot for intelligent blending.
Worn Edges or Dull Finishes:
-
Enhance brightness and contrast in small areas with the Dodge Tool to revive the shine.
-
Use a soft brush with low exposure (5–10%) to avoid blowing out highlights.
Gemstone Enhancements:
-
Sharpen the facets with the Sharpen Tool to increase clarity.
-
Add controlled highlights with a soft white brush set to a low flow and placed in strategic spots.
Avoid Over-editing:
Zoom in to 100% and toggle between before-and-after views often.
-
Make sure retouching doesn't result in plastic-looking jewelry.
-
Maintain the product’s authenticity—your goal is to clean, not completely alter.
Retouching is a subtle yet critical step. When done right, it improves presentation without misrepresenting the product, ensuring trust and visual satisfaction for the customer.
Change the Background
A clean, distraction-free background ensures your jewelry is the star of the image.
Popular Background Options:
-
Pure White (
#FFFFFF): Perfect for e-commerce platforms like Amazon and Shopify. -
Light Gray or Gradient: Adds dimension and elegance.
-
Lifestyle Backgrounds: Ideal for social media or branding purposes.
How to Change Background in Photoshop:
-
Create a Selection:
-
Use the Pen Tool or Select Subject feature to isolate the jewelry.
-
Refine the selection using
Select and Maskfor smoother edges.
-
-
Remove the Old Background:
-
Press
Deleteto remove the existing background or add a mask to preserve reversibility.
-
-
Add a New Background Layer:
-
Place a solid color or image layer beneath the isolated jewelry.
-
Use gradients or soft textures for a more premium feel.
-
Tips:
-
Match the background style to the brand tone.
-
Use realistic shadows or reflections to avoid a “floating” look.
Create a Clipping Path
A clipping path is a vector outline that isolates jewelry from its background, enabling clean edits or easy background replacements.
Steps to Create a Clipping Path in Photoshop:
-
Select the Pen Tool (
P):-
Zoom in and start drawing around the jewelry’s edge.
-
Create small, accurate anchor points to follow curves and contours.
-
-
Close the Path:
-
Complete the outline and save the path in the Paths panel.
-
-
Convert to Selection:
-
Right-click on the path >
Make Selection. -
Feather the selection by 0.5–1 pixel for smoother edges.
-
-
Use the Selection:
-
Apply a mask to hide the background or create a new layer with just the jewelry.
-
Best Practices:
-
Use clipping paths for pieces with clean, hard edges (e.g., rings, bracelets).
-
For complex designs or fine chains, combine paths with masking techniques.
A precise clipping path ensures your edits are clean and professional, especially for catalogs or online stores requiring consistent product presentation.
Crop for the Right Context
Cropping is more than trimming — it’s about focusing the viewer’s attention and aligning with your publishing platform’s requirements.
Why Cropping Matters:
-
Enhances composition and draws attention to focal points.
-
Adapts the photo to specific dimensions (e.g., square for Instagram, 4:5 for Etsy).
How to Crop Properly:
-
Use the Crop Tool (
C):-
Select preset aspect ratios based on where the photo will be used.
-
Keep the product centered or use the rule of thirds for a more dynamic layout.
-
-
Check Resolution:
-
Ensure cropped images are high-resolution (at least 1000 x 1000 px for web use).
-
Avoid pixelation by not over-cropping.
-
-
Consistency Across Products:
-
Maintain similar spacing and scaling across all photos in a collection for a unified look.
-
Pro Tip:
Always crop non-destructively by enabling "Delete Cropped Pixels" unchecked, so you can revert if needed.
Add Filters for Social Media
Filters enhance the mood of your photos and help maintain a consistent brand aesthetic across platforms.
Why Use Filters?
-
Grab attention in busy feeds.
-
Build brand recognition through a signature visual style.
Popular Filter Styles for Jewelry:
-
Warm Tones: Evoke luxury and richness.
-
Cool Tones: Suggest sophistication and elegance.
-
High Contrast: Emphasize sparkle and shine.
-
Muted/Matte: Add a soft, romantic feel for lifestyle shots.
How to Apply Filters:
-
Use Lightroom Presets:
-
Apply one-click filters designed for product photography.
-
Adjust contrast, clarity, shadows, and highlights for customization.
-
-
Create Custom Photoshop Actions:
-
Combine multiple adjustment layers (e.g., Curves, Hue/Saturation) into a reusable action.
-
-
Use Mobile Apps for Quick Edits:
-
Snapseed, VSCO, or Lightroom Mobile for on-the-go touch-ups.
-
Tips:
-
Apply filters on a duplicated layer so you can adjust opacity or mask certain areas.
-
Avoid over-filtering; keep the jewelry’s true colors visible for buyer confidence.
Change Color for New Variants
Offering multiple color options of the same design is common in e-commerce. Instead of photographing each variant, color editing lets you save time and resources.
Examples:
-
Changing silver to gold.
-
Switching gemstone colors.
Benefits:
-
Cost-effective.
-
Perfect for A/B testing product listings.
Color Change Strategies:
-
Hue/Saturation Adjustment:
-
Ideal for changing gemstone colors.
-
Target specific color ranges to avoid affecting the entire image.
-
-
Selective Color Tool:
-
Modify specific color channels (e.g., make blues more purple).
-
-
Replace Color Command:
-
Image > Adjustments > Replace Color. -
Sample and shift to the new color.
-
Important:
Ensure the edits look natural and retain lighting, shadows, and reflections. Use layer masks for precise application.
How to Change Color
Let’s walk through a practical example of turning a silver ring into a rose gold version:
-
Select the Jewelry:
-
Use the Pen Tool or Quick Selection Tool to isolate the metal part.
-
-
Create a Hue/Saturation Layer:
-
Layer>New Adjustment Layer>Hue/Saturation. -
Check “Colorize.”
-
-
Adjust Sliders:
-
Hue: Shift to the desired rose gold tone.
-
Saturation: Increase for vibrancy.
-
Lightness: Adjust to maintain metallic highlights.
-
-
Preserve Details:
-
Change the layer blend mode to “Color” or “Overlay” to keep shadows and reflections intact.
-
-
Refine With Layer Mask:
-
Paint with black on the mask to hide any unwanted areas (like gemstones).
-
This method ensures you maintain the photo’s realism while offering multiple color options efficiently.
Get the Best Jewelry Photography With a Pixel-Perfect Finish
Final touches matter. Before publishing:
-
Zoom to 100% to check for flaws.
-
Ensure edges are clean, colors are accurate, and backgrounds are consistent.
-
Export in the correct format (JPG for web, PNG if transparency is needed) and proper resolution (at least 72 dpi for web, 300 dpi for print).
-
Name files descriptively for SEO and product organization.
Editing jewelry photos is about more than aesthetics — it’s about capturing value, craftsmanship, and trust. With a pixel-perfect finish, you elevate your brand, increase sales, and give your audience the confidence to click “buy.”